Airtable is a popular spreadsheet/database hybrid that makes it easy to build collaborative applications with little or no code. With a few simple steps, Automator automations can send data to Airtable spreadsheets and databases.
Erstellen einer Automatisierung
To get started, make sure you have an Airtable account. It’s free to get started and the free account is sufficient to connect WordPress to Airtable.
There is unfortunately some complexity on the Airtable side to set it up to accept your data. Because of this, we recommend following this guidance provided by Airtable, as it will always have the most current instructions: https://support.airtable.com/hc/en-us/articles/1500003044161-Incoming-webhooks-trigger. At a high level, the following is required:
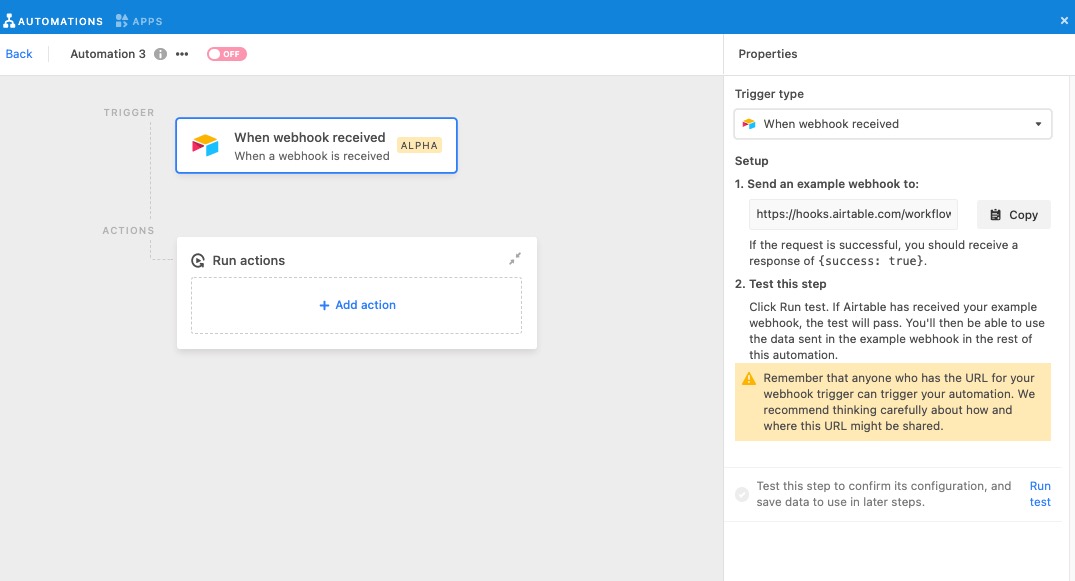
- Create an “Automation” in Airtable. This will show a unique webhook URL that you will use in the next section to pass data from Uncanny Automator. The page looks like this, with the webhook URL visible in step 1 on the right:

- Test the webhook. Use Automator to send a test to Airtable and confirm that it was successfully received.
- Add an automation action. When data is received by Airtable, it needs to know what to do with it. By clicking Add action in the Run actions section, you can Create or Update a record.
- Configure the Properties on the right side of the page so that the incoming webhook data is mapped to the correct Table and Fields in the Configuration section.
Erstellen Sie ein Automator-Rezept
Erstellen Sie als Nächstes Ihr Automator-Rezept:
- Create your new Automator recipe and add Airtable as an action. Choose Send data to Airtable webhook.
- Klicken Sie in der Aktion auf das Webhook -Feld, um die Webhook-Parameter festzulegen.
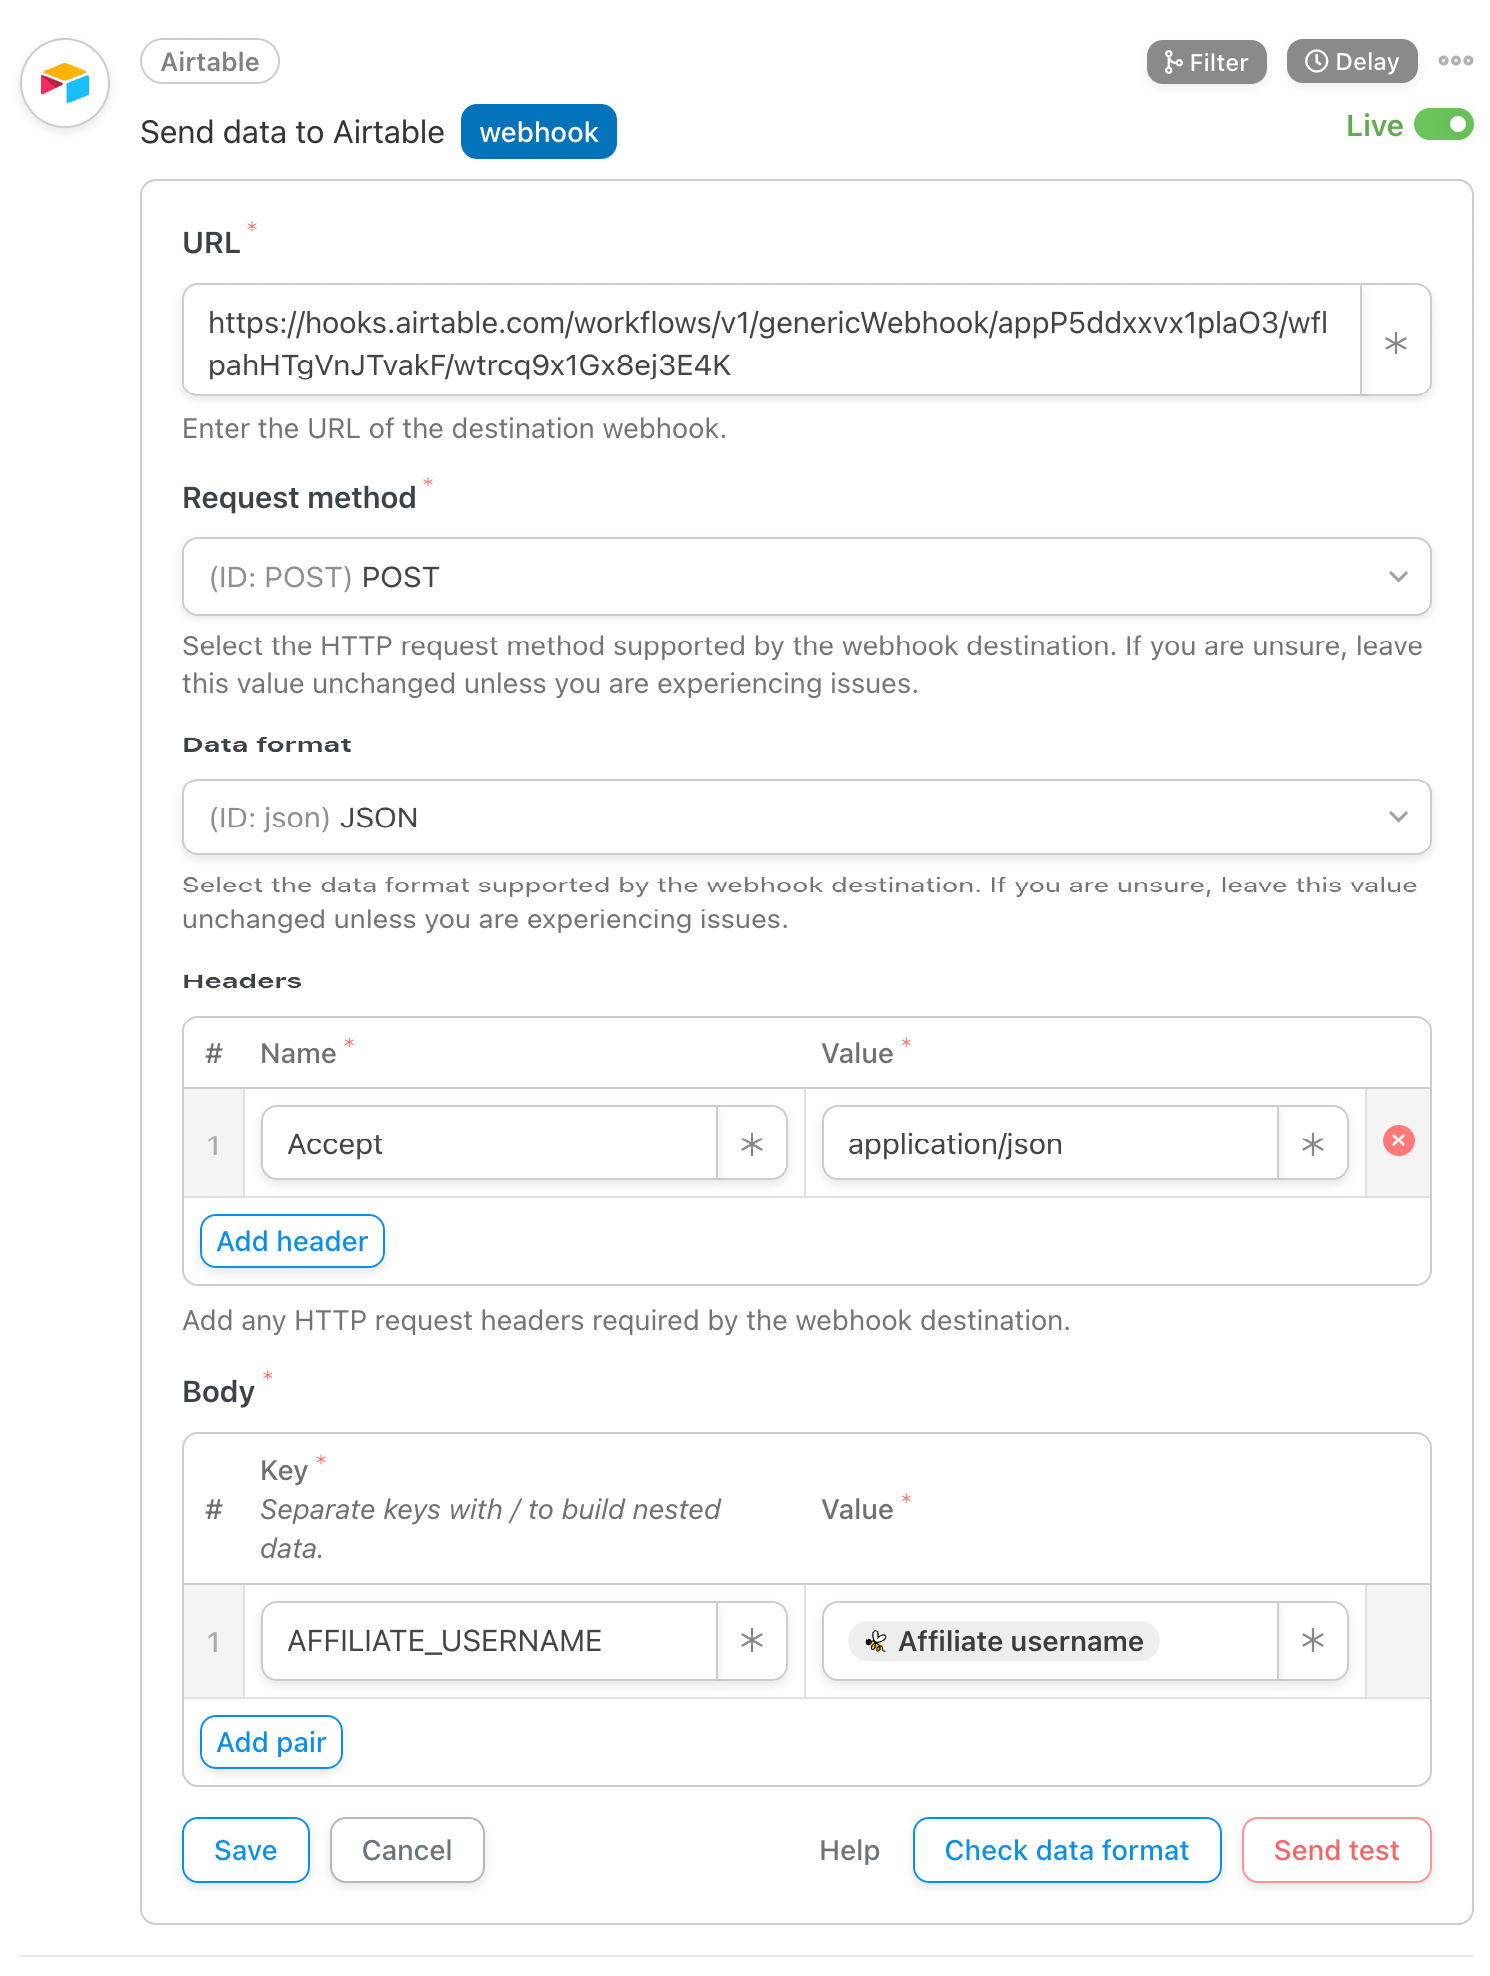
- In the URL field, paste the URL you copied over from Airtable (from step 1 above). This goes in the top field in the screenshot below.

- We recommend leaving the Request method, Data format and Headers as the defaults.
- If you want to pass data from WordPress to Airtable, enter match Schlüssel Und Wert Felder im Körper Abschnitt. Stellen Sie sich einen Schlüssel als Bezeichnung für den Wert vor.
- Geben Sie zunächst eine Textbezeichnung in das Feld „Schlüssel“ ein.
- Für Werte möchten Sie wahrscheinlich dynamische Daten zum Benutzer und zur WordPress-Umgebung übergeben. Klicken Sie zur Auswahl von Variablen auf das * -Symbol rechts neben dem Wert. Es werden Dropdown-Listen für allgemeine Token sowie Token angezeigt, die sich auf die Trigger im Rezept beziehen. Ein Beispiel für ein allgemeines Token ist der Benutzername, da er in jedem Rezept verwendet werden kann; ein Rezept-Token kann der Name eines Kurses sein, der mit einem Kursabschluss-Trigger verknüpft ist. Wählen Sie ein Token aus, indem Sie darauf klicken. Sie sehen dann beispielsweise „{{user_firstname}}“. Achten Sie darauf, das Token-Format nicht zu ändern.
- Wenn Sie eine Vorschau Ihrer ausgehenden Daten anzeigen möchten, klicken Sie auf Datenformat prüfen.
- To send test data to Airtable, click Send test. This sample tells Airtable the format of the data Automator will send and allow you to map Automator records on the Airtable side.
- Speichern Sie die Aktion. Stellen Sie nun die Aktion von Entwurf auf Live um. Vergessen Sie nicht, auch Ihre Auslöser und das Rezept auf Live zu setzen.
Take everything live
Once both the automation in Airtable and recipe in Automator are live, try triggering the recipe with a real example and confirm that the Airtable record is added or updated as expected.