Sending records from WordPress to IFTTT to trigger applets requires a few steps to get started. This one is less intuitive than other webhook-based integrations, so make sure to follow the instructions below carefully.
Set up an IFTTT webhook
To begin, make sure you have an IFTTT account. Then you’ll want to start by getting the webhook details you can use inside Automator and an IFTTT applet.
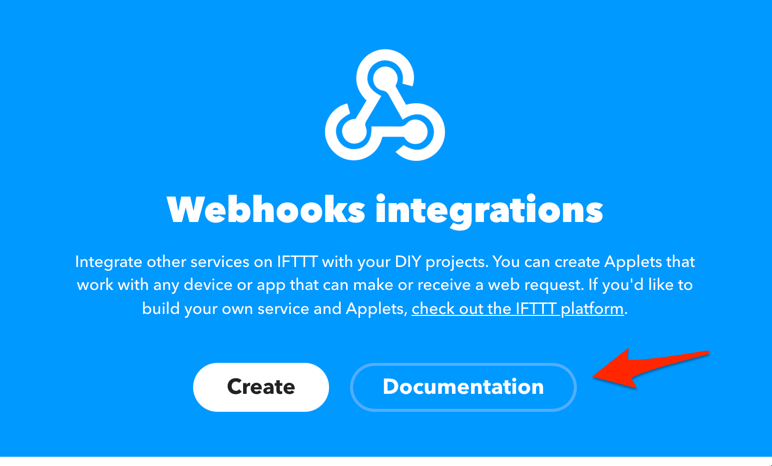
- After signing into your IFTTT account, visit the homepage. In the Explore section, search for and select Webhooks.
- Click the Documentation link to see your webhook details.
 You will now see a URL near the top of the Trigger an Event section with a clickable {event} field.
- Enter an identifiable event name here using only letters and underscores, like “new_order”.
- This will populate a URL near the bottom of the section that looks like https://maker.ifttt.com/trigger/{event}/with/key/{YOUR_IFTTT_KEY}. This is the webhook we will use in Automator later and it includes the event (“new_order” here) that will be used in the applet.
Create an Applet
Now that we have defined an event name and have the webhook URL, it’s time to create an applet.
- After returning to the IFTTT homepage, create a new applet by clicking the Create button at the top of the IFTTT page.
- In the If This box, click the Add button.
- Search for and choose Webhooks as the service.
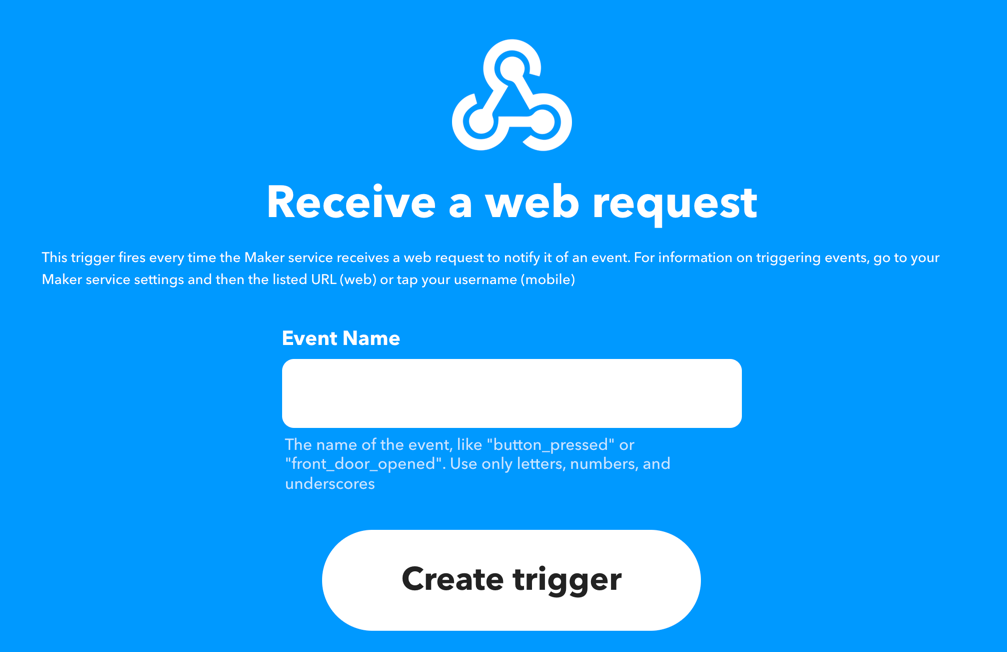
- Choose Receive a web request.
- In the Event Name field, enter the name that matches the event name you set up in the section above.

- Click Create trigger to finish setting up the trigger.
- You can now proceed to ad your Then That actions to the applet.
Erstellen Sie ein Automator-Rezept
Erstellen Sie als Nächstes Ihr Automator-Rezept:
- Create your new Automator recipe and add IFTTT as an action. Choose Send data to IFTTT webhook.
- Klicken Sie in der Aktion auf das Webhook -Feld, um die Webhook-Parameter festzulegen.
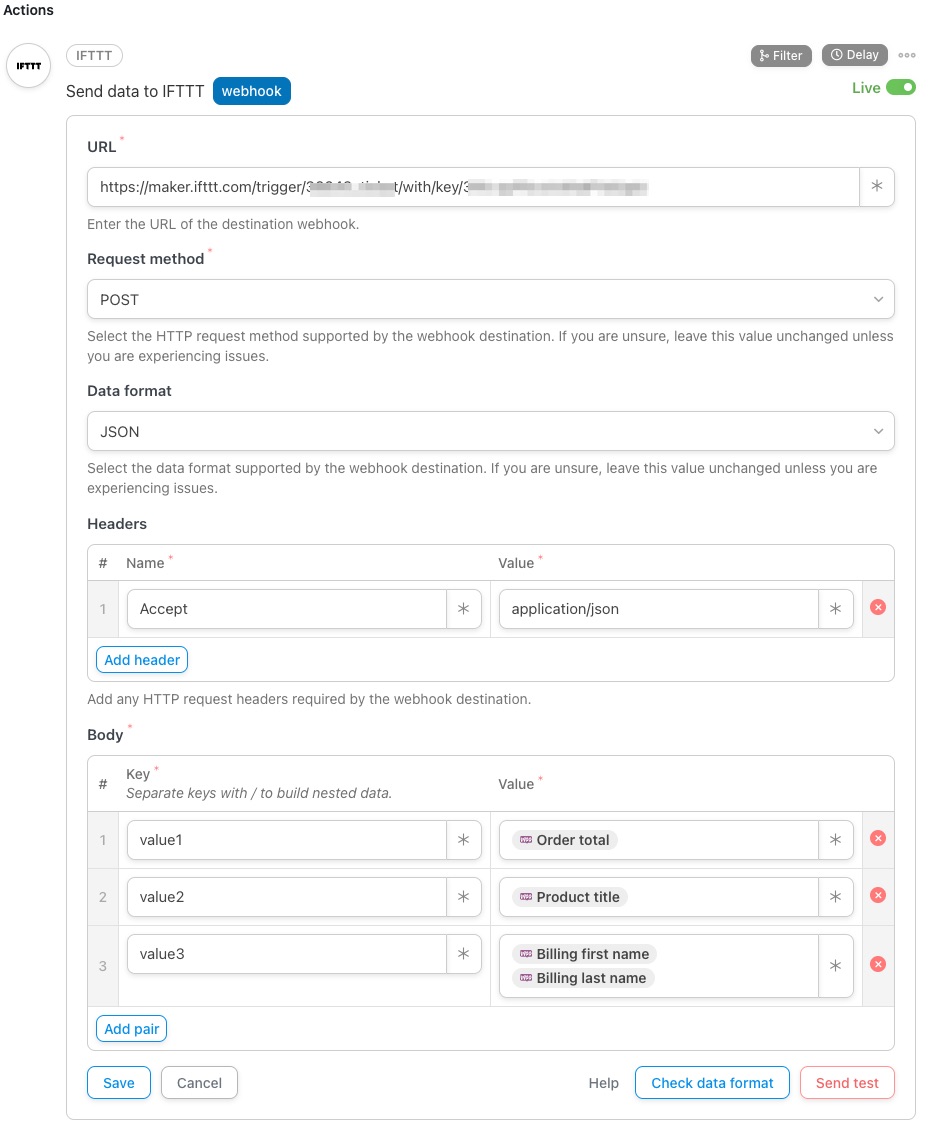
- In the URL field, paste the URL you copied over from IFTTT in the first section. This goes in the top field in the screenshot below.

- If you know what Request method IFTTT requires, select it from the dropdown. Otherwise, leave this as default (POST).
- If you know what Data format your receiving service requires, select it from the dropdown. Otherwise, leave this as default (JSON).
- If you know what Headers IFTTT requires, add them as Key and Value pairs. Otherwise, leave this as default.
- If you want to pass data from WordPress to IFTTT, enter the Schlüssel Und Wert Felder im Körper Abschnitt. Stellen Sie sich einen Schlüssel als Bezeichnung für den Wert vor.
- Enter a text label in the Key field first. By default, IFTTT provides three standard fields. You can directly pass the data by entering value1, value2, and value3 as the “Keys” in your body along with the values as shown in the screenshot above.
- Für Werte möchten Sie wahrscheinlich dynamische Daten zum Benutzer und zur WordPress-Umgebung übergeben. Klicken Sie zur Auswahl von Variablen auf das * -Symbol rechts neben dem Wert. Es werden Dropdown-Listen für allgemeine Token sowie Token angezeigt, die sich auf die Trigger im Rezept beziehen. Ein Beispiel für ein allgemeines Token ist der Benutzername, da er in jedem Rezept verwendet werden kann; ein Rezept-Token kann der Name eines Kurses sein, der mit einem Kursabschluss-Trigger verknüpft ist. Wählen Sie ein Token aus, indem Sie darauf klicken. Sie sehen dann beispielsweise „{{user_firstname}}“. Achten Sie darauf, das Token-Format nicht zu ändern.
- If you want to pass nested data from WordPress to IFTTT, enter Keys as a parent/child pair, separated by forward-slash / in the Body section. Please ensure that the Data format is set to JSON.
- Wenn Sie eine Vorschau Ihrer ausgehenden Daten anzeigen möchten, klicken Sie auf Datenformat prüfen.
- If you want to send a test webhook to IFTTT, click Send test.
- Speichern Sie die Aktion. Stellen Sie nun die Aktion von Entwurf auf Live um. Vergessen Sie nicht, auch Ihre Auslöser und das Rezept auf Live zu setzen.
And that’s it! You now have a recipe that triggers an action in IFTTT.