Make is a popular integration and automation platform that replaces Integromat. Automator can connect to it with a few simple steps so that you can use data from your WordPress site in new Make scenarios.
Set up a Make Scenario
Make uses “scenarios” to automate tasks. To include WordPress data in an automation, the first step is to set up a scenario.
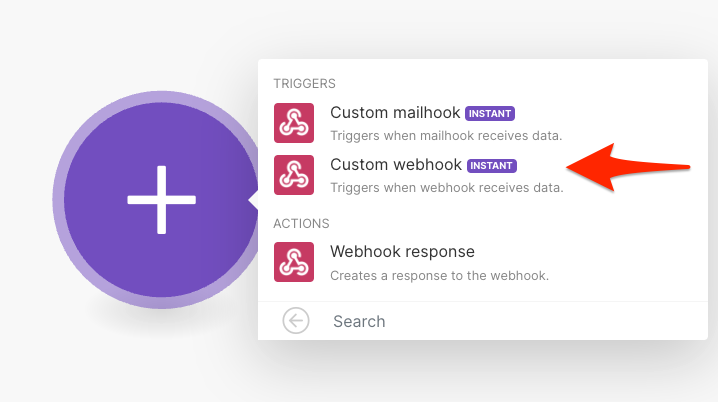
We recommend following the Make instructions for setting up a new scenario here: https://www.make.com/en/help/scenarios/creating-a-scenario. Once a scenario has been creating by clicking Create a new scenario from your dashboard, choose Webhooks as your first module. Within it, choose Custom webhook in the Triggers section.
 .
.
In the Webhooks window that appears, choose to Add a new webhook. Give it a name and click Save. It will automatically start listening for data.
Look for the button to Copy address to clipboard. Click that; we’ll need it on the Automator side so your recipe knows where to send data.
Erstellen Sie ein Automator-Rezept
Erstellen Sie als Nächstes Ihr Automator-Rezept:
- Create your new Automator recipe and add Make as an action. Choose Send data to Make webhook.
- Klicken Sie in der Aktion auf das Webhook -Feld, um die Webhook-Parameter festzulegen.
- In the URL field, paste the URL you copied over from Make (from above). This goes in the top field in the screenshot below.
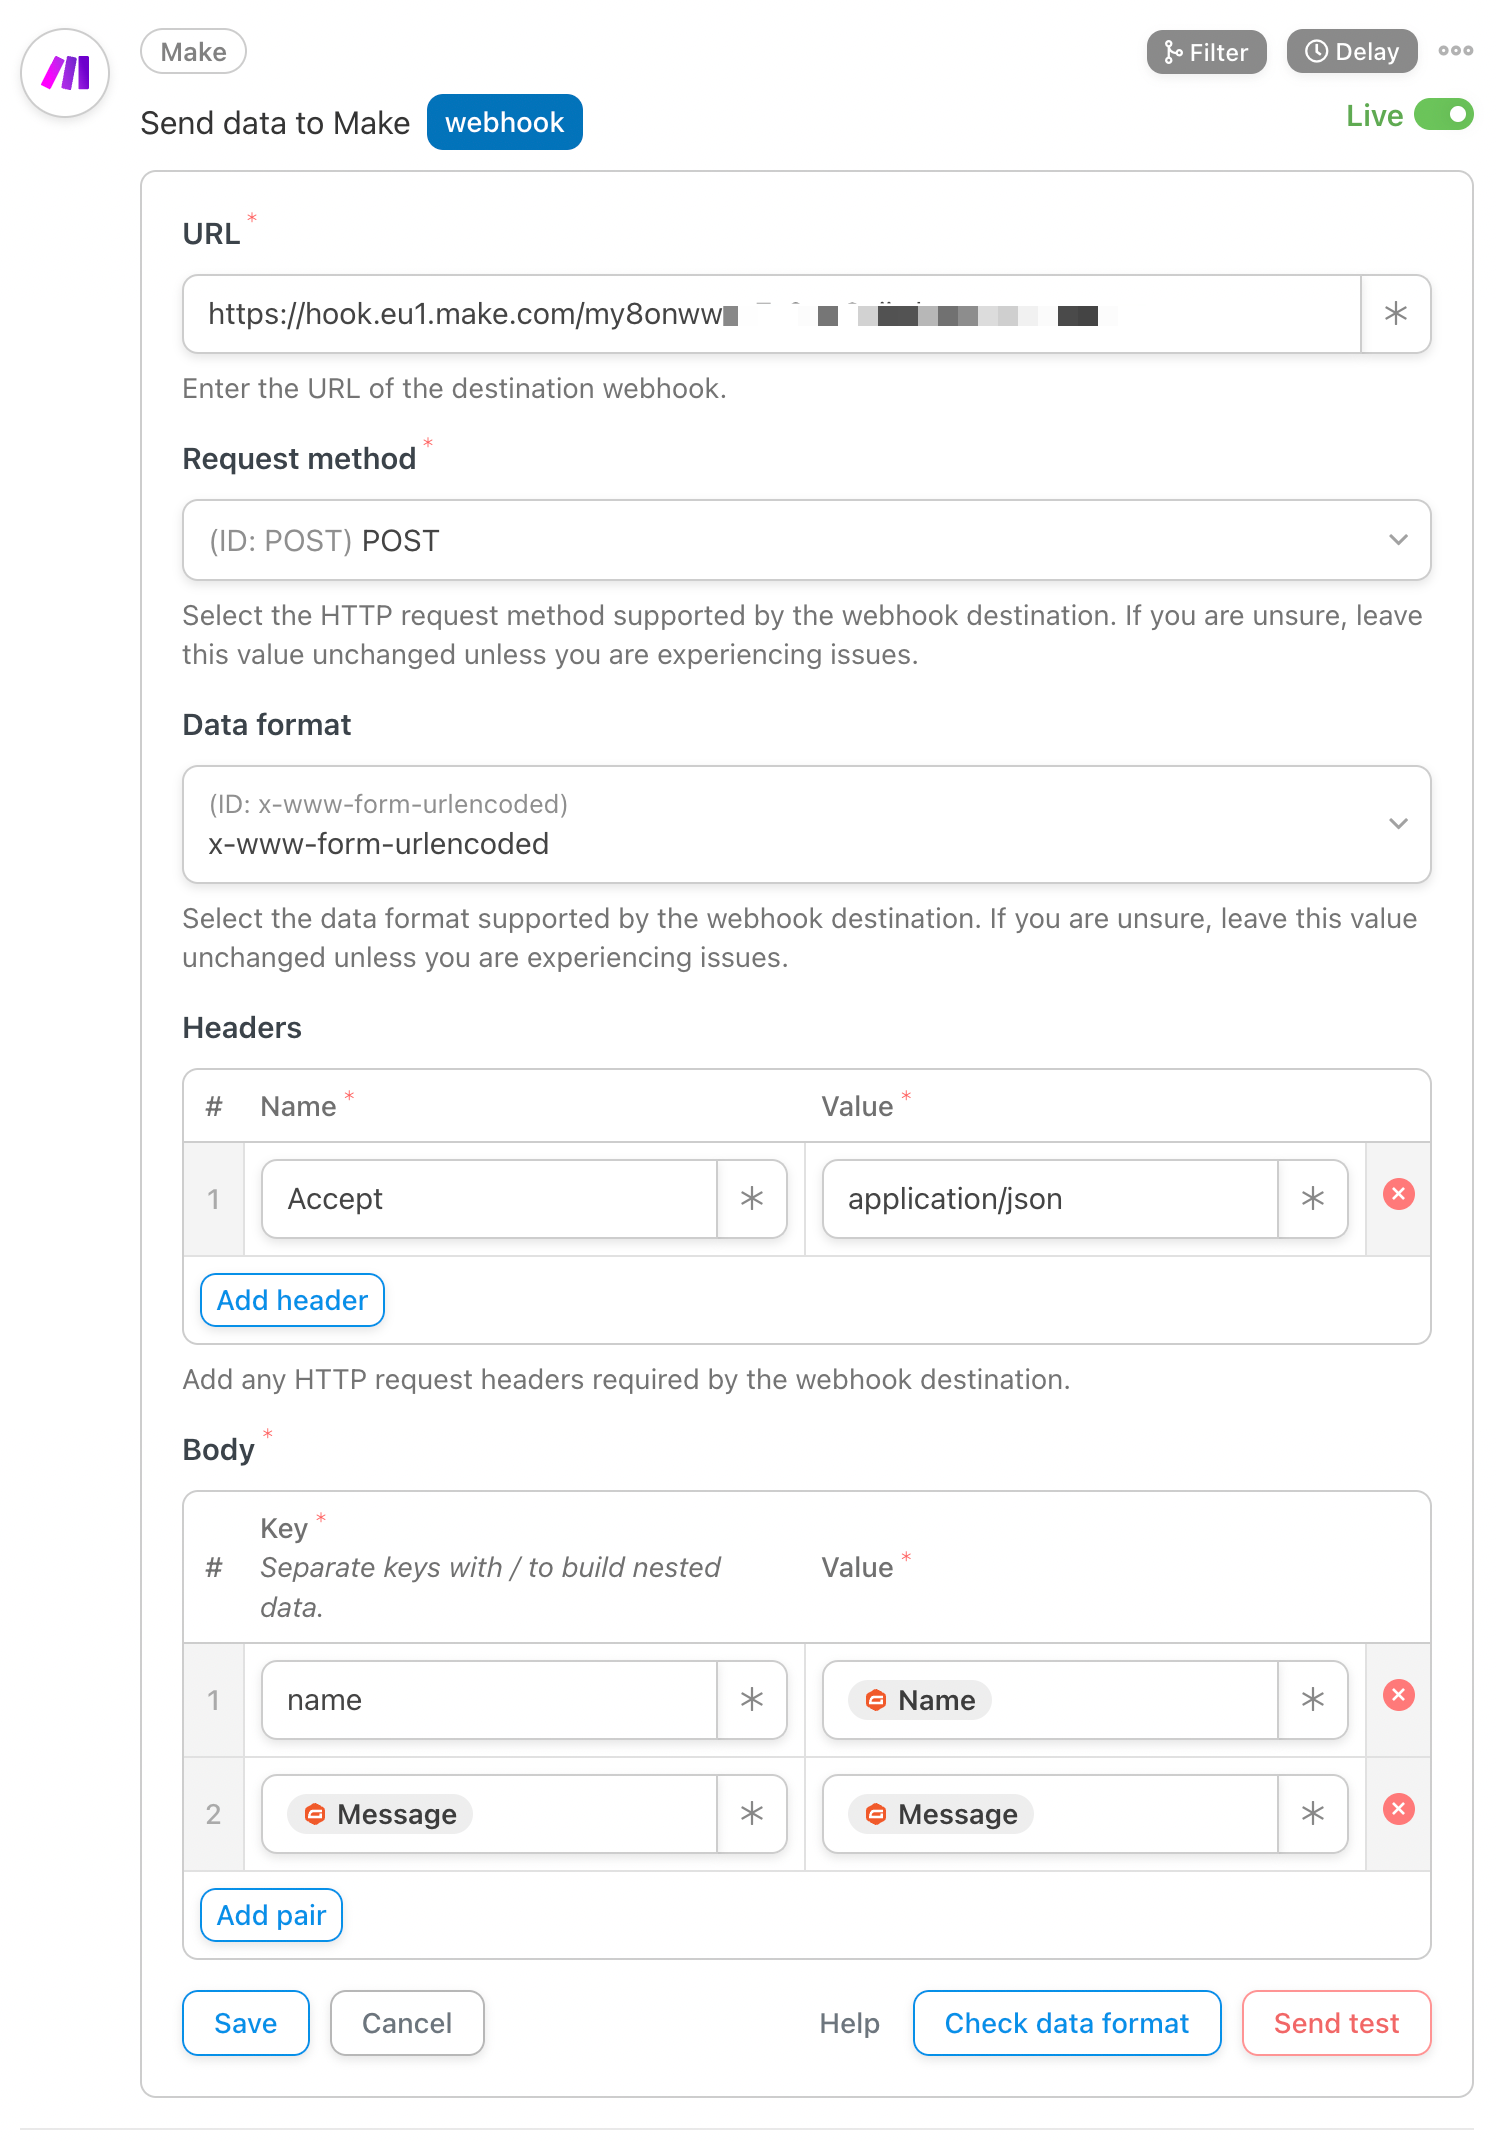
- We recommend leaving the Request method, Data format and Headers as the defaults.
- If you want to pass data from WordPress to Make, enter match Schlüssel Und Wert Felder im Körper Abschnitt. Stellen Sie sich einen Schlüssel als Bezeichnung für den Wert vor.
- Geben Sie zunächst eine Textbezeichnung in das Feld „Schlüssel“ ein.
- Für Werte möchten Sie wahrscheinlich dynamische Daten zum Benutzer und zur WordPress-Umgebung übergeben. Klicken Sie zur Auswahl von Variablen auf das * -Symbol rechts neben dem Wert. Es werden Dropdown-Listen für allgemeine Token sowie Token angezeigt, die sich auf die Trigger im Rezept beziehen. Ein Beispiel für ein allgemeines Token ist der Benutzername, da er in jedem Rezept verwendet werden kann; ein Rezept-Token kann der Name eines Kurses sein, der mit einem Kursabschluss-Trigger verknüpft ist. Wählen Sie ein Token aus, indem Sie darauf klicken. Sie sehen dann beispielsweise „{{user_firstname}}“. Achten Sie darauf, das Token-Format nicht zu ändern.
- Wenn Sie eine Vorschau Ihrer ausgehenden Daten anzeigen möchten, klicken Sie auf Datenformat prüfen.
- If you want to send a test webhook to Make, click Send test.
- Speichern Sie die Aktion. Stellen Sie nun die Aktion von Entwurf auf Live um. Vergessen Sie nicht, auch Ihre Auslöser und das Rezept auf Live zu setzen.
Take everything live
Switch back to Make and confirm that the webhook has received data. Once it has, it will update the page, so you can click OK to proceed with building the rest of your scenario, including setting up the data structure to map data from WordPress.


