Connectez OpenAI à WooCommerce avec Uncanny Automator pour générer des descriptions de produits basées sur l'IA et automatiser votre…
Comment connecter LifterLMS et Gravity Forms pour un engagement accru
Connect LifterLMS and Gravity Forms with Uncanny Automator for an enhanced experience. Engage your learners like never before.
Are you trying to connect the powerful learning management system LifterLMS with the form-builder Gravity Forms? You’ve landed on the right page.
In this step-by-step tutorial, we’ll show you how to harness the engagement power of Gravity (Forms that is) to improve your LifterLMS student experience using Uncanny Automator.
Even though you can enroll students in courses and process tuition payments with LifterLMS, Gravity Forms gives you the added flexibility to create more dynamic forms. In addition to course enrollment and tuition processing, you’ll be able to:
- sync surveys with courses and students,
- create conditional forms and sync them with courses and students, and
- much more!
The automations that we’ll explore in this tutorial will ensure that your students have a seamless and hassle-free learning experience with a LifterLMS and Gravity Forms integration.
But that’s enough of an introduction for now. Let’s get started.
Why Connect LifterLMS and Gravity Forms with Automator
LifterLMS is a leading learning management system for WordPress websites. It’s as user-friendly as it is feature-rich, making an excellent choice for anyone seeking to sell courses online.
Likewise, Gravity Forms is a powerful form-building plugin for WordPress websites. With features such as conditional logic, file import, and save-and-continue support it’s a natural fit for LMS users.
Connecting LifterLMS and Gravity Forms is a smart choice for anyone looking to enhance learner engagement, but it presents one challenge: no native integration! That’s where Uncanny Automator comes in.
Automator is the #1 automation and integration tool for WordPress websites. Using simple combinations of triggers and actions called recipes, Automator allows users to connect their favorite apps and plugins.
Powerful features such as Loops (that allow you to carry out workflows in bulk), Filters (that give you granular control over your workflows), and tokens (dynamic data pulled from your WordPress website and from within recipes) make Automator a must-have for WordPress users who value their time.
Additionally, Automator’s no-code promise and no fee-per-automation guarantee means that it’s as easy and cost-effective to use as it is powerful.
We’ll be using Automator Pro features throughout this tutorial, so go ahead and grab an Automator Pro license. Alternatively, download the free forever version, register your account to receive some app credits, and demo Automator’s bevy of premium integrations.
LifterLMS and Gravity Forms: Enroll Students
Now that you have Automator installed and activated on your WordPress website, let’s take a look at creating our first LifterLMS and Gravity Forms integration.
Even though LifterLMS allows you to enroll students, Gravity Forms gives you greater flexibility in the enrollment process.
For example, with Gravity Forms, you can set up a paginated form to collect more data, conditional logic to assess learner preparedness for a course, or even include checkboxes so users can enroll in multiple courses at once.
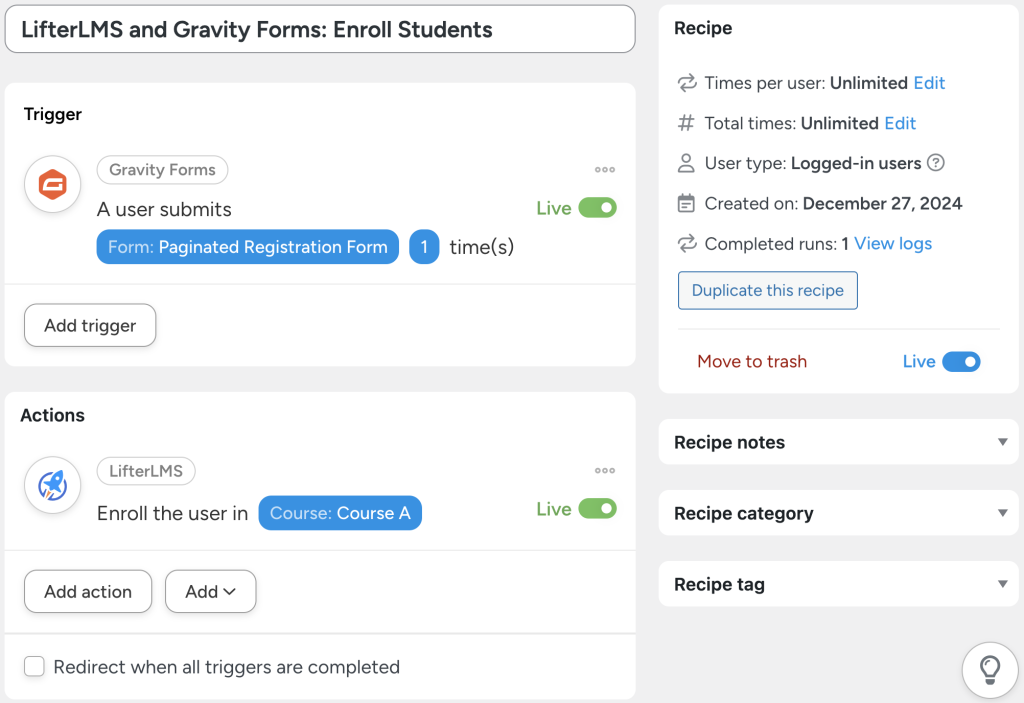
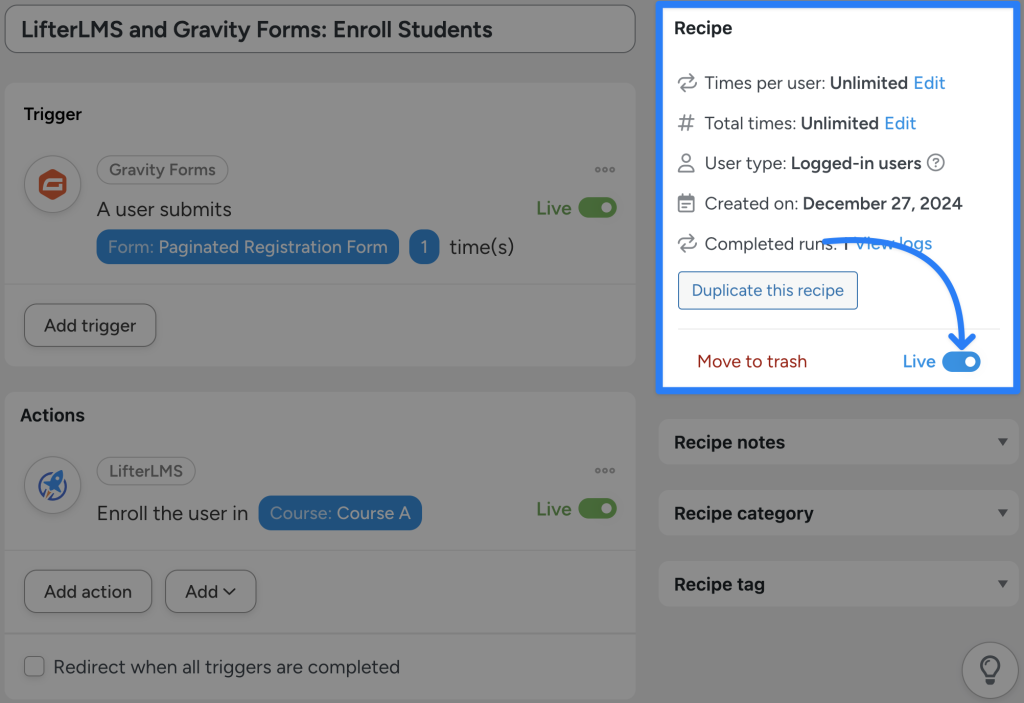
In the Automator recipe pictured above, we’re able to enroll students in LifterLMS courses from Gravity Forms submissions. Here’s how we did it.
Step 1: Create a New Recipe
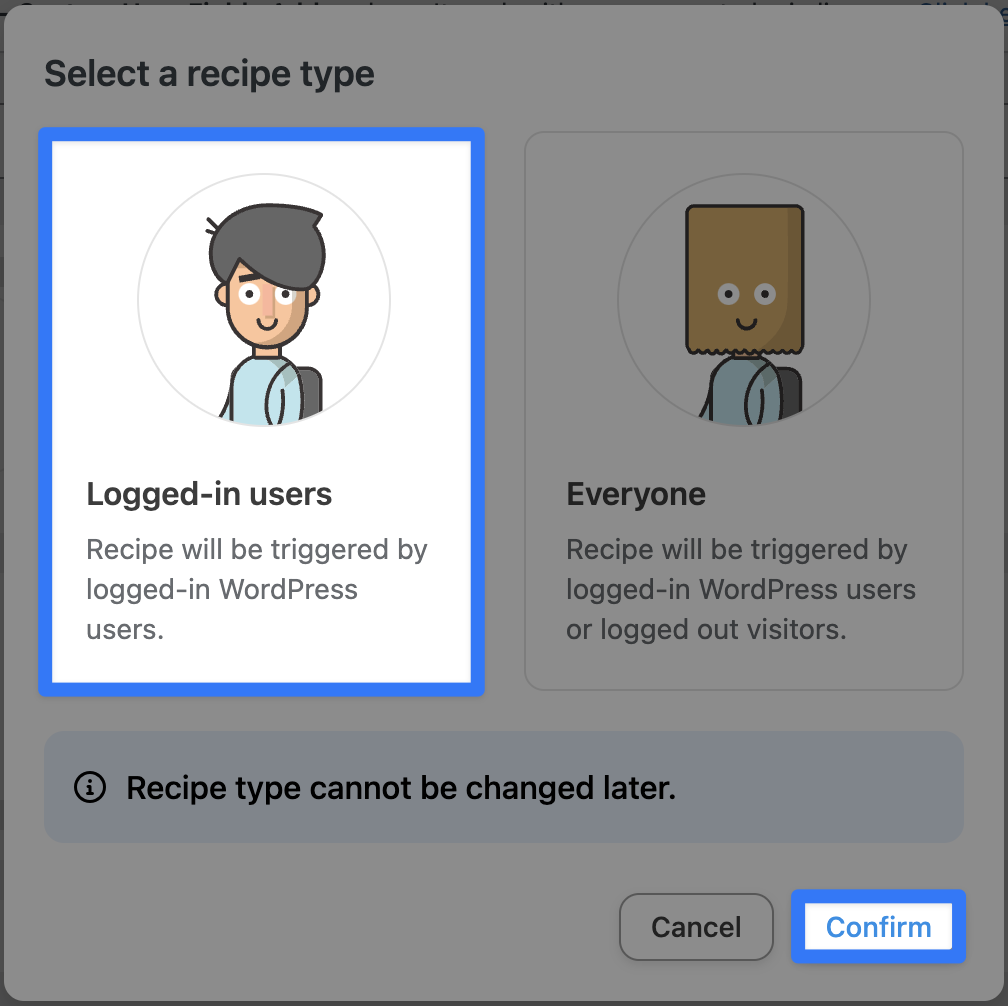
From your WordPress Admin Sidebar, navigate to Automator > Add new recipe. In the popup window that appears select Logged-in users.
Step 2: Name Your Recipe
Give your recipe a name that makes it easy to recognize at a glance. For example, we have named this recipe “LifterLMS and Gravity Forms: Enroll Students”.
Step 3: Configure Your Trigger(s)
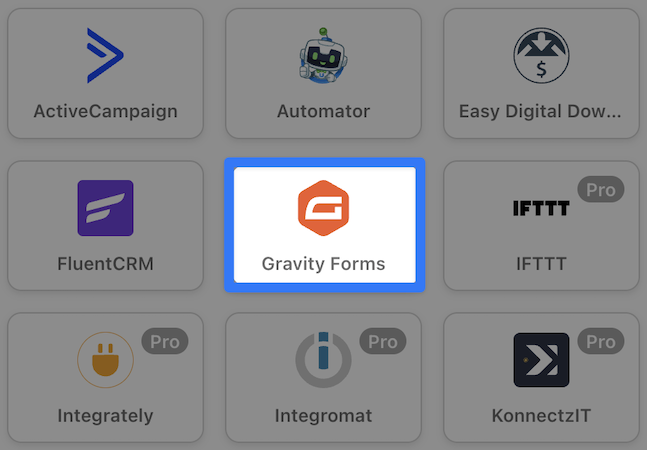
In the Trigger panel, from the menu of available integrations, select Gravity Forms.
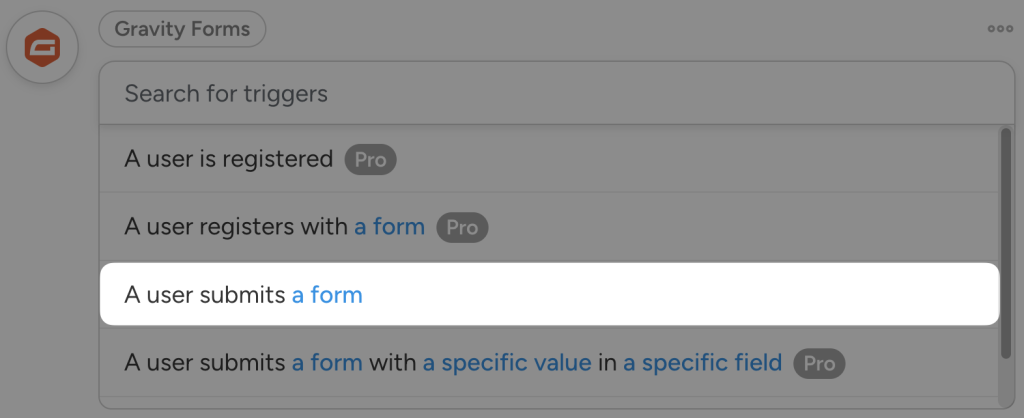
From the dropdown list that appears, select A user submits a form.
Automator will prompt you to select a form. For example, we have selected our “Paginated Registration Form”. Once you’re finished, click Save.
Your completed trigger should look something like this:
Step 4: Configure Your Action(s)
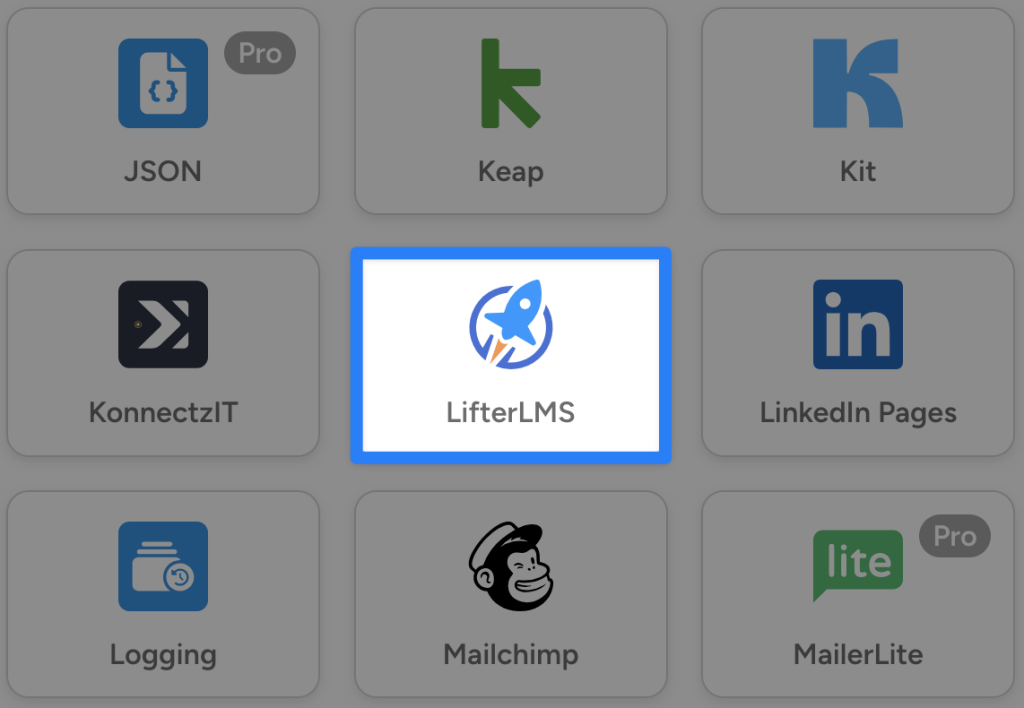
In the Actions panel, click Add action and select LifterLMS.
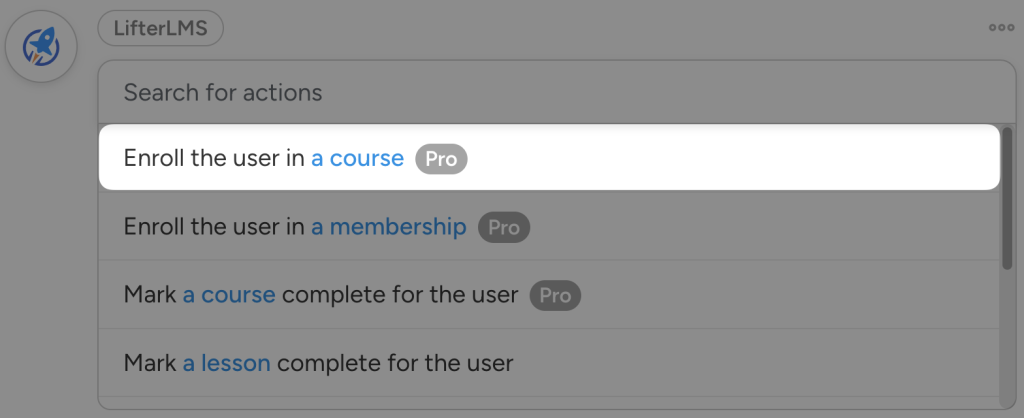
From the dropdown list that appears, select Enroll the user in a course.
Automator will prompt you to select a course. Once you’re finished, click Save.
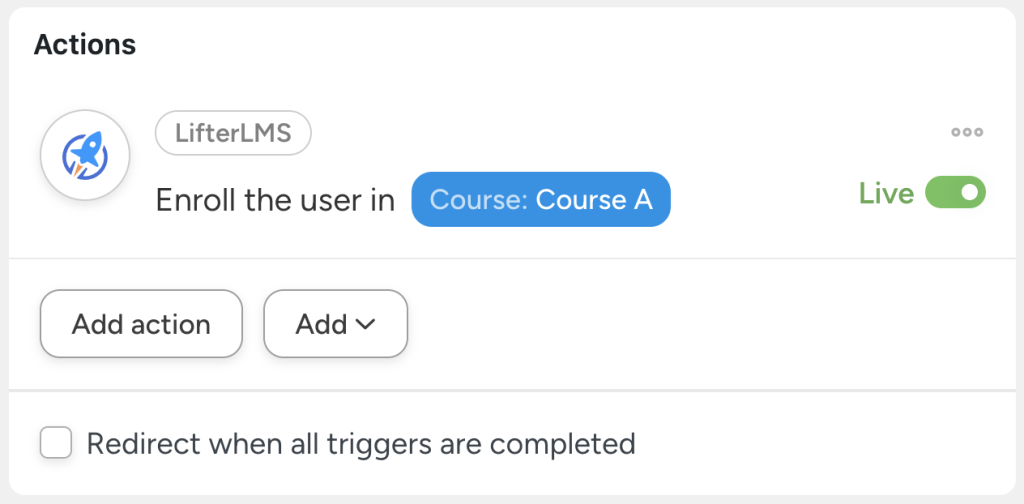
Your completed action should look something like this:
Step 5: Go Live!
You’re just about ready to connect LifterLMS to Gravity Forms. All you have to do is toggle the recipe from Draft to Live.
Now that you’ve successfully created a LifterLMS and Gravity Forms integration, let’s take a look at some advanced features to enhance your automation.
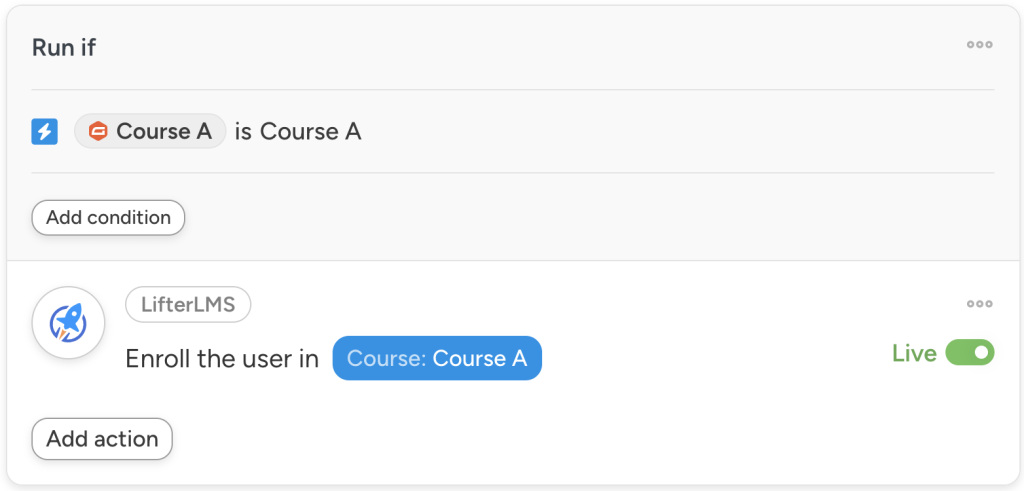
Step 6 (Optional): Add a Filter
If you have configured a form that allows students to register for multiple courses, you can use Automator’s Filter feature to create a dynamic enrollment process.
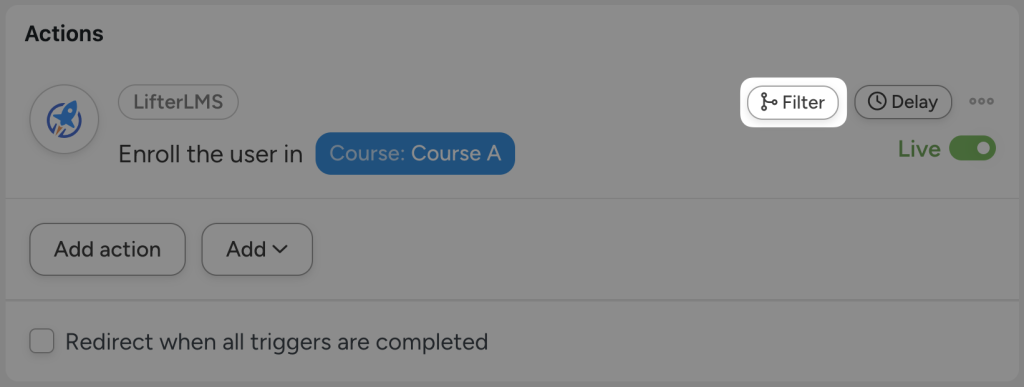
To add a filter, hover over the action and click Filter.
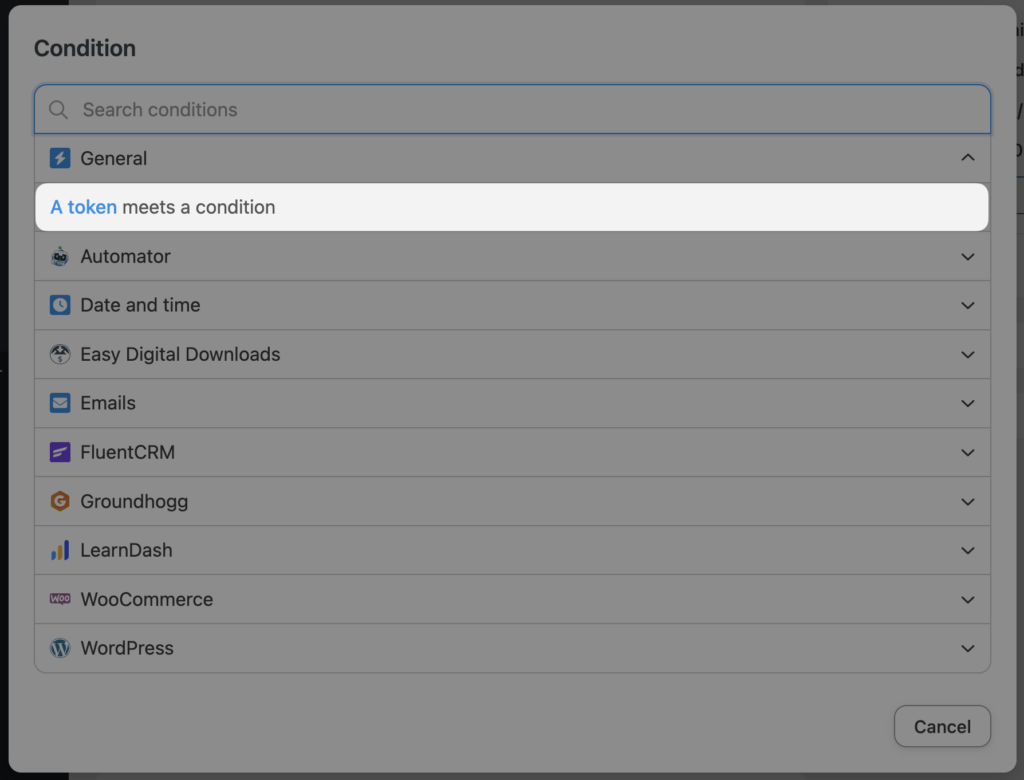
In the Condition modal that appears, select A token meets a condition.
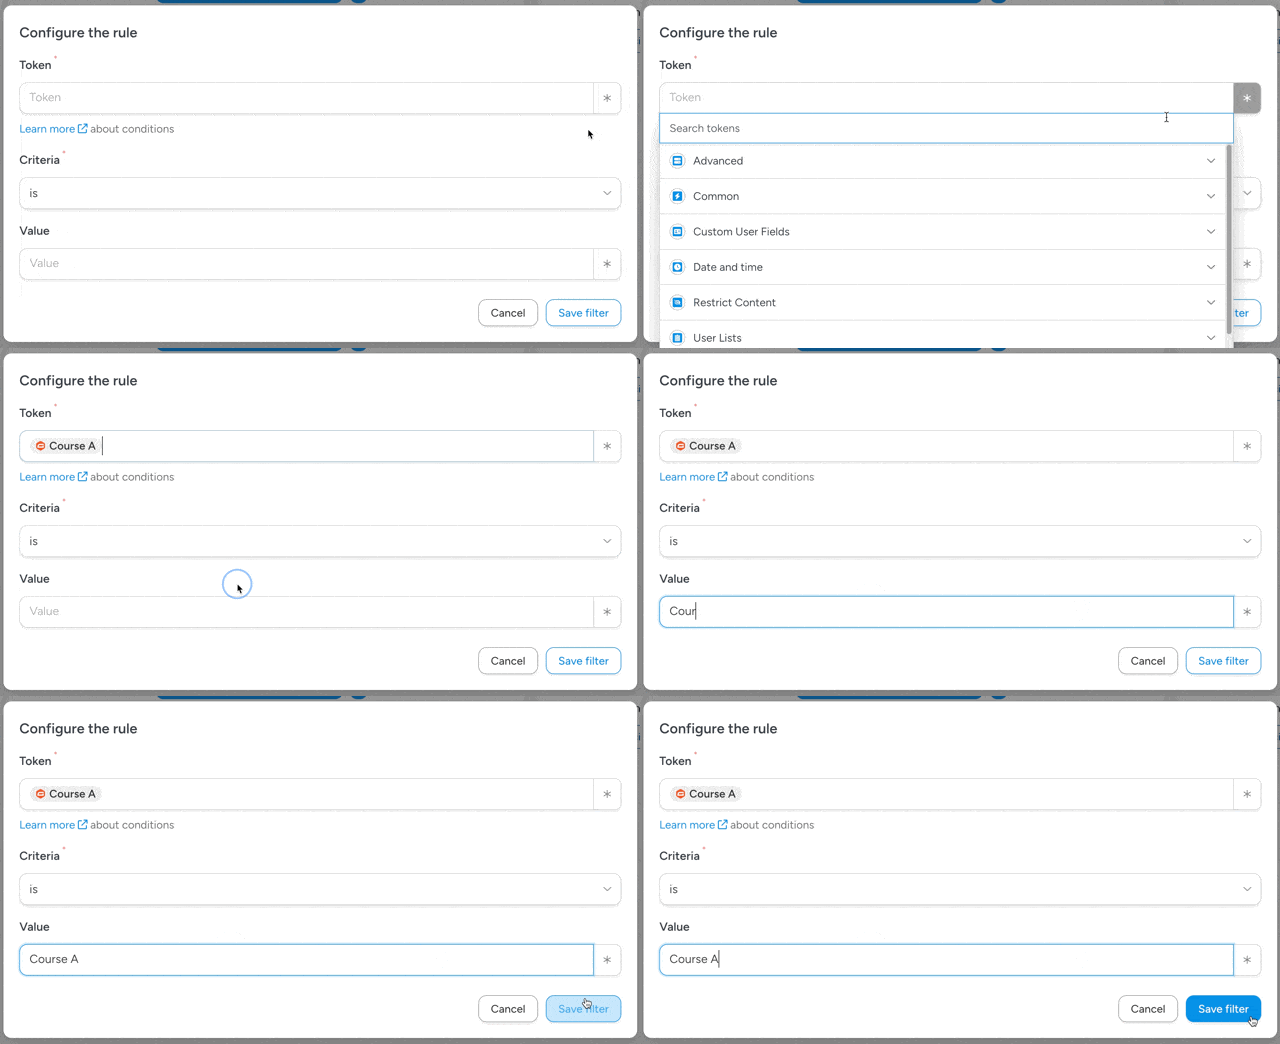
In the Token field, select the token from your Gravity Forms trigger that corresponds to the course to which you would like to enroll the user. For example, we have selected the token “Course A” from our enrollment form’s multiple choice section.
In the Value field, enter the value that corresponds to a positive selection. In other words, we have entered “Course A” as this is how Gravity Forms will confirm that a user has selected this option from the multiple choice.
Once you’re finished, click Save filter. Your completed action with a filter should now look something like this:
Add as many filters as you have options in your multiple choice on your enrollment form.
More Ways to Connect LifterLMS and Gravity Forms
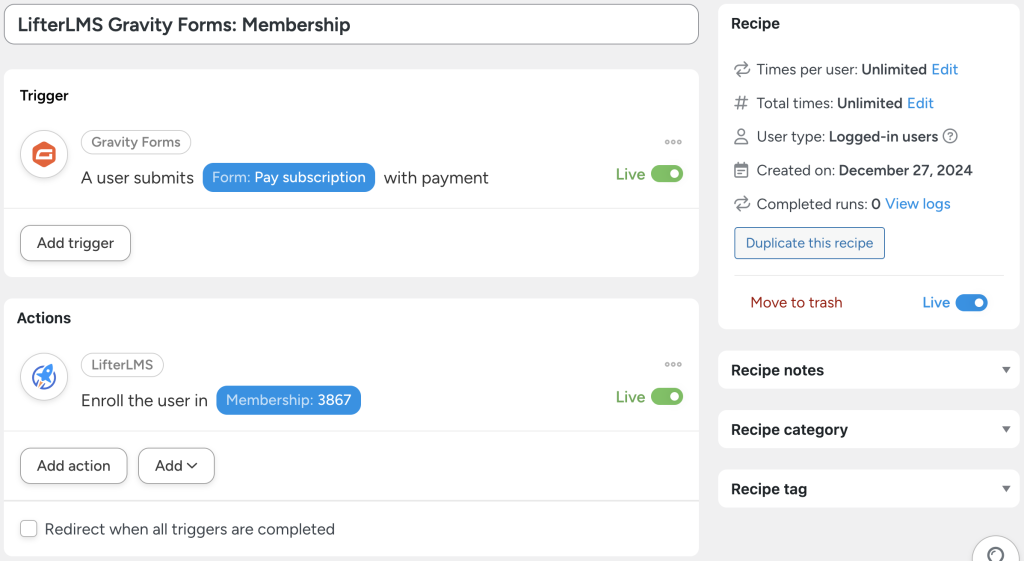
With dozens of triggers and actions for LifterLMS and Gravity Forms, Automator allows you to connect these powerful plugins however you choose.
In the recipe pictured above, you can register LifterLMS students for awesome memberships using Gravity Forms submissions. Harness the power of Gravity Forms’ Stripe integration and product fields to further customize your offerings.
With Automator, the sky is the limit!
Looking for even more ways to enhance engagement amongst your LifterLMS learners?
Read “The Top Tutor LMS Automations to Easily Enhance e-Learning Engagement” >>>
Questions fréquemment posées
Conclusion
Integrating LifterLMS and Gravity Forms using Uncanny Automator opens up a world of possibilities for your WordPress-powered learning platform.
From dynamic course enrollments to seamless payment processing, these automations enhance both the learner experience and your administrative efficiency. Whether you’re a course creator or an education entrepreneur, this integration is a game-changer for managing and growing your online learning community.
À la prochaine, bonne automatisation !






Cet article a 0 commentaire