使用 Uncanny Automator 将 OpenAI 连接到 WooCommerce,以生成由 AI 驱动的产品描述并自动化您的……
将 WooCommerce 连接到 Trello:掌握电子商务订单履行
Connect WooCommerce to Trello with Uncanny Automator and streamline your order fulfillment process. Create and update cards, collaborate with team members and deliver for your customers.
WooCommerce is the leading ecommerce platform for WordPress websites. On the other hand, Trello is a powerful web-based project management tool. By harnessing the kanban-style power of Trello, Woo store owners can master the art of order fulfillment.
But we probably didn’t have to tell you that. Finding solutions for connecting your Woo store to Trello is likely what brought you here.
In this blog post, we’ll show you how to create the seamless WooCommerce and Trello integration you’ve been looking for using the #1 automation tool on the market: Uncanny Automator.
We’ll show you how to create and update Trello cards based on your Woo orders, how to collaborate with your workspace members to deliver for customers and much more.
But that’s enough of an introduction for now. Let’s get started.
Why Connect WooCommerce to Trello with Automator
Uncanny Automator is the #1 automation and integration tool for WordPress websites. Using simple combinations of triggers and actions called recipes, you can easily connect any (or all) of your favorite apps and plugins.
While Automator is the best all-purpose tool for integrating your favorite apps and plugins, there are some features that make it particularly effective for connecting WooCommerce and Trello.
- Affordability: Unlike other automation and integration solutions, Automator won’t charge you each time you run an automation. In other words, the more you automate and integrate, the more you save!
- Ease-of-Use: Automator is a seriously powerful plugin. But don’t worry. All of that power is packed into a user-friendly click-and-play interface with a learning curve so gentle that it’s barely a mound.
- Customizability: A bevy of powerful features such as tokens, filters, schedules and formatters means that you can tailor any Woo and Trello recipe to suit your workflows. No other integration tool offers as many ways to customize your integrations as Automator.
- Integrations: Automator has 200 integrations with more on the way all of the time. This time means that you connect Woo and Trello to your CRM, customer support platform and much, much more.
- Seamless Connections: Across all of its integrations, Automator has countless triggers and actions. For WooCommerce alone, Automator offers a variety of triggers and actions to cover activity ranging from customer purchases to order updates and inventory monitoring. This means that you can use Automator to connect Woo to Trello for any and all of your ecommerce needs.
Ready to master the art of order fulfillment? Grab your Automator Pro license now so you can follow along as we create a seamless WooCommerce and Trello integration>>>.
Not ready to go Pro quite yet? You can still follow the rest of this tutorial with Automator’s FREE FOREVER version. Simply download and activate the plugin then register your account for a limited number of app credits. You’ll be able to use these credits towards creating integrations with web-based apps such as Trello, OpenAI, ActiveCampaign, Slack and more!
Create Trello Cards from WooCommerce Orders
Now that you have your Automator Pro license, let’s take a look at creating our first Automator recipe to connect WooCommerce to Trello.
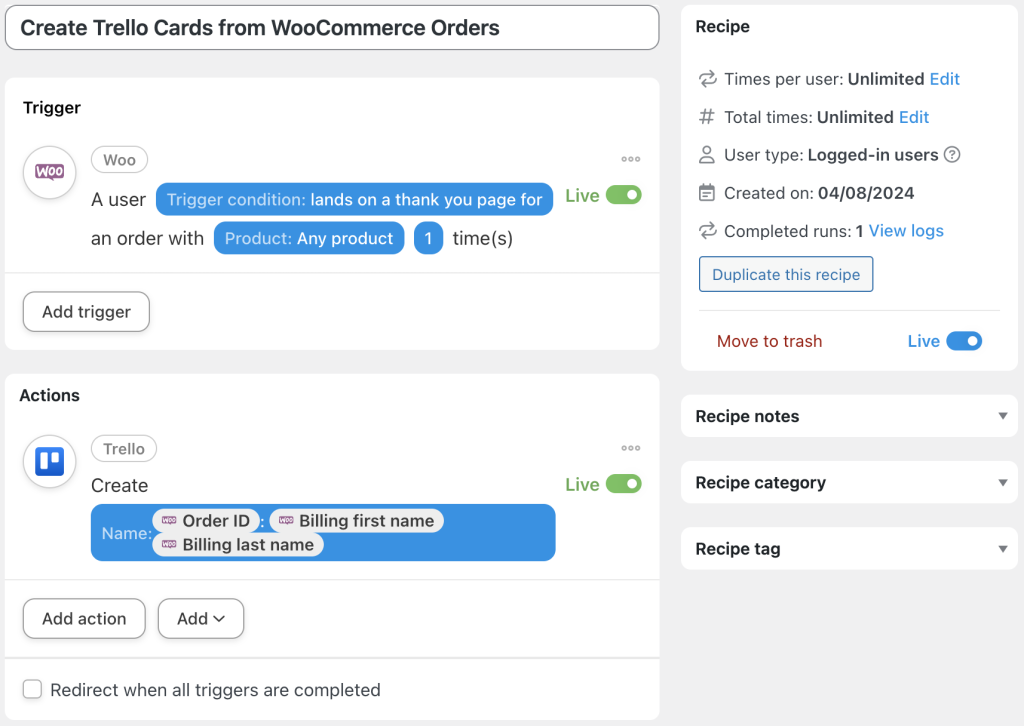
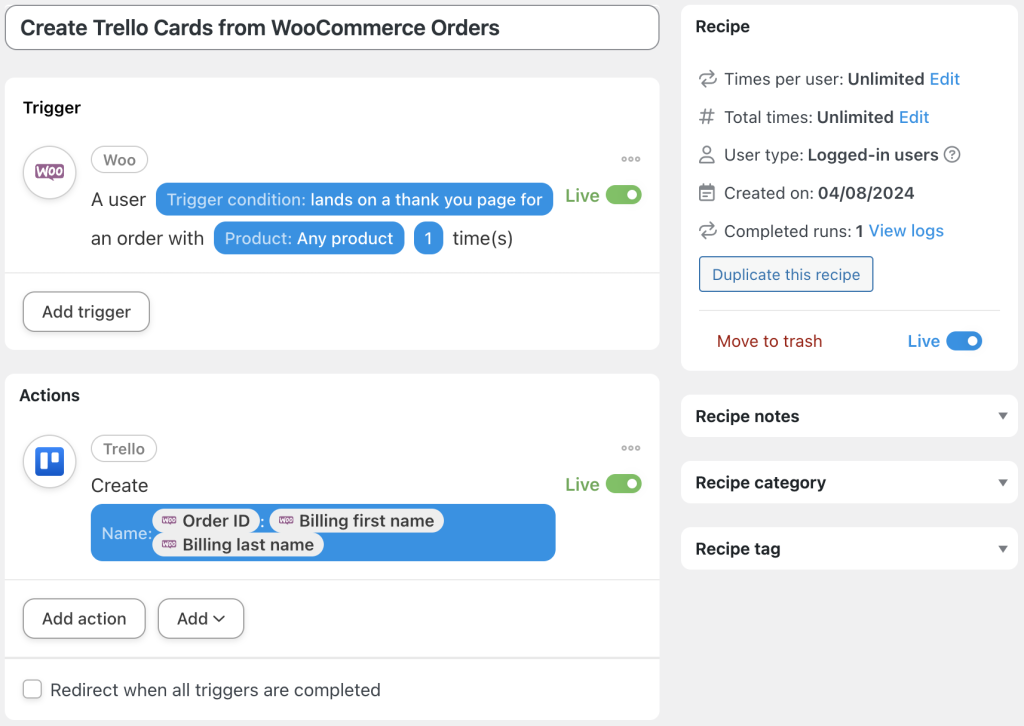
In the recipe pictured above, we’re able to create cards in Trello whenever a customer places an order in our Woo store. We can use Automator’s tokens features to add all of the order details to the Trello card. This way, our fulfillment team can easily track orders, meet deadlines and deliver for our customers.
Want to know how we did it? Follow the steps below.
Step 1: Create a New Recipe
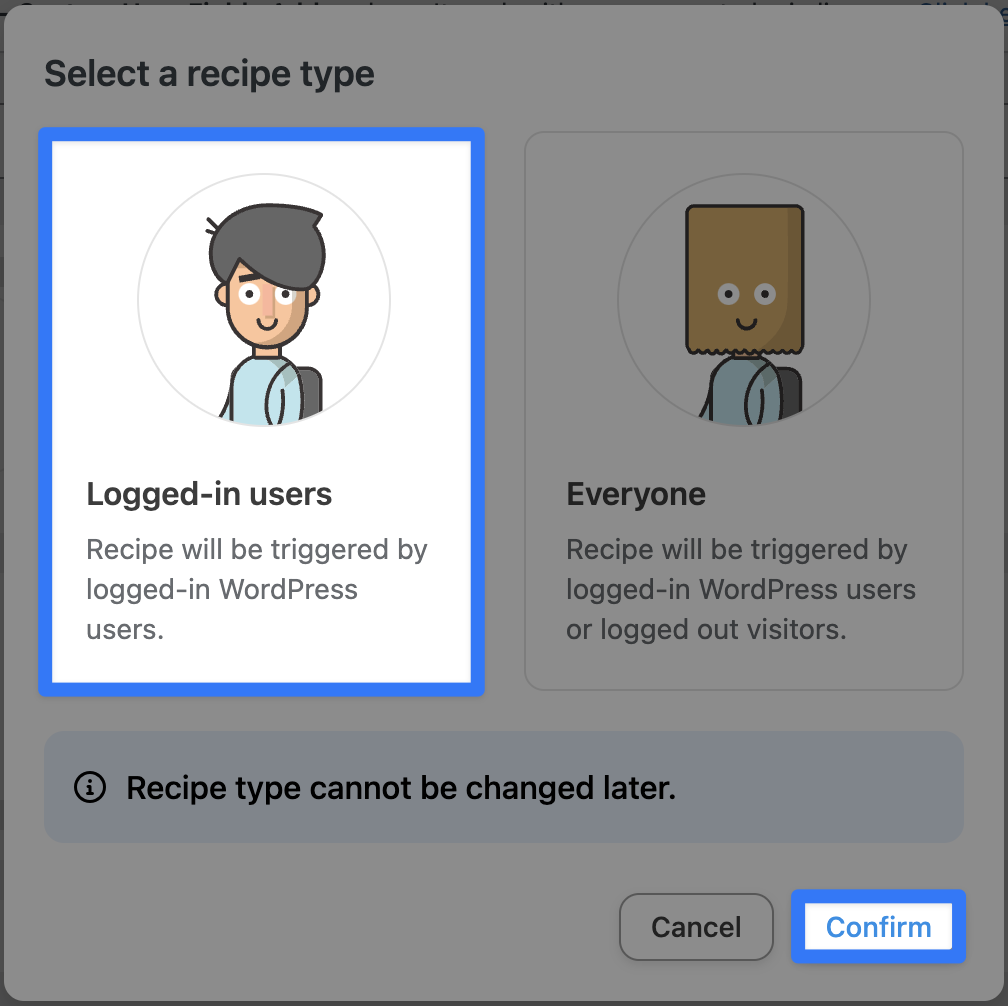
From your WordPress Admin Dashboard, navigate to Automator > Add new recipe. In the popup window that appears, select Logged-in users.
(Note: We have selected Logged-in users because our WooCommerce store settings require customers to either log in or create an account at checkout. If you do not have these settings and want to capture all orders, you can still select Everyone.)
Step 2: Name Your Recipe
Give your recipe a name that makes it easy to recognize at a glance. For example, we have named this recipe “Create Trello Cards from WooCommerce Orders”.
Step 3: Configure Your Trigger(s)
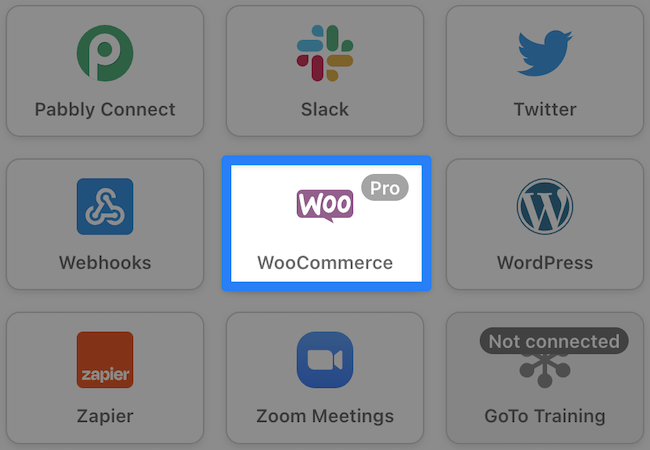
In the Trigger panel, from the menu of available integrations, select Woo.
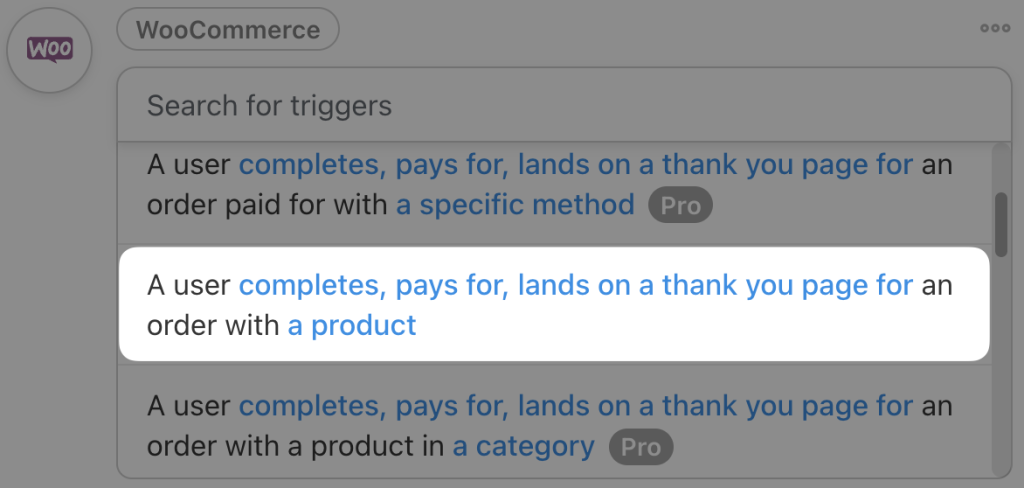
From the dropdown list that appears, select A user completes, pays for, lands on a thank you page for an order with a product.
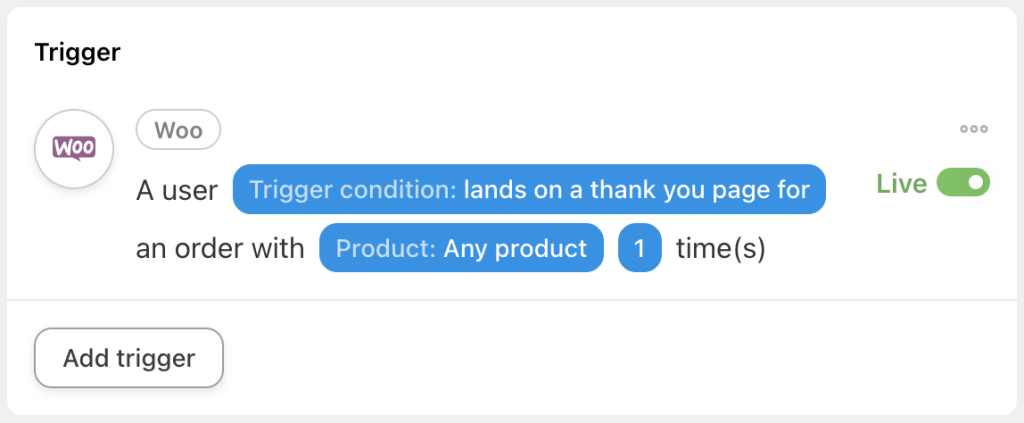
Automator will prompt you to select the Trigger condition and Product. For example, we have selected “lands on a thank you page for” and “any product” to capture orders as soon as a customer places them.
Once you’re finished, click Save. Your trigger should look something like this:
Step 4: Configure Your Action(s)
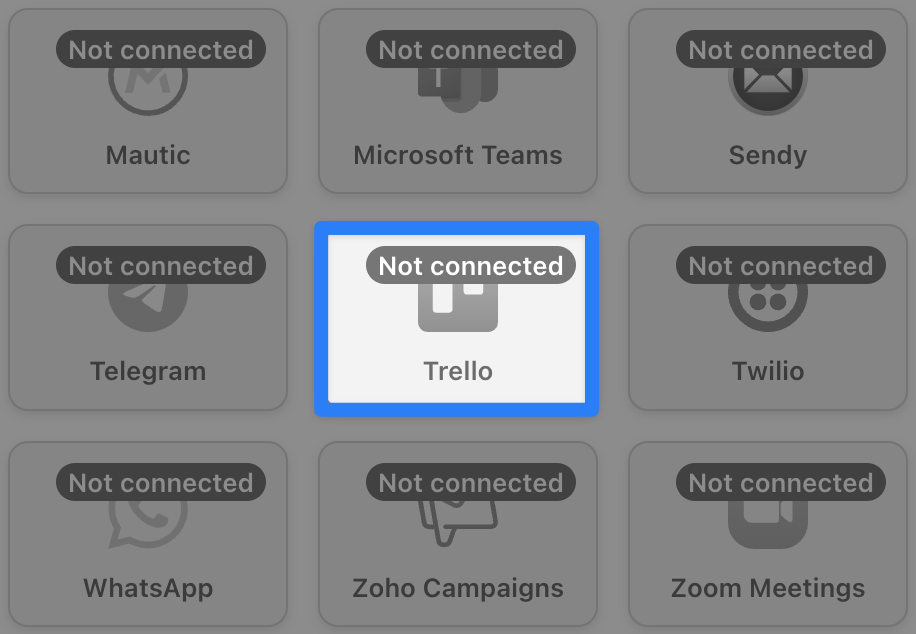
In the Actions panel, click Add action and select Trello.
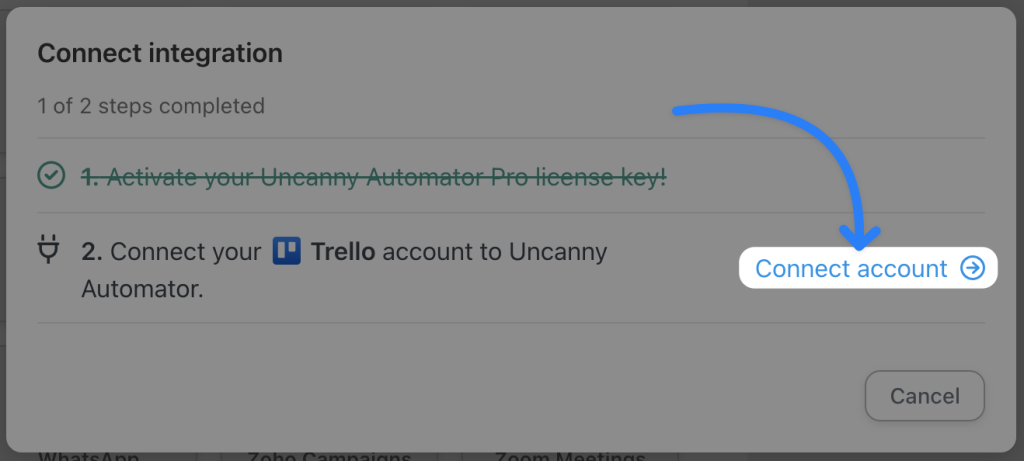
If you haven’t already connected your Atlassian/Trello account, click Connect account in the modal that appears.
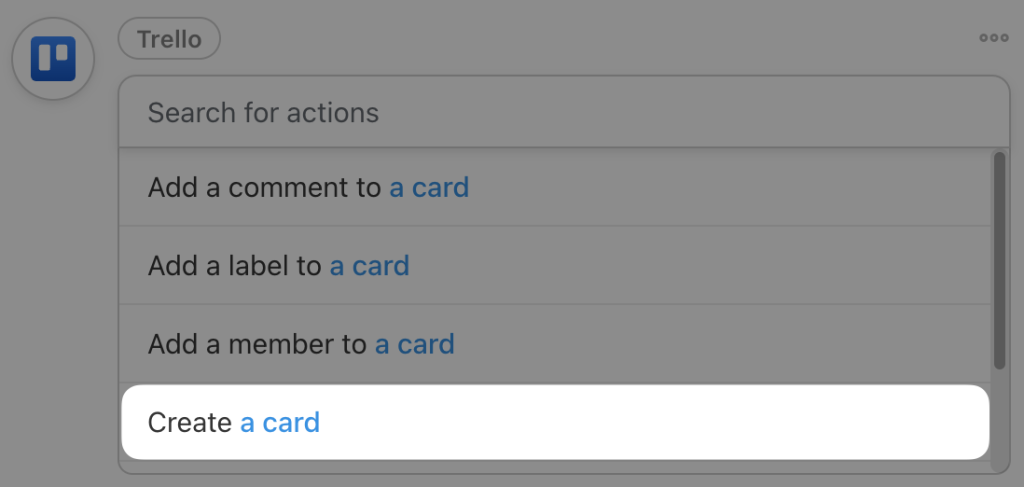
Follow the prompts. Once you’ve connected your account, return to the recipe editor. From the dropdown list that appears, select Create a card.
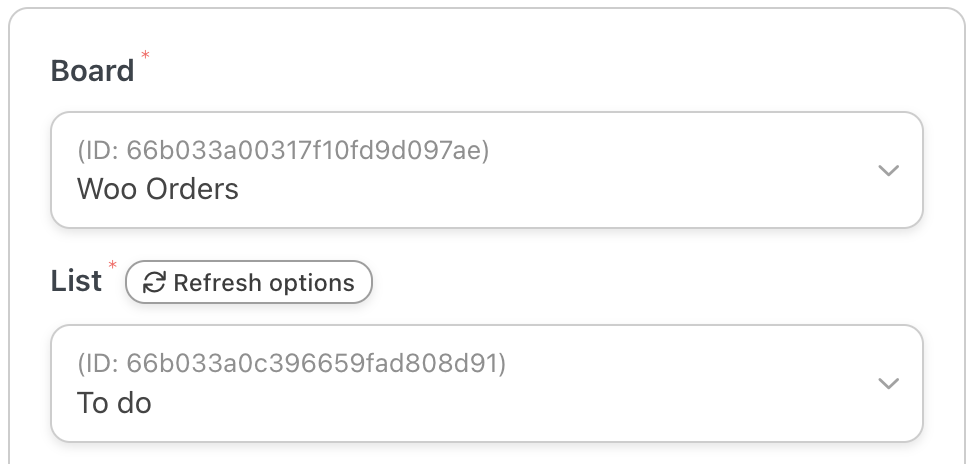
Automator will present you with a form. Select the Board and List where you want to create your Trello card.
We can use tokens (i.e., dynamic data pulled from your WordPress website and from within recipes) to fill out the remaining fields.
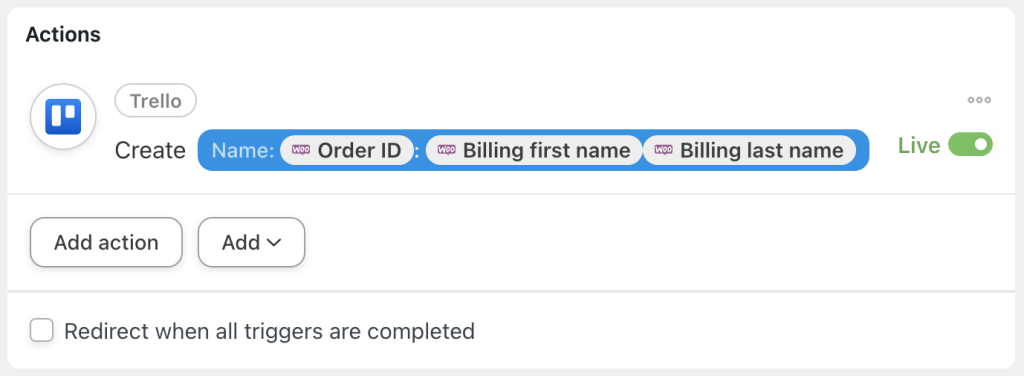
To select a token, simply click the Asterisk in a field. You can enter as many tokens in a field as you need. For example, in the Name field, we have selected the tokens “Order ID”, “Billing first name” and “Billing last name”.
You can fill out the remaining fields with the relevant tokens. For example, you might include the “Order Summary” token in the Description field and the “Current date” token in the Start date field.
If you have custom fields for your Trello cards, click Get custom fields and fill them out using the relevant tokens and/or static data.
Once you’re finished, click Save. Your completed action should look something like this:
(Note: We left the Due date field empty because we have configured an automation in Trello to add a due date to all cards added to our To Do list. However, if you want to add more dynamic due dates, scroll down to Step 6.)
Step 5: Go Live!
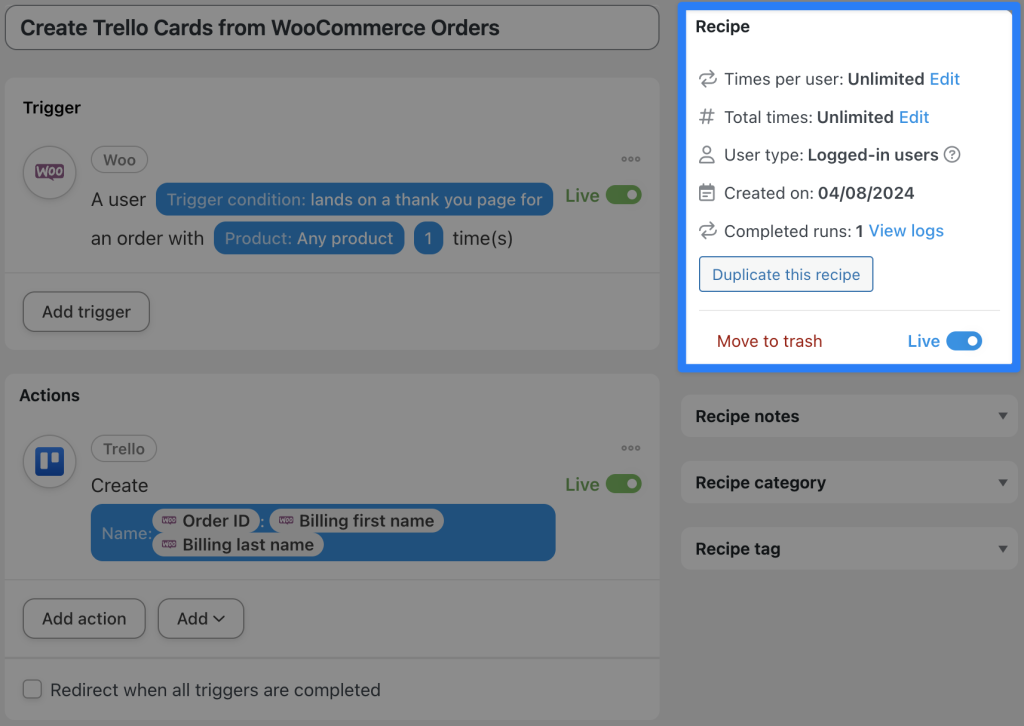
You’re just about ready to connect WooCommerce to Trello. All that’s left for you to do is toggle the recipe from Draft to Live.
That’s it! You’ve just connected your Woo store to Trello using the #1 automation and integration tool on the market.
Want to make more integrations like this one? Get your Automator Pro license now if you haven’t already>>>.
In the previous section, we mentioned that Automator has some powerful features that make it uniquely suited for connecting Woo to Trello. In the next steps, we’ll highlight some of those features to show you how Automator can add dynamic due dates to your Trello cards.
Step 6: Add a Date Formatter Action
Do you have a WooCommerce store with customers in different markets? Then, you probably have different delivery/fulfillment expectations.
Trello can automatically add due dates to your new cards. However, it can’t do that in a dynamic and responsive way. But, with Automator, you can create Trello cards with different Due dates depending on a customer’s shipping details.
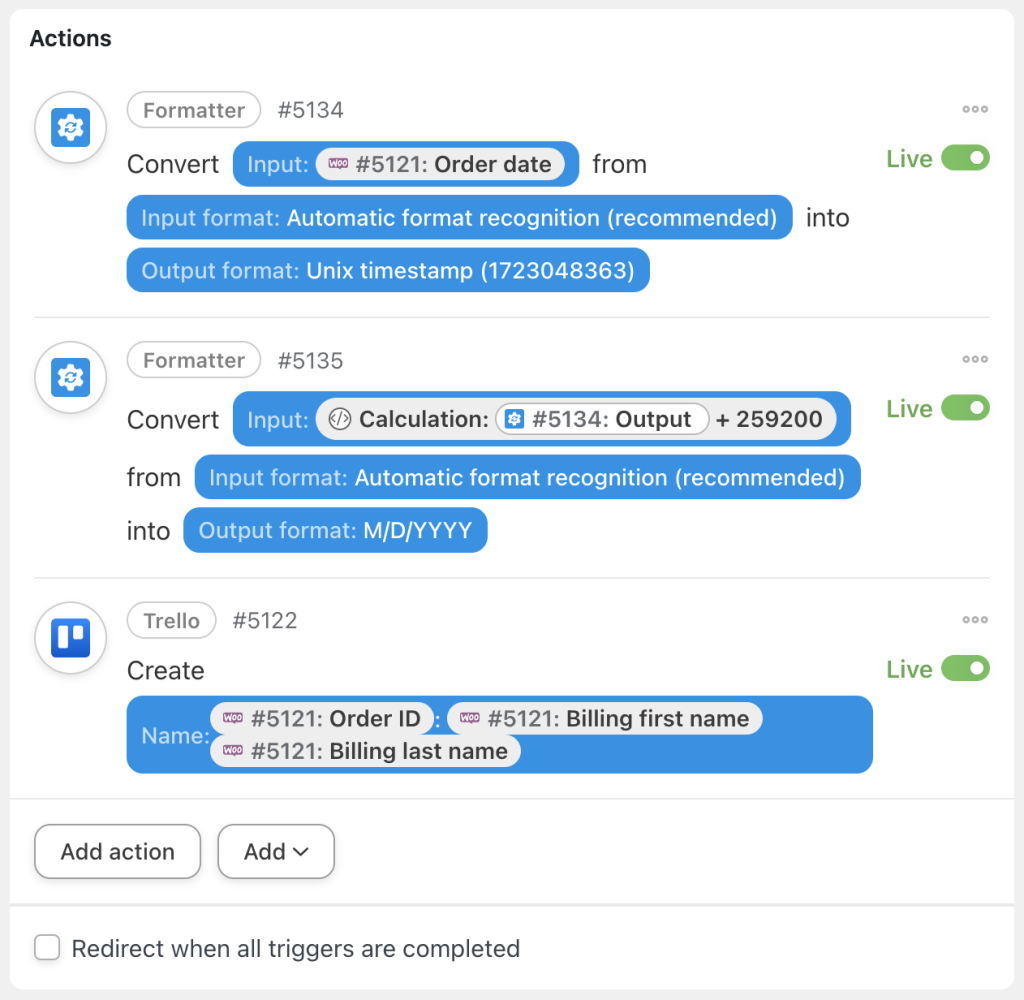
This process begins by converting the WooCommerce “Order date” token into a Unix timestamp (i.e., a form that we can manipulate with calculations). We then add a specified amount of time to the timestamp, convert it into date format that our Trello card will recognize and use that as the Due Date token.
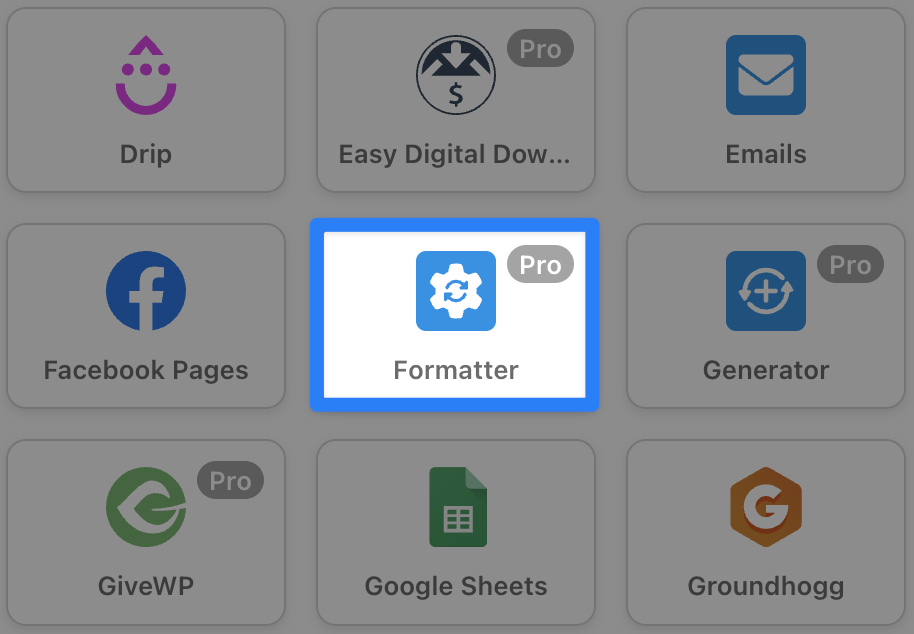
Let’s see how.In the recipe editor, click Add action and select Formatter.
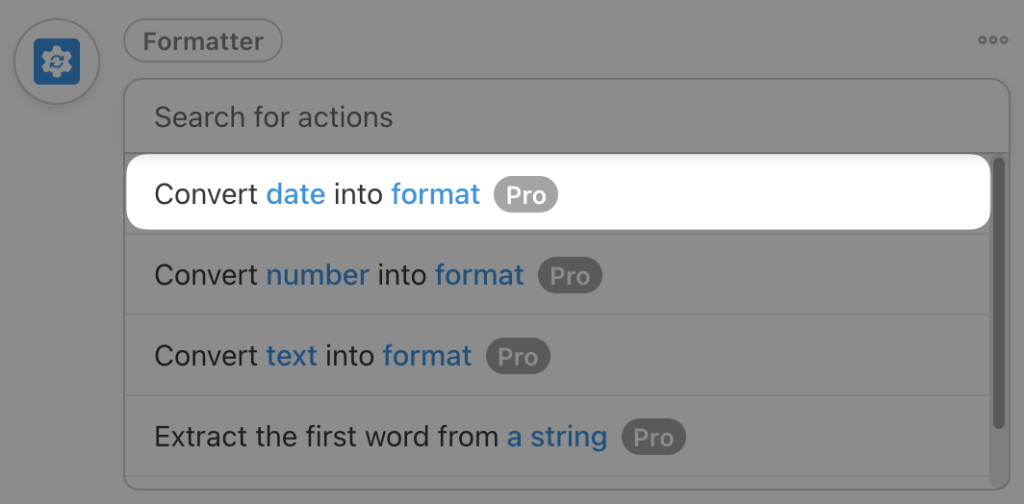
From the dropdown list that appears, select Convert date into format.
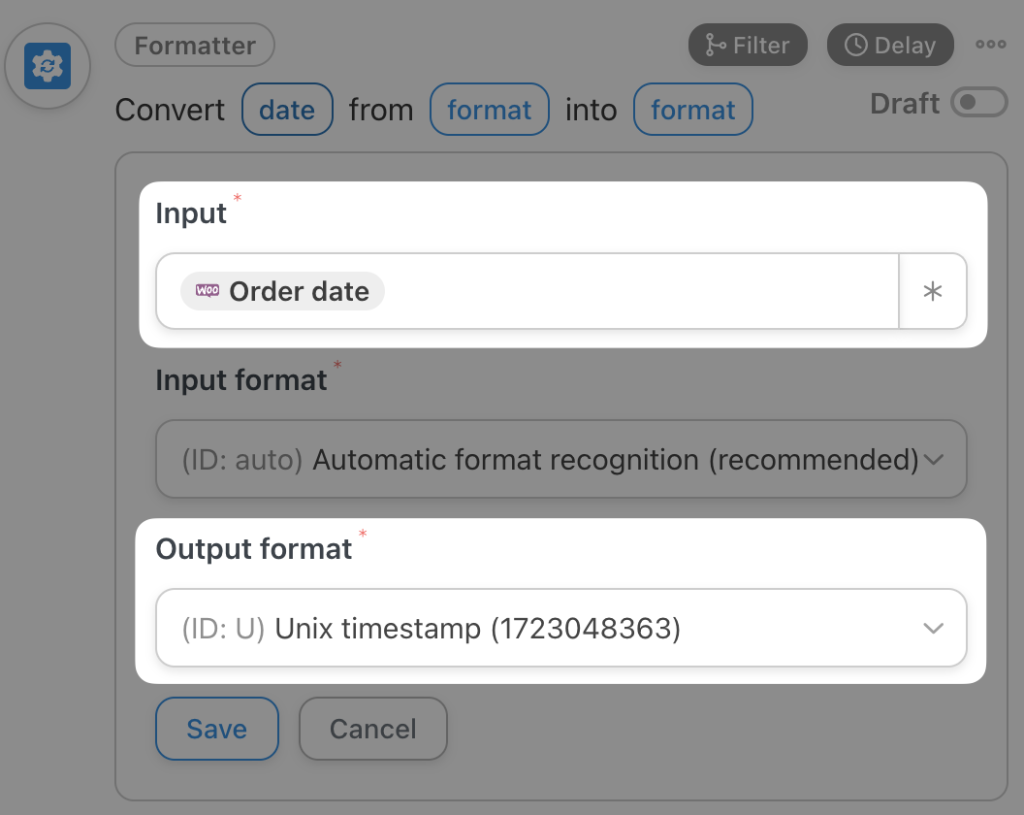
In the Input field, select the WooCommerce token “Order date”. In the Output format, select Unix timestamp.
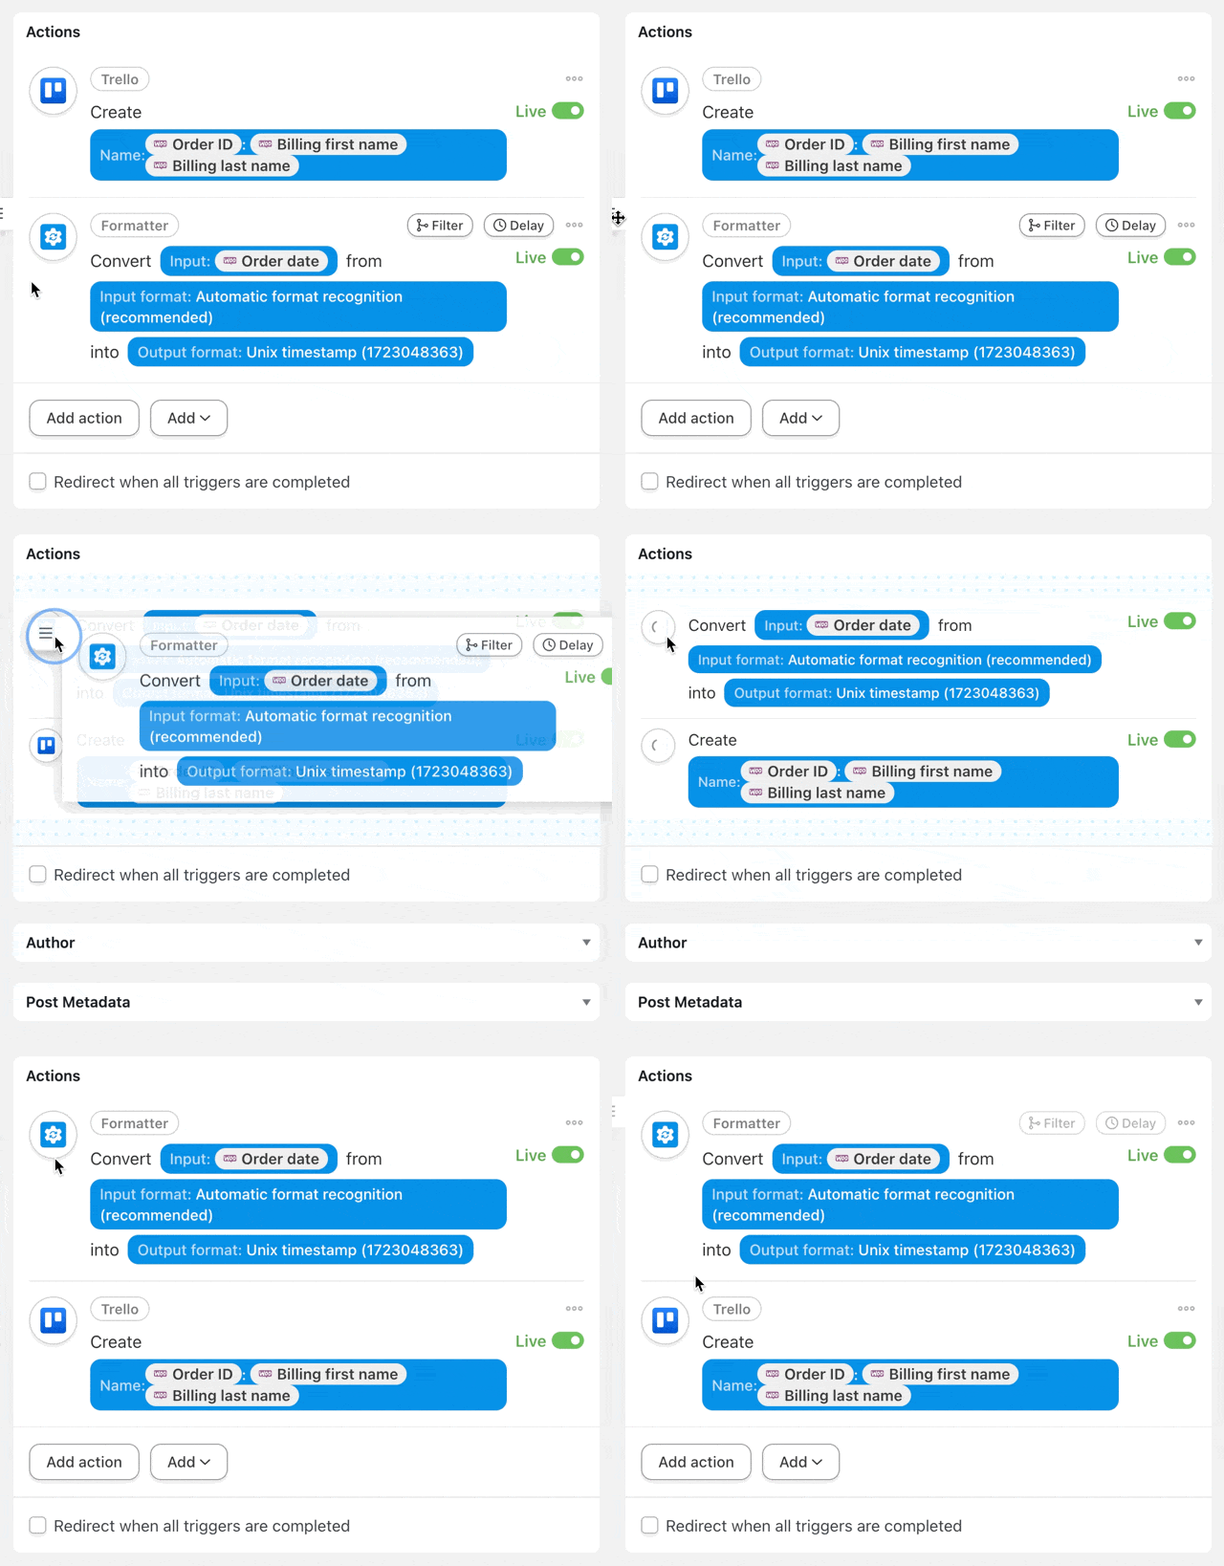
Once you’re finished, click Save. Then, drag and drop the Formatter action above the WooCommerce action.
(Note: Automator actions run in the sequence in which they appear in the recipe builder.)
Step 7: Add A Formatter and Calculation Action
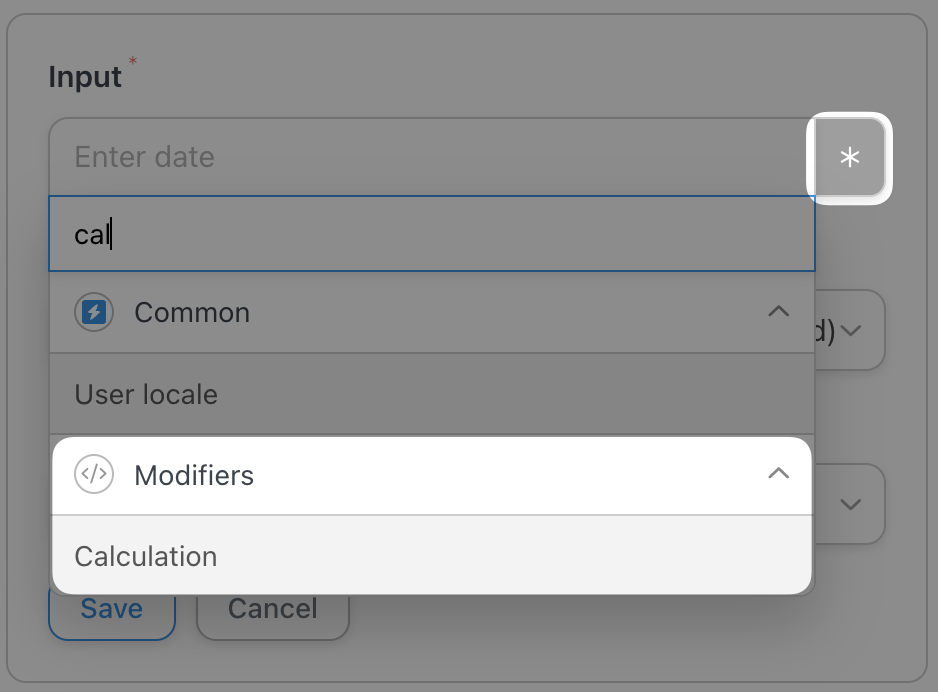
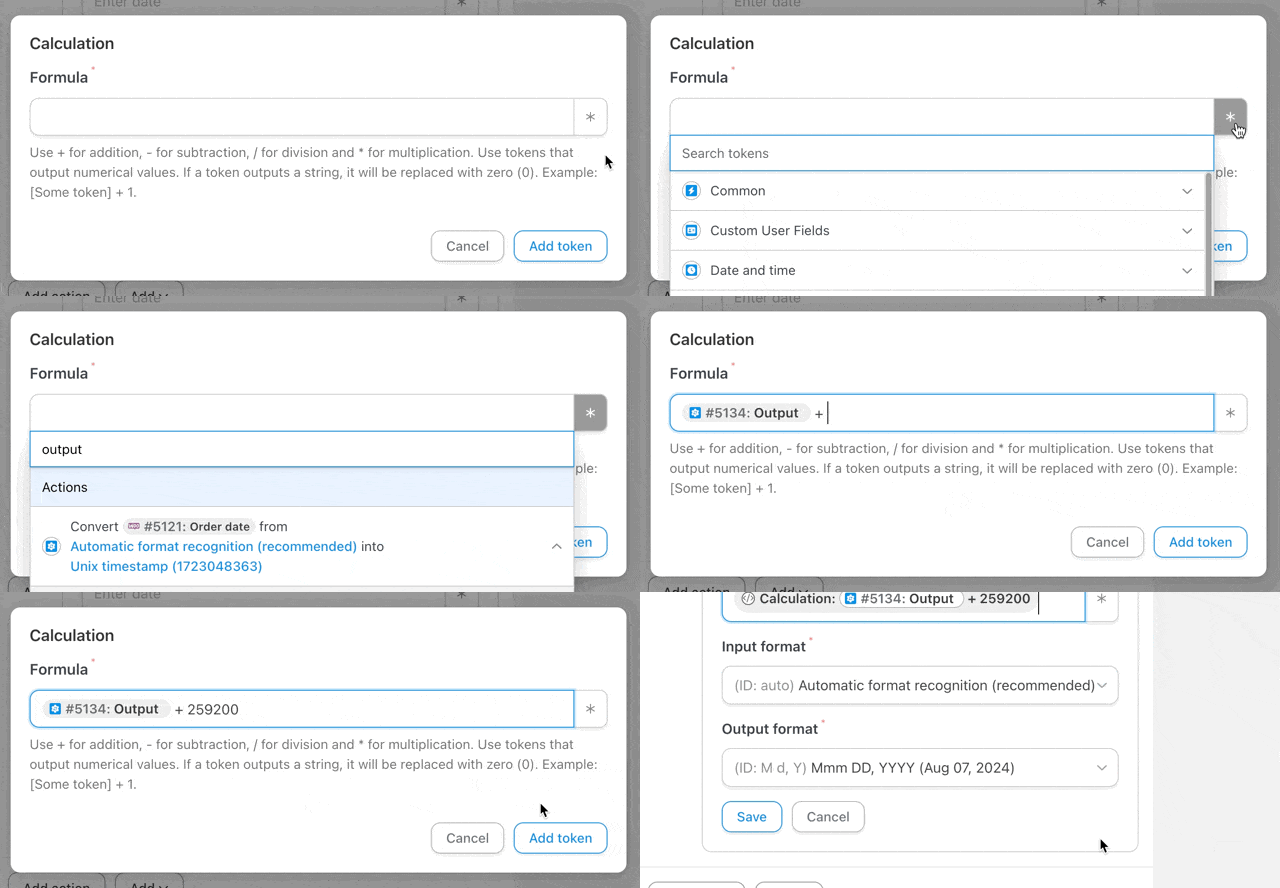
In the Actions panel, click Add action and select Formatter > Convert date into format again. This time, in the input field, select the token Calculation.
A modal will appear. In the Formula field, select the “Output token from the first Formatter action. Next, add a value in Unix time that represents the fulfillment deadline for a particular region. For example, we have added “259200” (i.e., 3 days in Unix time).
Change the output format to match the date format in your Trello account. For example, we have changed the output format to “M/D/YYYY”.
Once you’re finished, click Save and drag and drop this second Formatter action above the WooCommerce action.
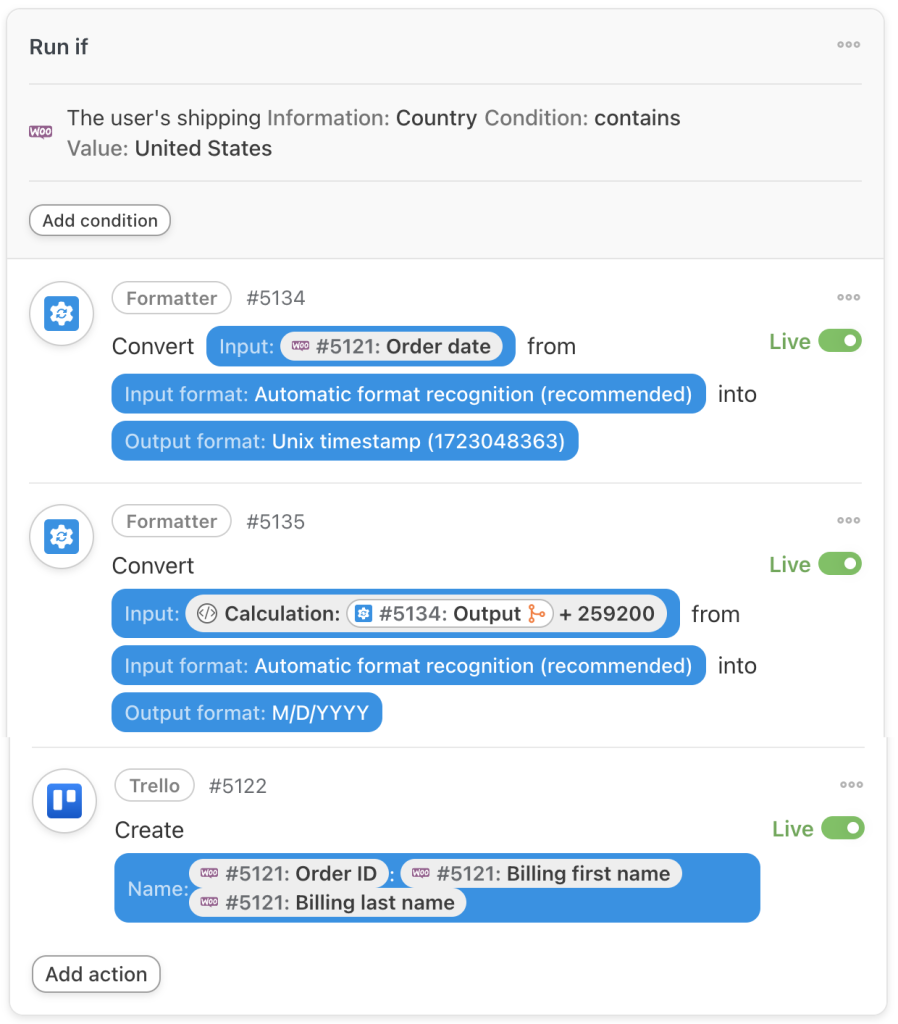
Right now, your Actions panel, should look something like this:
Step 8: Add a Filter
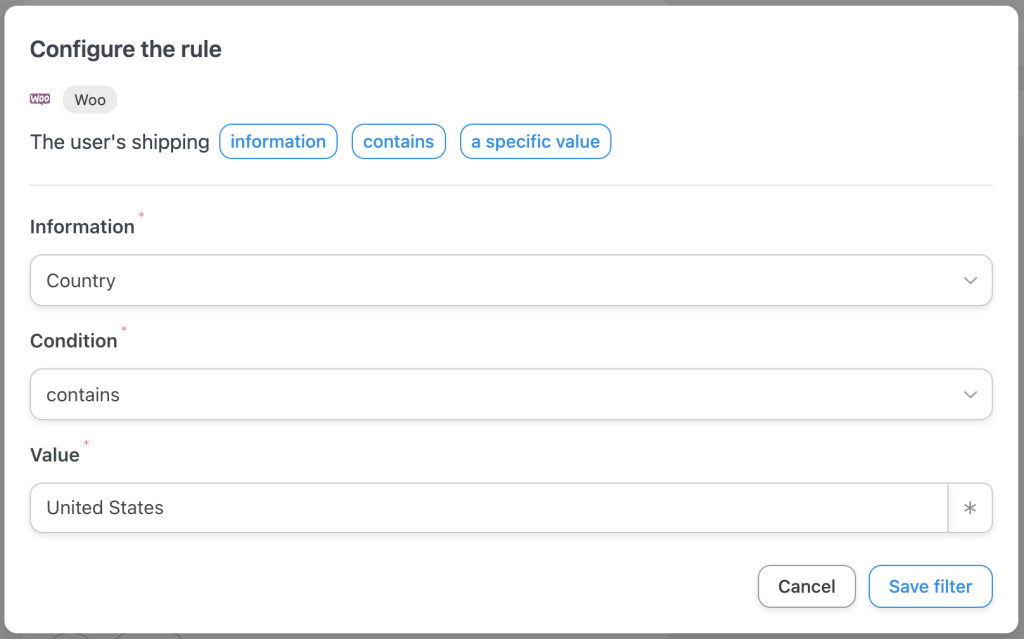
Now that we have created the token that represents our Due date, we can use filters to sort these actions by region. For example, we have a three (3) day fulfillment period for our United States based order.
We can use Automator filters to “group” these actions. Here’s how.
Hover over the first Formatter action and click Filter.
In the modal that appears, select The user’s shipping information contains a specific value.
A second modal will appear. Configure the rule that suits your workflows and click Save filter.
Drag and drop the secondary Formatter action as well as the Trello action into the pane with your new filter. Your Actions panel should now look something like this:
Step 9: Configure Your Due Date
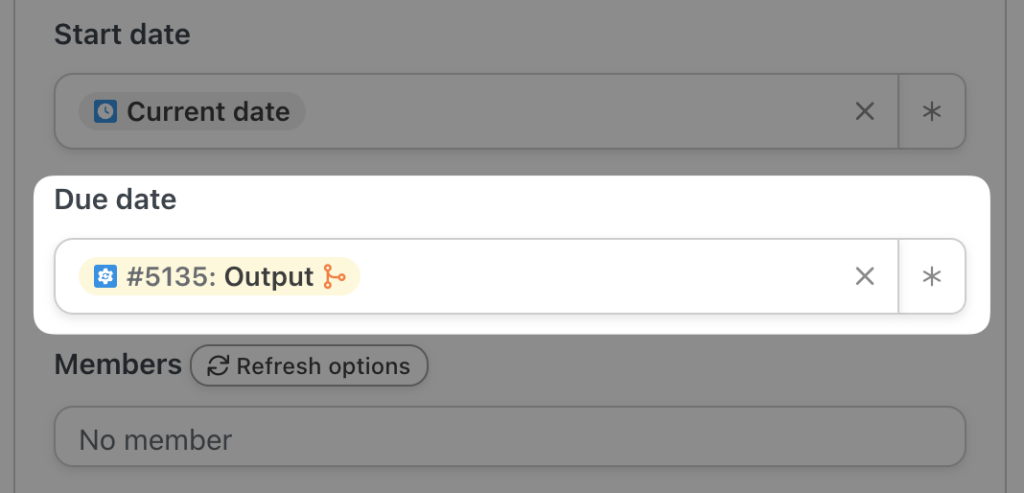
You’re almost finished adding dynamic due dates to your Trello cards. All you have to do is add the “Output” token from your second Formatter action to the Due Date field in your Trello action.
That’s it! You’re all done. You’ve just mastered some of Automator’s most advanced and powerful features for customizing your integrations.
You can add as many filters and actions as needed for each of your different regions.
Grab your Automator Pro license now and take advantage of fully customizable WooCommerce and Trello integrations>>>.
More Ways to Connect WooCommerce to Trello
You’ve just about mastered the art of connecting WooCommerce to Trello. Now, it’s time for you to try out some recipes of your own.
To help get you started, here are some recipes that you might find useful.
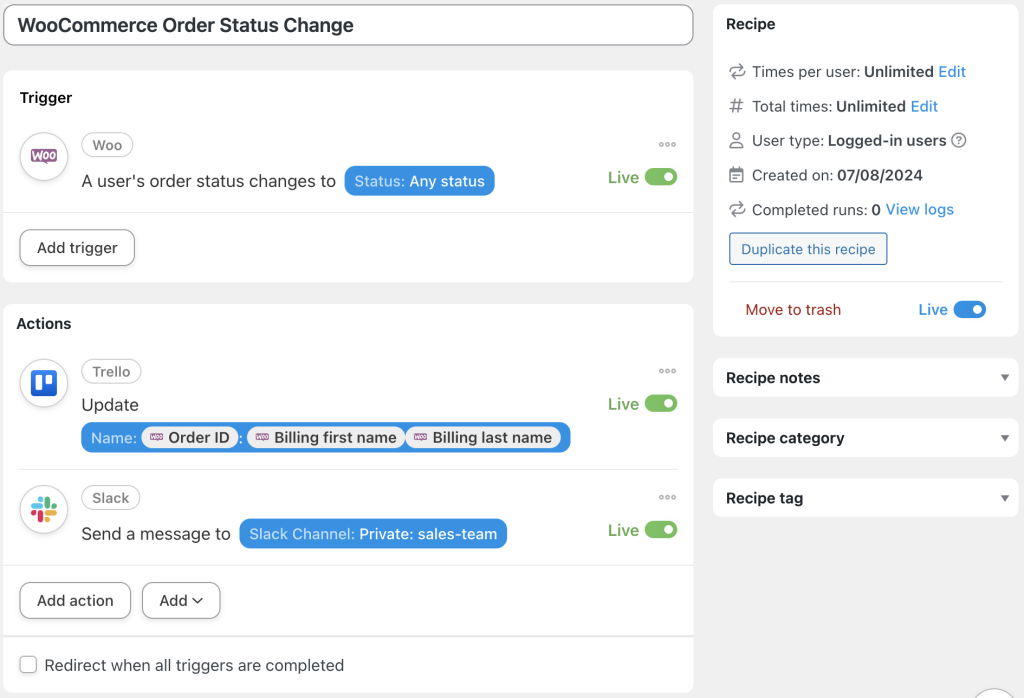
Update Trello Cards Based on WooCommerce Order Status
As we mentioned before, Automator has tons of triggers and actions for WooCommerce. Once you’ve created a Trello card for a WooCommerce order, keep it updated with the latest developments.”
In the recipe pictured below, we’re able to update a Trello card once an order status has changed. We can add new details, new team members, new labels or new custom fields.
We even added a secondary action to notify our sales team in Slack about the progress in their order fulfillment.
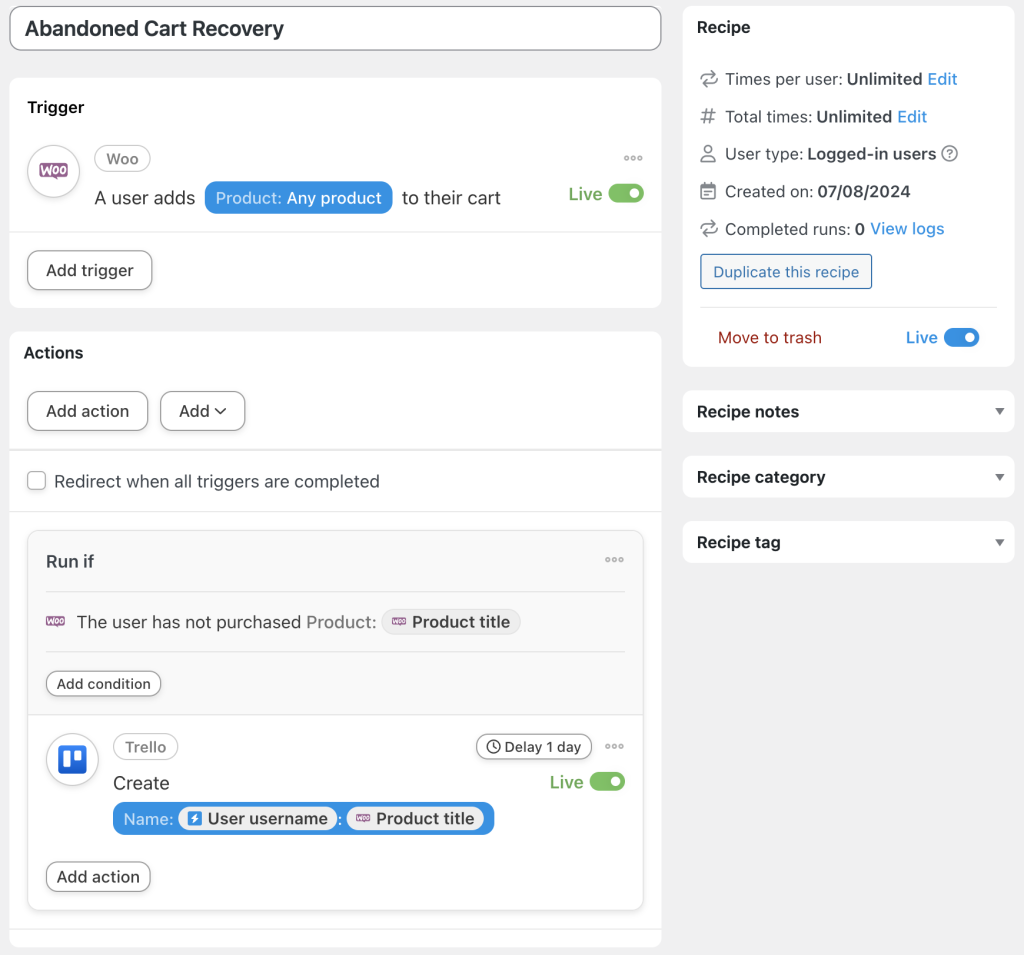
WooCommerce Cart Abandonment with Trello
Want to boost your conversions with a hands-on approach to cart abandonment recovery? Automator can help with that.
In the recipe pictured above, we’re able to create a Trello card whenever a Woo customer abandons a product in their cart that they haven’t purchased before.
These are just some of the powerful WooCommerce and Trello integrations you can create with Automator. Get your Pro license now and get on top of your ecommerce game>>>.
常见问题
结论
Integrating WooCommerce with Trello using Uncanny Automator is a game-changer for ecommerce businesses looking to streamline their order fulfillment and enhance team collaboration. With powerful features like dynamic tokens, advanced filters, and customizable actions, Automator empowers you to automate and optimize your workflows effortlessly.
In this blog, we covered setting up your first Woo and Trello integrations and showed you how to use powerful features to create more dynamic workflows.
Ready to transform your ecommerce operations and boost productivity? Get your Uncanny Automator Pro license today and take full advantage of seamless WooCommerce and Trello integrations>>>.
Until next time, happy automating!








这篇文章有 0 条评论