使用 Uncanny Automator 将 OpenAI 连接到 WooCommerce,以生成由 AI 驱动的产品描述并自动化您的……
Connect WPForms to Airtable: The Complete (Free & Easy) Guide
Connect WPForms to Airtable with Uncanny Automator—for free! Create a seamless integration to manage your WordPress data with ease.
Are you looking to create a seamless WPForms and Airtable integration? Better yet, do you want to do it for free and without a single line of code? Well, look no further. You’ve landed in the right place!
In this comprehensive guide, we’ll walk you through connecting WPForms to Airtable using the #1 automation and integration tool for WordPress websites: Uncanny Automator.
By the end of his tutorial, you’ll have clear instructions for automating your WPForms workflows, improving your Airtable data management, and enhancing your website’s functionality.
So, whether you’re a WordPress business owner, developer or just someone who values their time—and sanity—this guide will help you create seamless data flows between your forms and databases.
But that’s enough chit chat for now. Let’s get started!
Introduction to WPForms and Airtable
For WordPress businesses and developers alike, WPForms is the form-building plugin of choice—and a quick peek at its features makes it clear as to why.
WPForms supports the creation of all kinds of forms, from simple contact forms to more complicated payment forms with conditional logic. And, with an endless selection of templates to choose from, WPForms is as powerful as it is easy to use.
Likewise, Airtable is a flexible cloud-based relational database, that allows you to augment your data collection and storage.
Airtable is a favorite amongst WordPress users for storing everything from form submissions, to WooCommerce products and orders, events, and more. Users can store just about any kind of information in an Airtable record, be it images, URLs, emails, PDFs, and, well, just about anything you can think of.
Together, with WPForms and Airtable, you manage your form submissions with ease and organize your WordPress data in a way that makes it easy to digest and analyze.
Why Connect WPForms to Airtable With Automator
Uncanny Automator is the #1 automation and integration tool for WordPress websites, making it the perfect candidate for connecting WPForms to Airtable. And not just because Automator is the most powerful tool—it’s also FREE to get started!
Using simple combinations of triggers and actions called recipes, Automator integrates all of your favorite apps and plugins, allowing you to create seamless workflows across your website and beyond.
Now, we could list all of Automator’s must-have features and addons (Loops, Restrict Content, Custom User Fields, etc.) but then we’d never get to the matter that brought you here: connecting WPForms to Airtable.
Instead, here are the features that matter most for creating this WPForms and Airtable integration:
- Affordability: Unlike other automation and integration tools, Automator doesn’t charge per automation fees. That means you can store as many form submissions in Airtable as you want without incurring any additional costs. The more you automate and integrate, the more you save!
- 易于使用: Automator 拥有用户友好的点击即用界面,只需点击几下即可自动化复杂的工作流程,甚至只需更短的时间。只需选择自动化工作流程中所需的集成,选择一些触发器和操作,Automator 即可完成所有工作。
- Integrations and Addons: Connect WPForms to Airtable and 200 other integrations—with more on the way all of the time! In case that wasn’t enough, Automator’s Custom User Fields, Restrict Content and User Lists addons makes managing your WordPress content that much easier.
- Scalability: Do you have hundreds or even thousands of WPForms form entries stored elsewhere? Automator can help you export them to Airtable using Loops or XML, CSV, or even JSON file import. No job is too big—or too tedious—for Uncanny Automator’s U-Bot.
Ready to connect WPForms to Airtable—and 100s other apps and plugins?
Get Uncanny Automator Pro now >>>
Not sure that Automator is for you? No worries. Download the FREE FOREVER version of Automator then register your account. You’ll get a limited number of app credits so you can implement Automator’s WPForms and Airtable integration before making a commitment.
Step-by-Step Guide to Connect WPForms to Airtable
With Automator, you can connect Gravity Forms to Airtable to store form submissions and data of all kinds. But, for our first recipe, we’ll start with a simple form submission so you can master the basics.
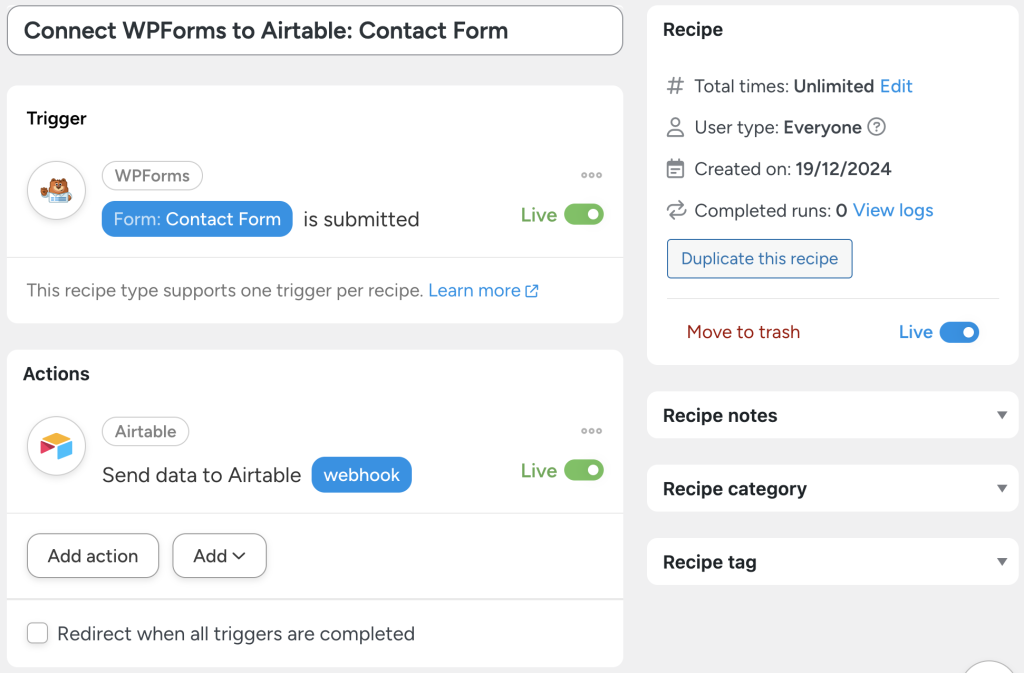
In the recipe pictured above, we’re able to sync form submission data from our basic WPForms contact form directly to Airtable. Using Automator’s tokens feature (i.e., dynamic data pulled from your WordPress website and from integrated apps and plugins), we’re able to store the information entered in our form in an Airtable database.
Here’s how we did it.
Step 1: Configure Your Form and Database
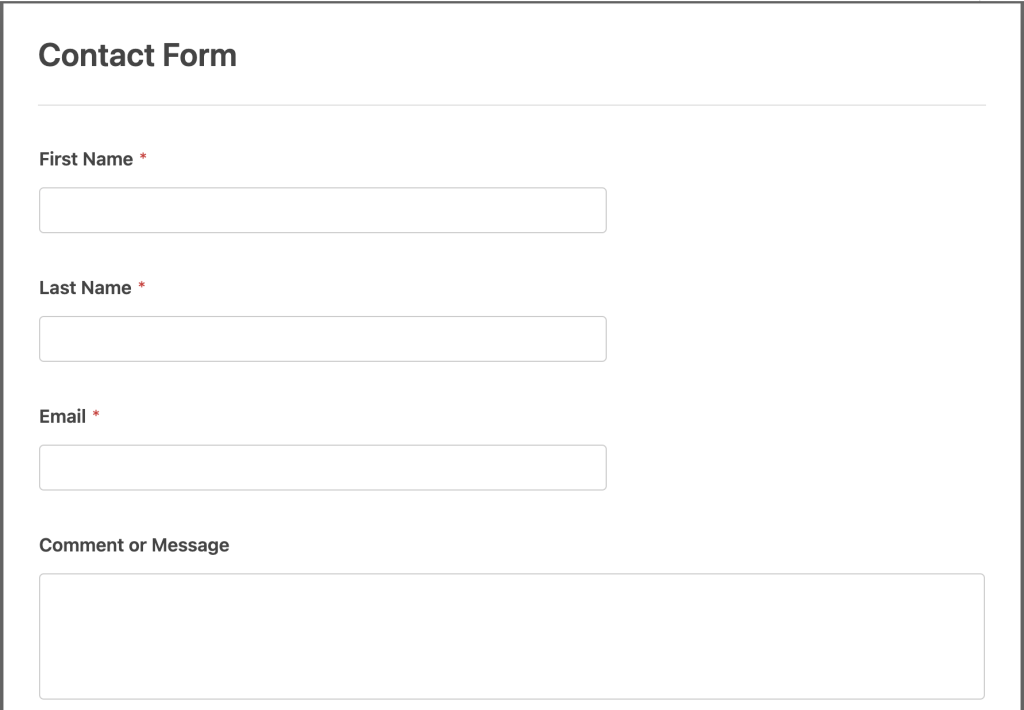
Configure your WPForms contact form and Airtable database so that they have matching fields/records. For example, our contact form has the following fields: First Name, Last Name, Email, and Comments.
As such, we’ve configured the records in our Airtable database to reflect these fields in addition to the Entry ID and Form Submission Date.
Step 2: Create and Name a New Recipe
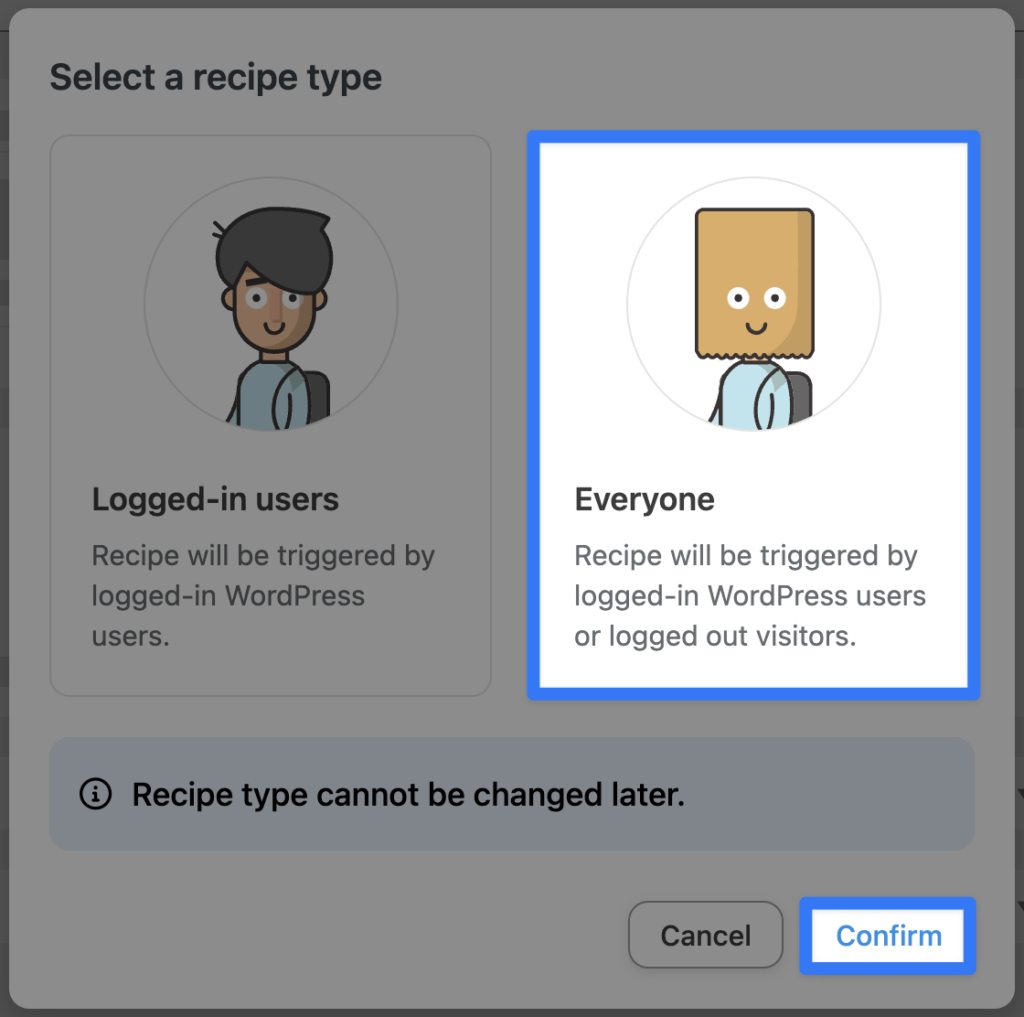
From your WordPress Admin Dashboard, navigate to Automator > Add new recipe. In the popup window that appears, select Everyone.
Give your recipe a name that makes it easy to recognize at a glance. For example, we have named this recipe “Connect WPForms to Airtable: Contact Form”.
Step 3: Configure Your Trigger(s)
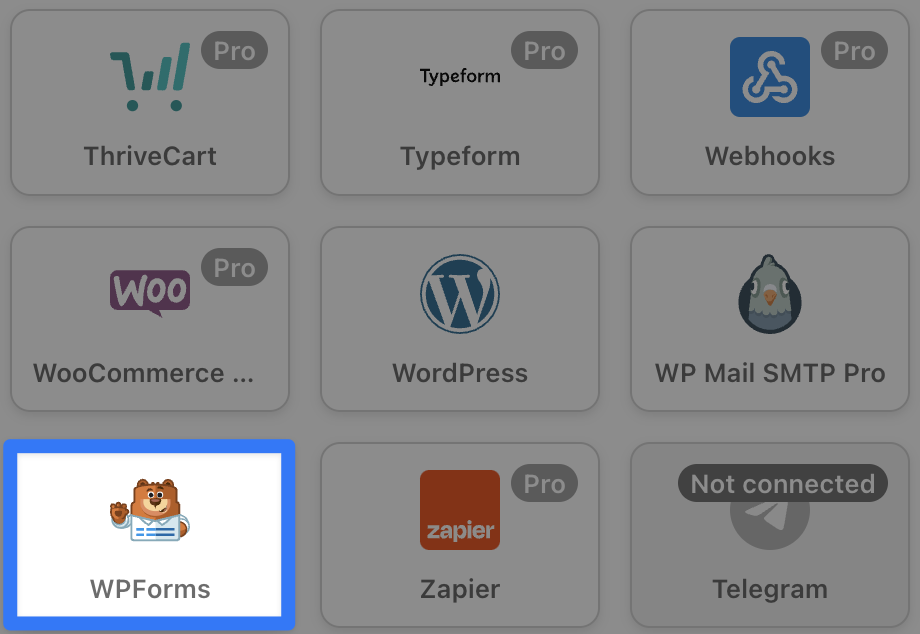
In the Triggers panel, from the menu of available integrations, select WPForms.
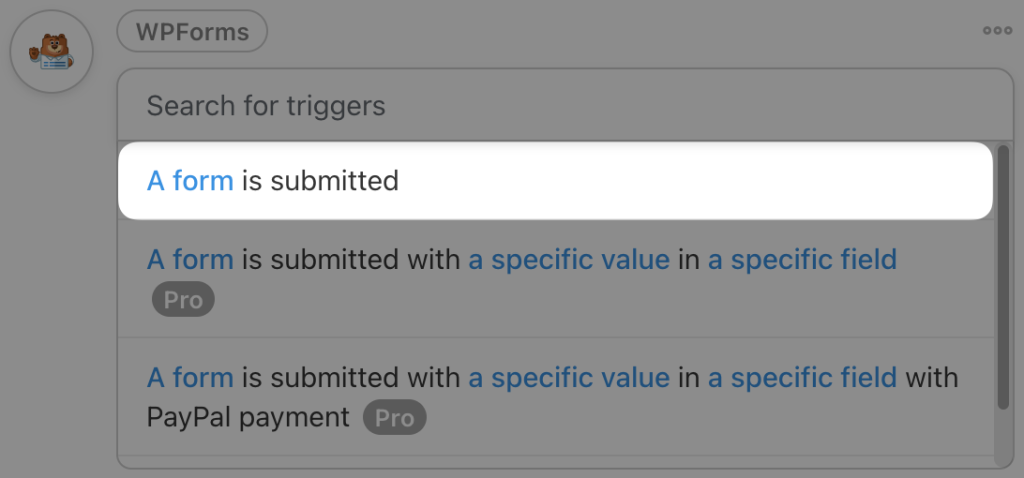
From the dropdown list that appears, select A form is submitted.
Automator will prompt you to select a form. Once you’re finished, click Save. Your completed trigger should look something like this:
Step 4: Configure Your Action(s)
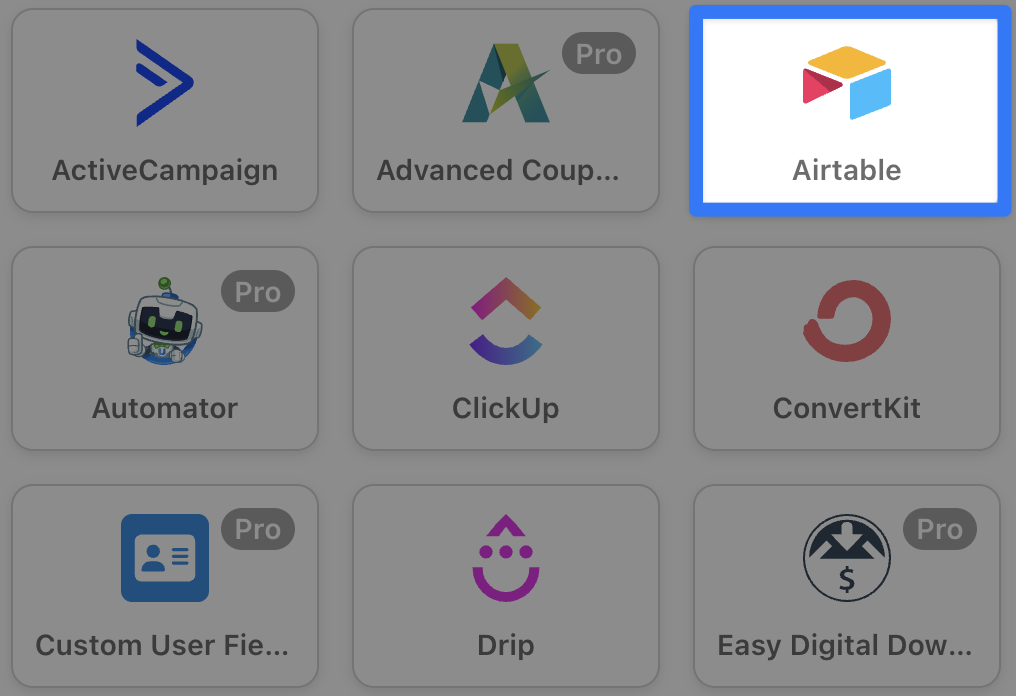
In the Actions panel, click Add action and select Airtable.
From the dropdown list that appears, select Send data to Airtable webhook.
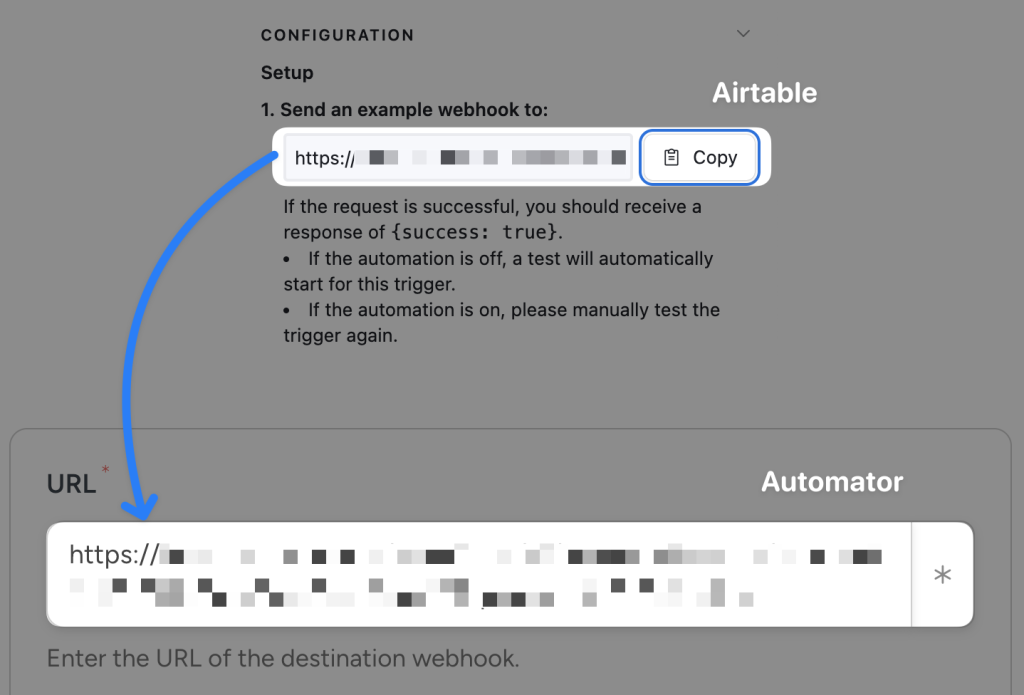
Automator will present you with a webhook form. To fill out the first field, URL, navigate to your Airtable database.
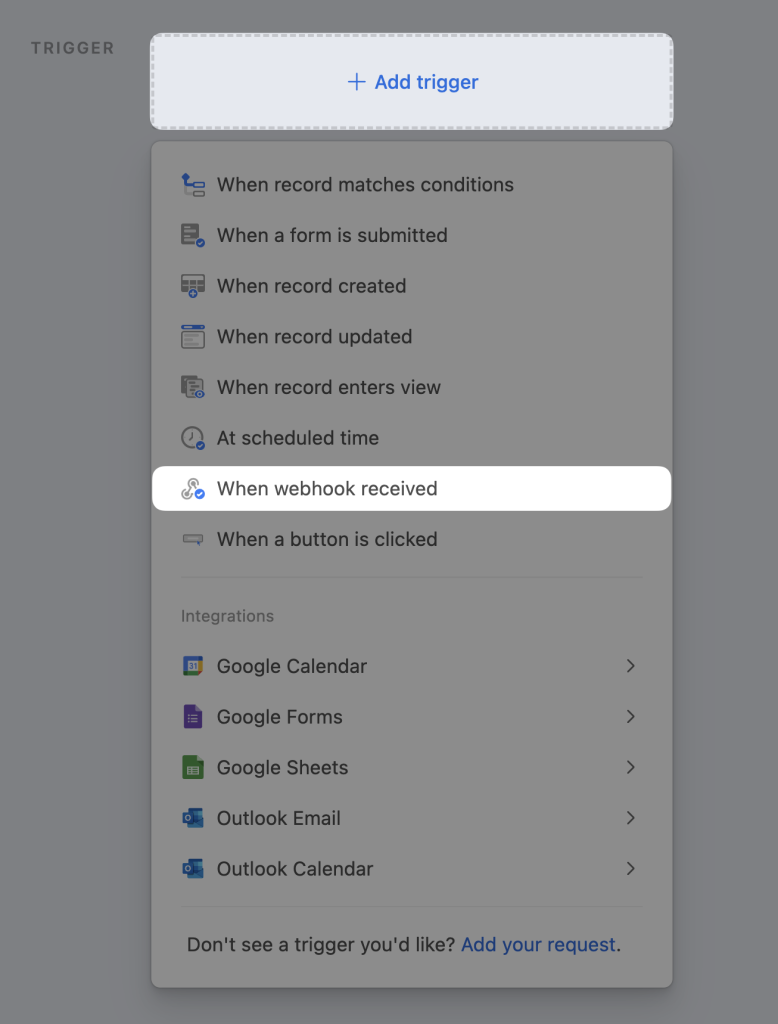
Once in the database, click on Automations in the upper left corner. In the Automations screen, click Add trigger and select When webhook received.
In the Properties pane, on the right hand side of the page, under Configuration, copy the URL provided. Return to the recipe editor and paste the URL into the URL field.
Unless you have experience with webhooks, you can leave the Request Method, Data format, Authorization, and Headers unchanged.
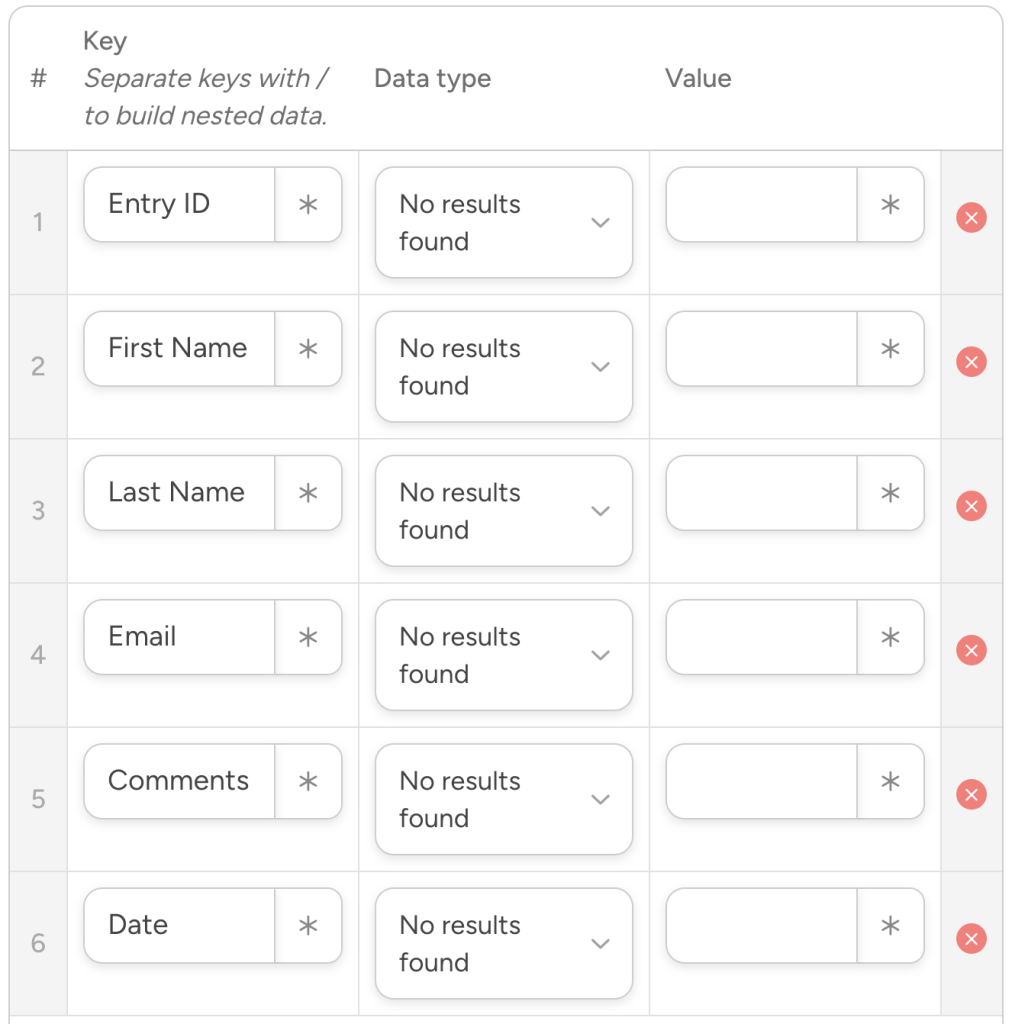
Next, in the Body field, click Add pair. Under the Key column, type in the names of the records in your Airtable database. For example, for us, that would be Entry ID, First Name, Last Name, Email, Comments, and Date.
This is how you will recognize the data that Automator sends to Airtable.
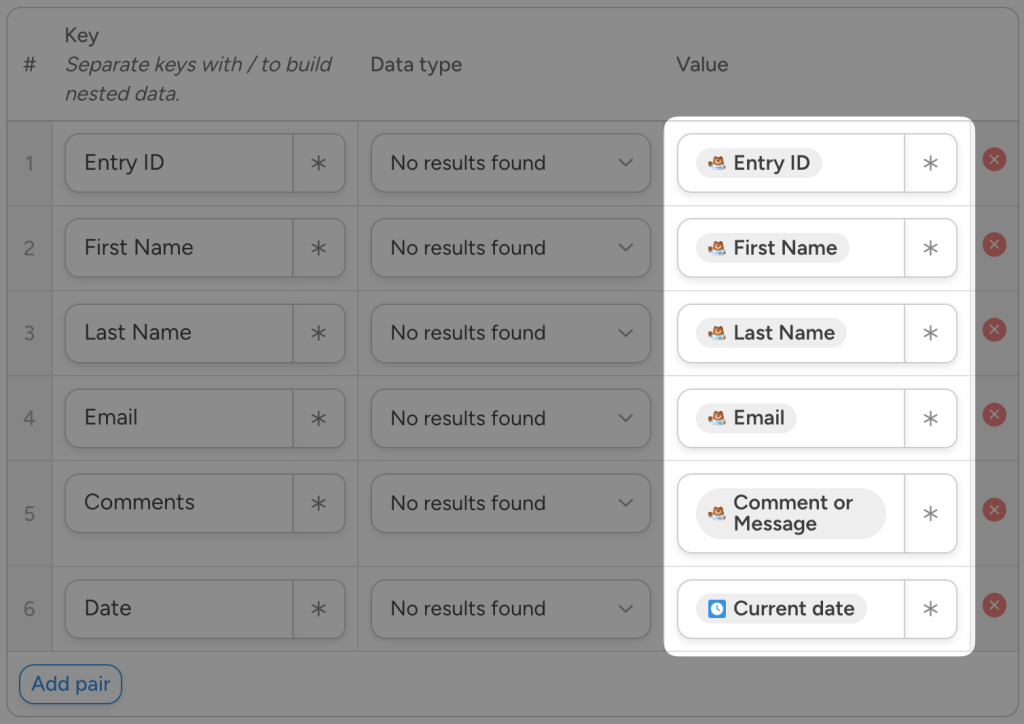
Next, we will fill out the fields in the Value column using tokens. To use a token, click the Asterisk in a field and select the corresponding token.
(Note: We used Automator’s Current date token instead of the Entry submission date token because of formatting. The Current date token returns the date in the same format from our WordPress settings. The Entry submission date token returns the date and time, which would be incompatible with our Airtable records.)
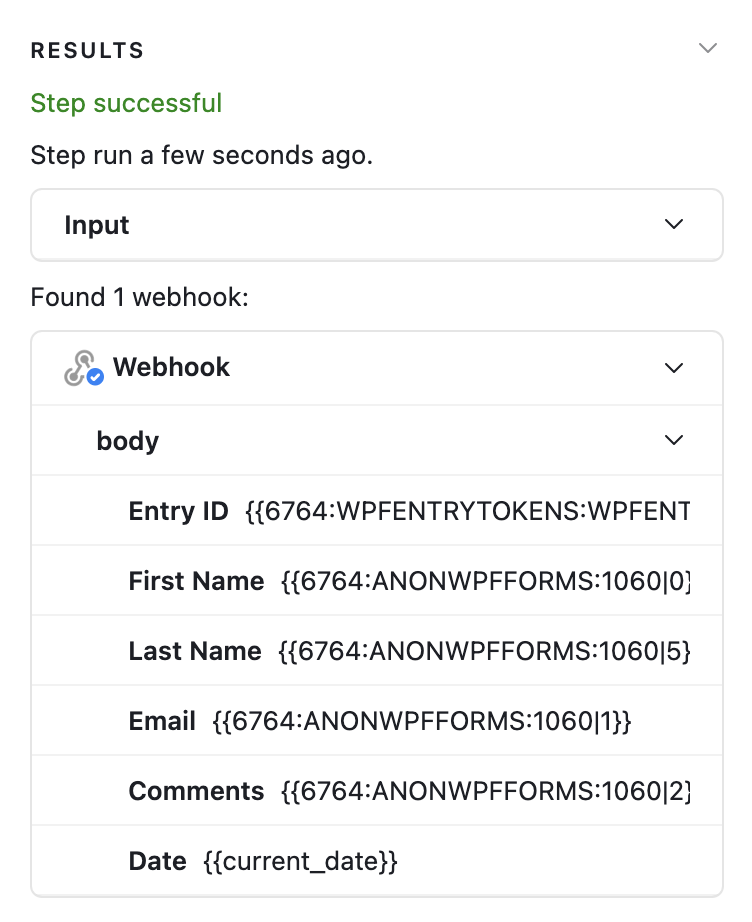
Click Send test then navigate to your Airtable automation. Once the test has been successful, you should see these results.
At this point, you can return to the recipe editor and click Save. Your completed action should look like this:
In your Airtable automation, click Add advanced logic or action. From the dropdown list that appears, select Create record.
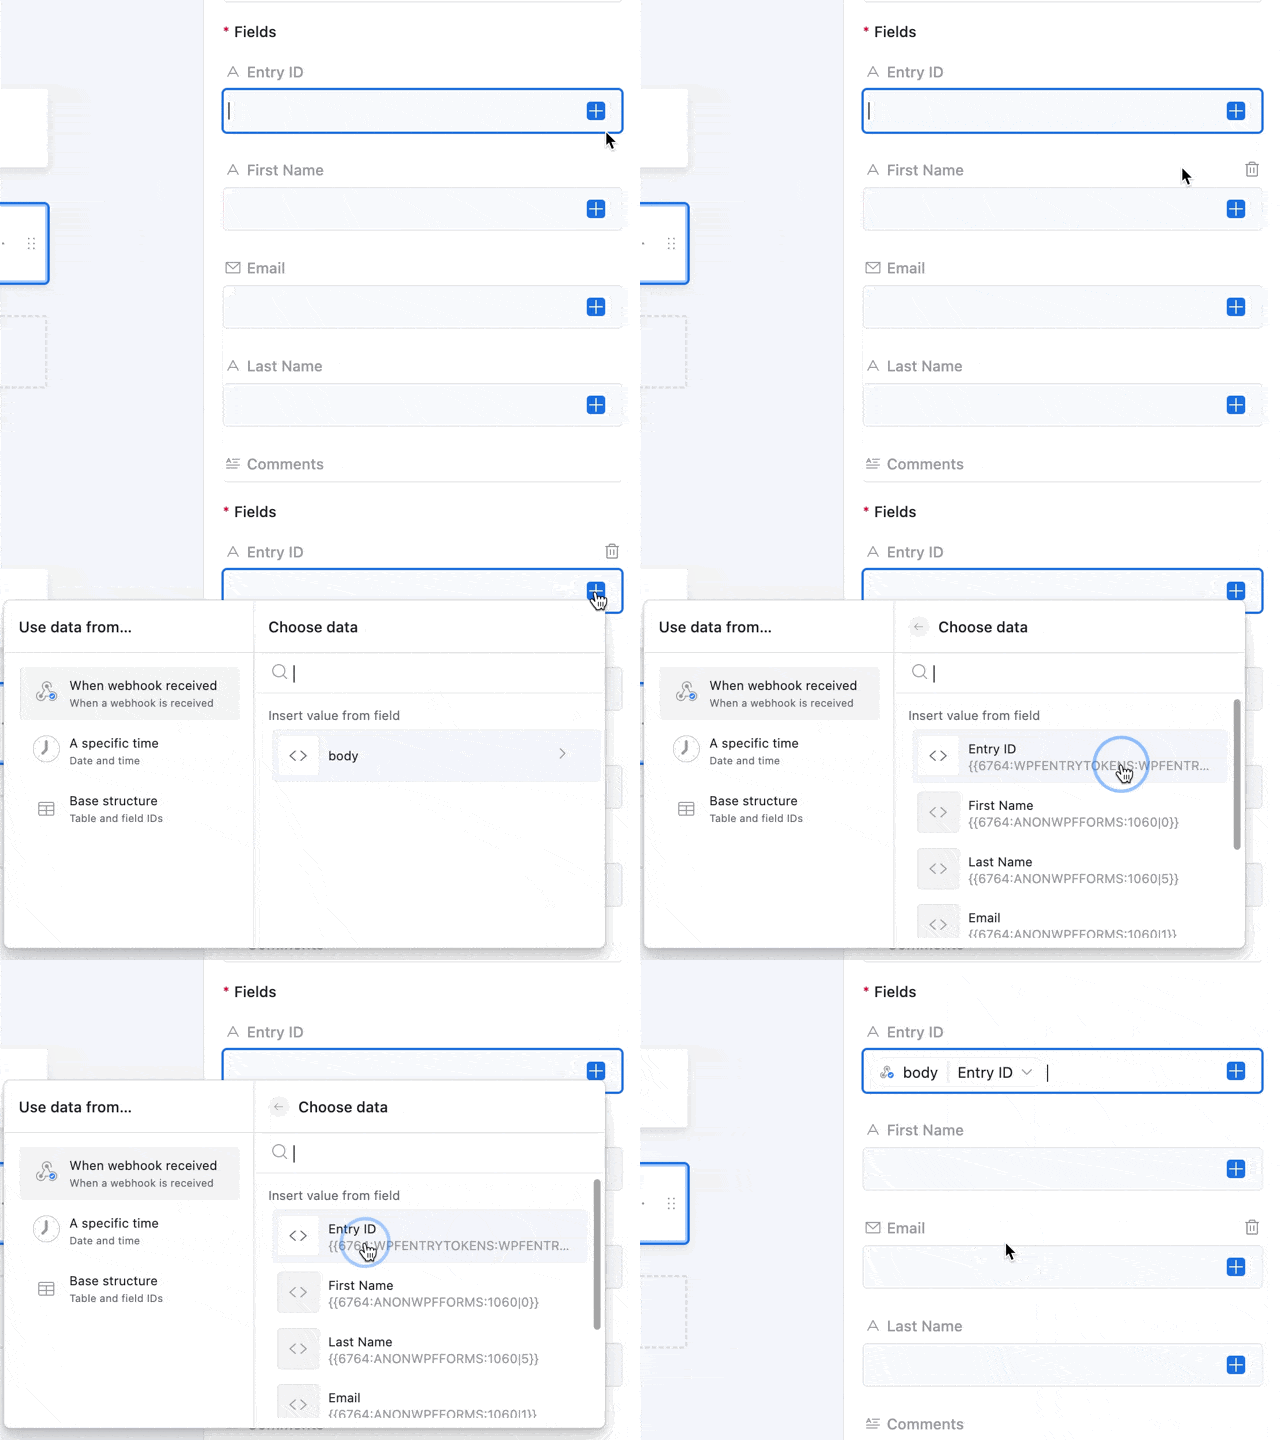
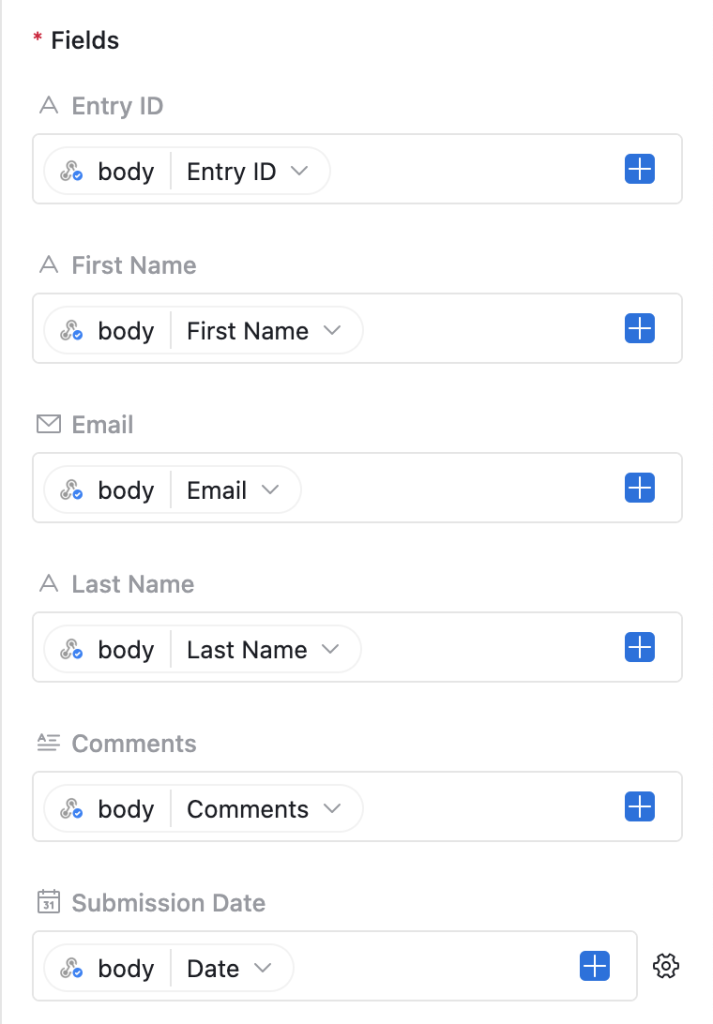
In the Properties pane, on the right hand side of the page, select a Table then click Choose field. Similar to how we used tokens in our Automator recipe, we’re going to fill out these fields using the dynamic results from the test.
To use dynamic data, click the “+” in the field and select the corresponding data.
Repeat this process for all of the fields.
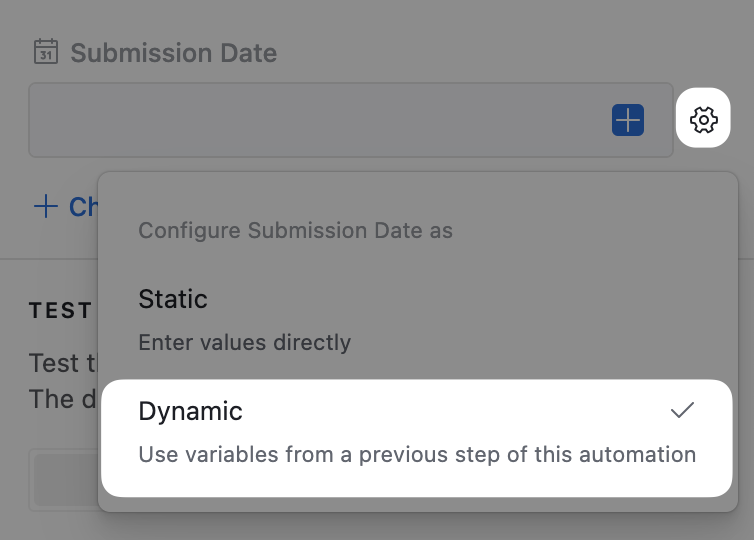
(Note: For some fields, you may need to change the settings from Static to Dynamic by clicking on the gear icon.)
Once you’re finished, toggle the automation to On.
Step 5: Go Live!
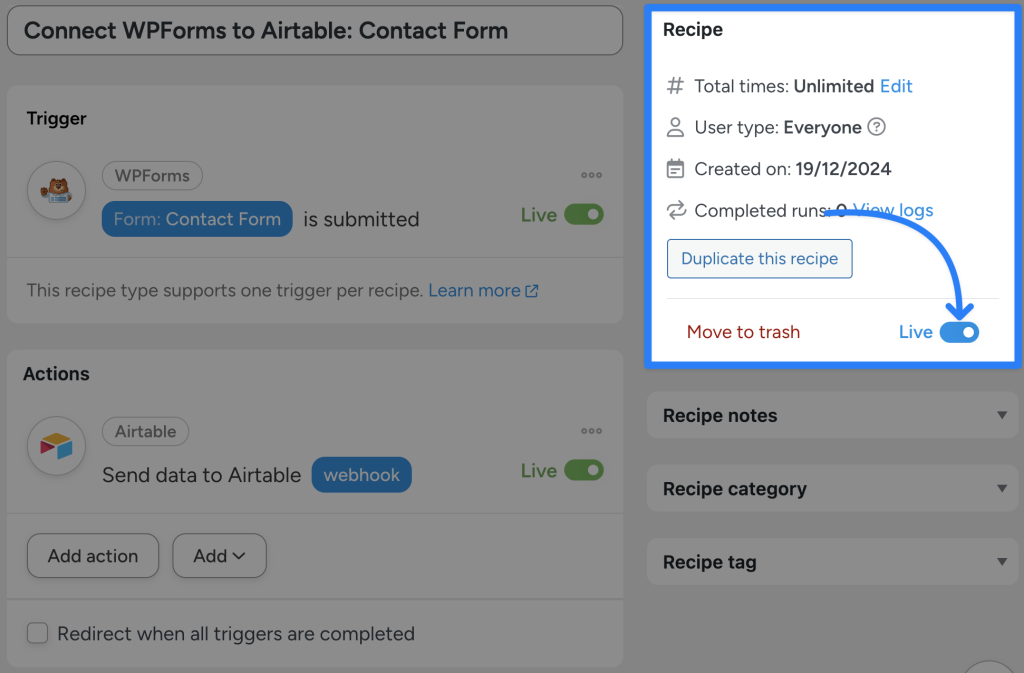
You’re just about ready to connect WPForms to Airtable. All that’s left for you to do is to toggle your Automator recipe from Draft to Live.
That’s it! Let’s take a look at our first WPForms to Airtable integration.
More Ways to Connect WPForms to Airtable
Now that you’ve gotten the hang of creating Automator recipes that connect WPForms to Airtable, why not kick things up a notch?
Both WPForms and Airtable support data of all kinds, meaning that you can sync everything from emails to images, to URLs, and more.
And, by adding Automator to the mix, you can easily enhance these workflows by incorporating other apps and plugins.
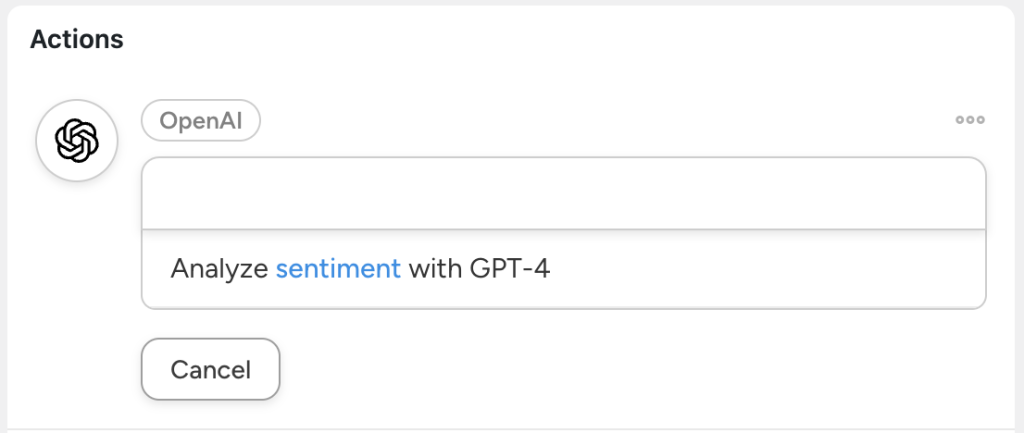
For example, using Automator’s OpenAI integration, you can perform sentiment analysis on form submissions before sending them over Airtable.
Or, use OpenAI to translate form submissions into your preferred language before syncing the data with Airtable.
With 200 integrations, the sky is the limit!
Upgrade to Automator Pro now to unlock more integrations >>>
常见问题
结论
Connecting WPForms to Airtable doesn’t have to be complicated or costly.
With Uncanny Automator, you can create powerful, automated workflows that save time, reduce errors, and let you focus on what matters most—growing your business and WordPress community.
Whether you’re syncing basic form submissions or building advanced workflows with integrations like OpenAI, Automator makes it easy to manage your data with just a few clicks.
So why wait? Start building smarter workflows today.
直到下一次,祝您自动化愉快!













这篇文章有 0 条评论