使用 Uncanny Automator 将 OpenAI 连接到 WooCommerce,以生成由 AI 驱动的产品描述并自动化您的……
如何使用排名第一的集成工具将 WP Charitable 连接到 BuddyBoss
Connect WP Charitable to BuddyBoss with Uncanny Automator and build the online charitable community that you’ve always dreamed of.
Are you looking to build a thriving online charitable community? Or maybe you want to enhance your e-learning or social networking site by giving your members the power to make donations? Either way, you’ve landed on the right page.
In this post, we’ll show you how to connect WP Charitable’s robust donation functionality with BuddyBoss’s powerful community-building features using Uncanny Automator—the #1 integration tool for WordPress websites.
When it’s all said and done, you’ll have a powerful platform that encourages engagement and fosters a spirit of giving.
We’ll show you how to welcome new donors to the right social groups, notify campaign managers about generous donations, and much more.
So, in the spirit of giving, let’s get into it.
Why Connect WP Charitable to BuddyBoss with Automator?
You may already know Uncanny Automator as the #1 automation and integration tool for WordPress websites. But, in case you didn’t, here’s the gist…
Using simple combinations of triggers and actions called recipes, Automator allows you to connect all of your favorite apps and plugins. And there are some standout features that make Automator ideal for creating the WP Charitable and BuddyBoss integration that you’ve been looking for.
These are the Automator features that WP Charitable and BuddyBoss users will love:
- Affordability: Giving shouldn’t be costly—and with Uncanny Automator, it isn’t. Unlike other automation/integration tools out there, Automator doesn’t charge per automation fees. In other words, the more your WordPress donate, the more you save!
- Ease-of-Use: Not a developer? No need to worry. Automator allows you to create even the most complex of workflow automations across any number of apps and plugins… without having to write any code! And if you’re having trouble getting started, you can always browse Automator’s Recipe templates for some quick inspiration.
- Seamless Integration: Automator is fully integrated with your WordPress website. This means that you can share any data stored on your WordPress website across all your apps and plugins. You can even import data from a CSV, XML, or JSON file or connect to another website from a webhook!
- Scalability: Whether you’re collecting tens of dollars or tens of millions of dollars in donations, Automator is more than up to the task of growing with you. With 200 integrations and more on the way all of the time, Automator can handle your diversifying workflows. Additionally, powerful features such as Loops, means that you can manage your donations, donors, members, and more at scale—with the click of a button.
- More Features: With a bevy of powerful addons and an increasing number of features, Automator is quickly becoming the everything plugin. From uploading files, to automating workflows, and even restricting content, Automator can do it all.
Ready to connect WP Charitable to BuddyBoss?
Get your Automator Pro license >>>
Not ready to go Pro quite yet? You can still integrate WP Charitable with BuddyBoss using Automator’s FREE FOREVER version. Simply download and activate the plugin then register your account for a limited number of app credits. You’ll be able to use these credits towards creating integrations with web-based apps such as Zoom, ActiveCampaign, Slack and more!
Connect WP Charitable to BuddyBoss: Step-by-Step
Now that you have Uncanny Automator installed on your WordPress website, let’s take a look at creating our first WP Charitable and BuddyBoss integration.
Add WP Charitable Donors to BuddyBoss Groups
Our first Automator recipe to connect WP Charitable to BuddyBoss is one you can recreate with the free version of Automator.
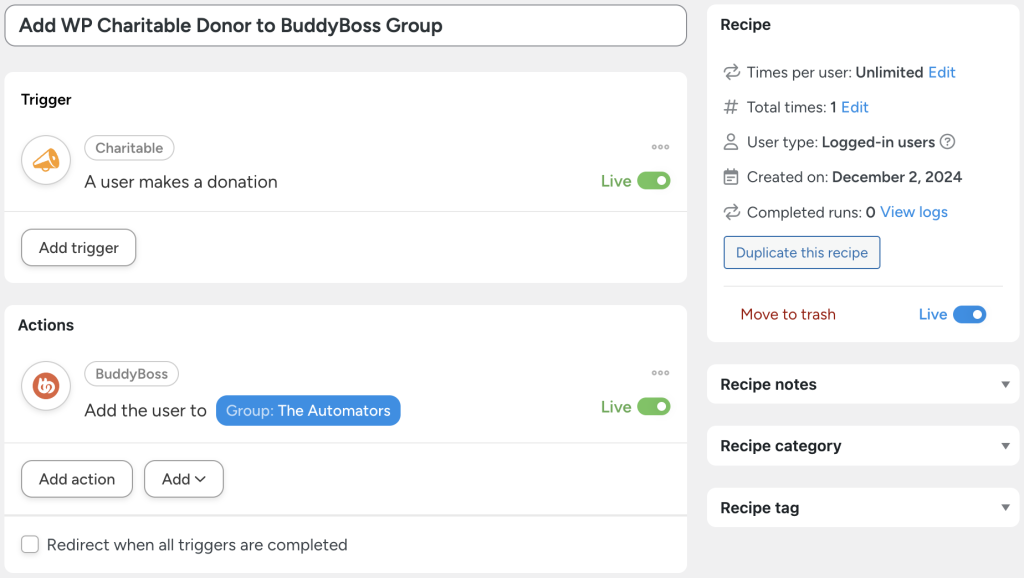
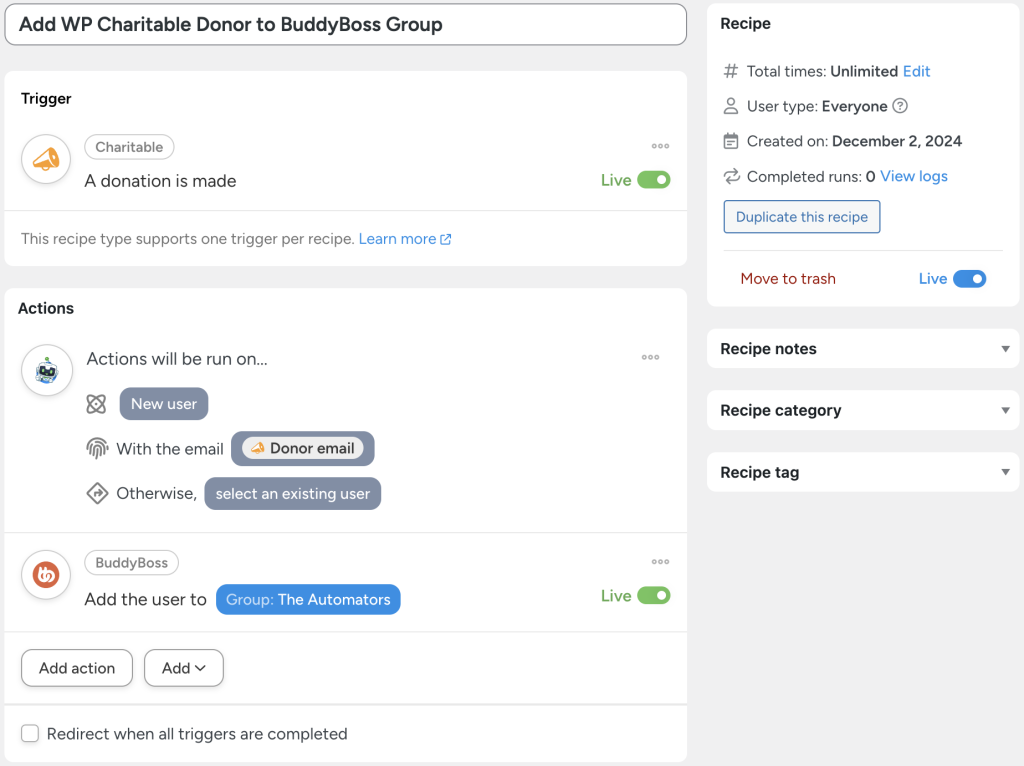
In the recipe pictured above, we’re able to add a WordPress user to a BuddyBoss group when they make a donation. Follow the steps below to recreate this recipe yourself!
Step 1: Create a New Recipe
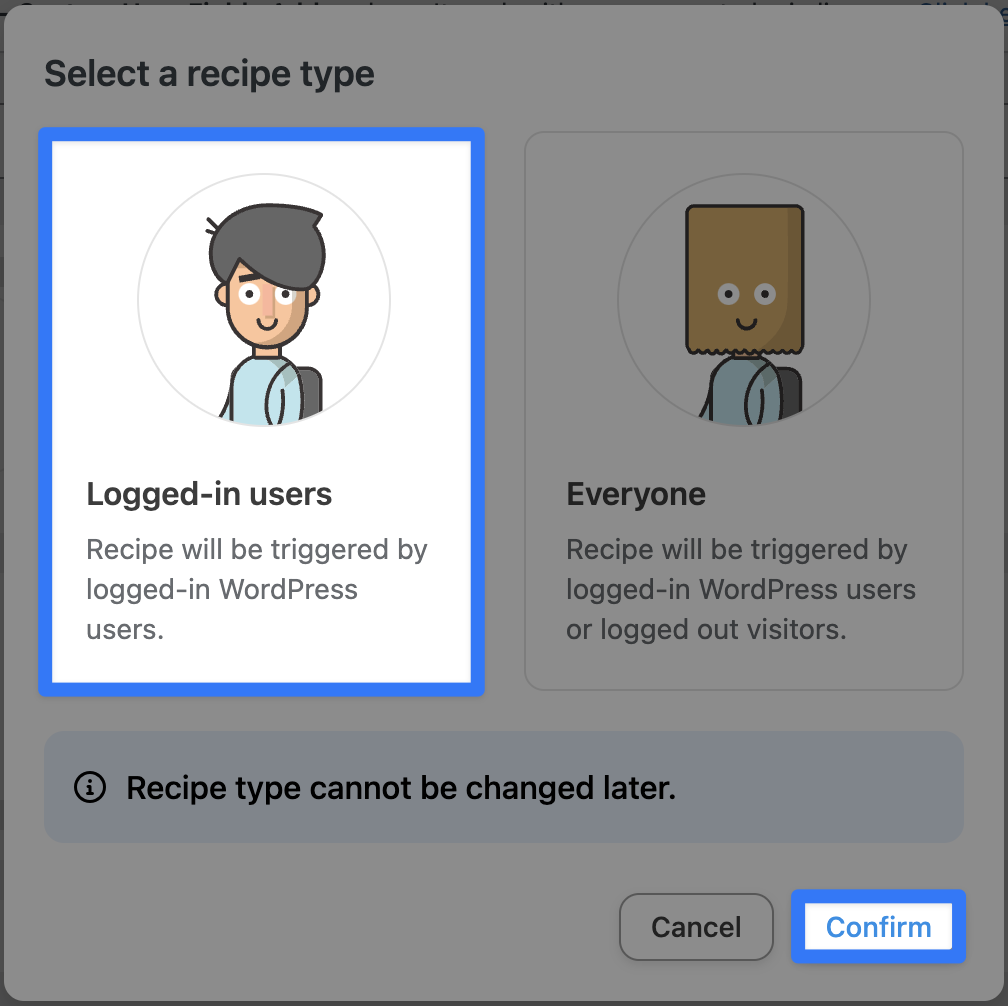
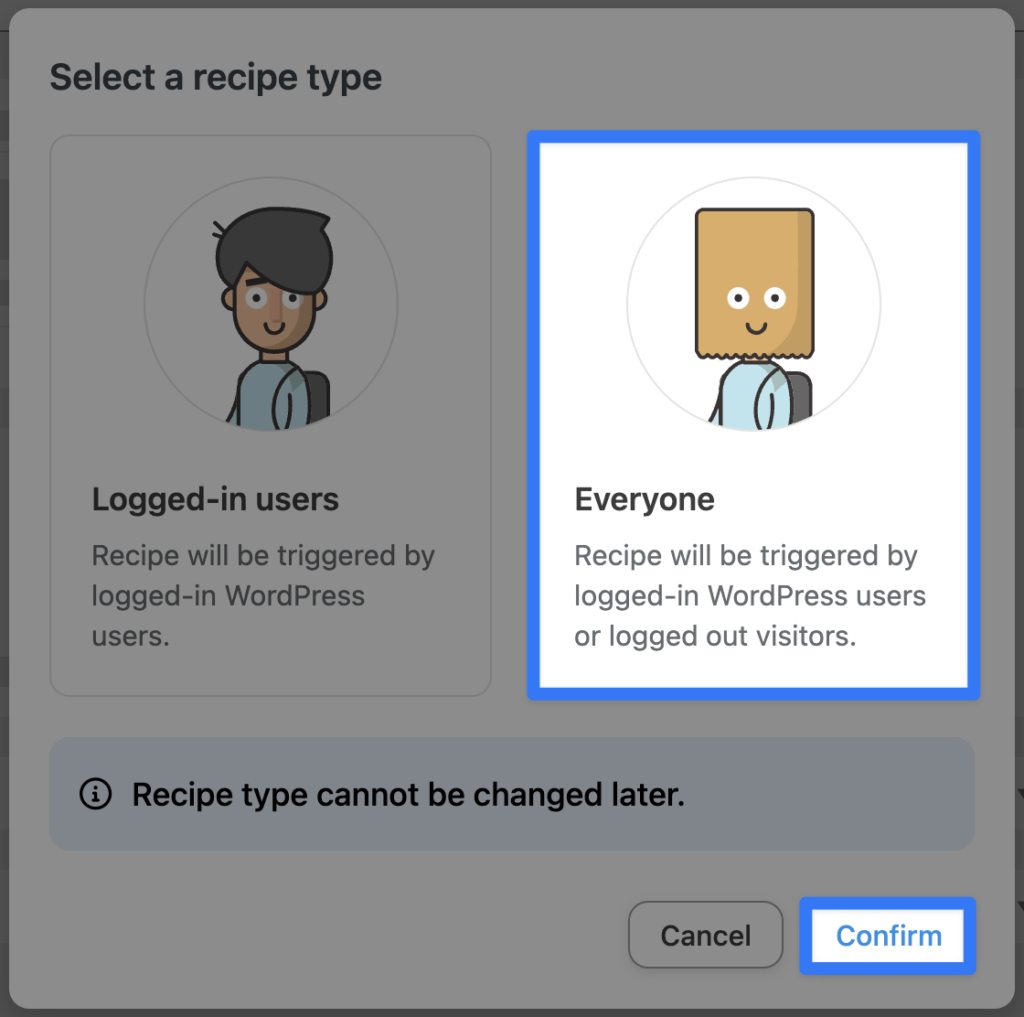
From your WordPress Admin Dashboard, navigate to Automator > Add new recipe. In the popup window that appears, select Logged-in users.
Step 2: Name Your Recipe
Give your recipe a name that makes it easy to recognize at a glance. For example, we have named this recipe “Add WP Charitable Donor to BuddyBoss Group”.
Step 3: Configure Your Trigger(s)
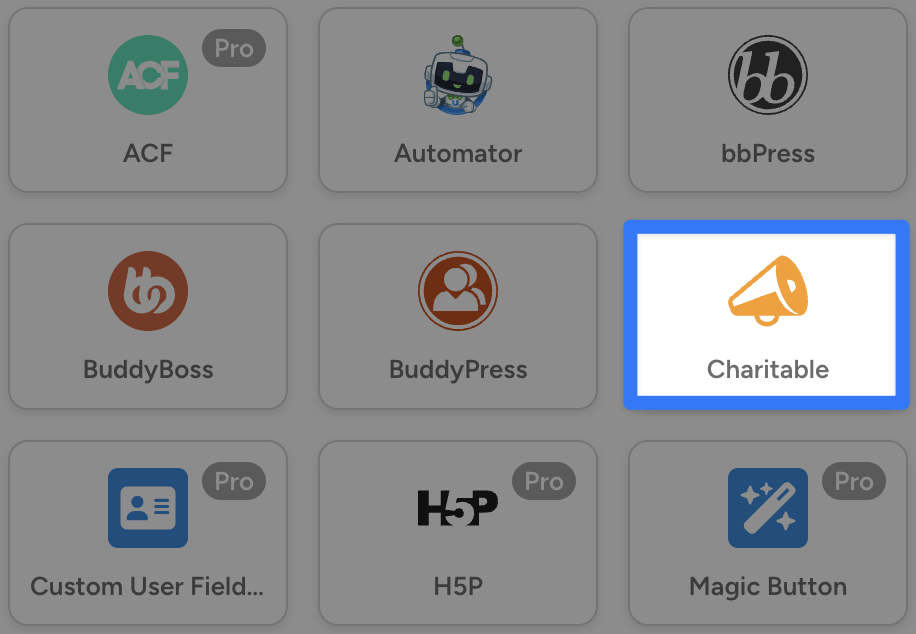
In the Trigger panel, from the menu of available integrations, select Charitable.
From the dropdown list that appears, select A user makes a donation.
Your Trigger panel should look like this:

Step 4: Configure Your Action(s)
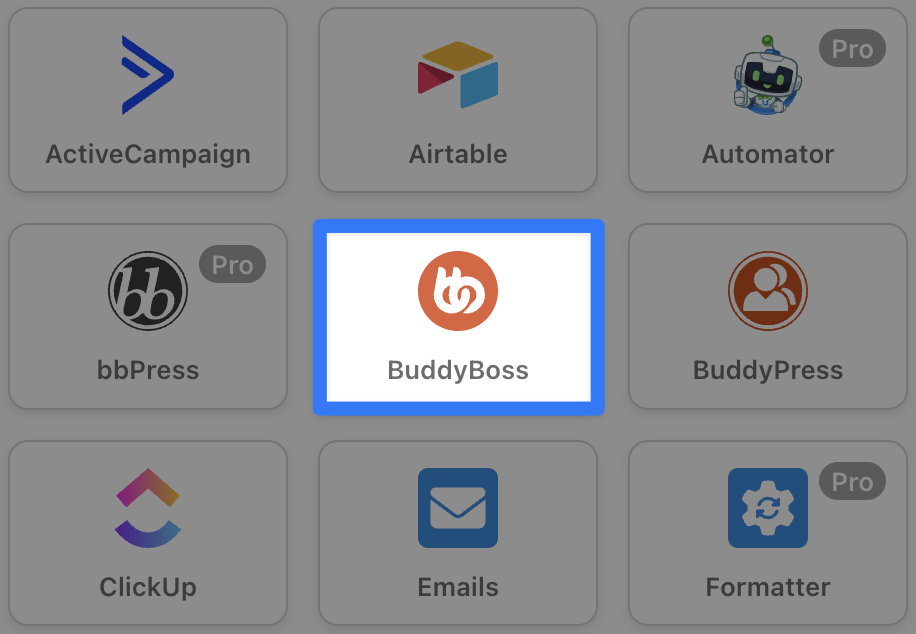
In the Actions panel, click Add action and select BuddyBoss.
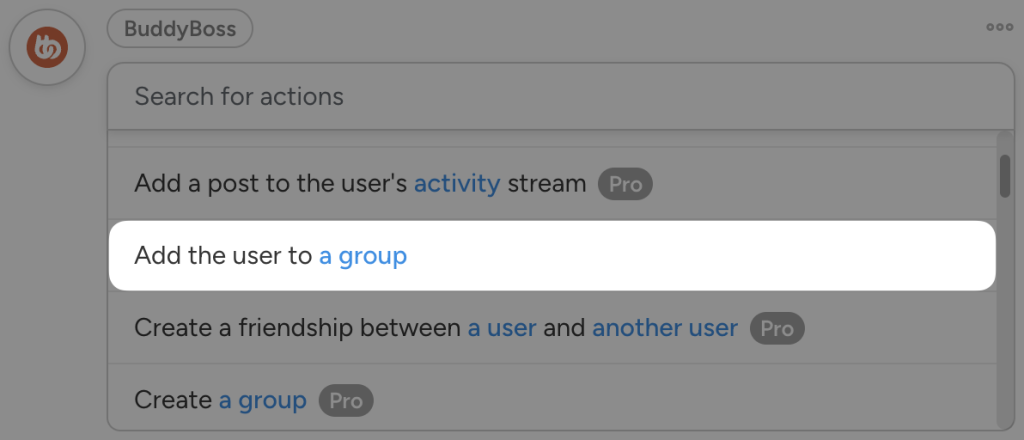
From the dropdown list that appears, select Add the user to a group.
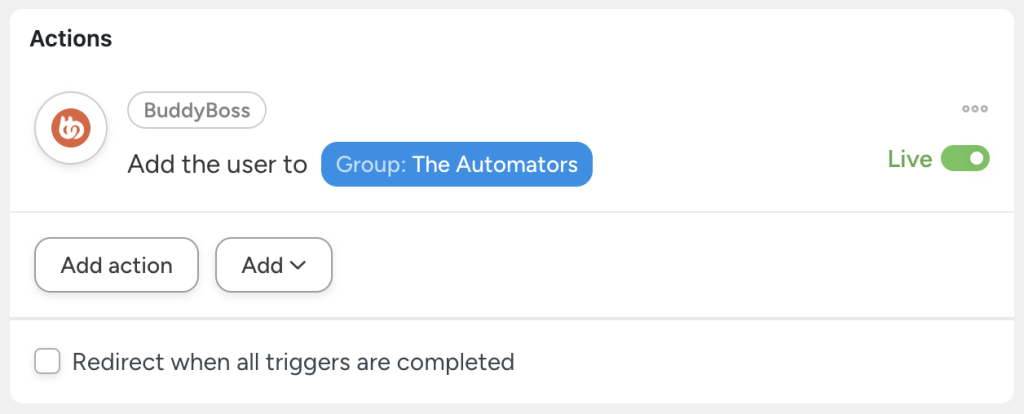
Automator will prompt you to select one of your BuddyBoss groups. Once you’re finished, click Save.
Your Actions panel should now look something like this:
Step 5: Go Live!
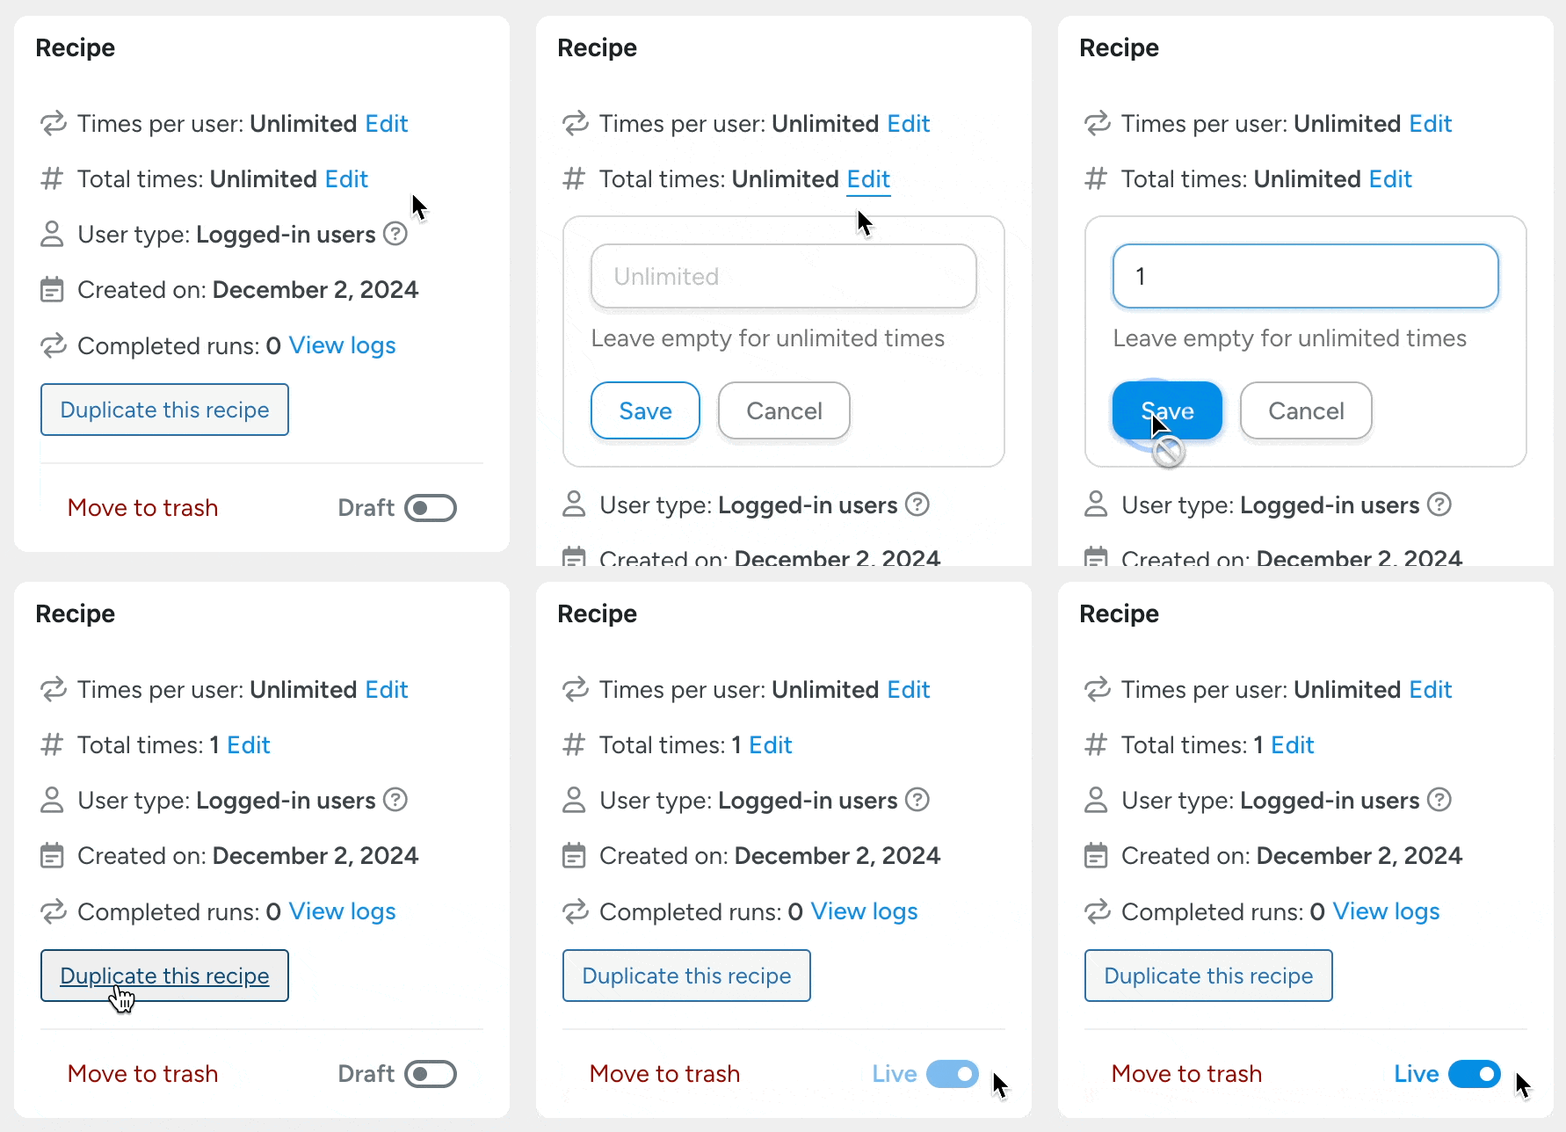
You’re just about ready to connect WP Charitable to BuddyBoss. First, set the Total times to “1”. This will ensure that the recipe only runs once per user.
Next, toggle the recipe from Draft to Live.
And that’s it! You’ve just connected WP Charitable to BuddyBoss.
If you’re using the Pro version of Automator, you can expand your online charitable community even further. Automator Pro allows you to create WordPress users right within recipes, as pictured in the recipe below.
We’ve only just scratched the surface of what Automator can do with WP Charitable and BuddyBoss. From here on out, we’ll be showing you how much more giving is possible with Automator Pro.
So, if you haven’t yet, grab your Automator Pro license and follow along >>>
Engage Recurring Donors with BuddyBoss Forums
Now that you’ve gotten the hang of creating Automator recipes that connect WP Charitable to BuddyBoss, let’s take a look at some more advanced recipes. But don’t worry—they’re just as easy to create.
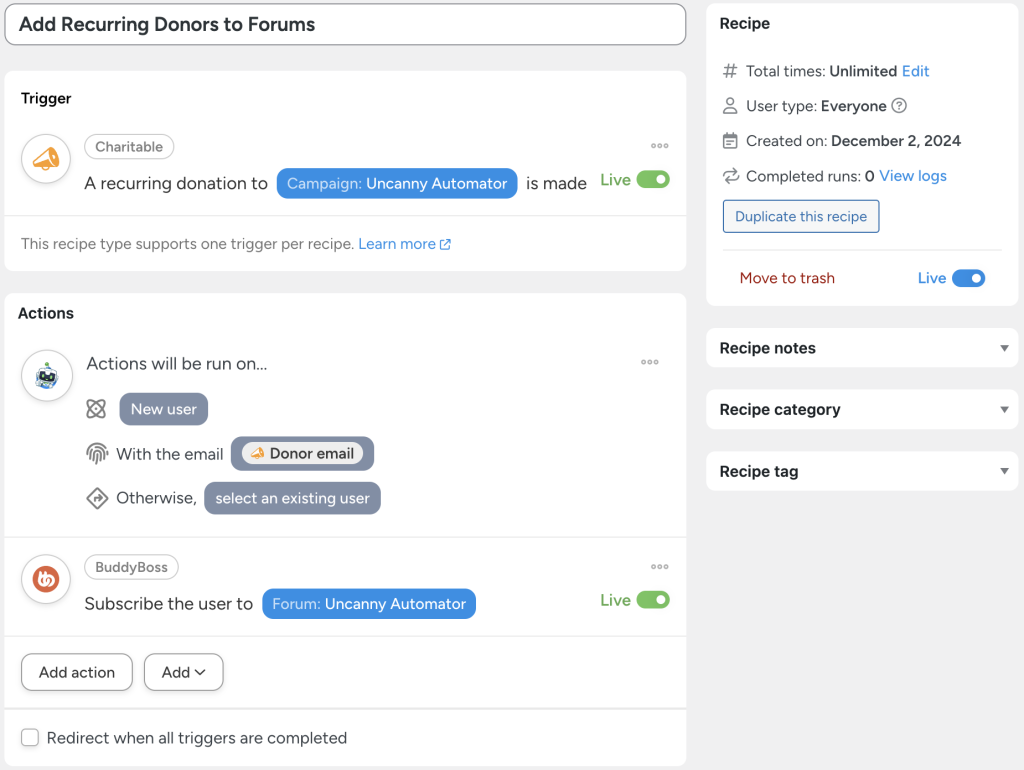
In the recipe pictured above, we’re able to add recurring donors to a BuddyBoss forum. This way, our most dedicated donors can keep up with updates, progress, important notices, compelling discussions on issues they care about, and more.
Here’s how we did it.
Step 1: Create a New Recipe
From your WordPress Admin Dashboard, navigate to Automator > Add new recipe. In the popup window that appears, select Everyone.
Step 2: Name Your Recipe
Give your recipe a name that makes it easy to recognize at a glance. For example, we have named this recipe “Add Recurring Donors to Forums”.
Step 3: Configure Your Trigger(s)
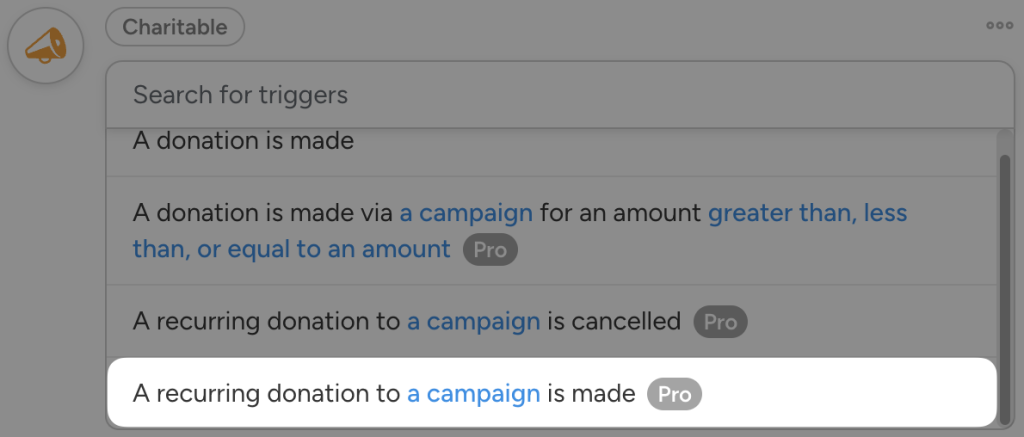
In the Trigger panel, from the menu of available integrations, select Charitable. From the dropdown list that appears select A recurring donation to a campaign is made.
Automator will prompt you to select a WP Charitable campaign. Once you’re finished, click Save.
Your completed trigger should look something like this:
Step 4: Configure Your Action(s)
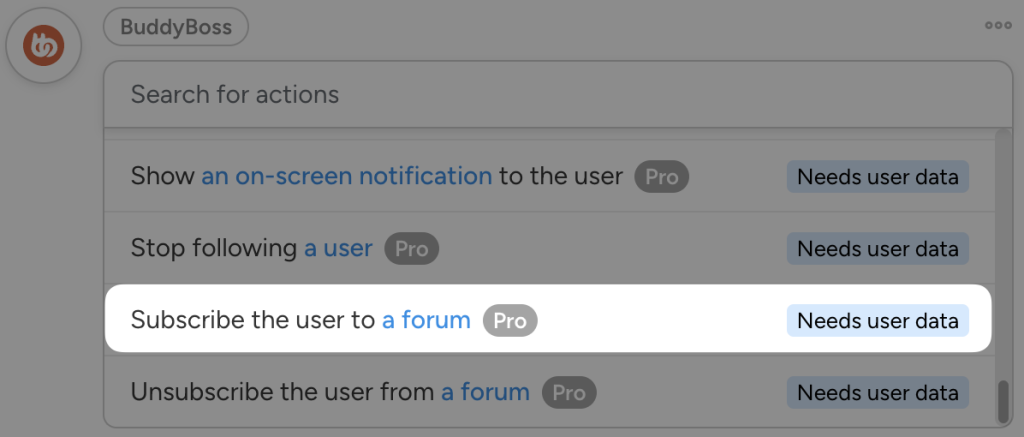
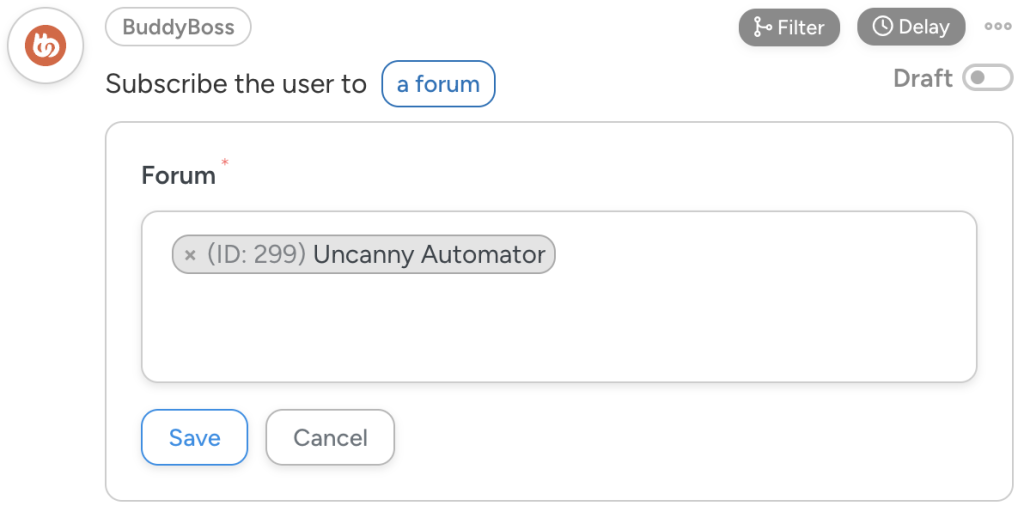
In the Actions panel, click Add action and select BuddyBoss. From the dropdown list that appears, select Subscribe the user to a forum.
Automator will present you with a modal, informing you that user data is required to complete the action. In the modal, click Set user data.
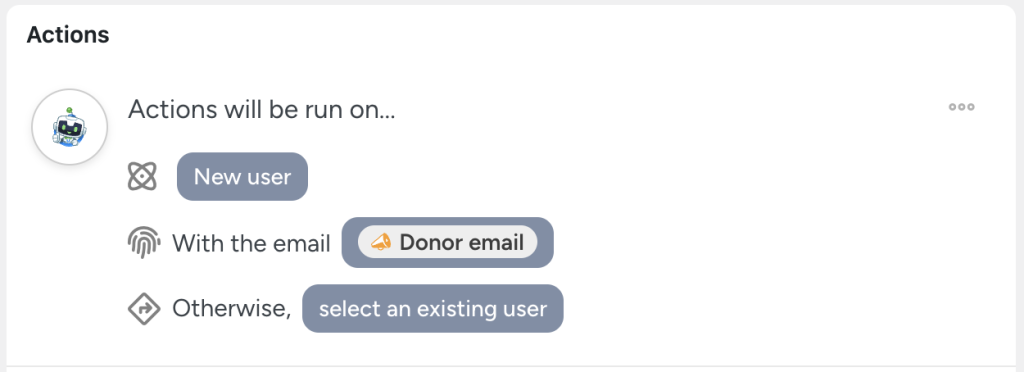
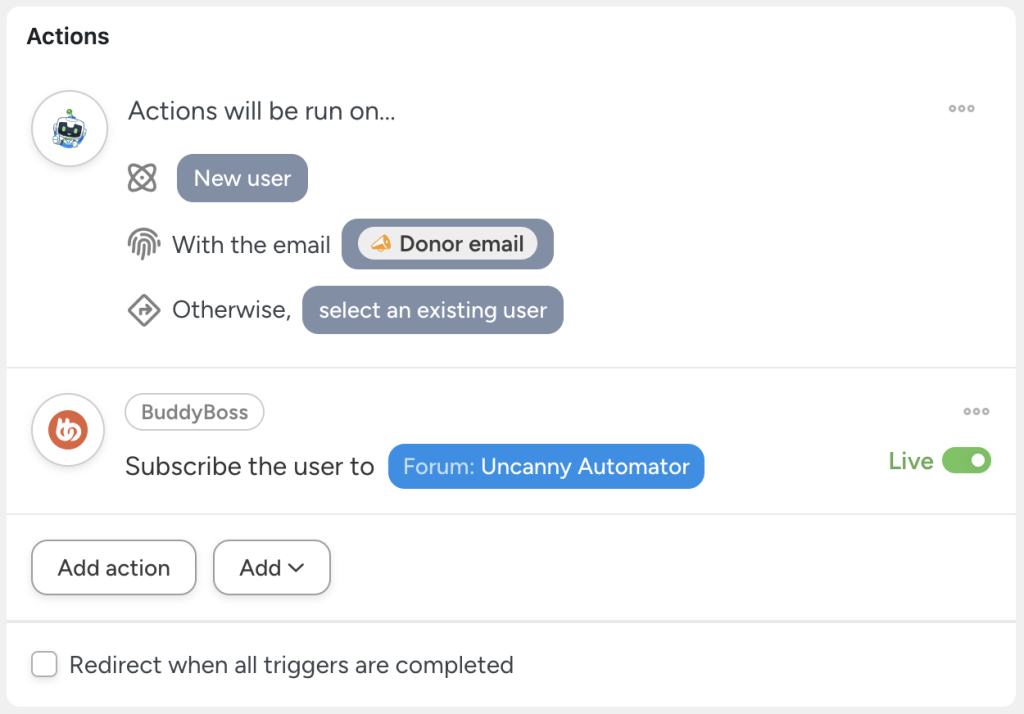
At the top of the Actions panel, click New user.
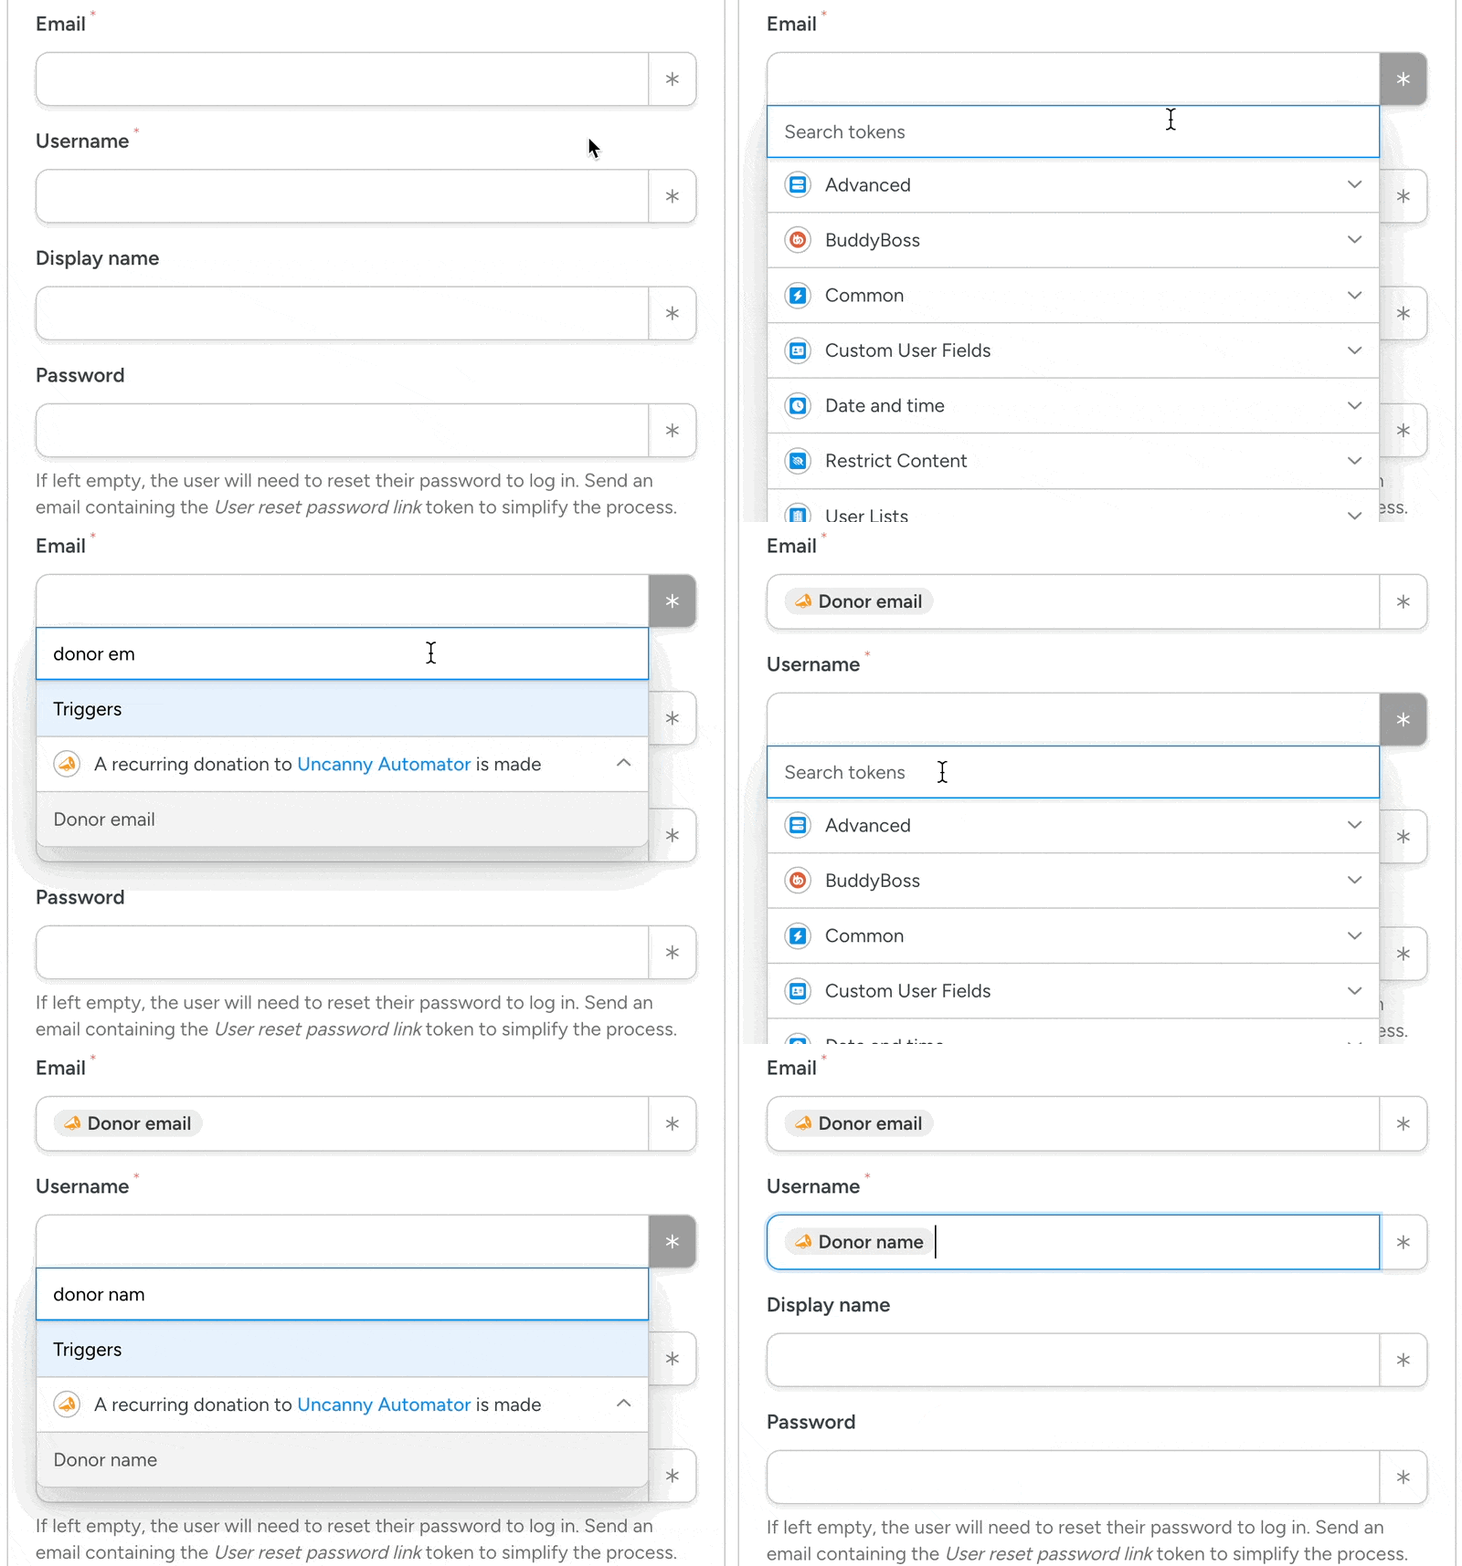
Automator will then present you with a form to fill out the new user’s data. We will fill out these fields using tokens (i.e., dynamic data from your WordPress website and from within recipes).
To use a token, click the Asterisk and select the corresponding token. You can search for a token to speed up the process.
Fill out the remaining fields to best suit your own workflows. Once you’re finished, click Save. The top of your Actions panel should now look something like this:
Return to your BuddyBoss action and select the forum(s) to which you would like to add these new recurring donors.
Once you’re finished, click Save. Your Actions panel should now look something like this:
Step 5: Go Live!
All you have to do now is toggle the recipe from Draft to Live.
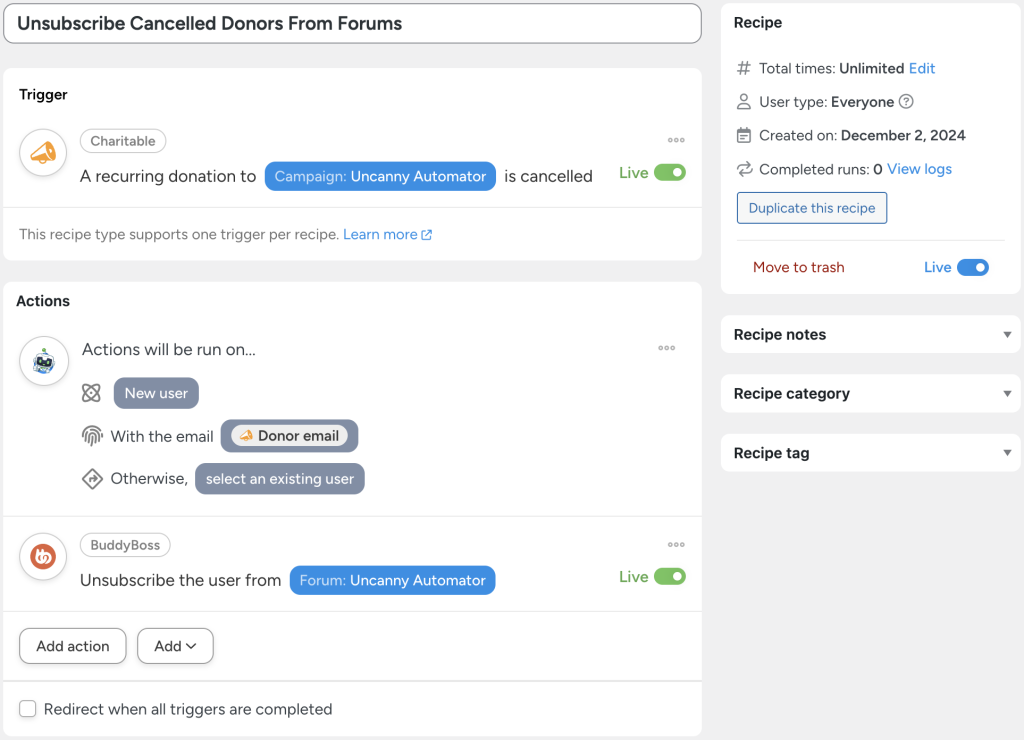
But your community-building automations shouldn’t end there. If one of your donors cancels their recurring payments to a campaign, Automator can unsubscribe them from the BuddyBoss forum.
This ensures that your donors are always engaged with the communities closest to their hearts—and wallets!
Want to get to know your donors a little better? Automator’s User Lists, Custom User Fields, and Restrict Content addons can help you keep track of your donors by campaign, dollar value, and… well, anyway you want!
These powerful addons are FREE with the Automator Pro – Plus and Pro – Elite licenses.
Upgrade to get free addons >>>
Shoutout and Celebrate Your Biggest Donors
Creating an online charitable community with WP Charitable and BuddyBoss is all about spreading the love. So, why not show your biggest donors some appreciation?
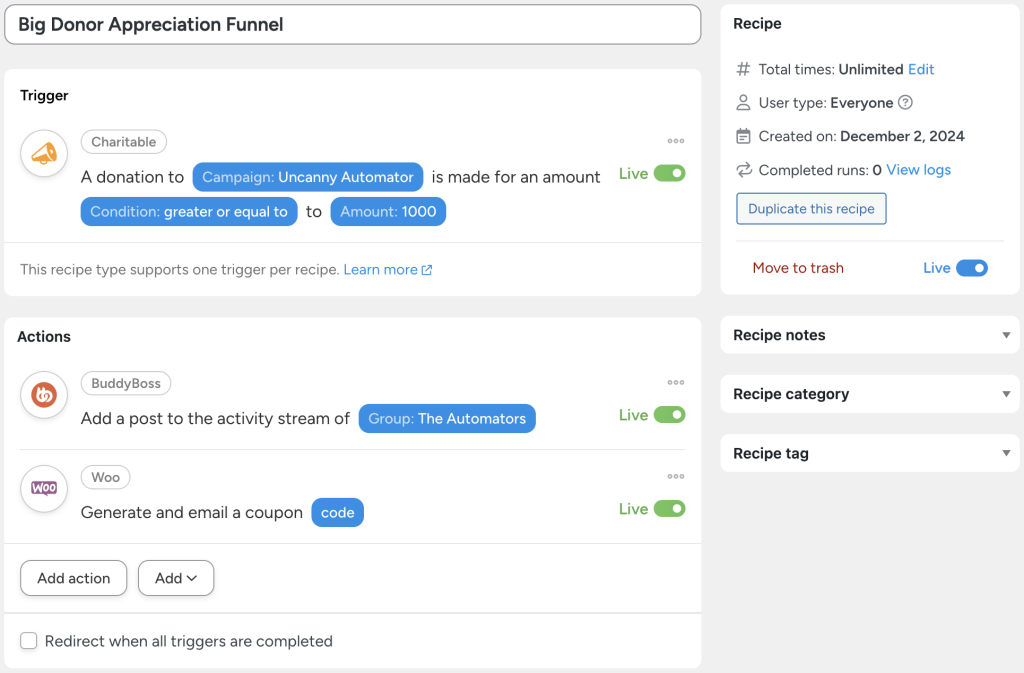
With the recipe pictured above, we’re able to make a post to a BuddyBoss group’s activity stream whenever one of our donors makes a large contribution. This kind of social reinforcement and recognition is sure to boost our charitable community’s engagement.
But… in case a shoutout won’t do, we’ve added a second action to this recipe. If a donor’s contribution meets a specific threshold, we will generate and email a WooCommerce coupon code directly to their inbox.
So it’s true—what goes around, comes around!
常见问题
结论
See how simple that was?
Connecting WP Charitable to BuddyBoss using Uncanny Automator is the perfect way to bring donations and community engagement together on your WordPress website. By automating these aspects of your WordPress website, you can focus on what really matters: building a vibrant charitable community and supporting the causes you care about most.
With the recipes and examples shared in this post, you now have everything you need to create a powerful platform that not only encourages generosity but also fosters meaningful connections between your members and donors.
Whether it’s welcoming new donors to exclusive groups, engaging recurring contributors in forums, or celebrating your biggest supporters in activity streams, Uncanny Automator makes it all possible—and effortless.
So, what are you waiting for? Start building your online charitable community!
Download Uncanny Automator now and let the giving begin >>>
直到下一次,祝您自动化愉快!




这篇文章有 0 条评论