Revive old WordPress posts with AI and Uncanny Automator. Learn how to reverse content decay…
The Best Way to Bulk Edit WordPress Posts
Save time and clicks with Uncanny Automator’s Post Loops feature. Effortlessly bulk edit WordPress posts, from metadata to product prices and more!

Have you been looking for a way to edit your WordPress posts in bulk? Maybe you want to add a new tag to certain posts? Or, perhaps you want to add or edit the post meta for your courses, lessons and quizzes. You may even want to create a storewide discount.
No matter the exact reason, if you want to create, edit and manage WordPress posts in bulk, you’ve landed on the right page.
Of course, WordPress gives you the option to perform bulk actions on your posts such as “Move to trash”. However, that’s about the extent of the range of options. In this blog post, however, we’ll show you the best way to bulk edit WordPress posts, beyond WordPress’ native features.
Uncanny Automator’s Post Loops feature is the best way to edit your WordPress posts in bulk. But don’t let us just tell you about it.
Scroll down and we’ll show you why you’ll be going postal for Automator’s Post Loops!
Introduction: Bulk Editing WordPress Posts Like a Pro
We probably don’t have to tell you: WordPress is the best content management system out there! Nevertheless, managing your content at scale can be a challenge.
Thankfully, with the Uncanny Automator Post Loops feature—that we’ll introduce you to in this article—makes managing your WordPress posts at scale simple.
By the end of this guided walkthrough, you’ll be able to create and edit WordPress post meta and content with just the click of a button. After some step-by-step guides, we’ll give you some additional examples.
Let’s get started.
Why Bulk Edit WordPress Posts
Painting with a broad brush isn’t always a bad thing. Especially when it comes to content management. Bulk editing your WordPress posts can save you time and money—not to mention, some finger cramps from too much clicking.
In case you were wondering, here are some of the advantages of managing and editing your WordPress posts in bulk.
1. Save Time and Money
You could always change things like post titles and metadata individually. But, who has time for that? If you have thousands of posts of various kinds to manage, bulk editing allows you to save time and cut back on costs.
2. Consistency
Templates can help you maintain consistency and brand standards across your website. However, within posts and post metadata themselves, you’ll need some help. Bulk editing with Uncanny Automator enables you to update various post elements across multiple posts at once, ensuring cohesiveness across your website.
3. SEO Optimization
Bulk editing allows you to quickly implement SEO improvements to multiple posts simultaneously. Update meta tags, titles, or keywords to enhance search engine visibility and improve overall website rankings.
4. Content Updates
When you need to make changes to content, such as adding additional content, updating information, or including new links, bulk editing ensures a swift and efficient process across numerous posts.
5. Feature Changes or Removal
If you decide to modify or remove certain features, categories, or tags across multiple posts, bulk editing becomes an invaluable tool. It simplifies the process of implementing these changes uniformly throughout your WordPress site.
With so many benefits at your fingertips, we’re certain that you’re eager to figure out how to edit your WordPress posts in bulk. In the next section, we’ll introduce you to the Uncanny Automator Post Loops feature.
It’s the easiest way to create, edit and manage WordPress posts in bulk.
Introducing Uncanny Automator‘s Post Loops Feature
At its core, Uncanny Automator is the #1 automation and integration tool for WordPress websites. But with some advanced features, such as Post Loops and filters, it can be a whole lot more.

In this blog post, we’ll focus on how Automator’s Post Loops feature can help you manage your WordPress content at scale.
Post Loops are an Automator Pro feature so you’ll need to grab a license to follow along. Fortunately, Automator offers a 14-day money back guarantee so you can try out Post Loops risk-free.
We’re certain that you’ll love the time-savings, so get your Automator Pro license today.>>>
Bulk Edit WordPress Post Meta
Bulk editing WordPress post meta can unlock a world of possibilities. Whether you want to retroactively change the author of some posts or add new meta fields altogether, editing in bulk will unlock new potential.
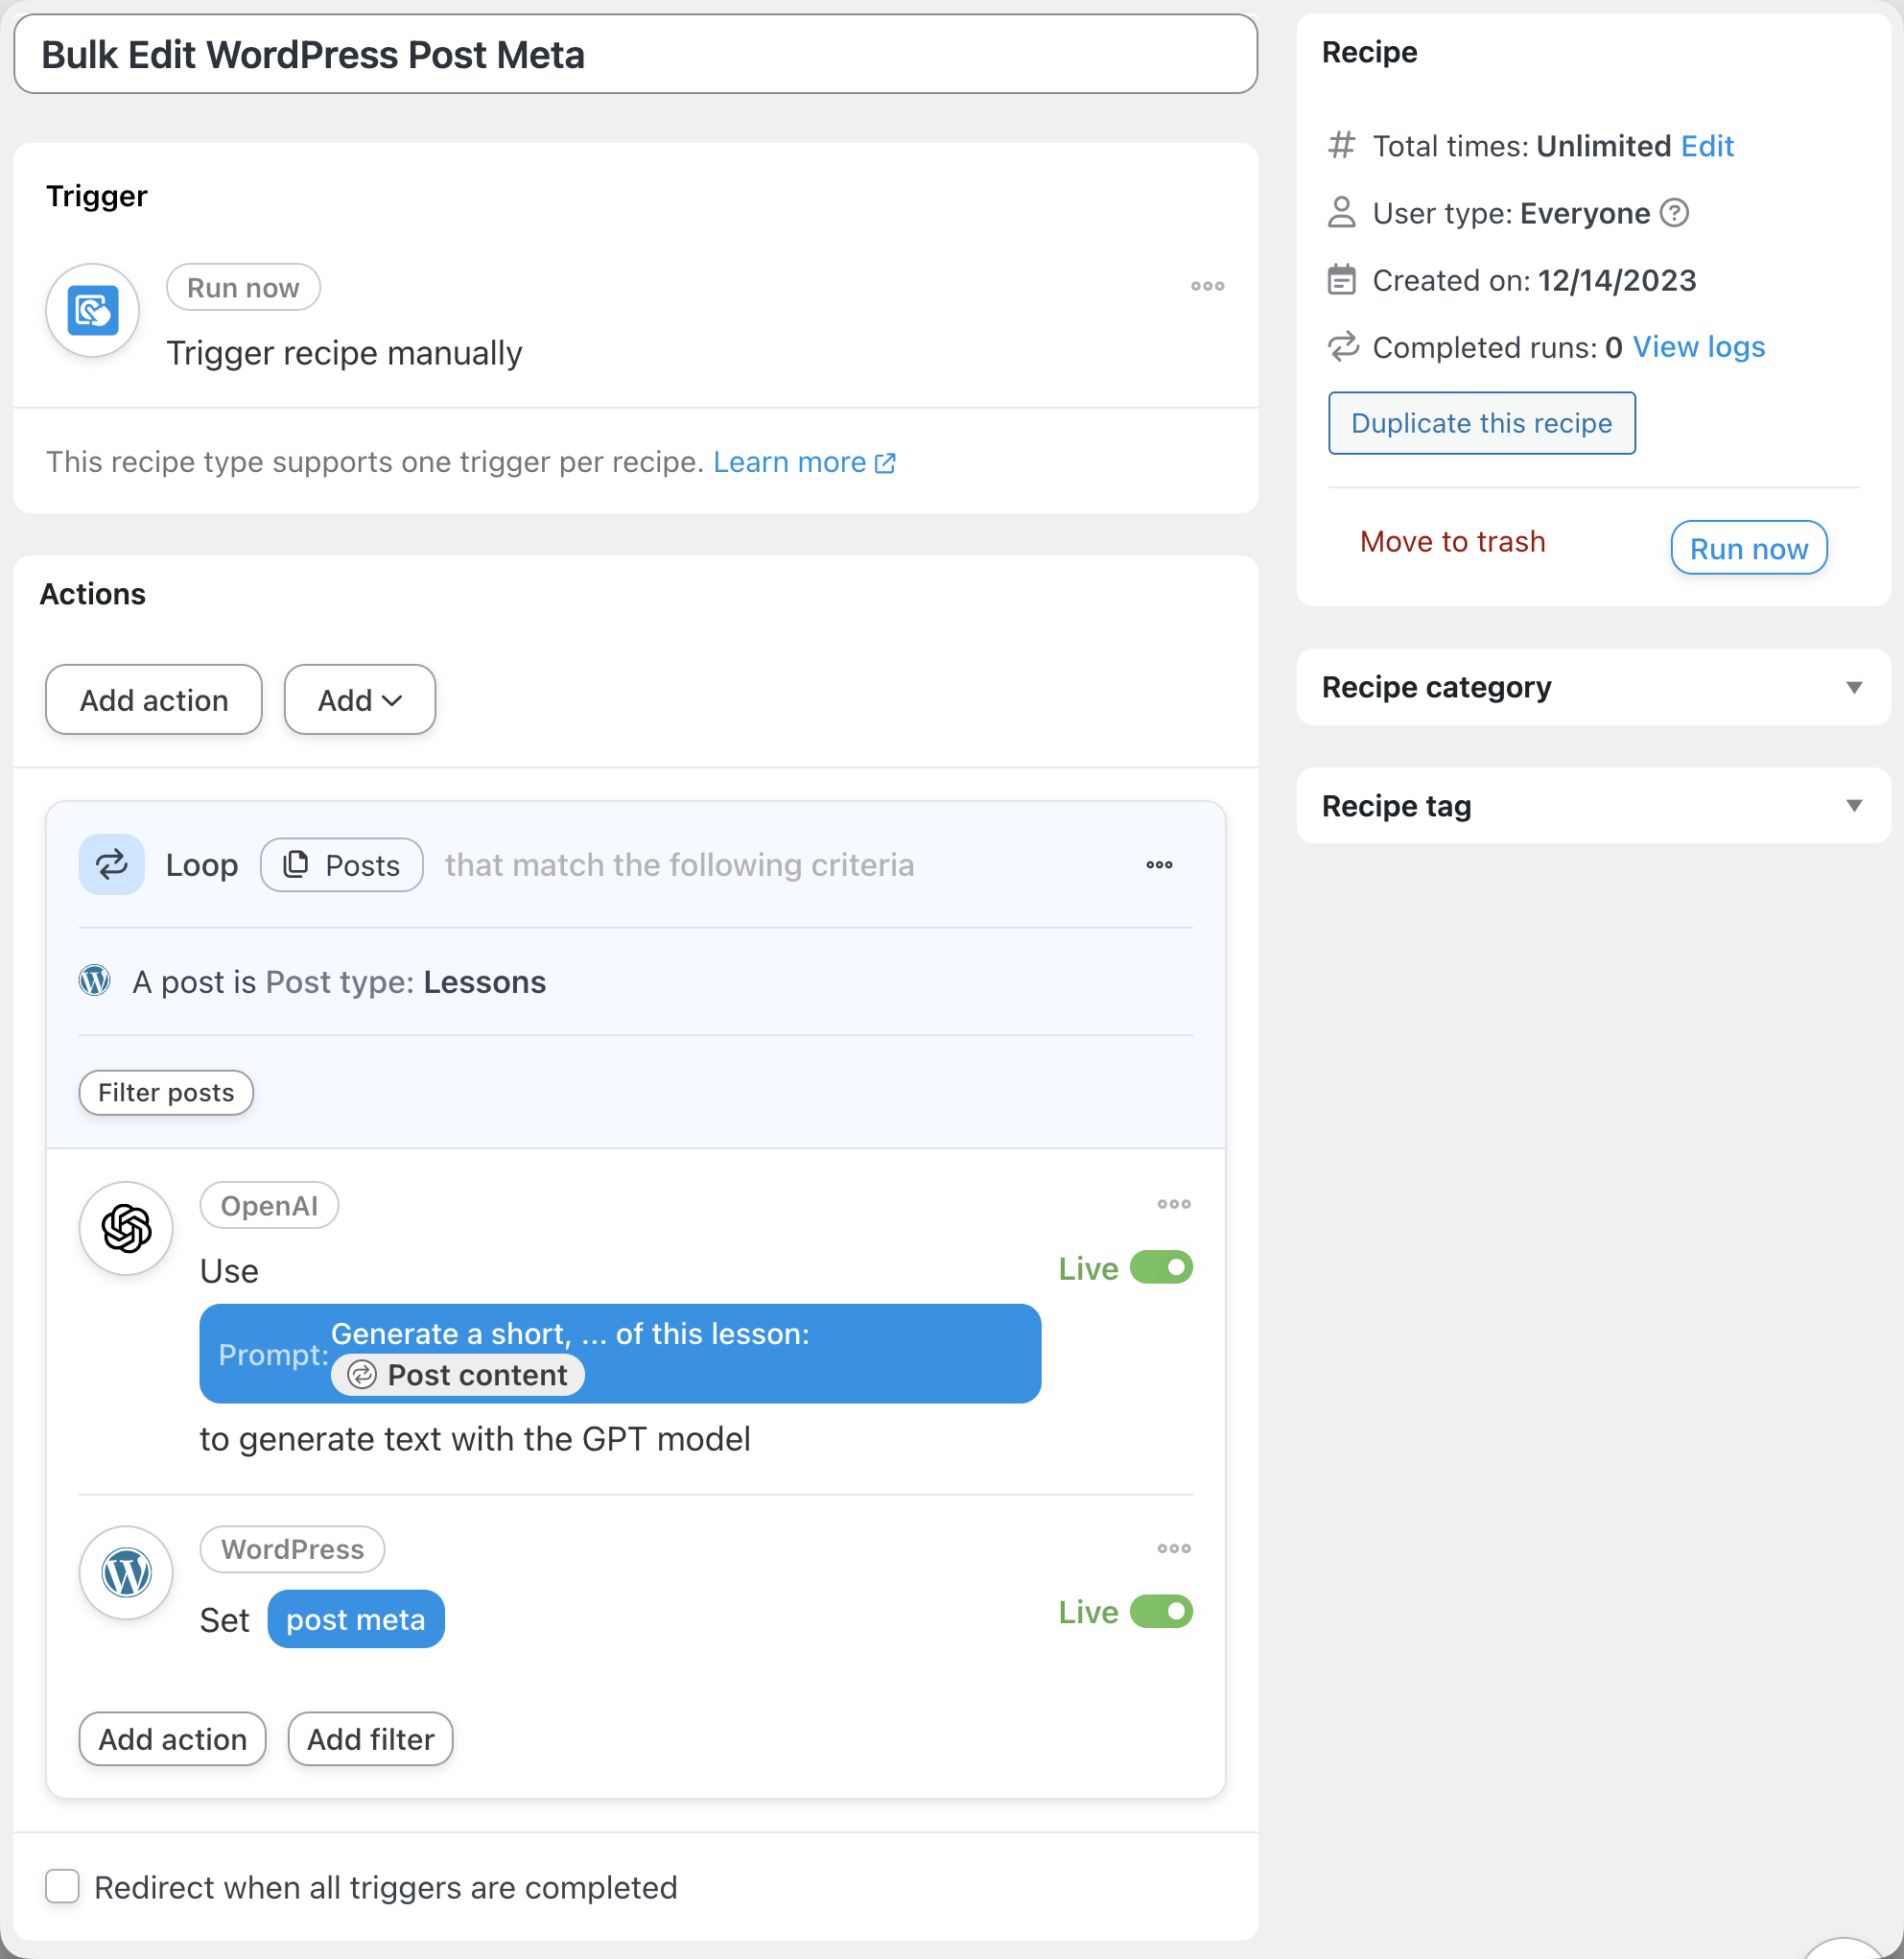
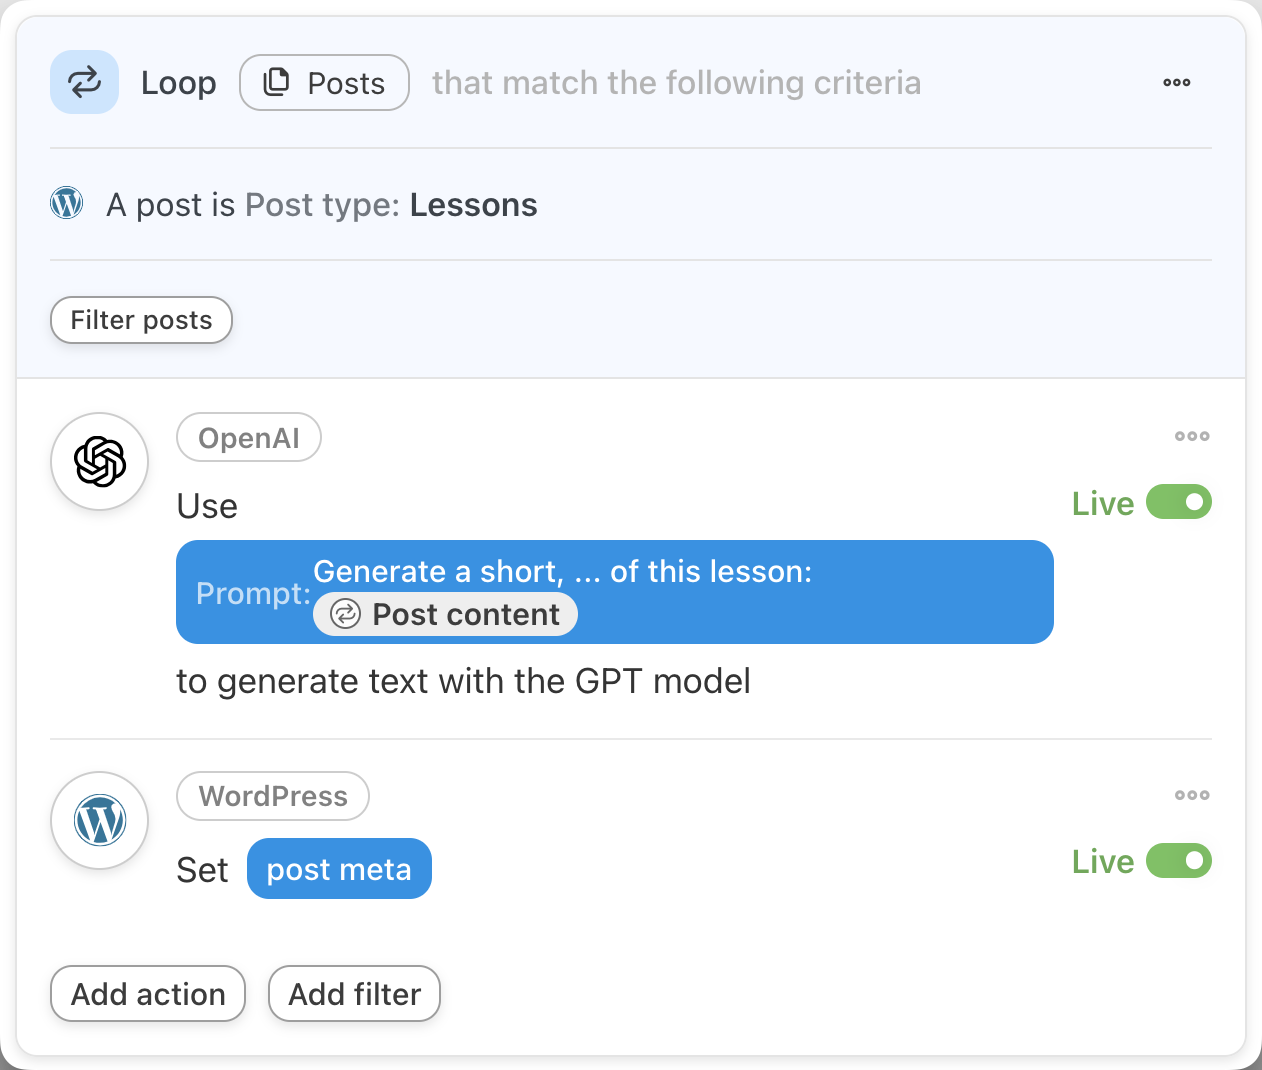
In the recipe pictured above, we’re able to add an AI-generated SEO summary to all of our existing LearnDash lessons. Then, using another action, we simply store those summaries as post meta with the key “ai_summary”.
Follow the five steps below to bulk edit WordPress post meta on your own website.
(Note: If you’re unfamiliar with key/value pairs, read our brief but informative guide here.)
Step 1: Create and Name New Recipe
From your WordPress Admin Dashboard, navigate to Automator > Add New. In the pop-up window that appears, select Everyone and click Confirm.

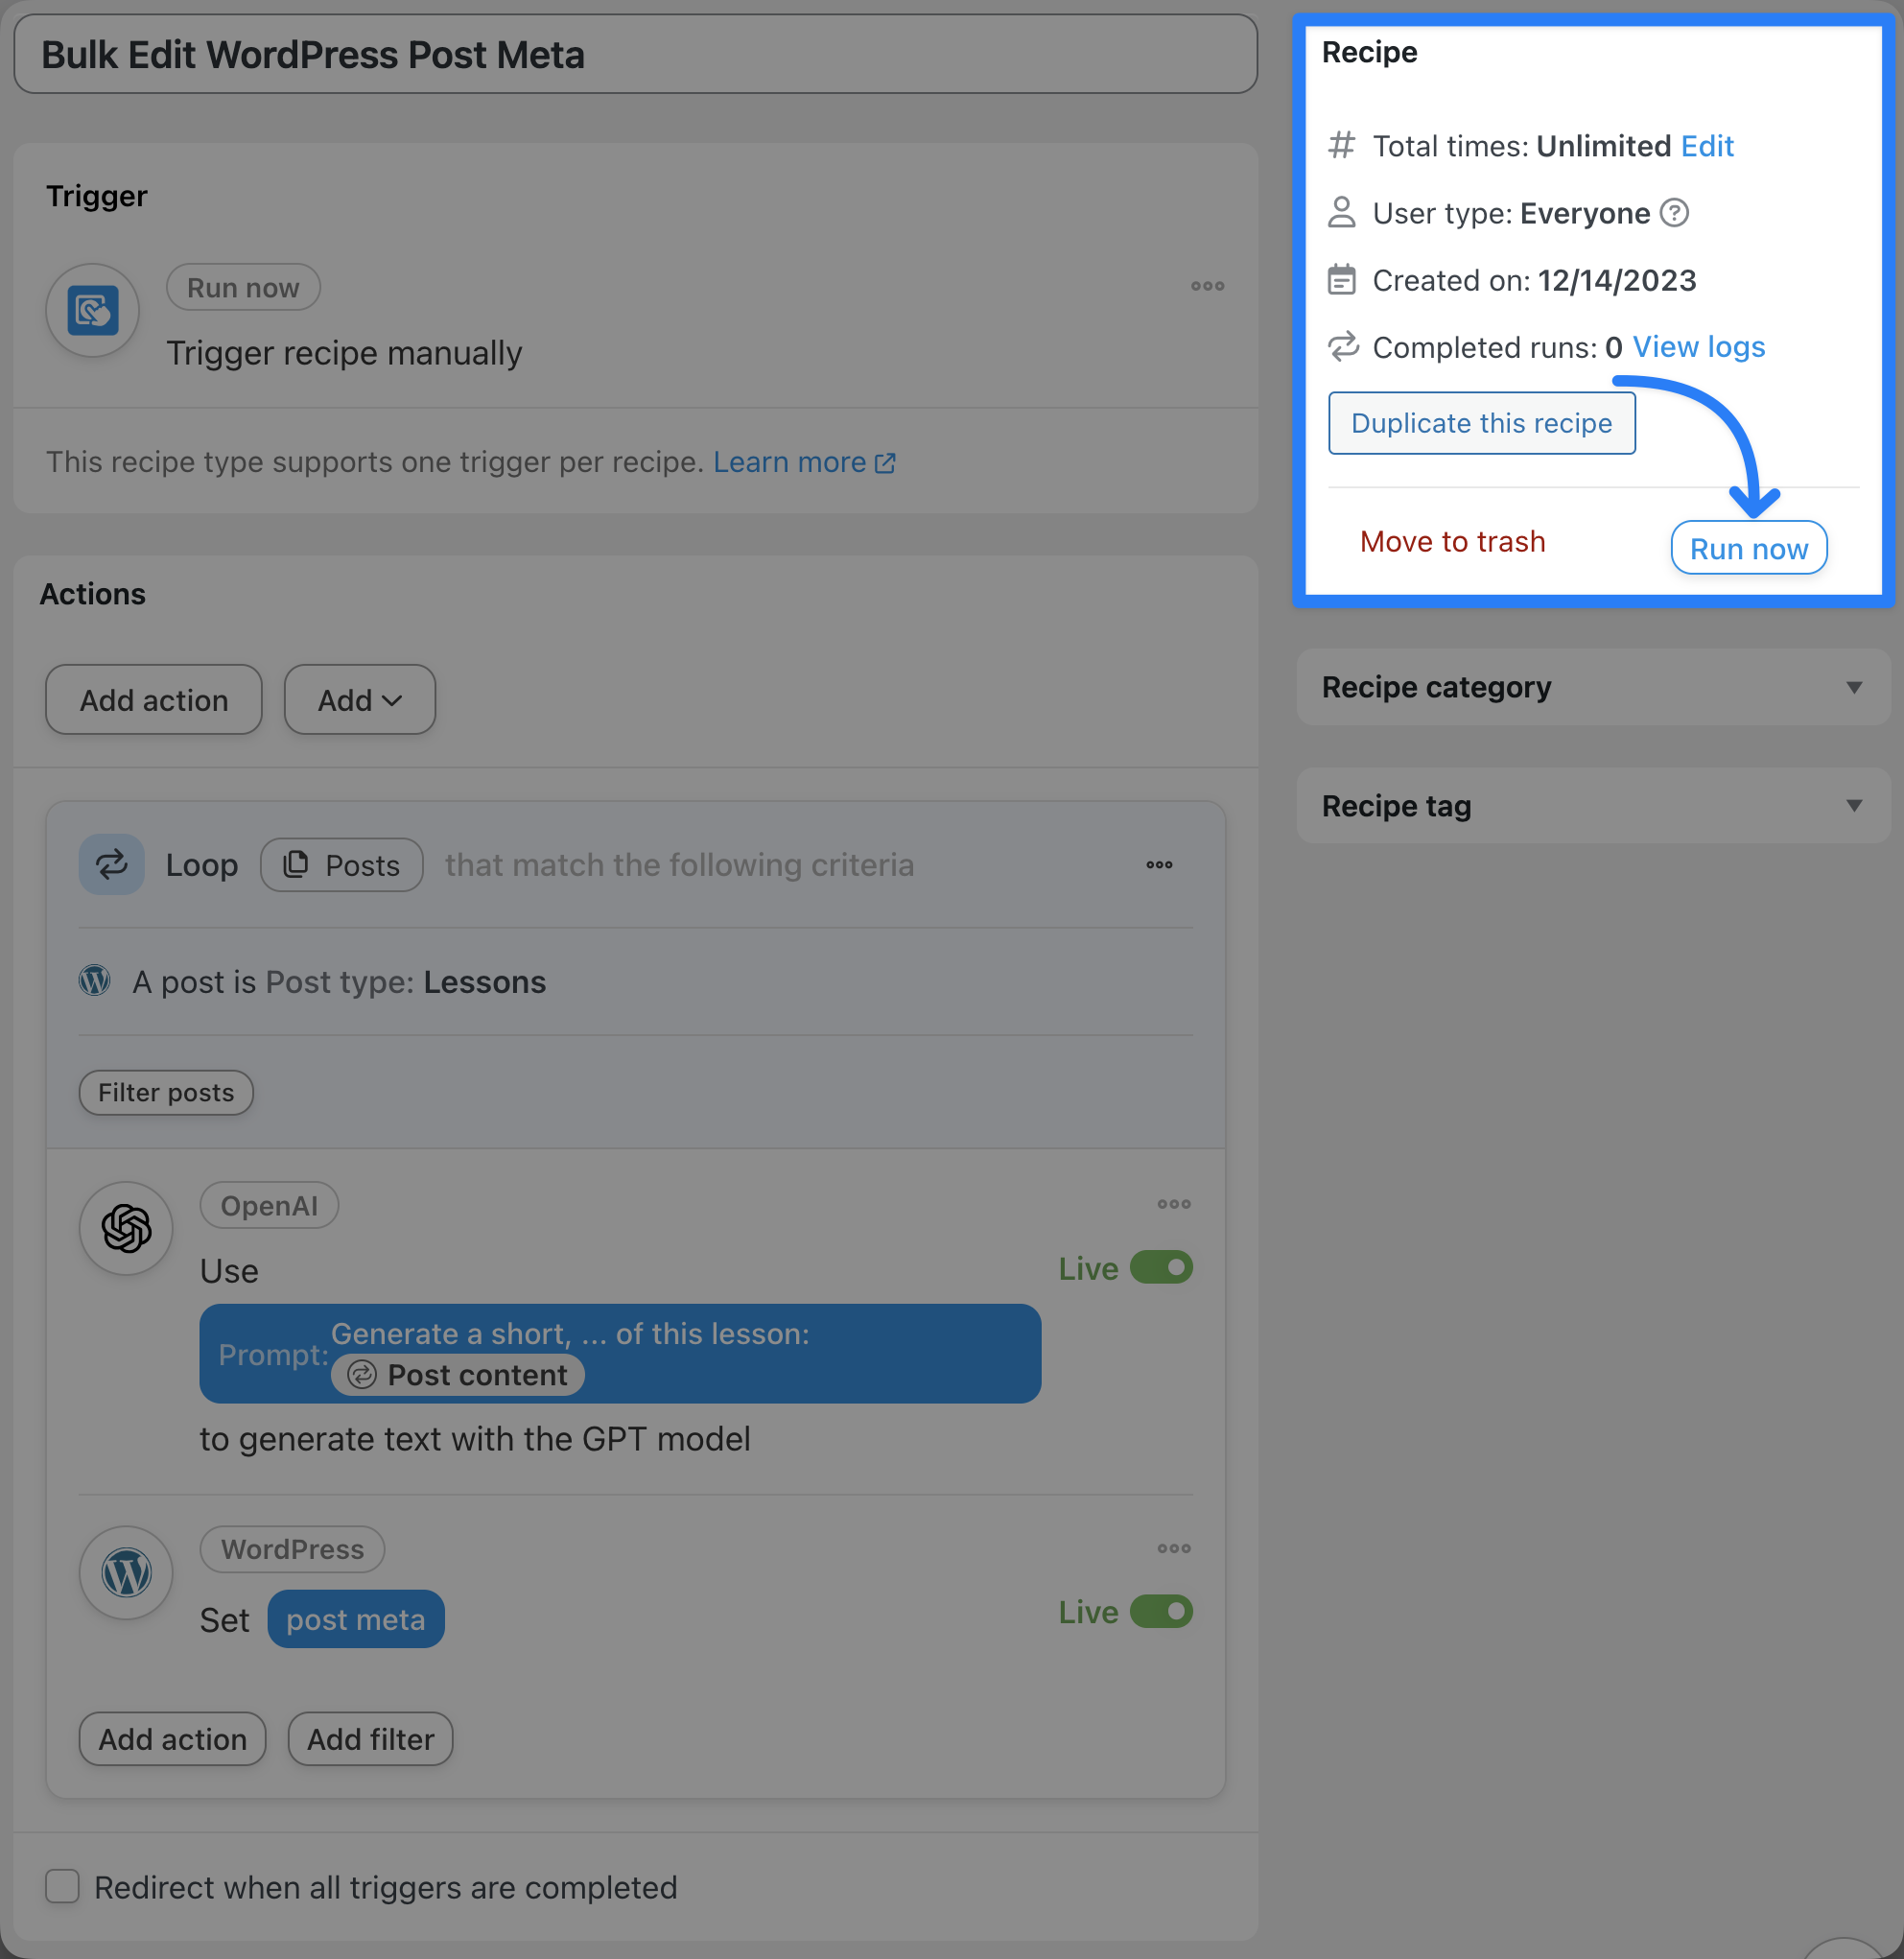
Give your recipe a name that makes it easy to recognize at a glance. For example, we’ve named this recipe Bulk Edit WordPress Post Meta.
Step 2: Configure Your Trigger(s)
In the Triggers panel, from the menu of available integrations, click Run now.

From the drop-down list that appears, select Trigger recipe manually.
Step 3: Configure Your First Post Loop Action
In the Actions panel, click Add. From the drop-down list that appears, select Post loop.

Automator will select the post type Post by default. As we are adding metadata to our lessons, we will want to change the post type. To do this, simply hover over the Loop panel and click the Edit filter icon.
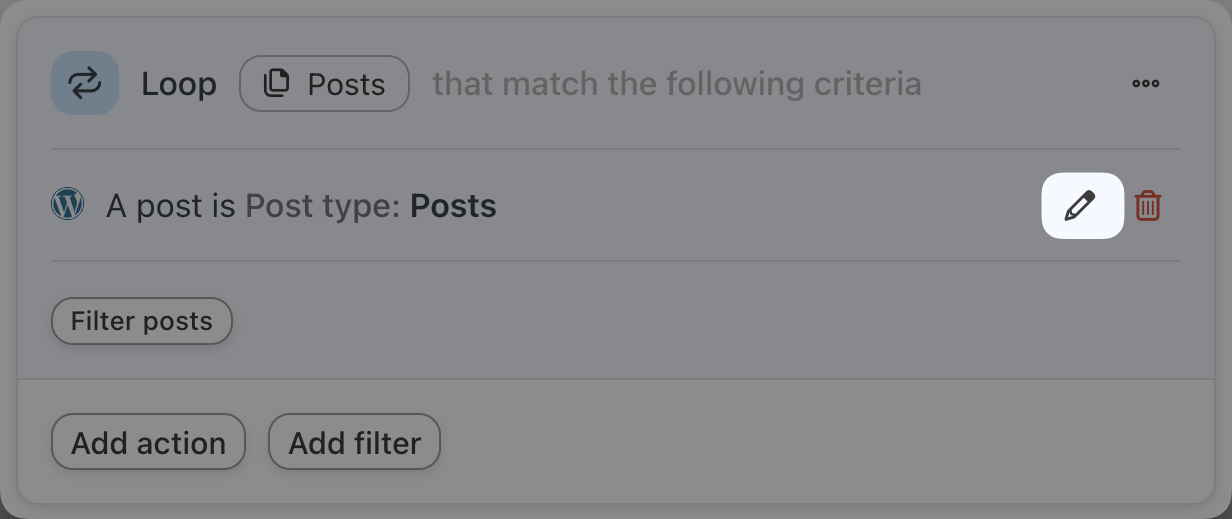
In the Configure loop filter window, select Lessons in the Post type field.

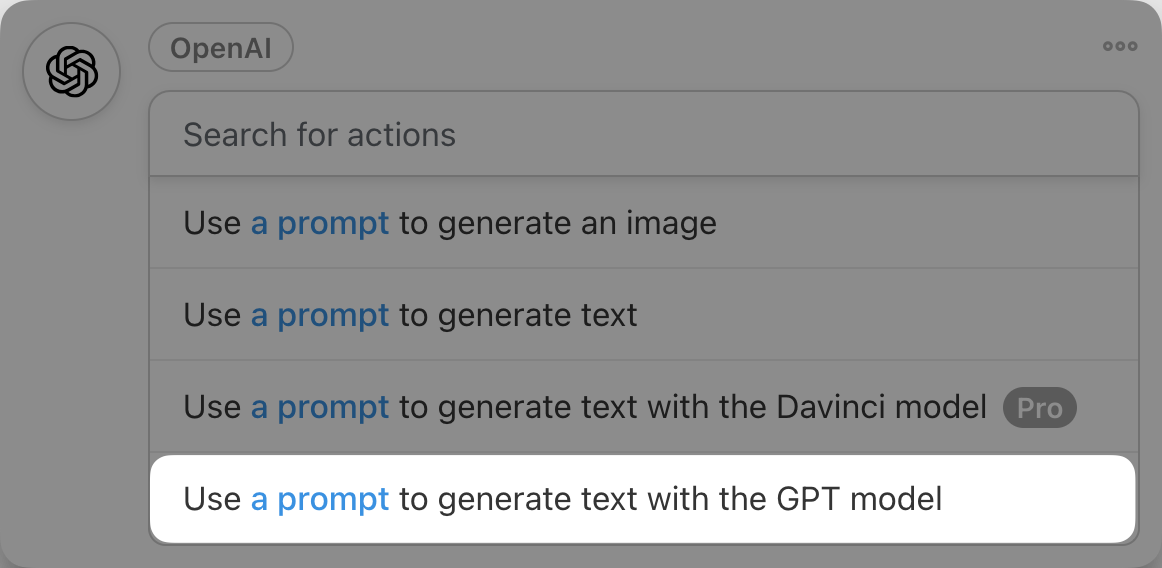
In the Loop panel, click Add action. From the menu of available integrations, select OpenAI.

Follow the prompts to connect your OpenAI account, if you haven’t already. If you’re uncertain how to connect your OpenAI account, consult our brief guide here.
Once you’ve connected your account, from the drop-down list that appears, select Use a prompt to generate text with the GPT model.
To get OpenAI to generate the summary for each of our lessons, we’re going to use tokens (i.e. dynamic data pulled from your WordPress website and from within recipes.)
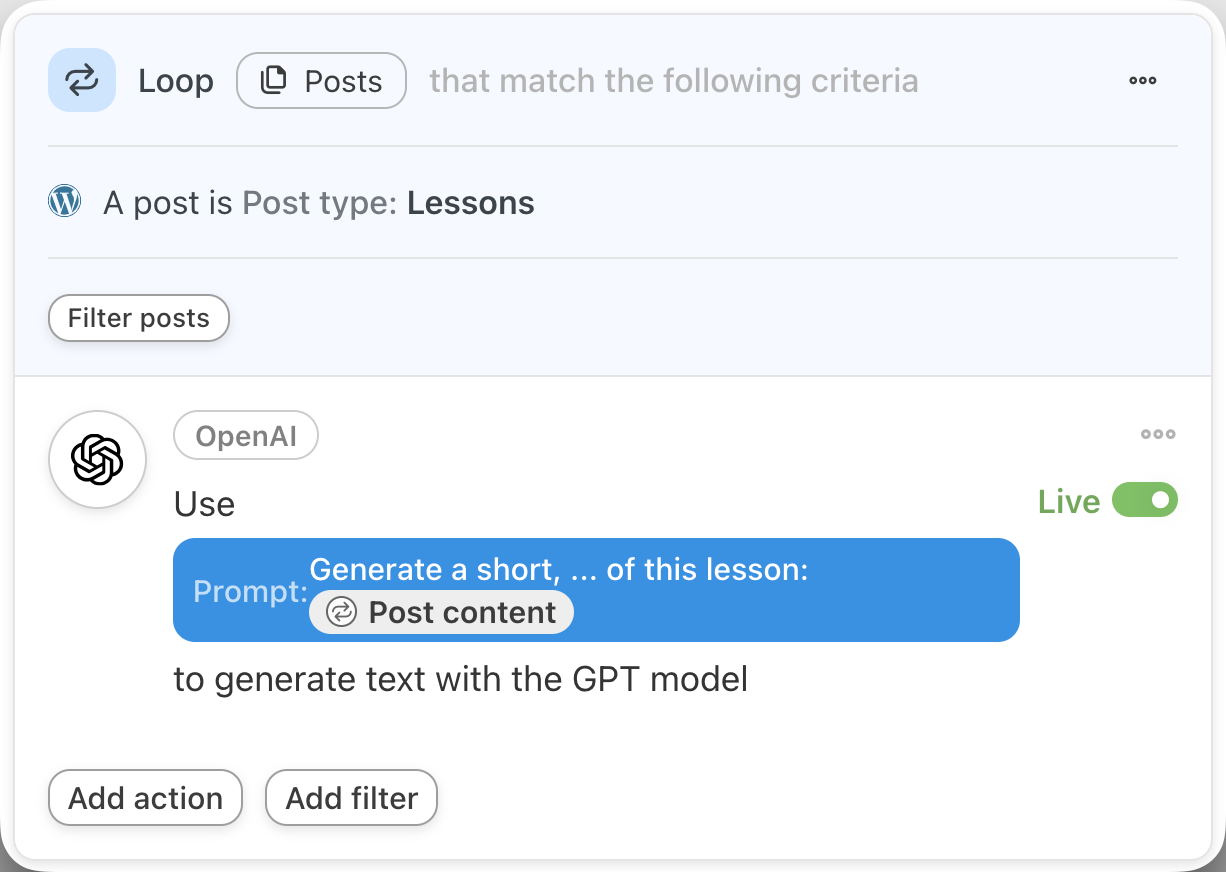
In the Prompt field, click the Asterisk. From the drop-down list that appears, select Loop > Post content.

Once you’re satisfied with your prompt and settings, click Save. Your Loop panel should look something like this:
Step 4: Configure Your Second Post Loop Action
Now, we want to store these AI-generated summaries for our lessons as post meta. To do this, we’ll simply add another action to our Loop panel.
In the Loop panel, click Add action. From the menu of available integrations, select WordPress.

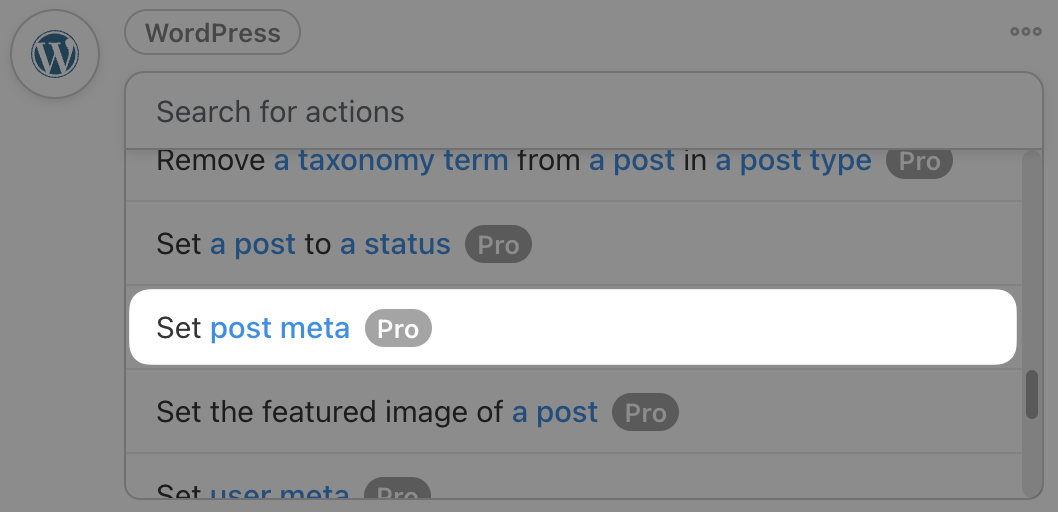
From the drop-down list that appears, select Set post meta.
In the Post type field, select Lesson.
In the Post field, select Use a token/custom value.

For Automator to cycle through all of the lessons, click the Asterisk in the subfield and select the Post ID token.

In the Key field, enter the key under which you want to store the summary. For example, we’ve named this key “ai_summary”.
In the Value field, select the Response token under the OpenAI action.

Once you’re finished, click Save. Your Loop panel should look something like this:
Step 5: Bulk Edit Your Lessons!
You’re just about ready to add some SEO metadata to your WordPress posts. All you need to do is click Run now.
Editing your WordPress post meta in bulk is just the tip of the iceberg with Automator’s Post Loops feature. Once you’ve gotten the hang of Automator’s other advanced features, you’ll be able to make just about any edits to your WordPress posts that you can dream of.
Bulk Edit Product Prices in WooCommerce
Ever wanted to run a storewide discount? Or maybe just a discount on some items in your WooCommerce store that meet certain criteria?
Follow the steps below to edit your WooCommerce prices in bulk.
Step 1: Create and Name a New Recipe
From your WordPress Admin Dashboard, navigate to Automator > Add New. In the pop-up window that appears, select Everyone.
Give your recipe a name that makes it easy to recognize at a glance. For example, we’ve named this recipe “Bulk Edit Prices in WooCommerce”.
Step 2: Configure Your Trigger(s)
In the Triggers panel, from the menu of available integrations, click Run now. From the drop-down list that appears, select Trigger recipe manually.
Step 3: Configure Your Post Loop Type and Filter
In the Actions panel, click Add. From the drop-down list that appears, select Post loop.
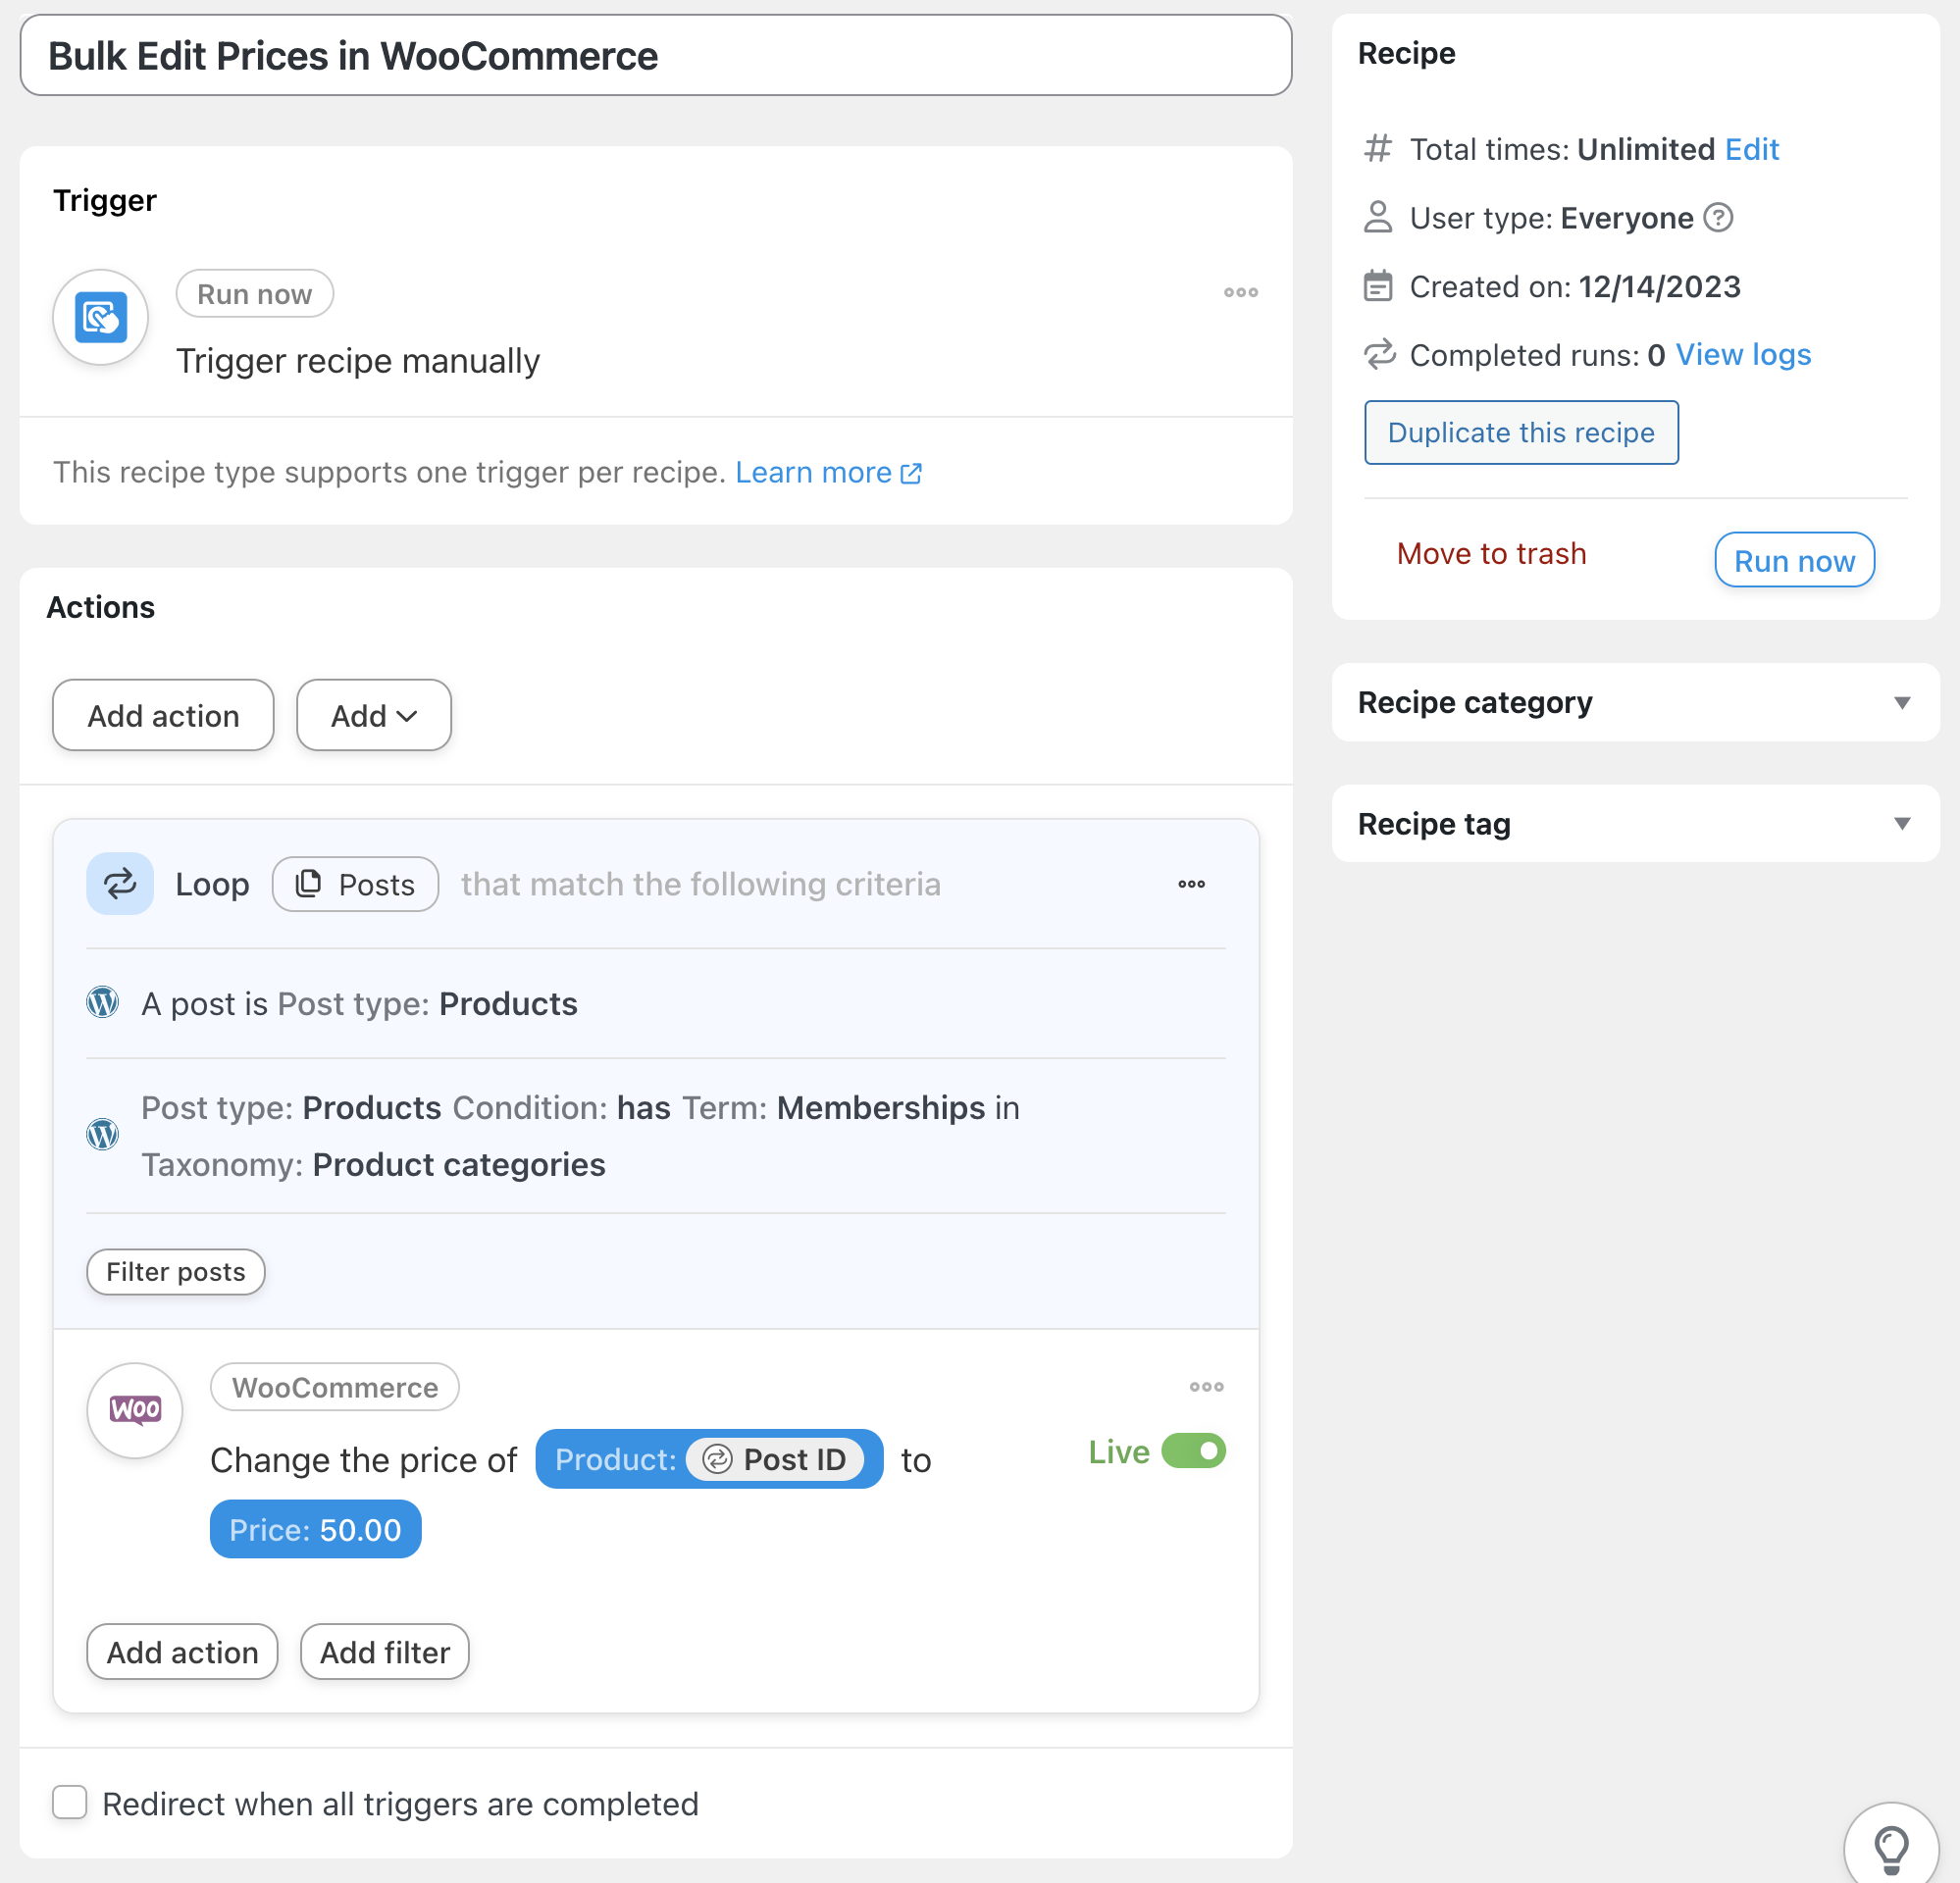
Click the Edit filter icon and select the post type Products. Next, because we don’t want to change the price of all of our products, we’re going to add a filter. To do this, click the Filter posts button.
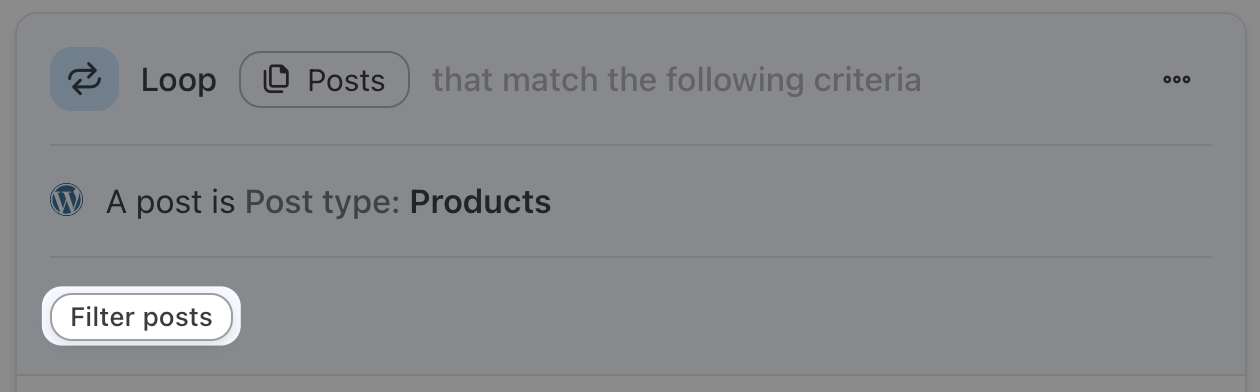
Automator will present you with different conditions for filtering your posts. We selected A type of post has/does not have a term in a taxonomy. You can select any filter condition that suits your workflows.
In the Configure the loop filter window, define the condition(s) that will allow you to isolate only the products whose prices you want to change. For example, we’ve configured the conditions to target our memberships.
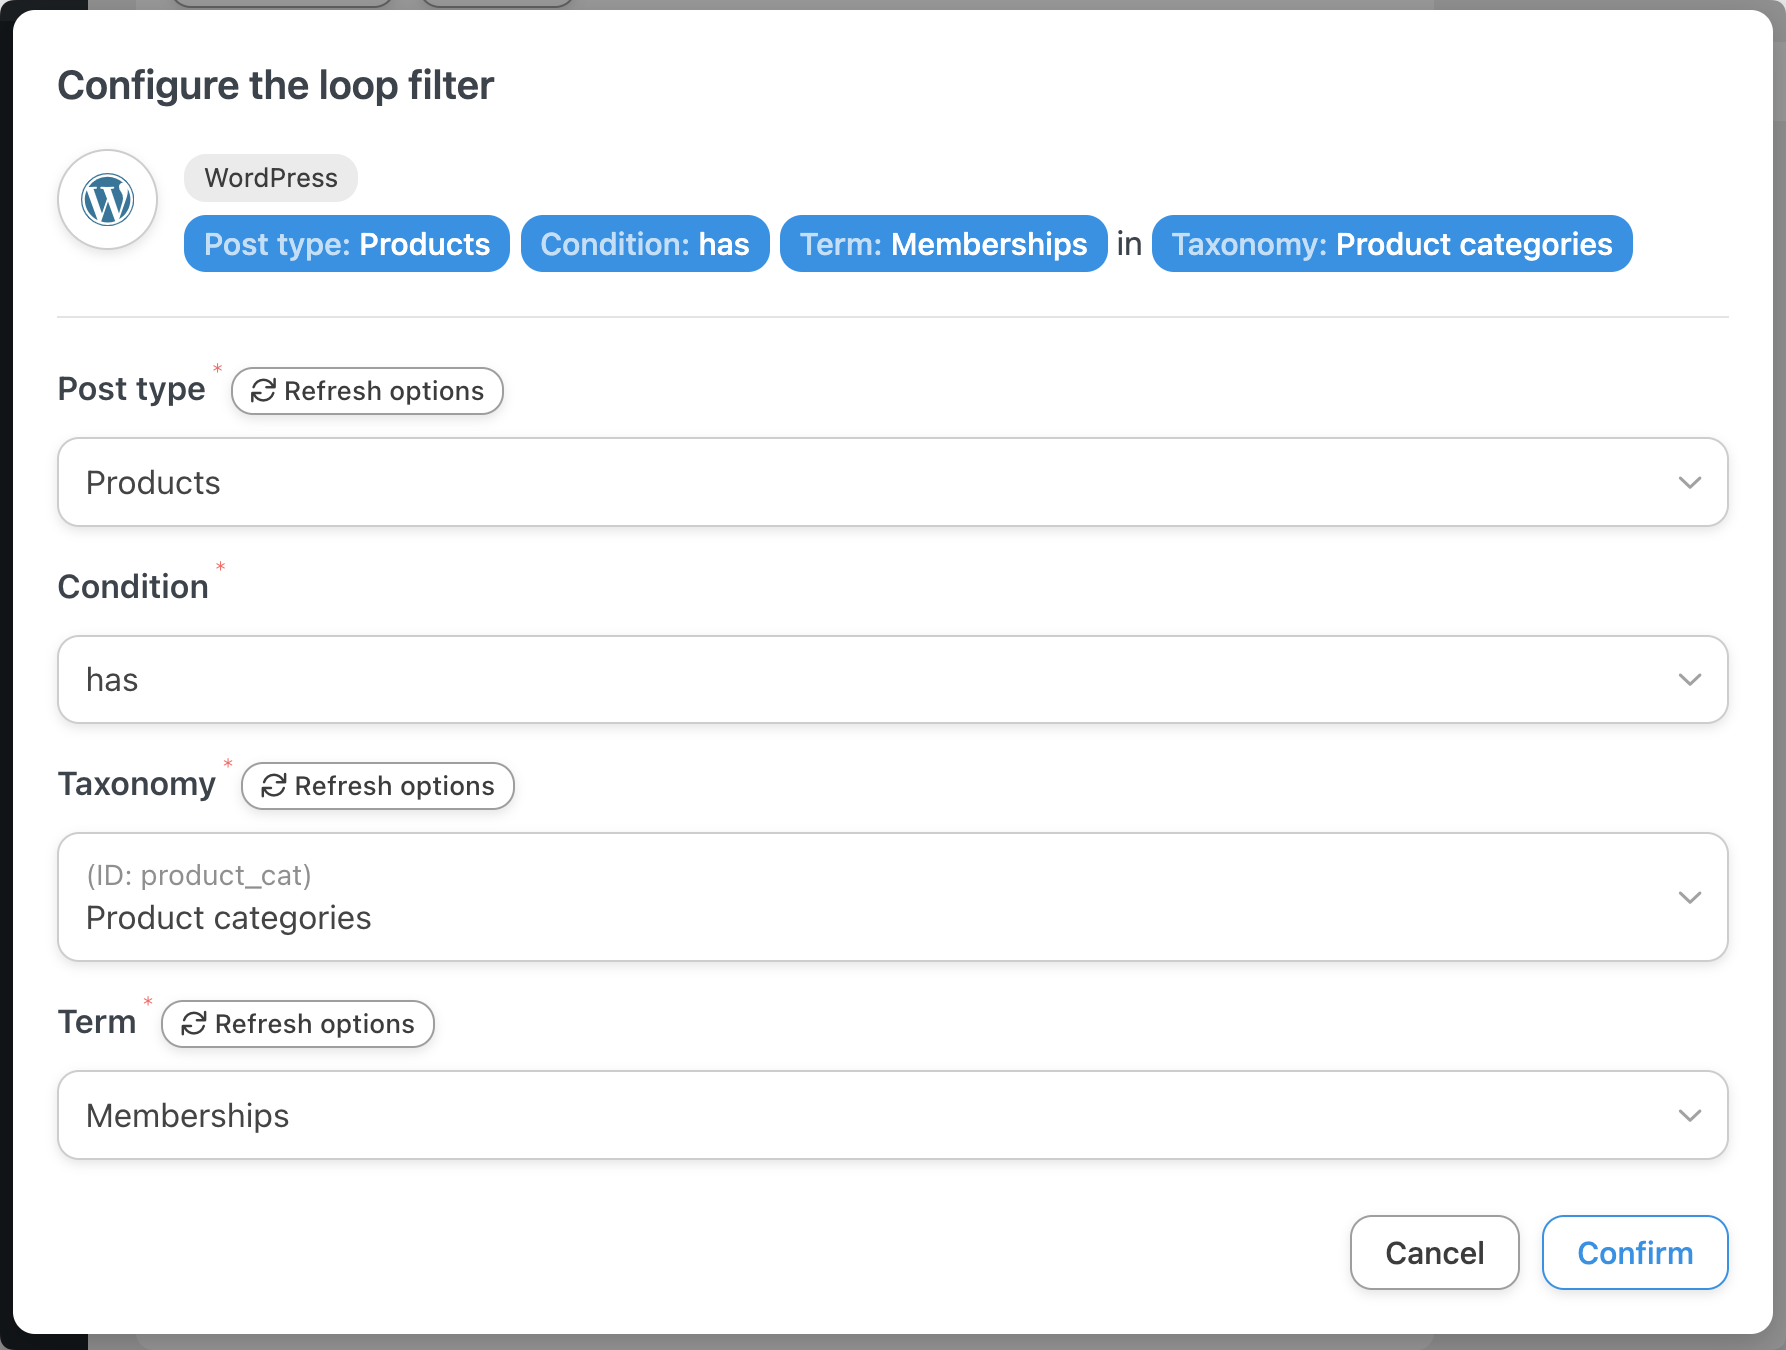
When you’re finished, click Confirm.
Step 4: Configure Your Post Loop Action
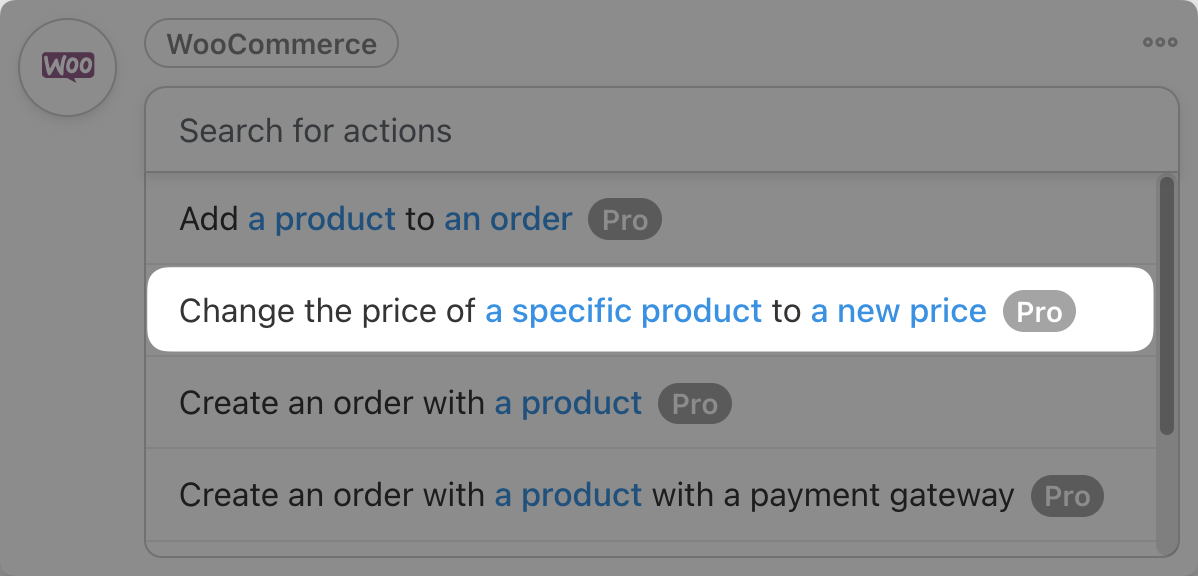
In the Loop panel, click Add action. From the menu of available integrations, select WooCommerce.

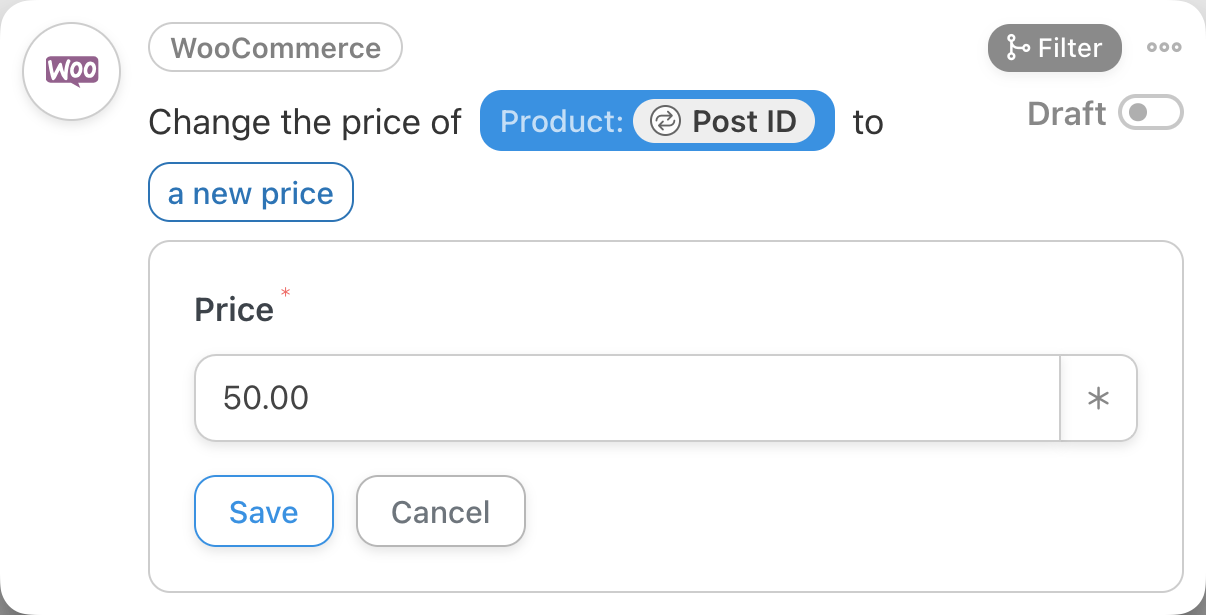
From the drop-down list that appears, select Change the price of a specific product to a new price.
In the Product field, select the Use a token/custom value > Loop > Post ID as we did in the previous recipe.
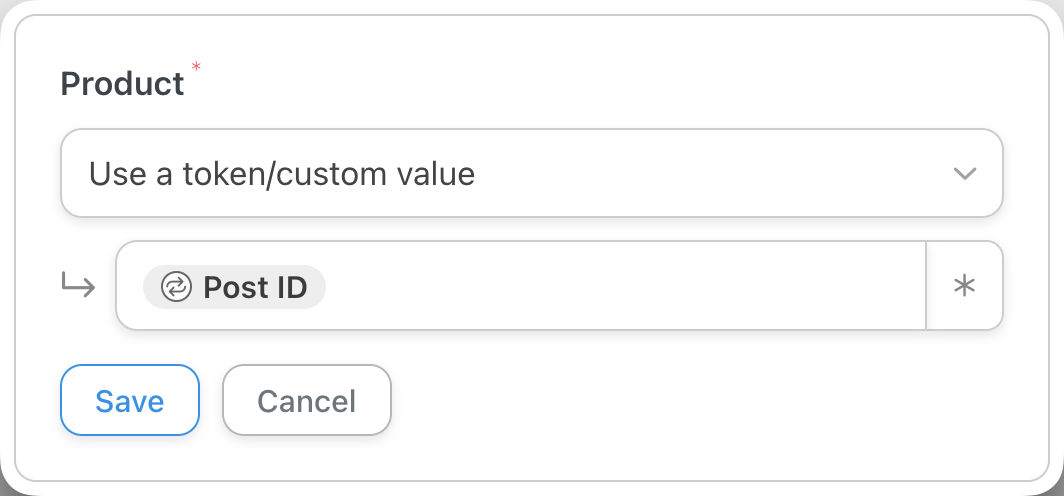
Click Save and set the new price in the Price field. For example, we have chosen to set the new price to $50.00.
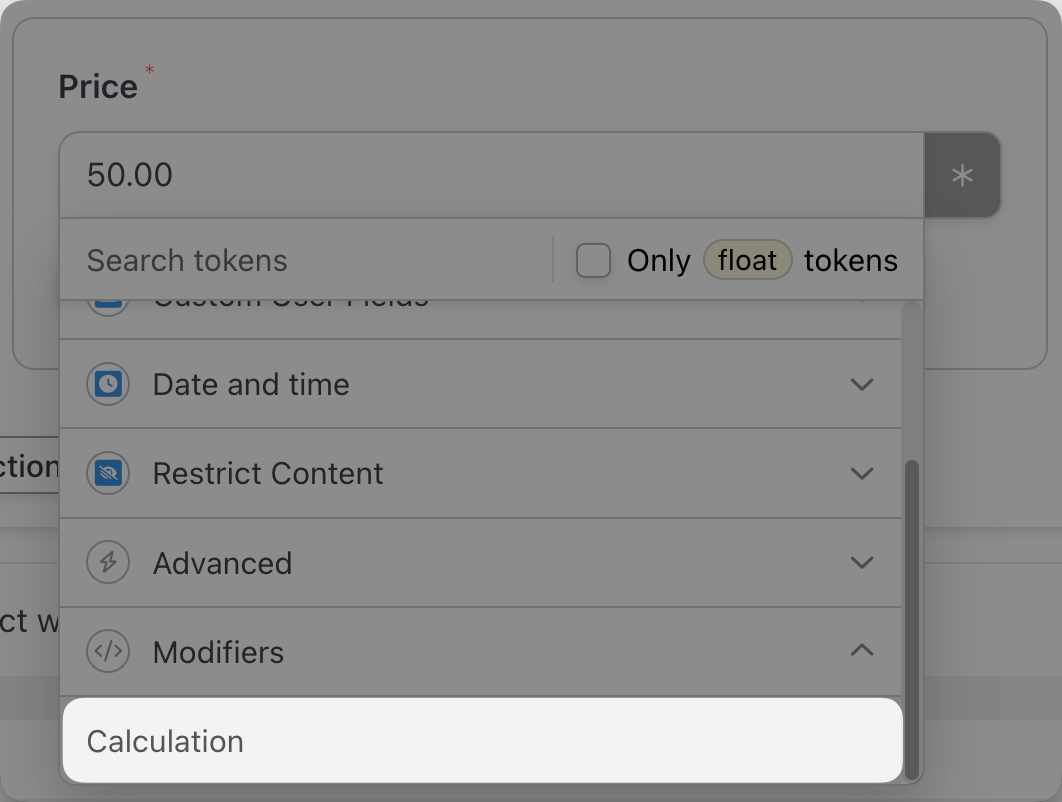
Alternatively, if you can use Automator’s powerful Calculations feature to change the prices of products in bulk in a more dynamic way. For example, using Calculations, we can apply a 10% discount to all of our memberships and later reverse the discount when the sale ends.
To use the Calculations feature, simply click the Asterisk in the Price field and select Modifiers > Calculation from the drop-down list.
To complete the calculation, follow the steps in the video below:
Once you’ve configured the new price, either statically or dynamically with a calculation, simply click Save.
Step 5: Run with Your Sale!
All you have to do to begin a storewide sale, is click Run now!
Conclusion: Save Time with Post Loops
We hope you see how Automator’s Loops feature can help you “bulk” up your WordPress website! Now that you have the ability to edit WordPress posts in bulk, we can’t wait to see what great new content you come up with.
Not sure how to create the recipe you want? Interested to know more about Automator’s advanced features? Drop us a line in the comments section below.
Until then, happy looping!

Related Posts


This Post Has 0 Comments