Revive old WordPress posts with AI and Uncanny Automator. Learn how to reverse content decay…
How to Connect Gravity Forms to Google Sheets
Automatically send Gravity Forms submissions to Google Sheets. Create a seamless Gravity Forms + Google Sheets integration with Uncanny Automator.

Are you looking for a way to connect Gravity Forms to Google Sheets? Well, we certainly hope so! Whether you want to analyze form submissions, share them with the whole team or just create backups, you’ve found the perfect solution.
Uncanny Automator is the best tool for creating a seamless Gravity Forms + Google Sheets integration, and by the end of this brief guide, we’ll prove to you why that’s true. In this article, we’ll show you how to:
- connect Gravity Forms to Google Sheets,
- store form submission data in Google Sheets and,
- integrate Gravity Forms with 214 more integrations!
Without further ado, let’s start defying gravity!
Introduction
In this guide, we’re going to take you through the steps of connecting Gravity Forms to Google Sheets with Uncanny Automator. But, before we get to the gravity defying part of this integration, let’s take a closer look at the plugins and apps involved.
Gravity Forms
As it is, already, one of the leading form-building plugins for WordPress websites, we probably don’t have to sell you on Gravity Forms. But there are some powerful features in this out-of-this-world plugin that are worth highlighting.

Whether you want to enhance a simple contact form, process payments or collect donations, survey your customers or receive files, Gravity Forms is the plugin you’re looking for. This powerful data capture tool is packed with features such as pagination and conditional logic that are guaranteed to take your WordPress business into the stratosphere.
In case you haven’t already, grab your Gravity Forms license now so your business can take-off.>>>
Uncanny Automator
If you ever find yourself wondering, “How do I connect this plugin to the other one?” just think of Uncanny Automator. As the #1 WordPress automation and integration tool, Automator connects all of your favorite apps and plugins, creating seamlessly automated workflows in the process.

Features such as filters and loops allow you to create powerful automations to execute repetitive tasks with the click of a button. Additionally, Automator puts your website’s data at your fingertips in the form of tokens, allowing you to create fully customizable and responsive integrations.
Unlike other integration tools out there, Automator doesn’t charge per-automation fees. This means that you can send as many form submissions to Google Sheets as you want without incurring additional costs.
Before we continue, make sure to grab an Automator Pro license so you can follow along.>>>
(Alternatively, download the free forever version of Automator and register your account for a limited number of app credits. You’ll need those credits to connect your WordPress website to your Google account.)
Google Sheets
Given the ubiquity of Google apps, Google Sheets probably doesn’t need an introduction. However, most WordPress businesses don’t realize that, with the right tools (such as Automator), they can harness the power of Google Sheets to improve their website and workflows.

Whether you’re looking to manage your WooCommerce inventory across multiple websites or simply trying to keep an external list of users, Google Sheets can help you. By connecting Gravity Forms to Google Sheets with Automator, you can perform sentiment analysis, collect subscription data in real-time, collaborate with the whole team and much more!
If you don’t already have a Google account dedicated to your WordPress website, register for a free account now.>>>
Connect Gravity Forms to Google Sheets
Now that you have everything you need, it’s time to connect Gravity Forms to Google Sheets. We’ll start off with a simple example of an Automator recipe (i.e. a combination of triggers and actions) then give you some ideas for more advanced integrations.
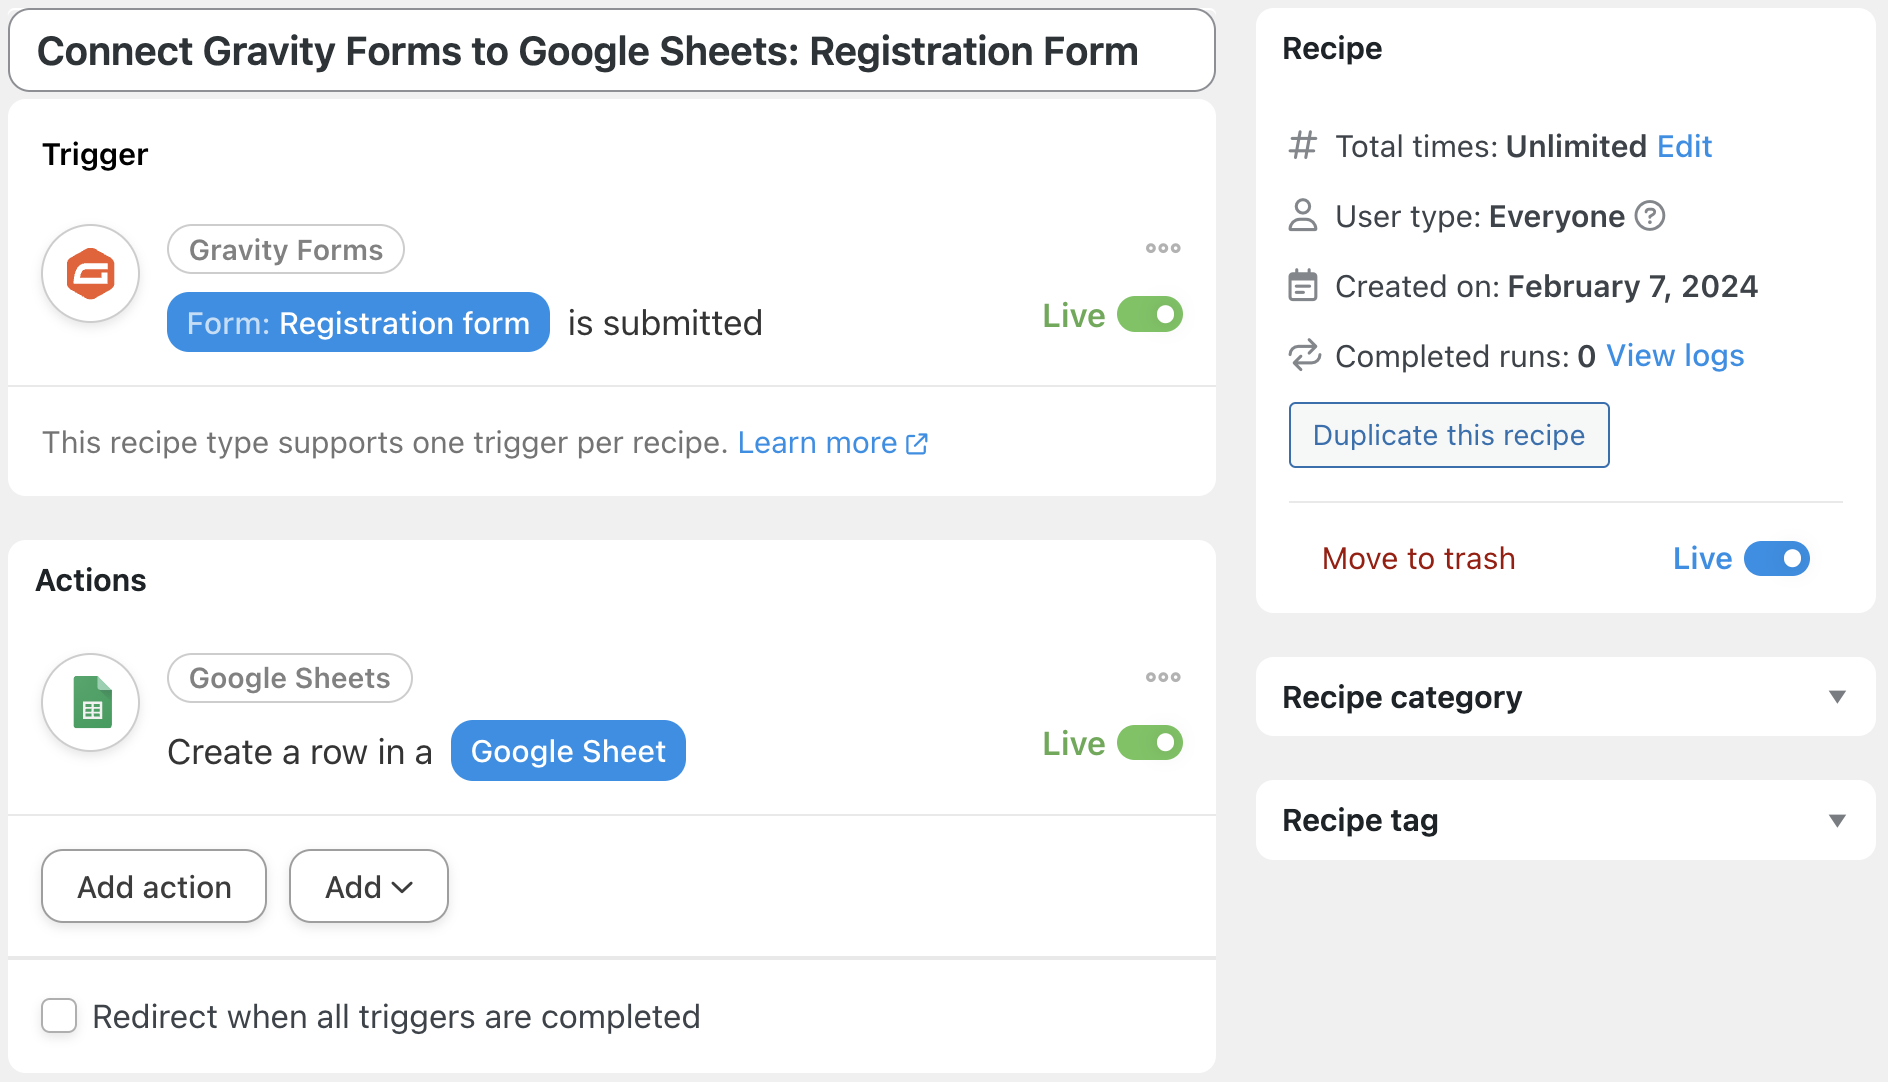
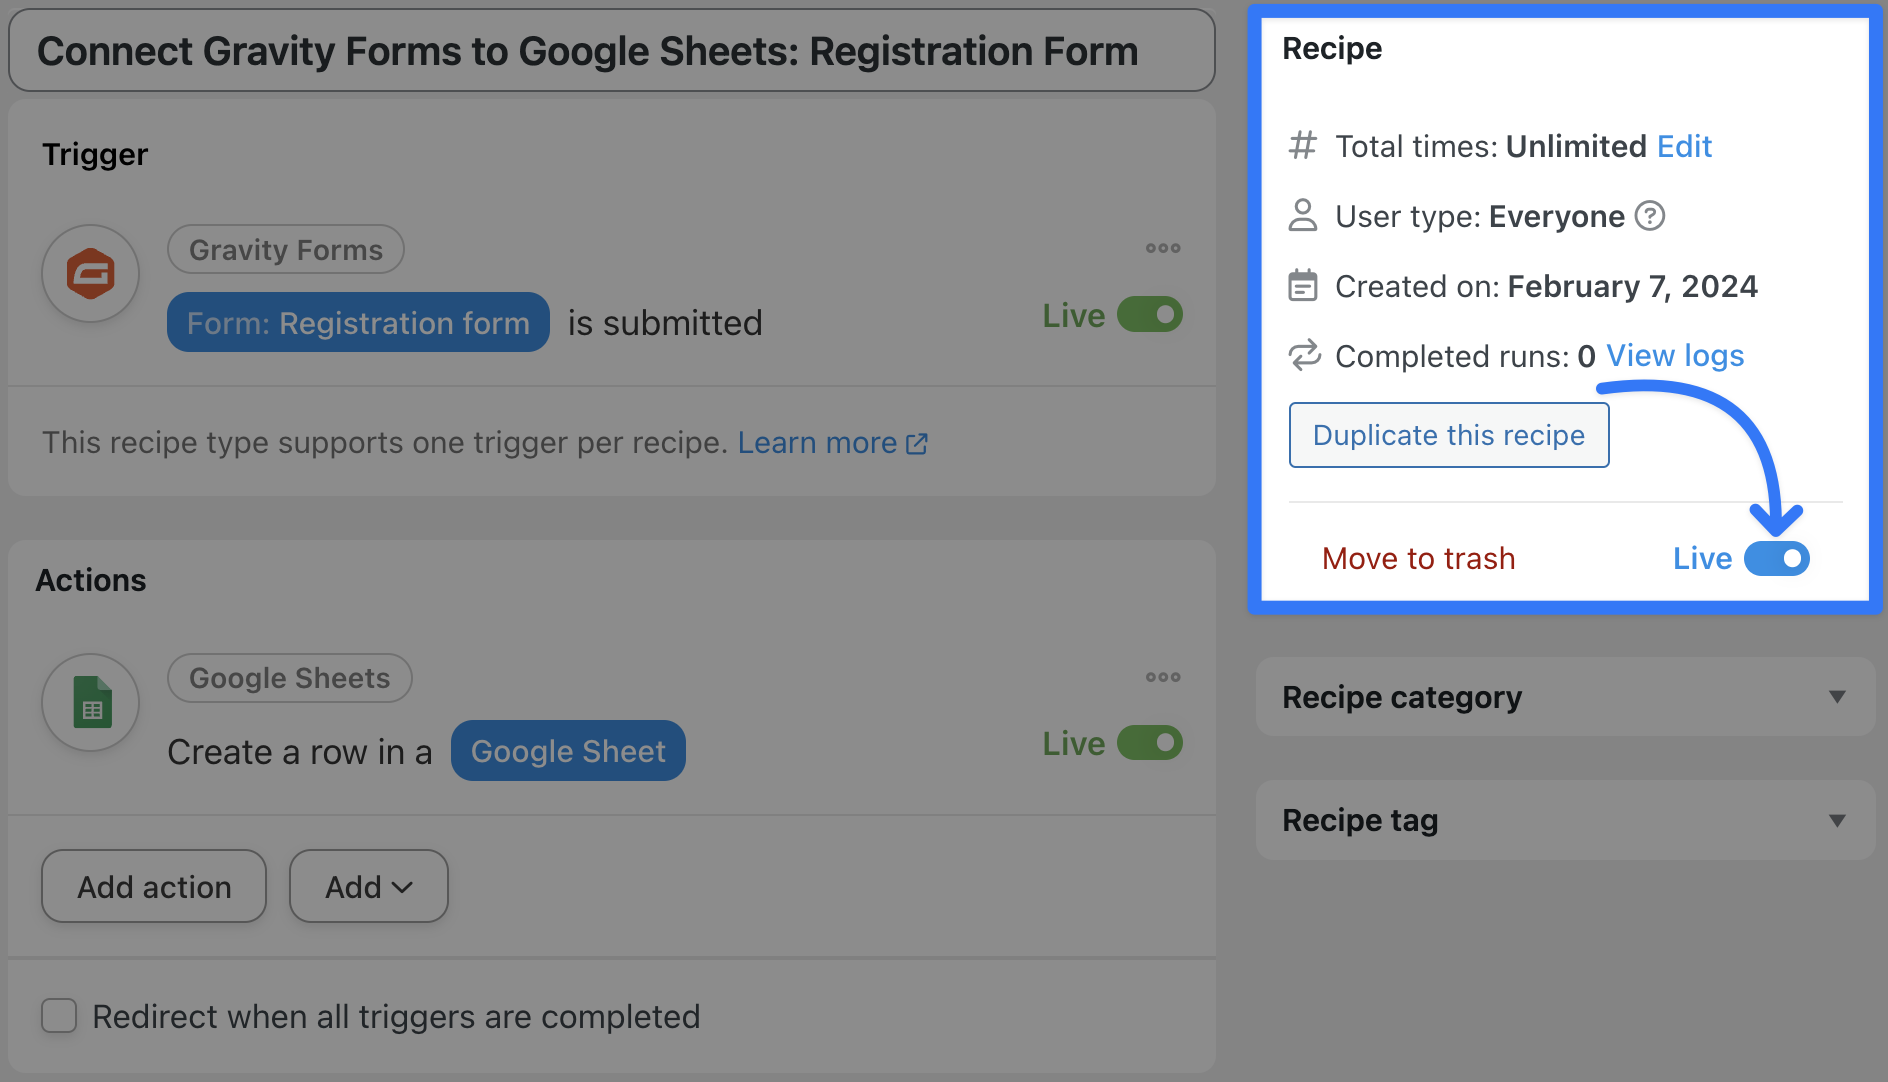
In the recipe pictured above, we’re able to send form data to Google Sheets every time someone submits our registration form, whether a registered user on our website or not. In the next five steps we’ll show you how to recreate this simple recipe.
Step 1: Create a New Recipe
From your WordPress Admin Dashboard, navigate to Automator > Add new recipe. In the pop-up window that appears, select Everyone.

If you only want to capture form submissions from registered users on your website, simply select Logged-in users instead.
Step 2: Name Your Recipe
Give your recipe a name that makes it easy to recognize at a glance. For example, we’ve named this recipe “Connect Gravity Forms to Google Sheets: Registration Form”.
Step 3: Configure Your Trigger(s)
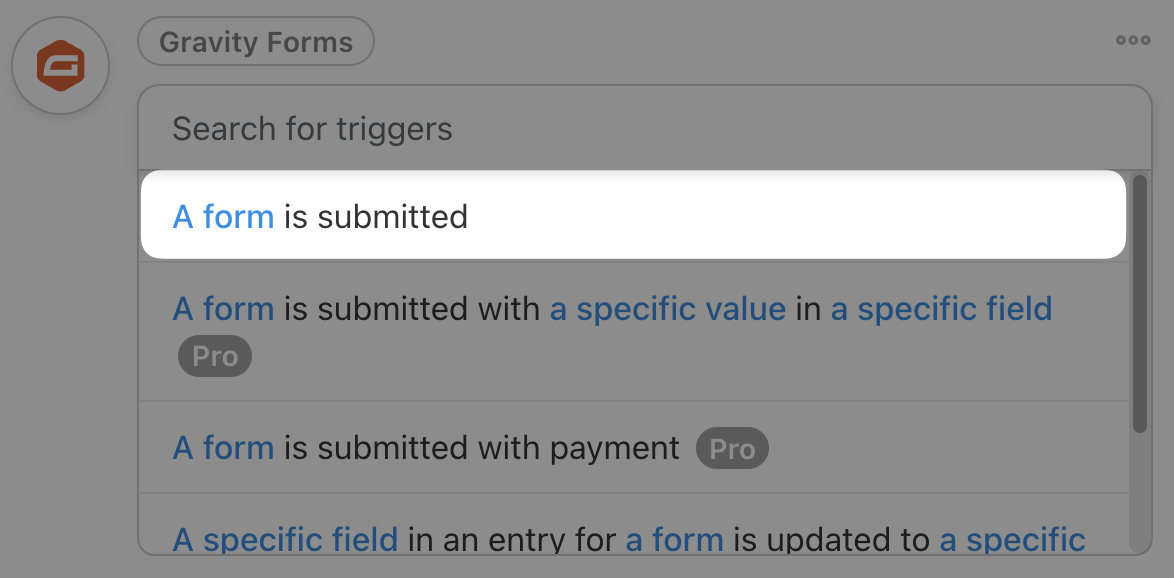
In the Trigger panel, from the menu of available integrations, select Gravity Forms.

From the drop-down list that appears, select A form is submitted.
Automator will prompt you to select one of your forms. Once you’ve selected a form, click Save. Your Trigger panel should look something like this:

Step 4: Configure Your Action(s)
In the Actions panel, click Add action and select Google Sheets from the menu of available integrations.

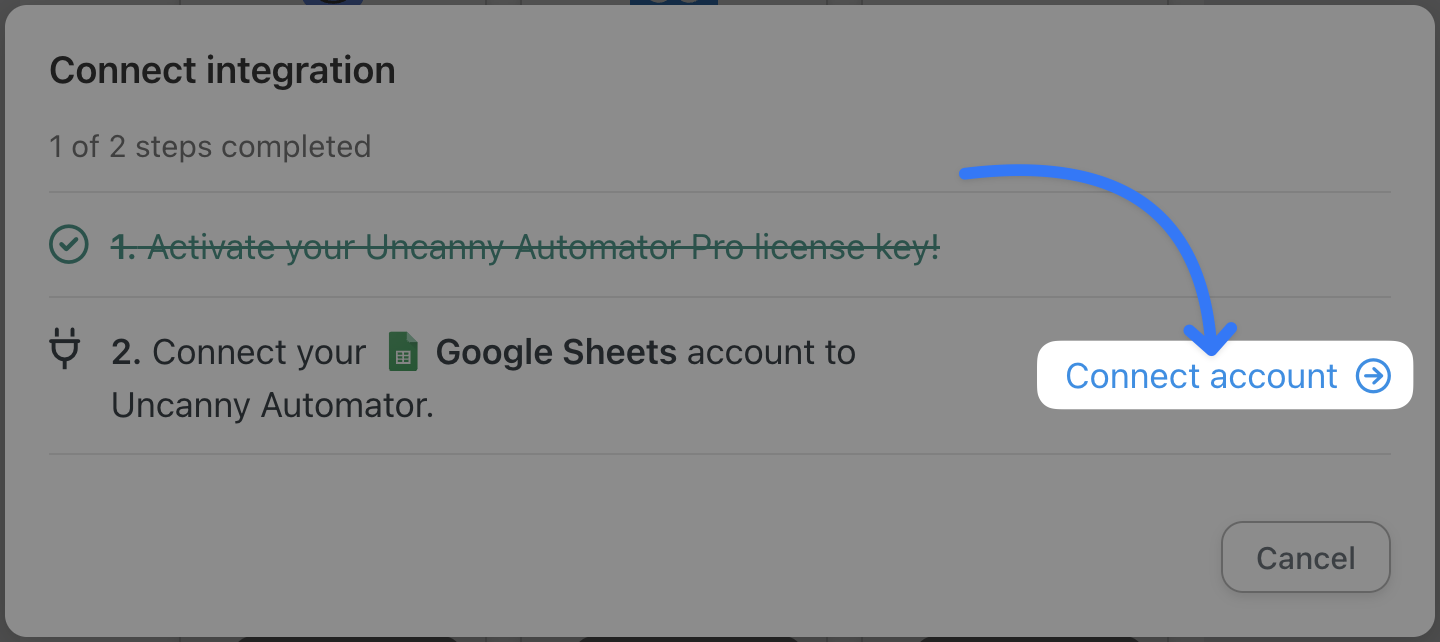
(Note: If you have not already connected your Google account, Automator will prompt you to do so. Click Connect account in the pop-up window and follow the instructions.)
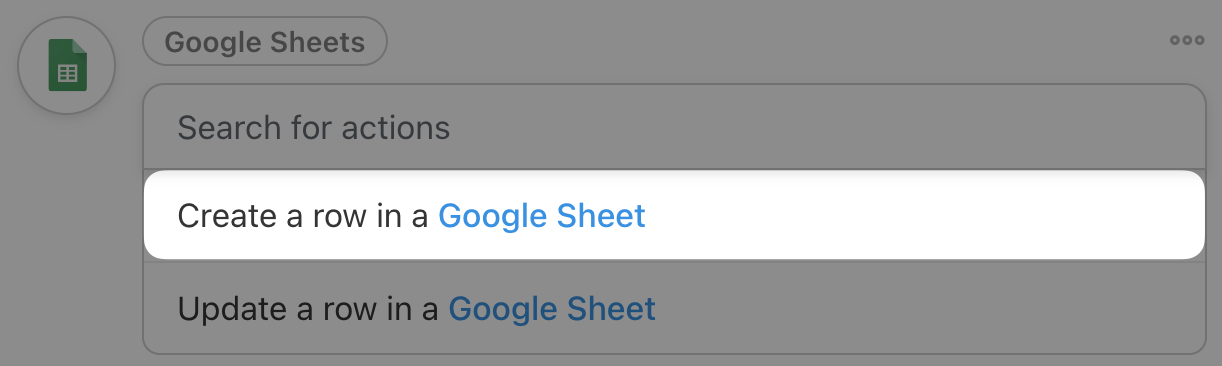
Once you have connected your account, return to the recipe editor and select Create a row from the drop-down list that appears.
Automator will prompt you to select the Drive, Spreadsheet and specific Worksheet where you would like to store your Gravity Form submissions. Once you’ve selected the worksheet, click Get columns.

Automator will return the first value in each column (presumably, the column header/title) in the Column fields. We have configured each column in our selected worksheet to correspond to a field from our Gravity Forms registration form, in addition to a “Date and Time” column.
Using tokens (i.e. dynamic data from your WordPress website and from within recipes), we can then populate the Value fields with the data that people entered in our registration form.
To select a token, click on the Asterisk. From the drop-down list that appears, select the token that corresponds to the column. For example, we have selected the Name (Prefix) token from our Gravity Forms trigger that corresponds to the “Name (Prefix)” column in our Google Sheets worksheet.
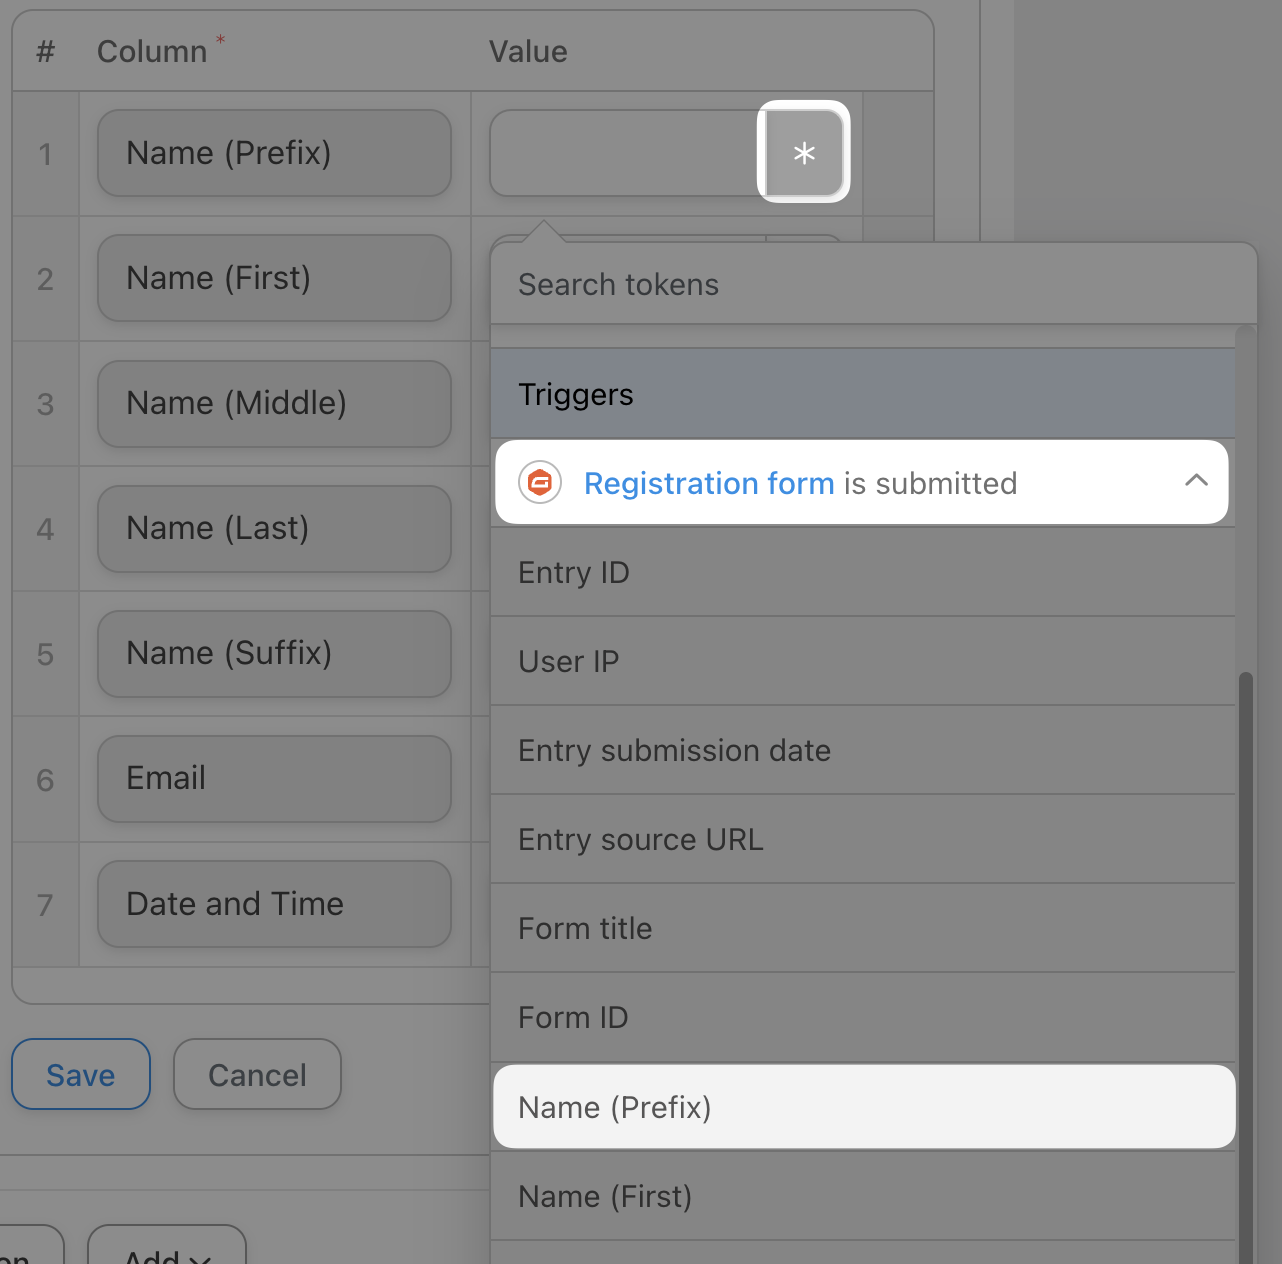
Fill in the remaining Value fields with your desired tokens. When you’re finished, click Save. Your completed action should look like this:

Step 5: Go Live and Defy Gravity!
You’re just about ready to complete your first Gravity Forms + Google Sheets integration. All that’s left for you to do is to toggle the recipe from Draft to Live.
That’s it! You’ve just connected Gravity Forms to Google Sheets. But this was just a simple example. Let’s see what you can do with some of Automator’s more advanced features.
More Ways to Connect Gravity Forms to Google Sheets
Now that you have the basics down, you can start to explore some of Automator’s more advanced features such as filters, calculations and delays to further customize your integrations.
For example, using filters, we’re able to automatically sort our form submissions into different worksheets based on what users entered into the form fields.
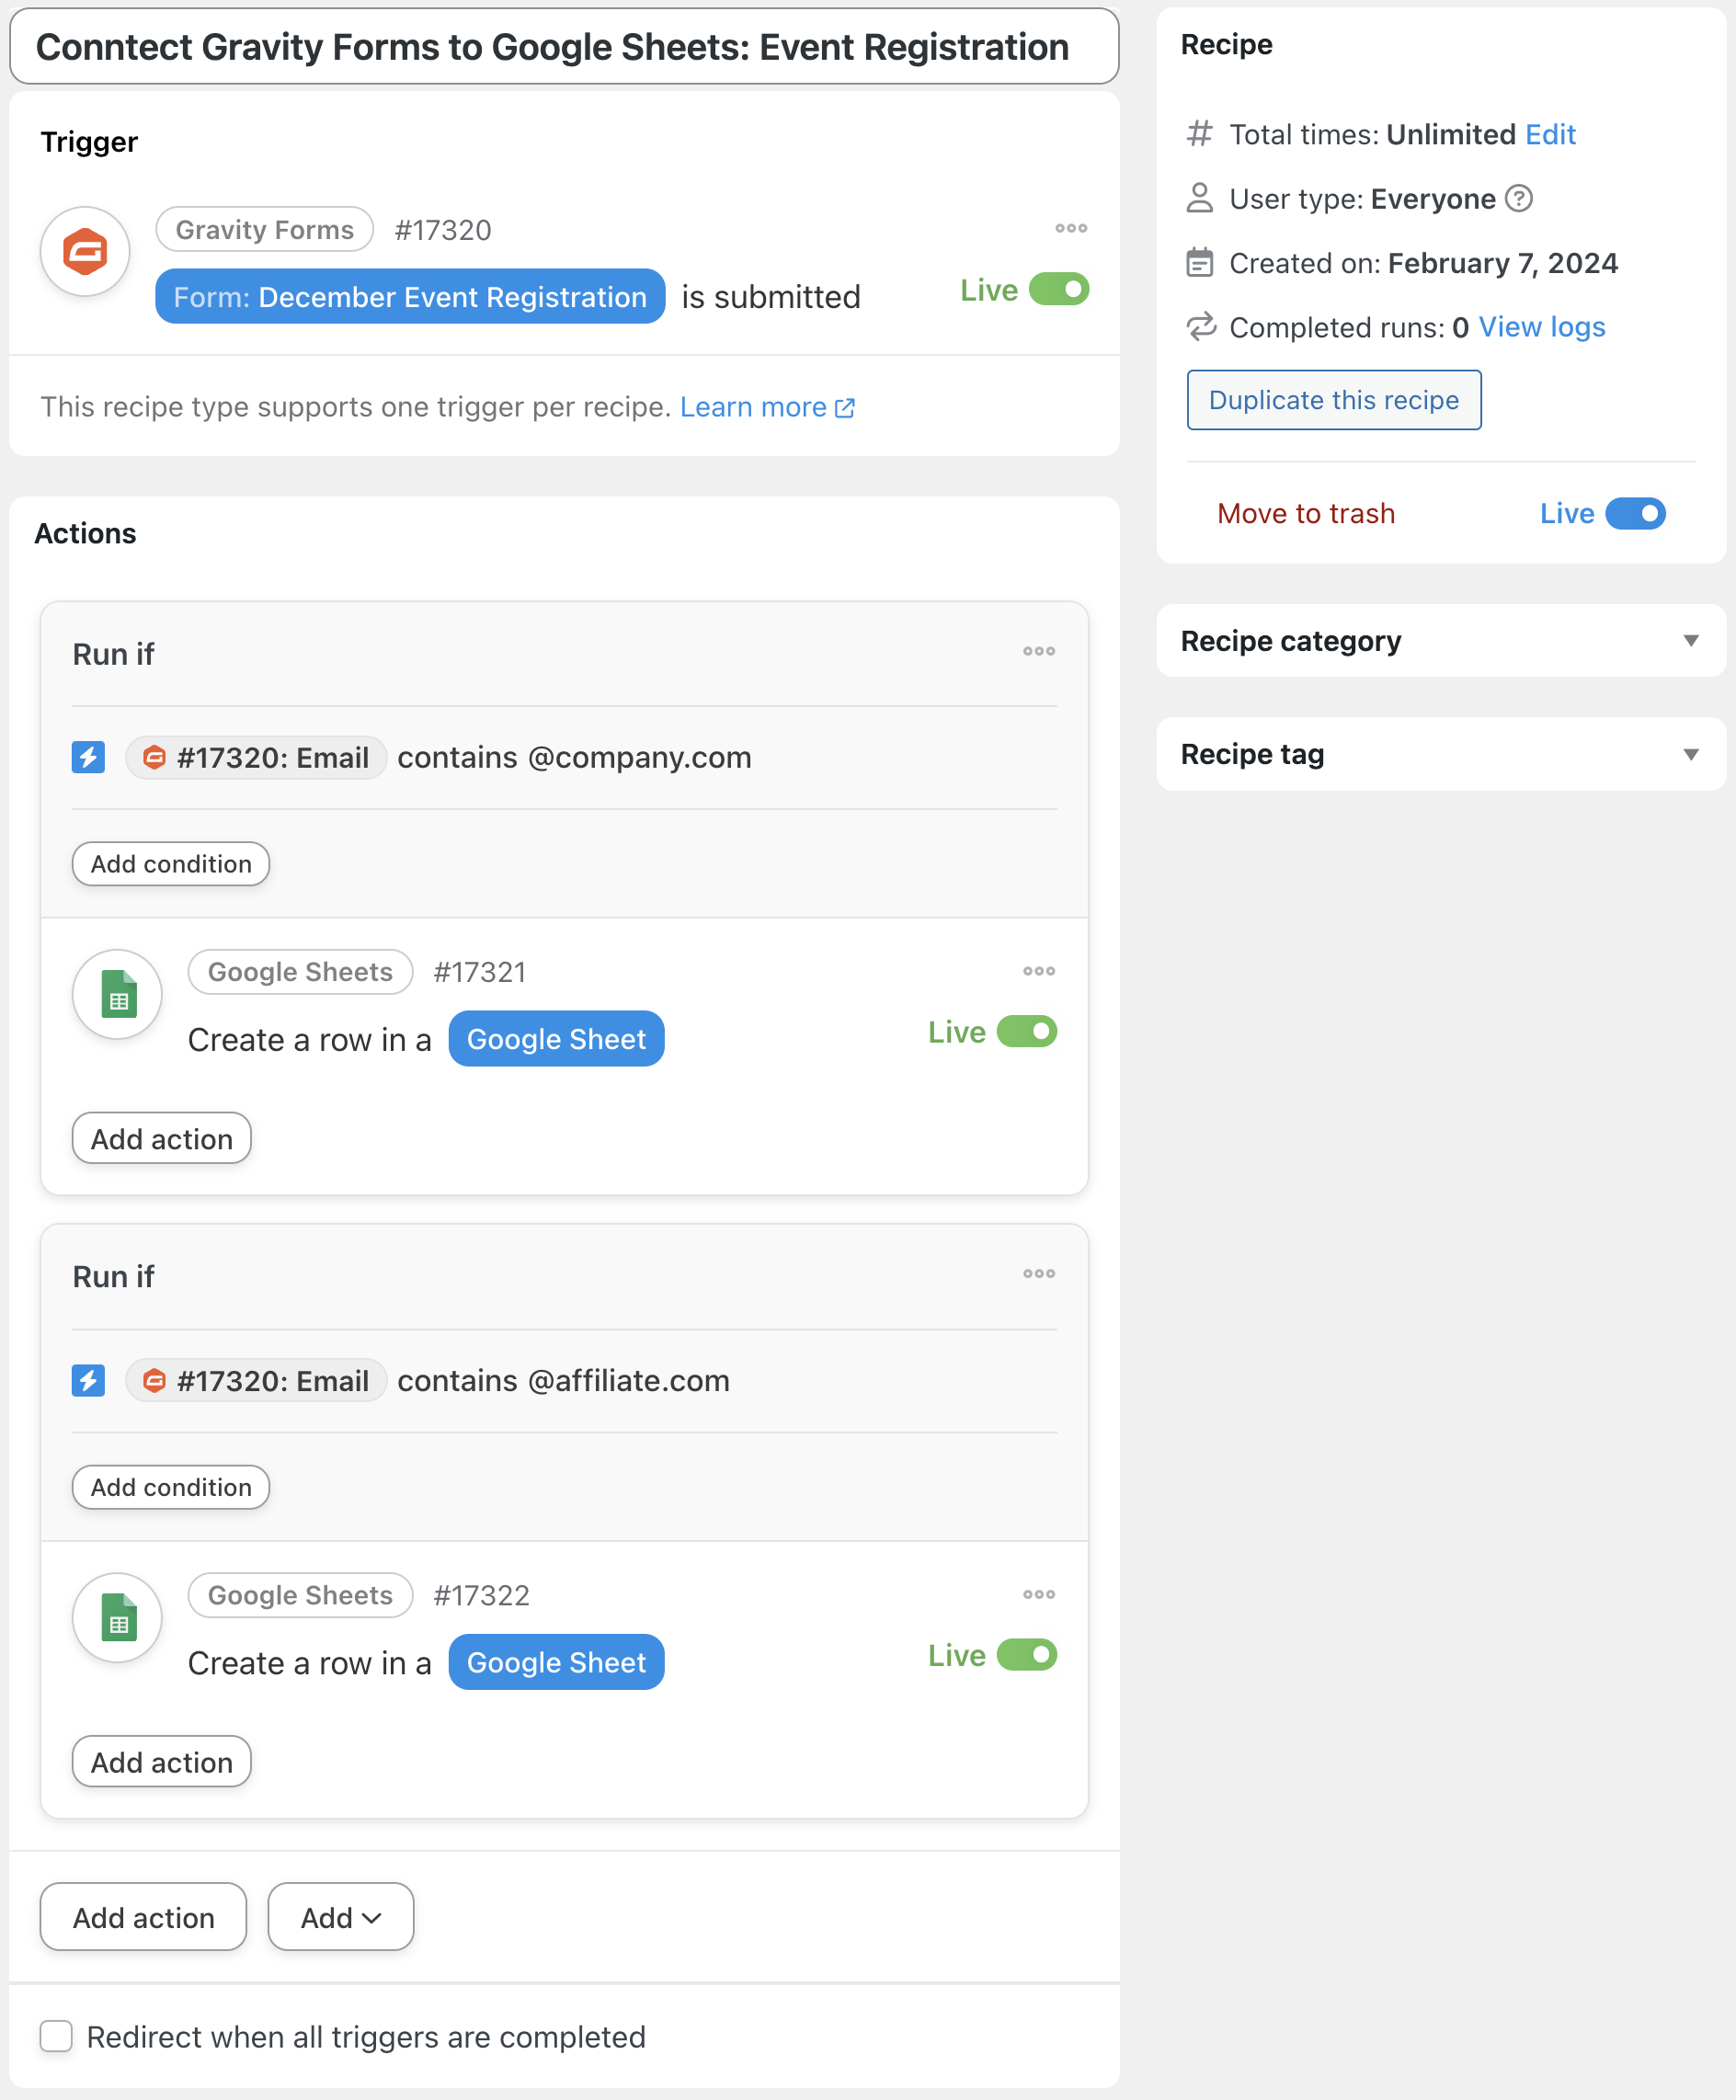
A recipe like the one pictured above helps us to keep our form data organized without requiring us to spend hours sorting through it all.
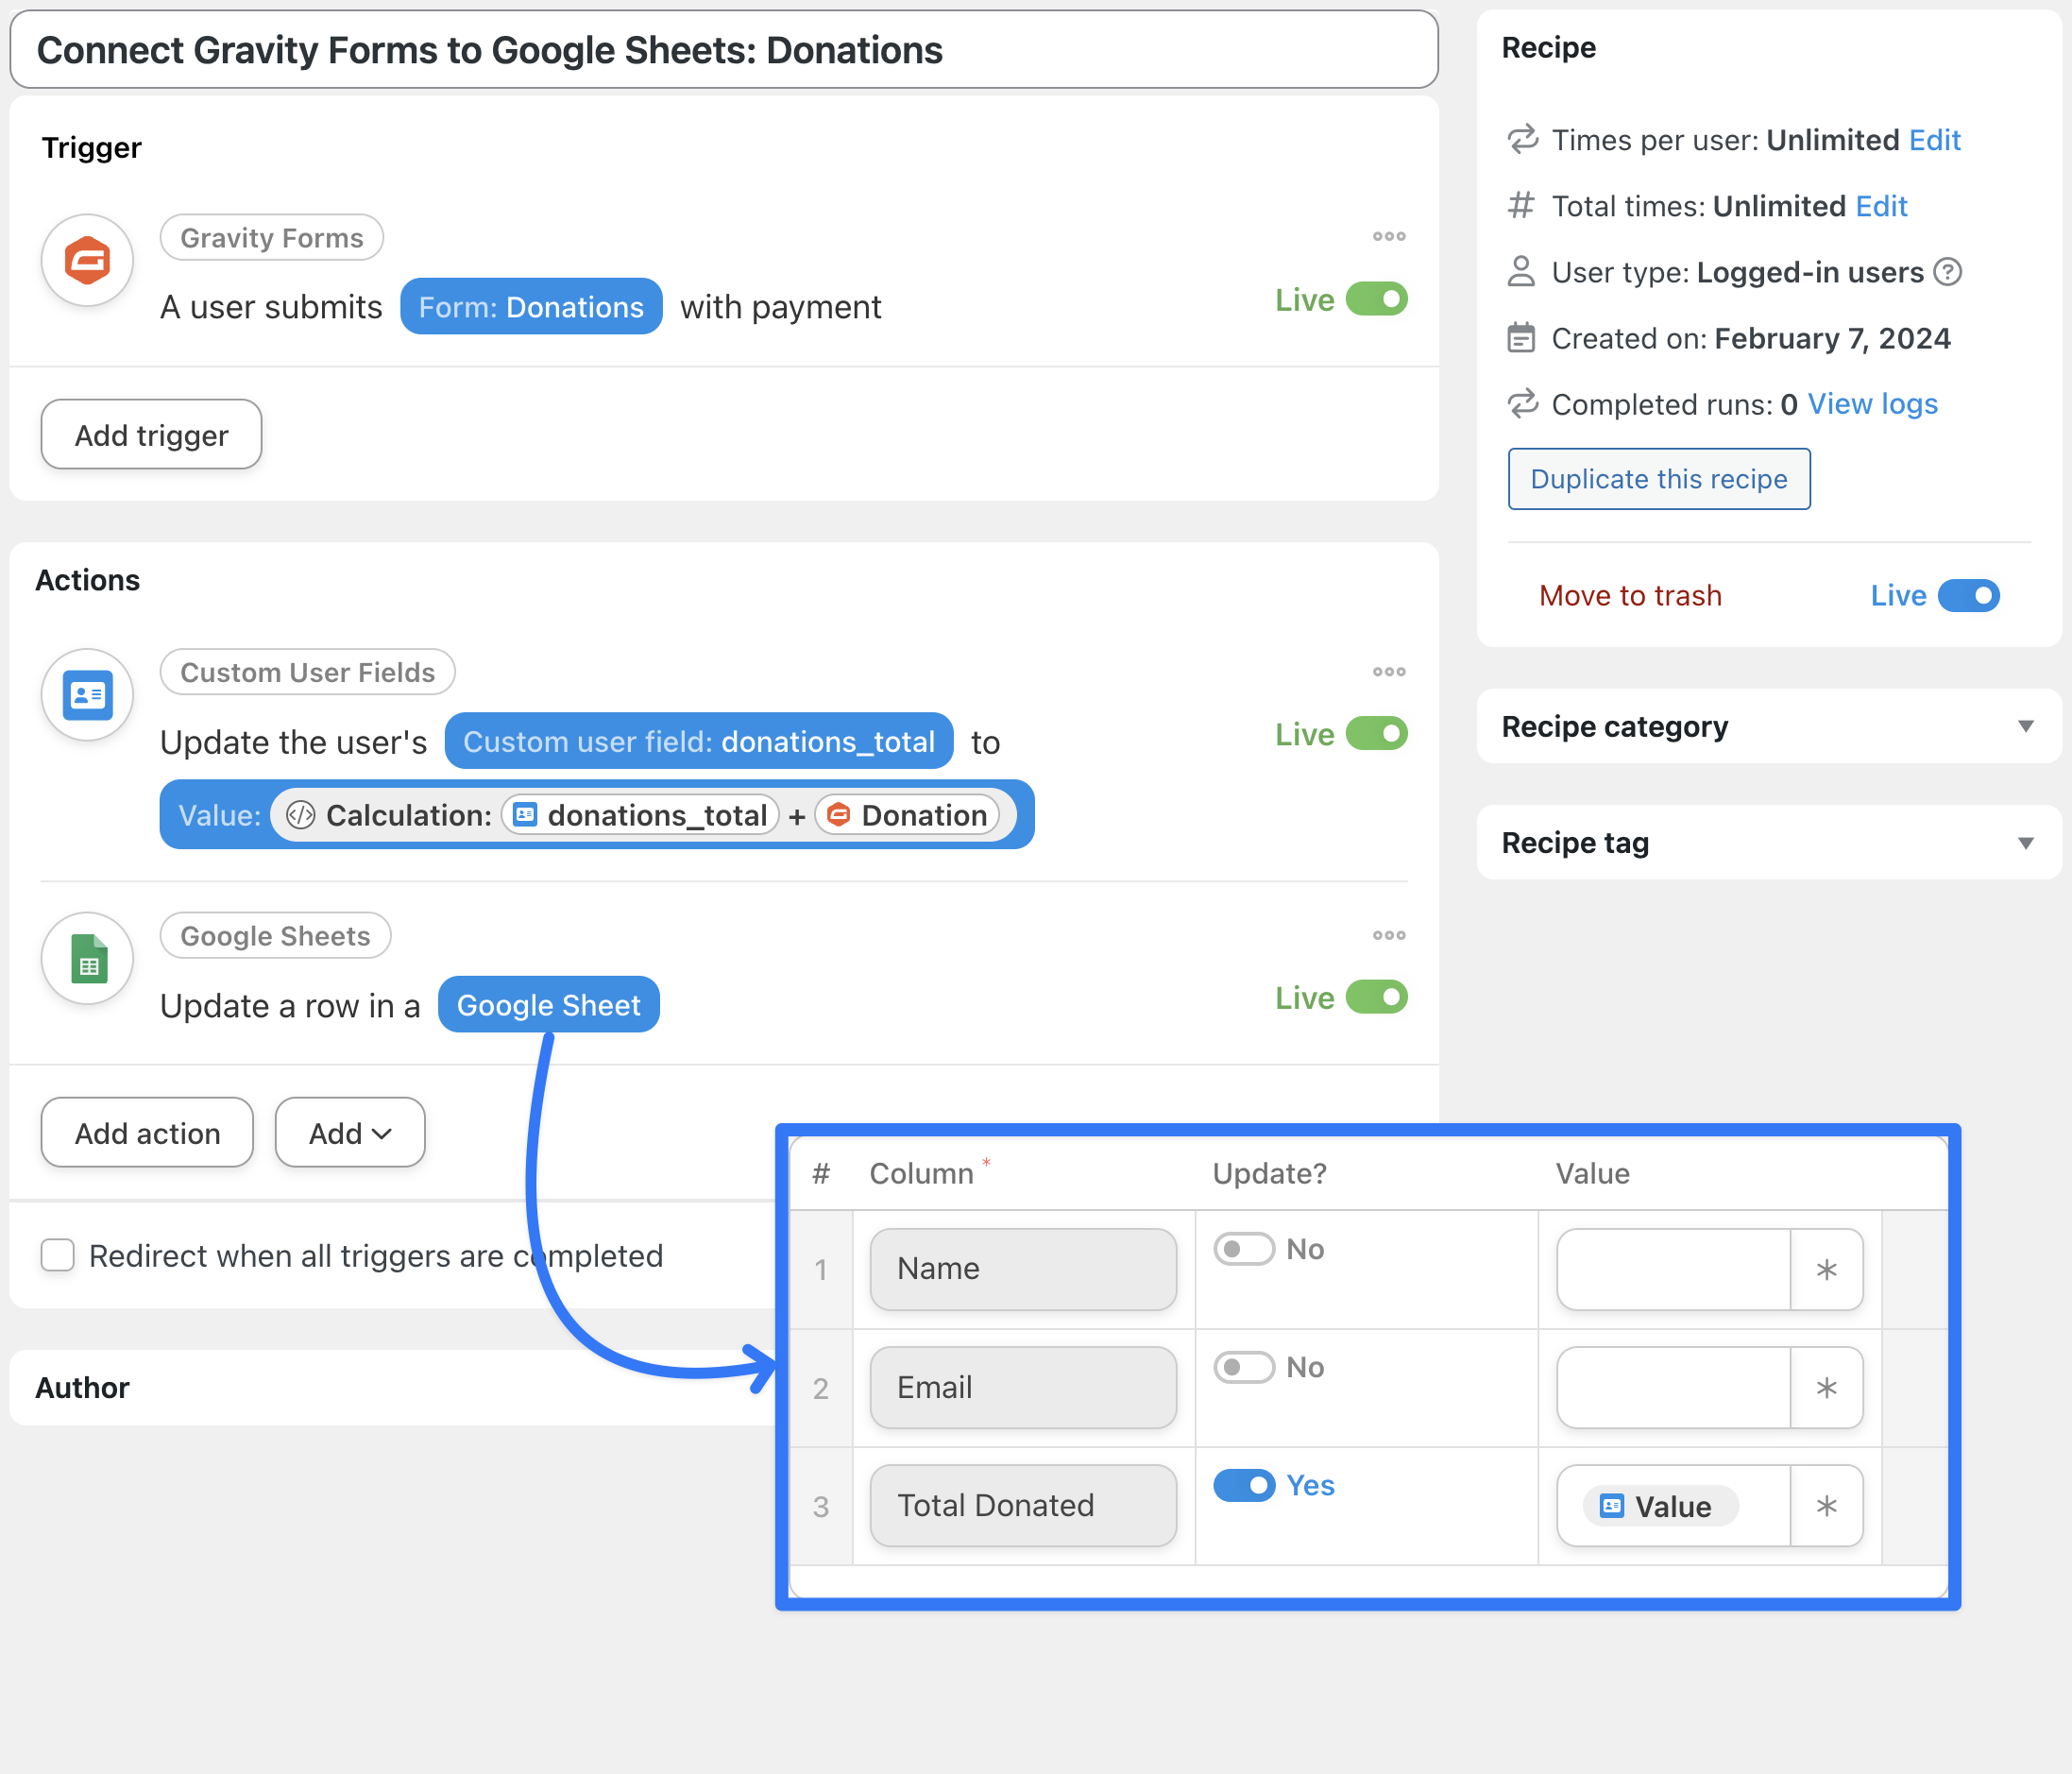
Further, if you upgrade to an Automator Plus or Elite license, you’ll get the Custom User Fields Addon for FREE, unlocking a whole new world of data collection possibilities. For example, in the recipe pictured below, we’re able to use the Custom User Fields Addon to keep track of our users’ total lifetime donations before updating that value in Google Sheets.
Keep exploring more of Automator’s advanced features to customize your Gravity Forms + Google Sheets integration.
Conclusion
In this guide, we showed you how to:
- connect Gravity Forms to Google Sheets with Uncanny Automator,
- securely store Gravity Forms data in Google Sheets and,
- customize your Gravity Forms + Google Sheets integration.
We hope you feel like you’re ready to defy gravity with Automator’s help! But, if you still have any questions, feel free to drop us a line in the comments section below.
Until next time, happy automating!

Related Posts


Is there any way to get the new submissions to be added to the top of the spreadsheet instead of the bottom?
Hi Forrest,
The action we use here basically says to Google Sheets, “Add this entry to the first blank row you find going down from the top of the page”. So, if you want things added to the top instead, you could try leaving a (completely) blank row beneath your column heading.