Revive old WordPress posts with AI and Uncanny Automator. Learn how to reverse content decay…
Connect ActiveCampaign to BuddyBoss
Keep your community connected! Create a seamless, two-way BuddyBoss and ActiveCampaign integration with Uncanny Automator. Tag your contacts, manage your lists and much more.
Are you looking for a way to connect ActiveCampaign to BuddyBoss? Of course you are! That’s how you ended up on this page—and good thing you did.
With Uncanny Automator, you can create a seamless, two-way BuddyBoss and ActiveCampaign integration in just a few clicks—and even fewer minutes!
Want to add new BuddyBoss community members to your ActiveCampaign account and mailing lists? Maybe you want to tag contacts in ActiveCampaign whenever they join a new BuddyBoss forum? It’s all possible (and remarkably easy) with Uncanny Automator.
But the community-building doesn’t end there. With Automator, you can send ActiveCampaign data directly to your WordPress website! No code, no cost, no confusing steps.
But that’s enough talk. Let’s get into the good stuff.
Introduction
In this step-by-step guide, we’ll show you how to connect ActiveCampaign to BuddyBoss—and BuddyBoss to ActiveCampaign! Better yet, we’ll show you what makes Uncanny Automator the best tool for the job.
By the end of this walkthrough, you’ll have created a totally seamless, two-way integration between BuddyBoss and ActiveCampaign. You’ll know how to tag your ActiveCampaign contacts based on their BuddyBoss activity, add and remove BuddyBoss community members from ActiveCampaign lists and even send valuable ActiveCampaign data to your WordPress website.
This is one community-building integration that you simply have to have.
Why Connect ActiveCampaign to BuddyBoss with Automator
ActiveCampaign is one of the biggest and most feature-rich marketing automation tools available to businesses seeking closer connection with their customers. Likewise, BuddyBoss is the community-focused, membership management plugin of choice for countless WordPress websites. Needless to say, an integration this powerful deserves nothing but the best.
Enter Uncanny Automator.
Automator is the #1 automation and integration tool for WordPress websites, making it the perfect choice for connecting your favorite apps and plugins. Of course, you don’t have to take our word for it.

We know that when it comes to creating seamless integrations, there are plenty of other tools and addons available. But, apart from the 5-star ratings from Automator’s tens of thousands enthusiastic users, there are plenty of other factors that set Automator apart from the competition.
- Affordability: Don’t want to pay per automation fees? Then Automator is unquestionably the tool for you. Unlike other automation and integration solutions, Automator won’t charge you each time you run an automation. In other words, the more you automate and integrate, the more you save!
- Ease-of-Use: Automator is a seriously powerful plugin. Whether you want to tap into your WordPress metadata or automate entire workflows across multiple external apps, Automator has you covered. But don’t worry. All of that power is packed into a user-friendly click-and-play interface with a learning curve so gentle that it’s barely a mound.
- Versatility: How many plugins do you know that can function as a workflow automator, app integrator, custom fields editor, metadata manager, content restrictor and, well, you get the idea? We’re willing to bet that this is the first one. Whether you want to auto-publish new products to Instagram, edit custom user and post fields in bulk or manage workflow, Automator has you covered.
- Integrations: Automator has 214 integrations with more on the way all of the time. This means that you can connect ActiveCampaign and BuddyBoss to a whole lot more than just each other. The best part? With an easy-to-use webhooks integration, you can connect your WordPress website to, well, the whole internet if you really wanted to!
- Support: Unparalleled support has made Automator one of the highest-rated plugins in the WordPress ecosystem. Can’t find an integration that you really want? Is there a feature that would make your life easier? Maybe you need some help setting up a time-saving recipe. Whatever your automation and integration needs might be, the Automator support team is never more than a help request away.
Convinced yet? Get your Automator license today so you can follow along.>>>
Tag Your BuddyBoss Contacts in ActiveCampaign
If you want to segment your BuddyBoss members in ActiveCampaign, tags are probably the best way to do it. And, thanks to some unique Automator features, you can easily automate the segmentation process.
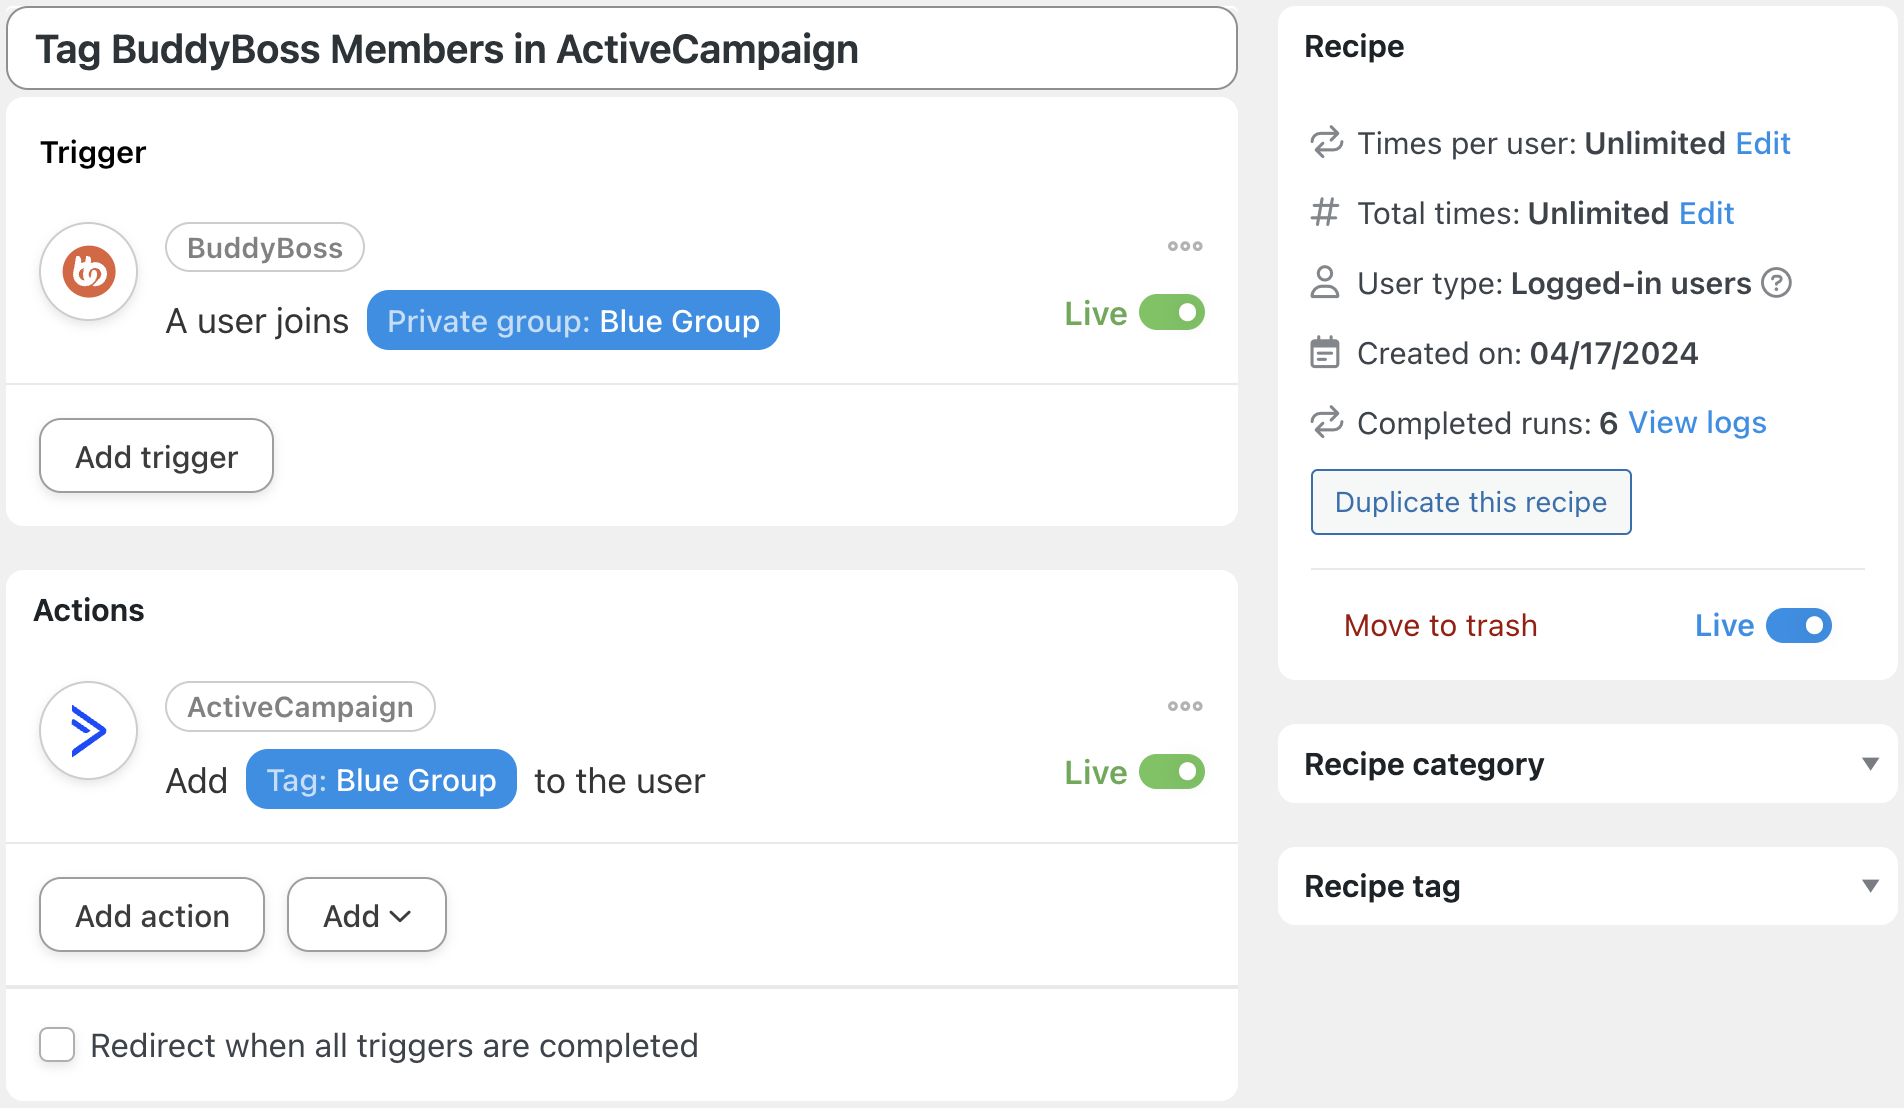
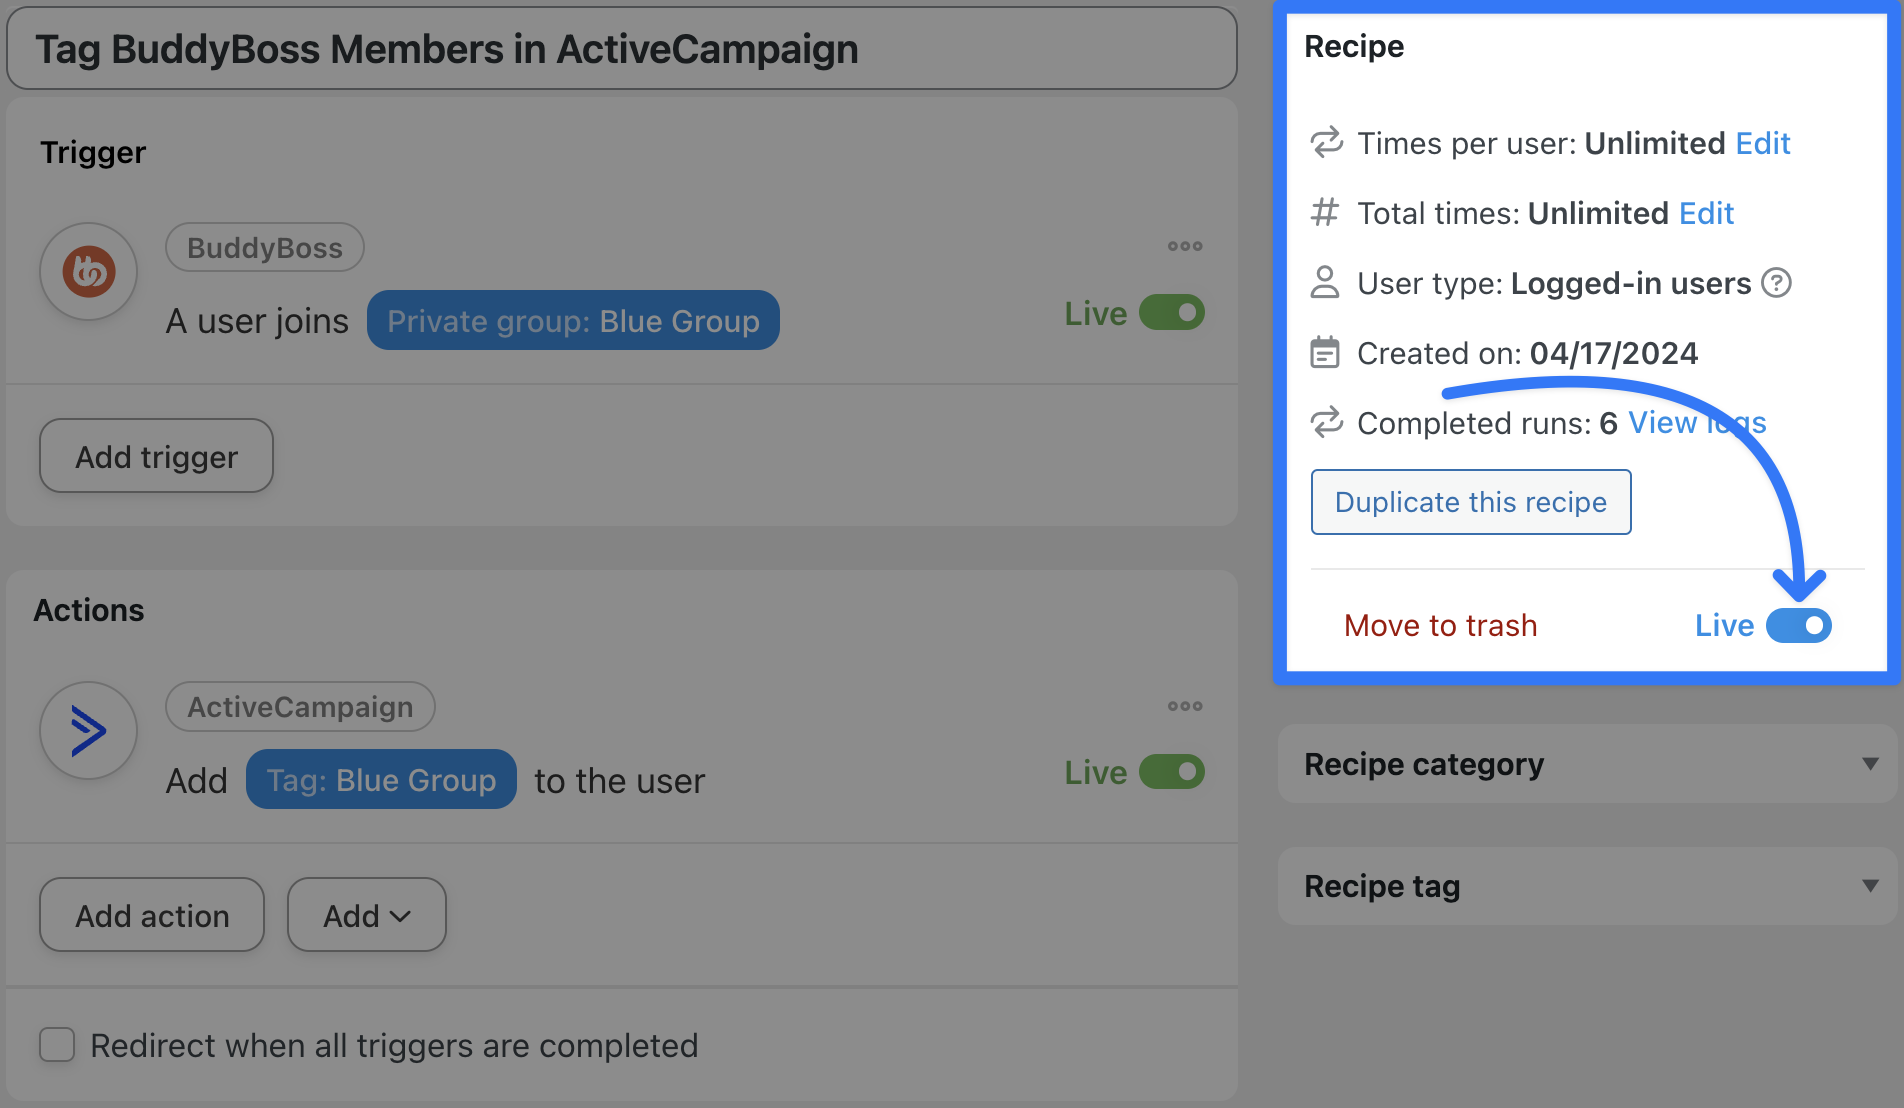
In the recipe pictured above, for example, we’re able to add tags to our BuddyBoss members in ActiveCampaign whenever they join a particular group.
Let’s take a look at how we did it.
Step 1: Create a New Recipe
From your WordPress Admin Dashboard, navigate to Automator > Add new recipe. In the pop-up window that appears, select Logged-in users.

Step 2: Name Your Recipe
Just like a good BuddyBoss group, recipes in Automator need cool names. Give your recipe a name that makes it easy to recognize at a glance. For example, we’ve named this recipe “Tag BuddyBoss Members in ActiveCampaign”. Alright, it’s not the coolest name—but it’s pretty descriptive.
Step 3: Configure Your Trigger(s)
In the Trigger panel, from the menu of available integrations, select BuddyBoss.

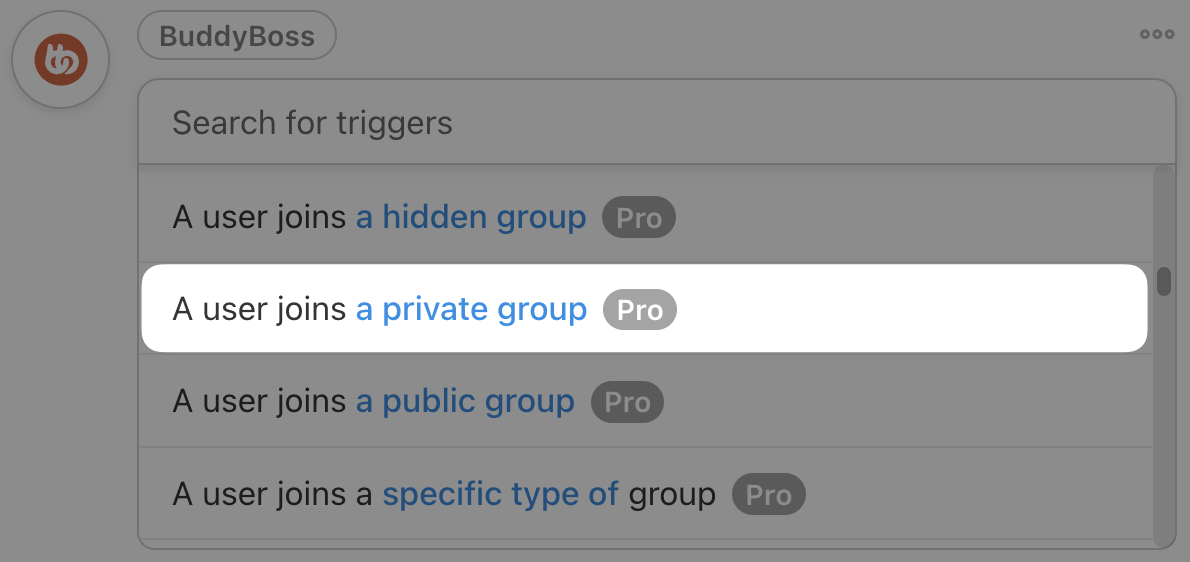
Automator has well over three dozen triggers for BuddyBoss (and if you need more, just let us know). From the dropdown list that appears, select your desired trigger. For example, we want to segment our BuddyBoss members in ActiveCampaign by group. As such, we’ve selected the trigger A user joins a private group.
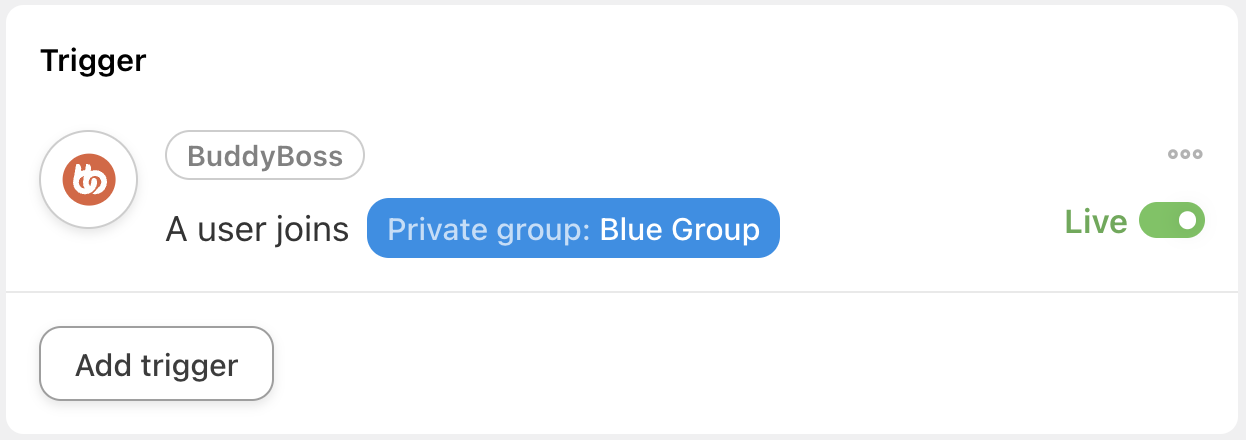
If your selected trigger had highlighted text in blue, then Automator will prompt you to make a selection. Our trigger, for example, has prompted us to select a group.
When you’re finished, click Save. Your completed trigger should look something like this:
Step 4: Configure Your Action(s)
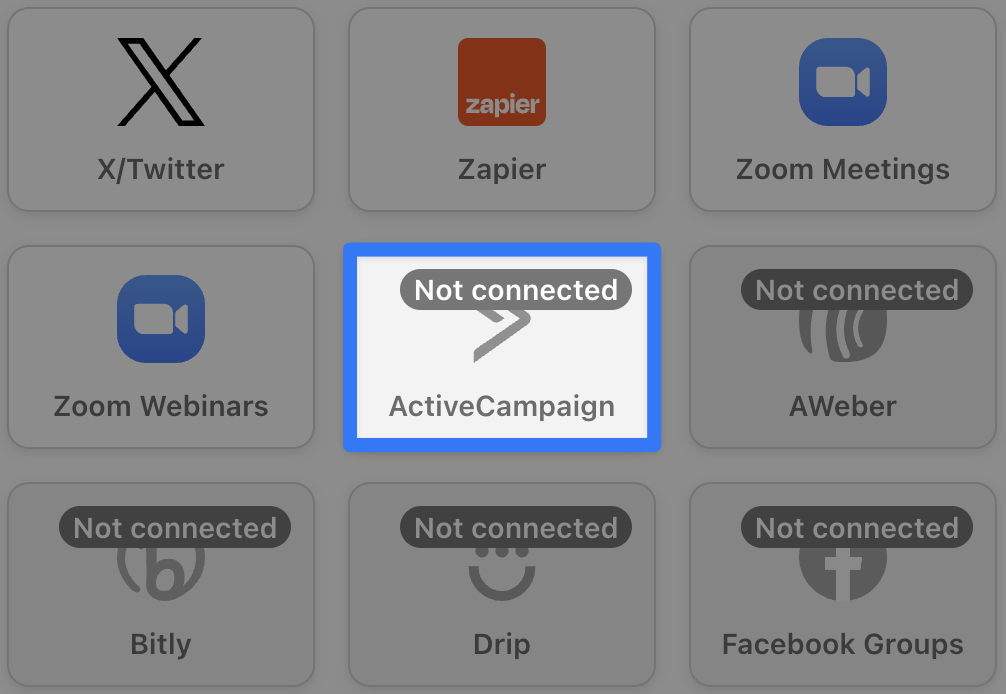
In the Actions panel, click Add action and select ActiveCampaign from the menu of available integrations.
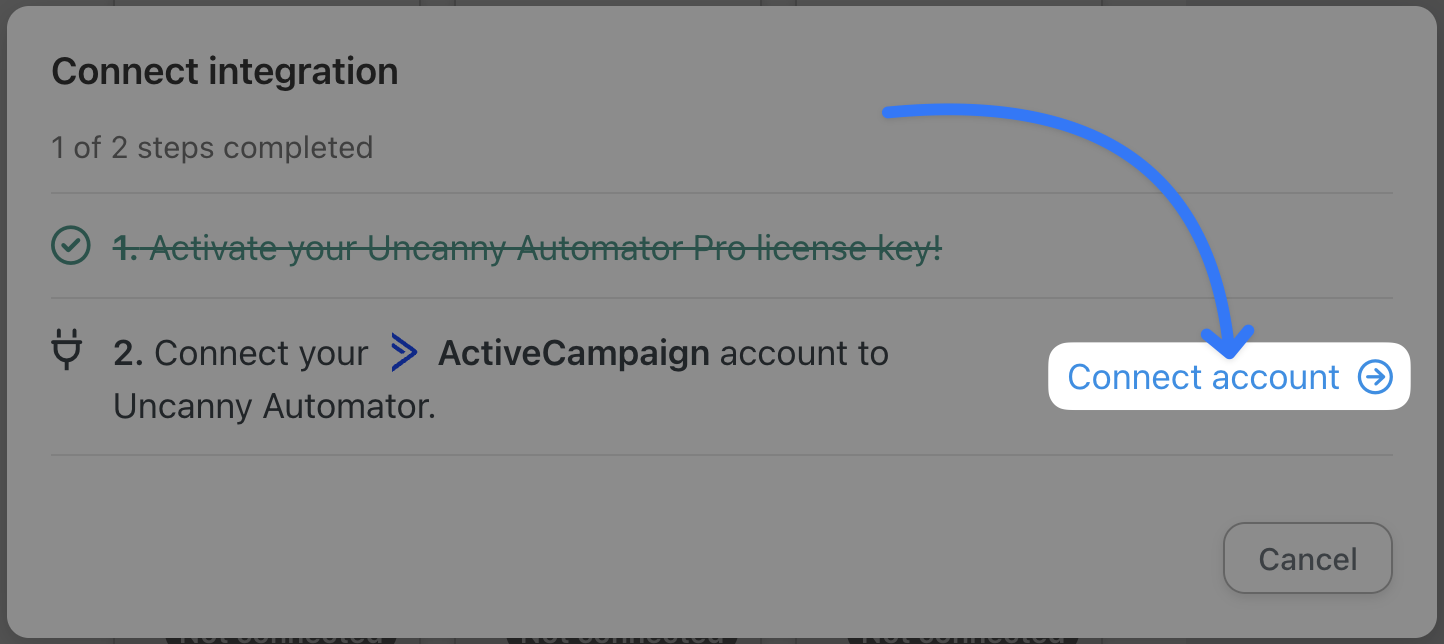
If you haven’t yet connected your ActiveCampaign account, then a pop-up window will appear. Click Connect account.
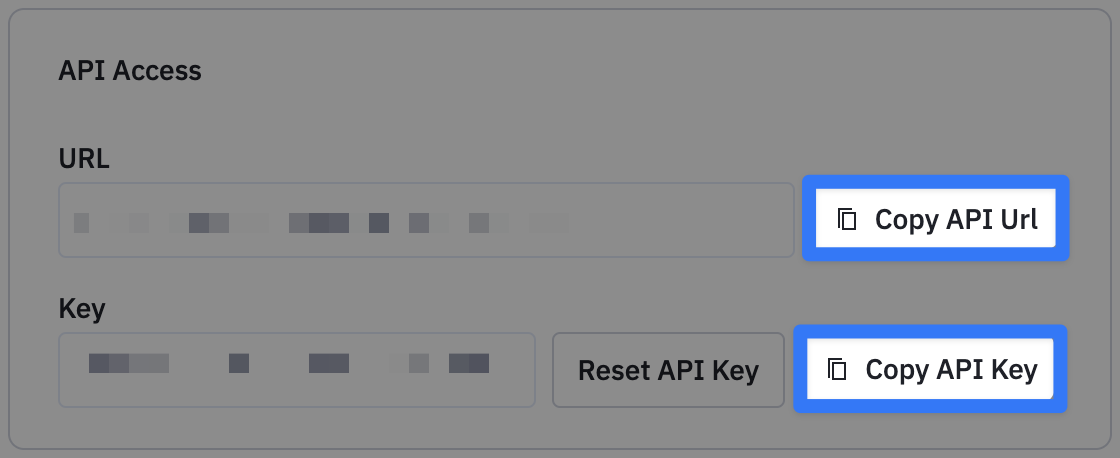
Another pop-up window will appear, prompting you to enter your Account URL and API key. To find these, go to your ActiveCampaign account and navigate to Settings > Developer. Copy the URL and API key.
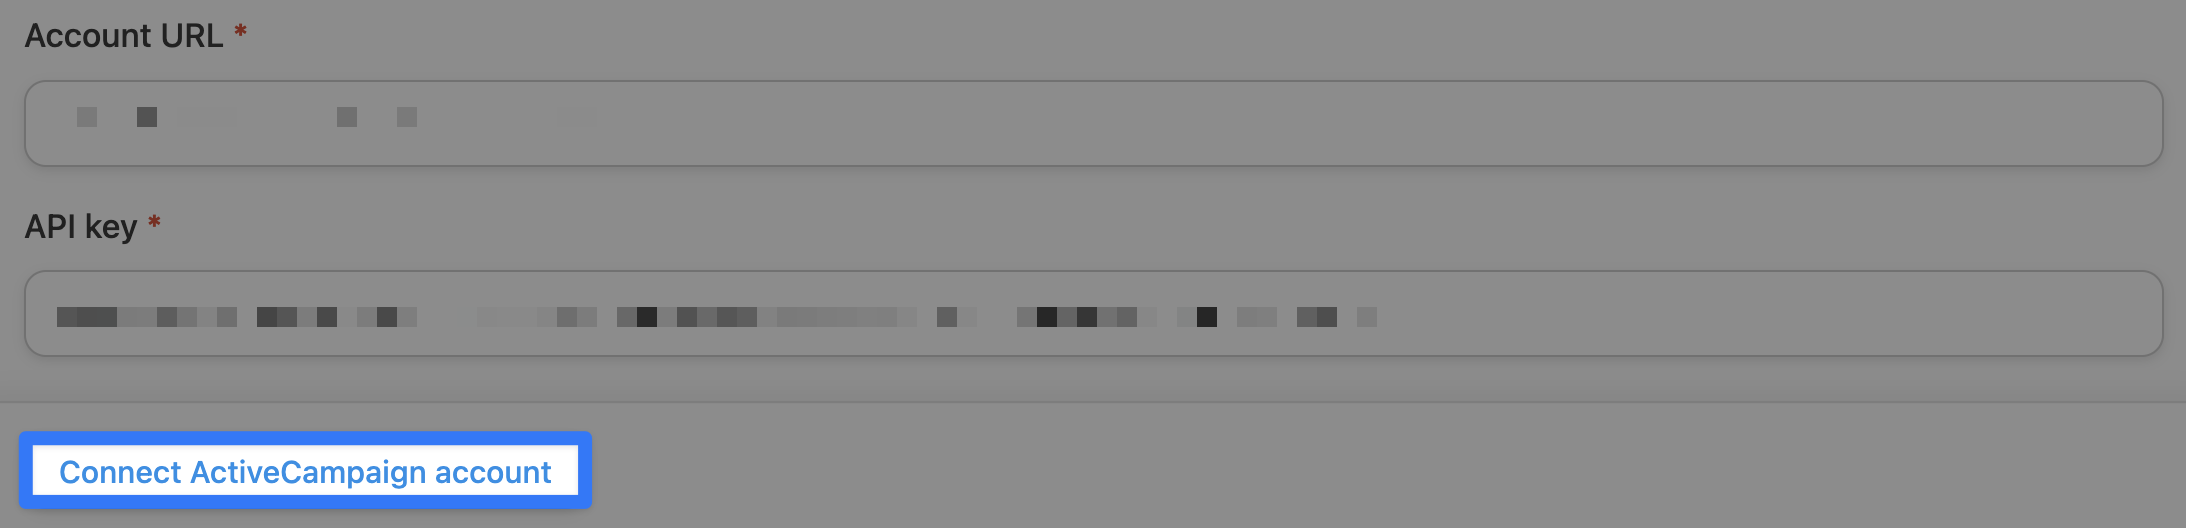
Paste the information into the corresponding fields in the Automator pop-up window. When you’re finished, click Connect ActiveCampaign account.
Next, click Save Settings and return to the recipe editor.
From the dropdown list appears, select Add a tag to the user.
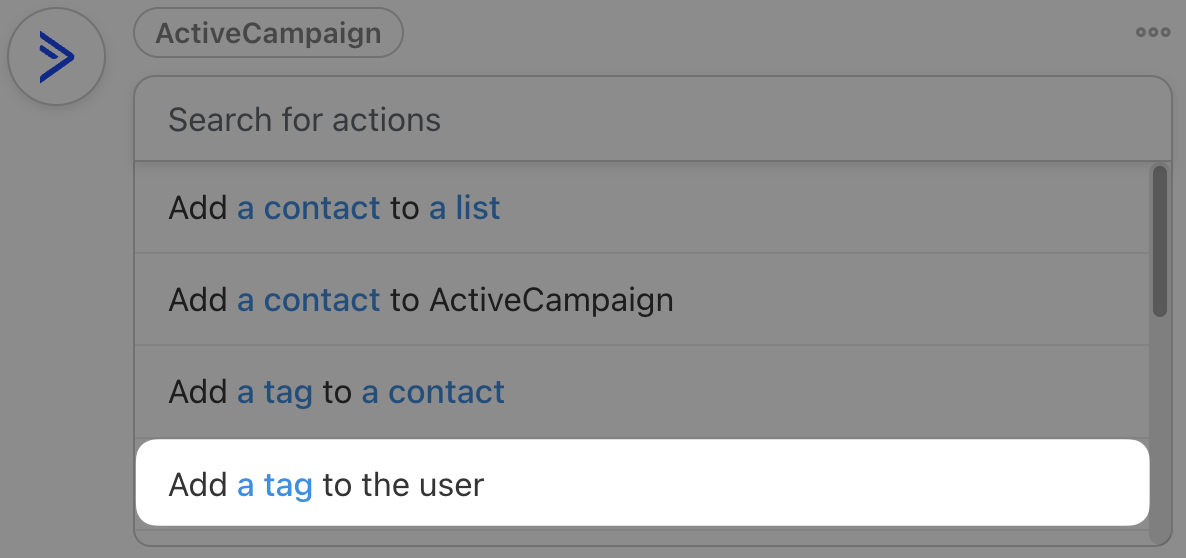
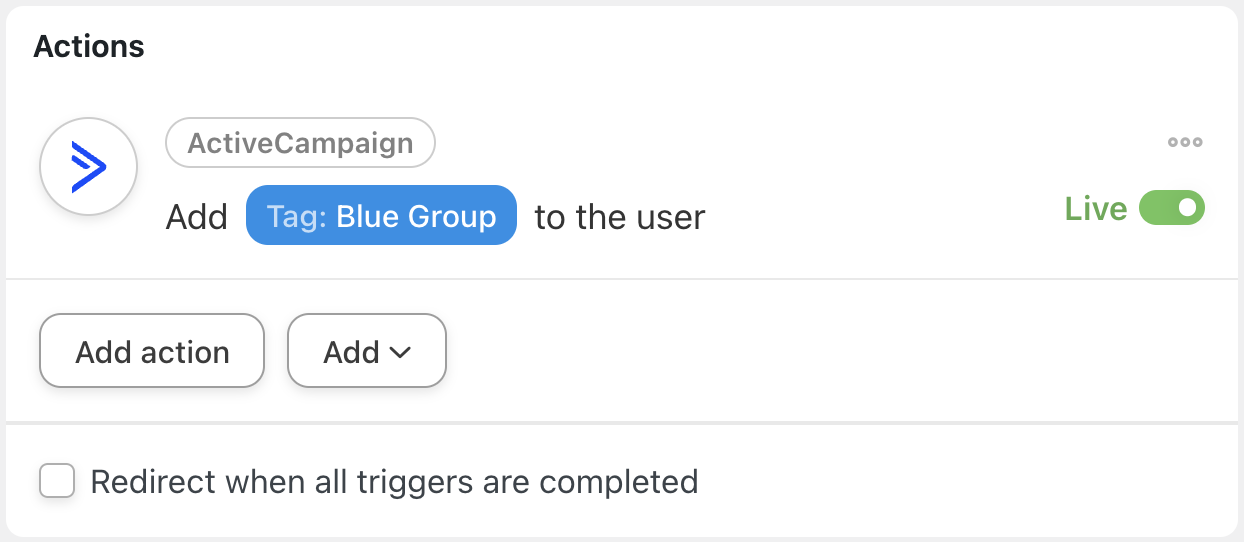
Automator will prompt you to select the tag you want to add to the user’s email in ActiveCampaign. Select the tag that corresponds to the BuddyBoss group from Step 3.
Once you’re finished, click Save. Your completed action should look something like this:
Step 5: Go Live!
You’re just about ready to connect ActiveCampaign to BuddyBoss. All that’s left for you to do now is toggle the recipe from Draft to Live.
That’s it! Now that you’ve gotten a hang of the basics, let’s take a look at what else you can do with this powerful integration.
Manage Your ActiveCampaign Lists from BuddyBoss
One of the coolest Automator features that you’ll love is the ability to run Loops. These are essentially bigger automations that cycle through users or posts and perform actions on them. Take the recipe pictured below for example.
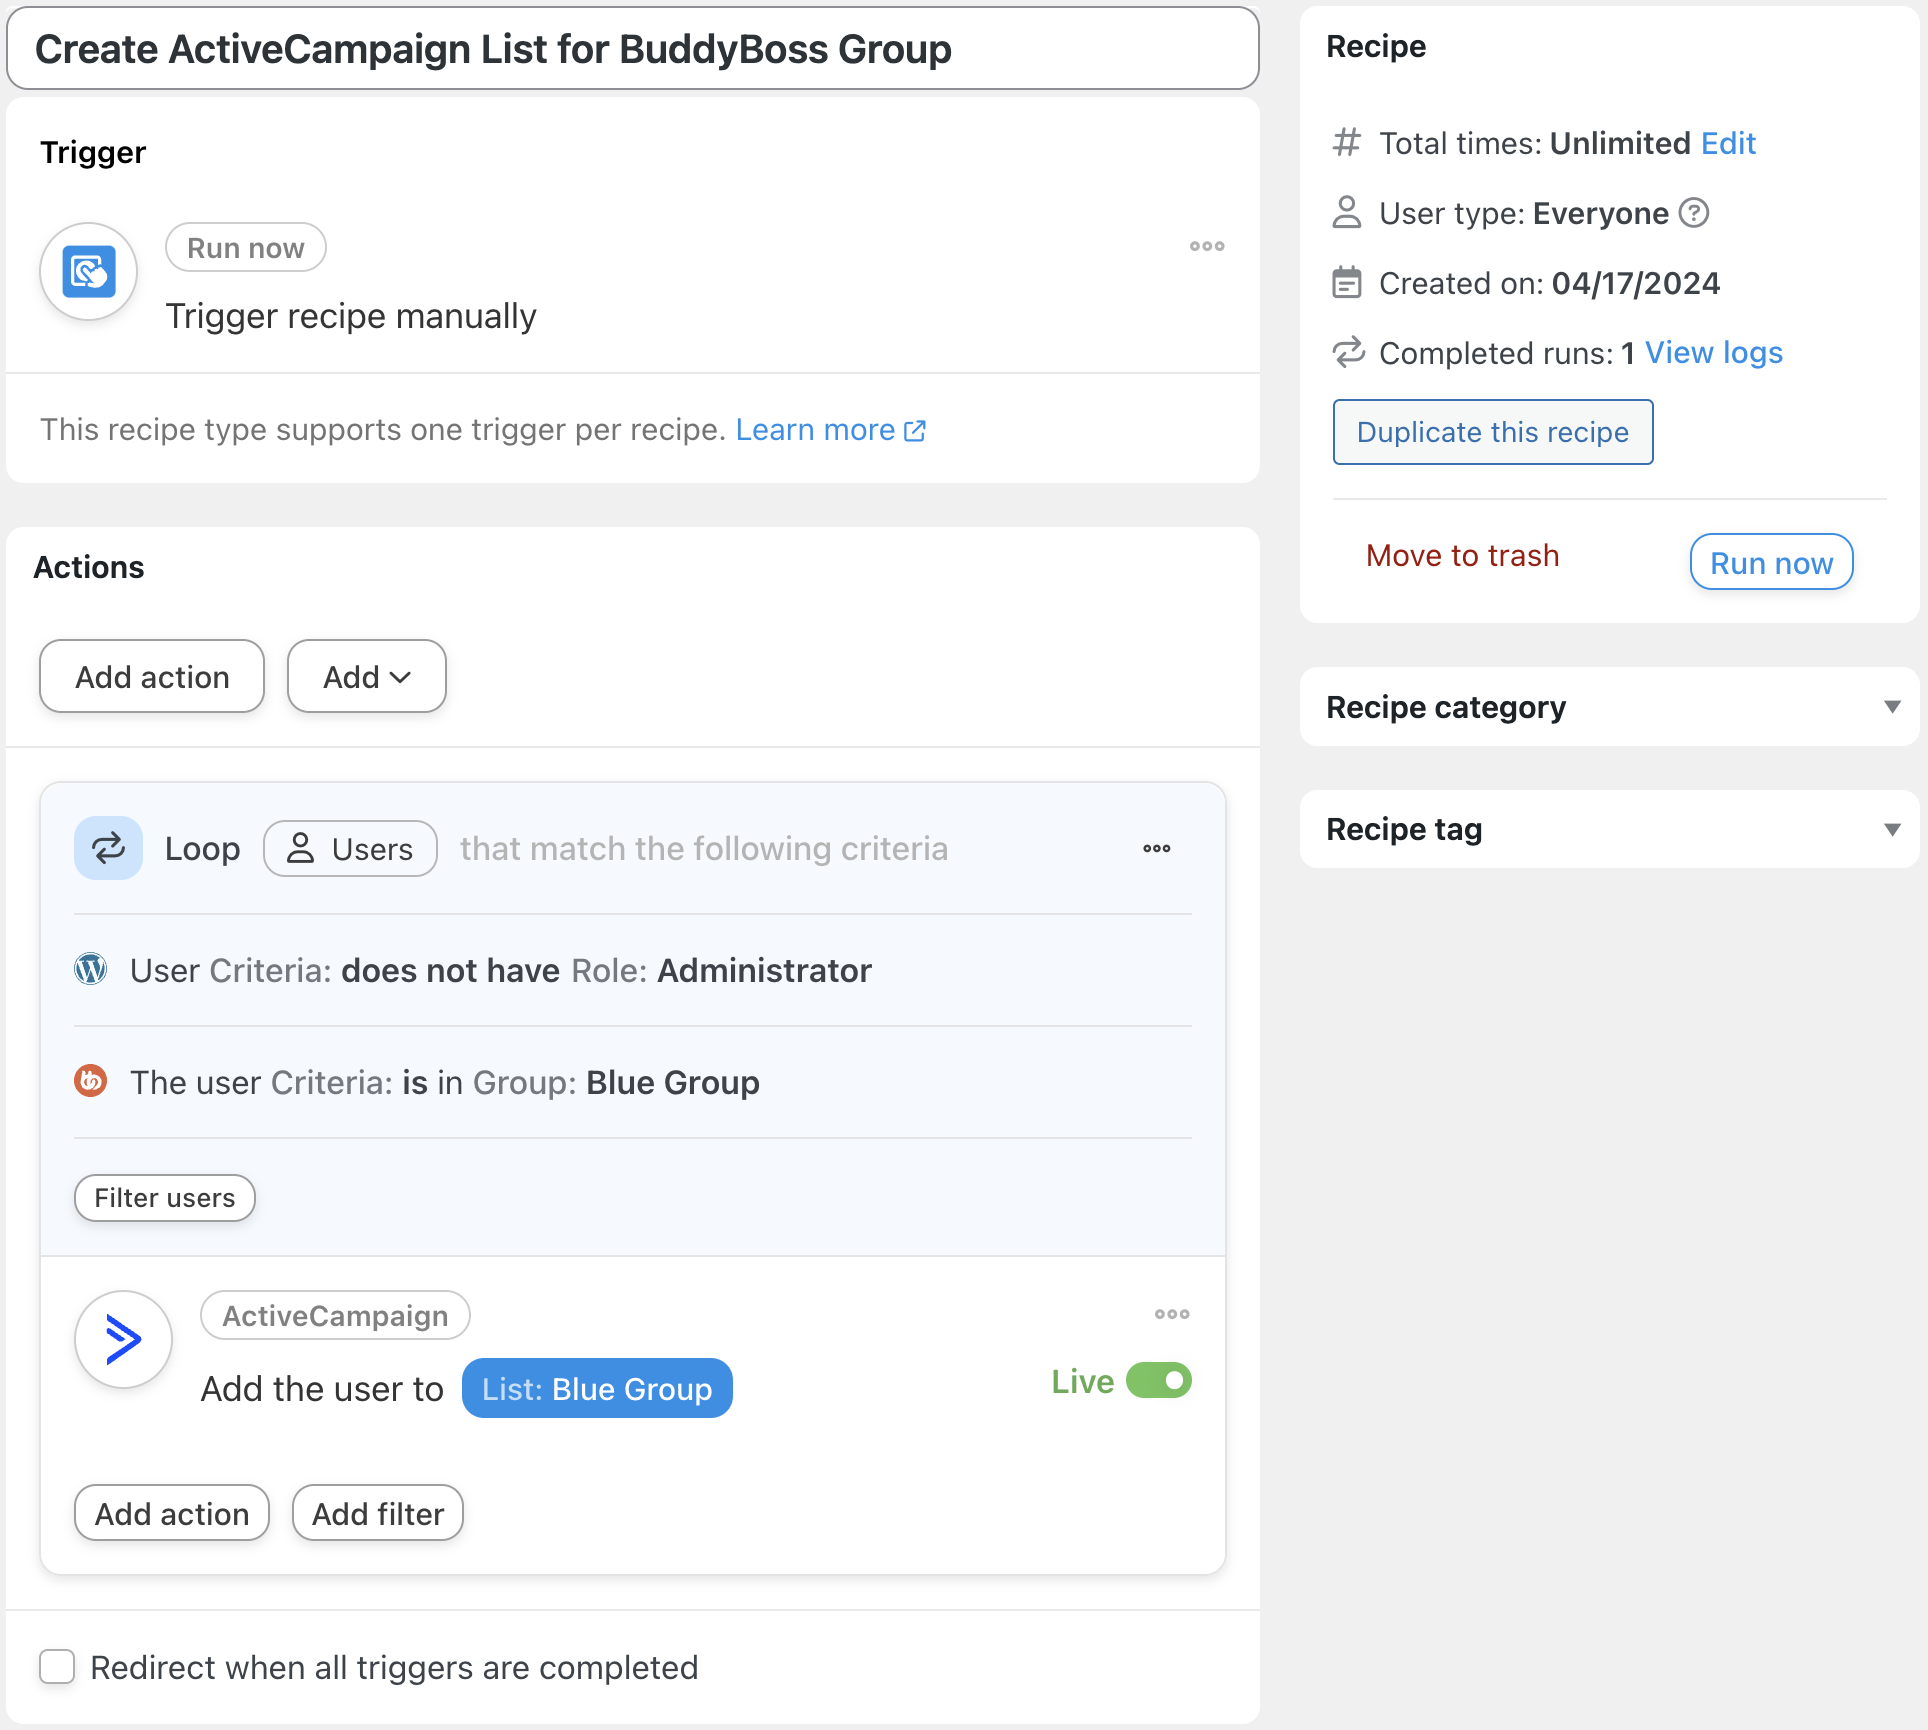
With just the click of a button, we’re able to populate an entire ActiveCampaign list with the contact information of users in a BuddyBoss group.
Want to know how we did it? It’s easier than you think.
Step 1: Create a New Recipe
From your WordPress Admin Dashboard, navigate to Automator > Add new recipe. In the pop-up window that appears, select Everyone.
Step 2: Name Your Recipe
Give your recipe a name that makes it easy to recognize at a glance. For example, we’ve named this recipe “Create ActiveCampaign List for BuddyBoss Group”.
Step 3: Configure Your Trigger(s)
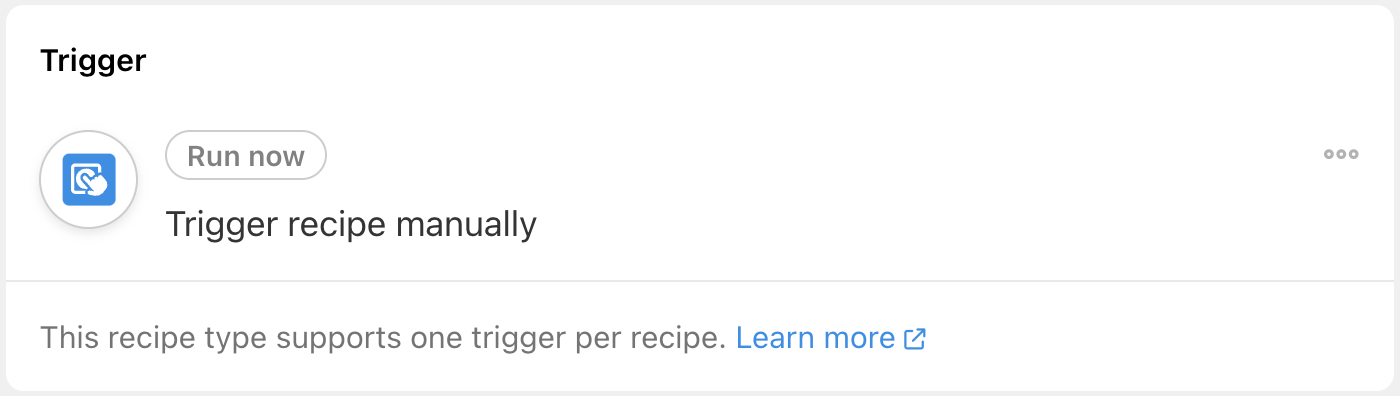
In the Trigger panel, from the menu of available integrations, select Run now. From the dropdown list that appears, select Trigger recipe manually. When you’re finished, your trigger should look like this:
Step 4: Configure Your Action(s)
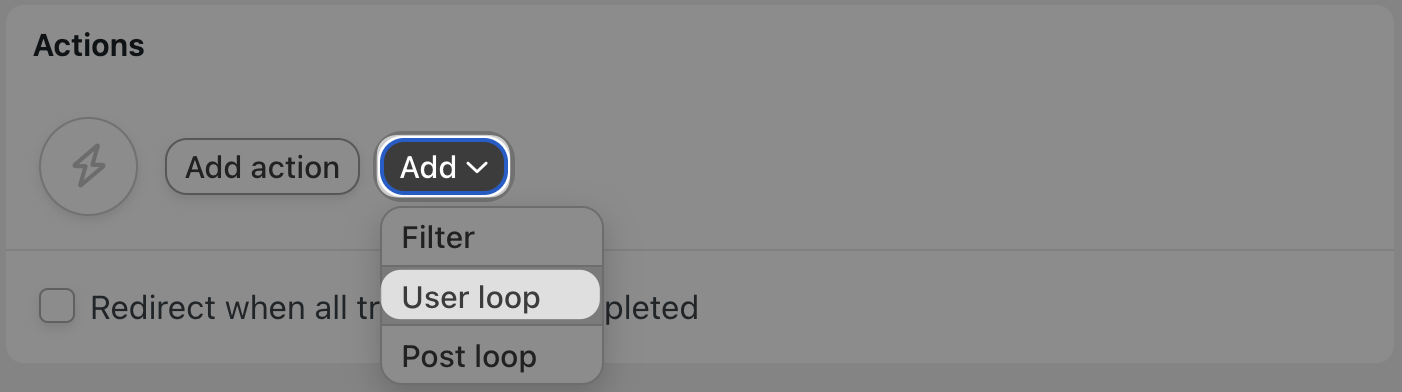
In the Actions panel, click Add and select User loop from the dropdown list.
Once you’re finished, click Confirm.
Now that you’ve selected the users that the action(s) will run on, you can add the actions themselves.
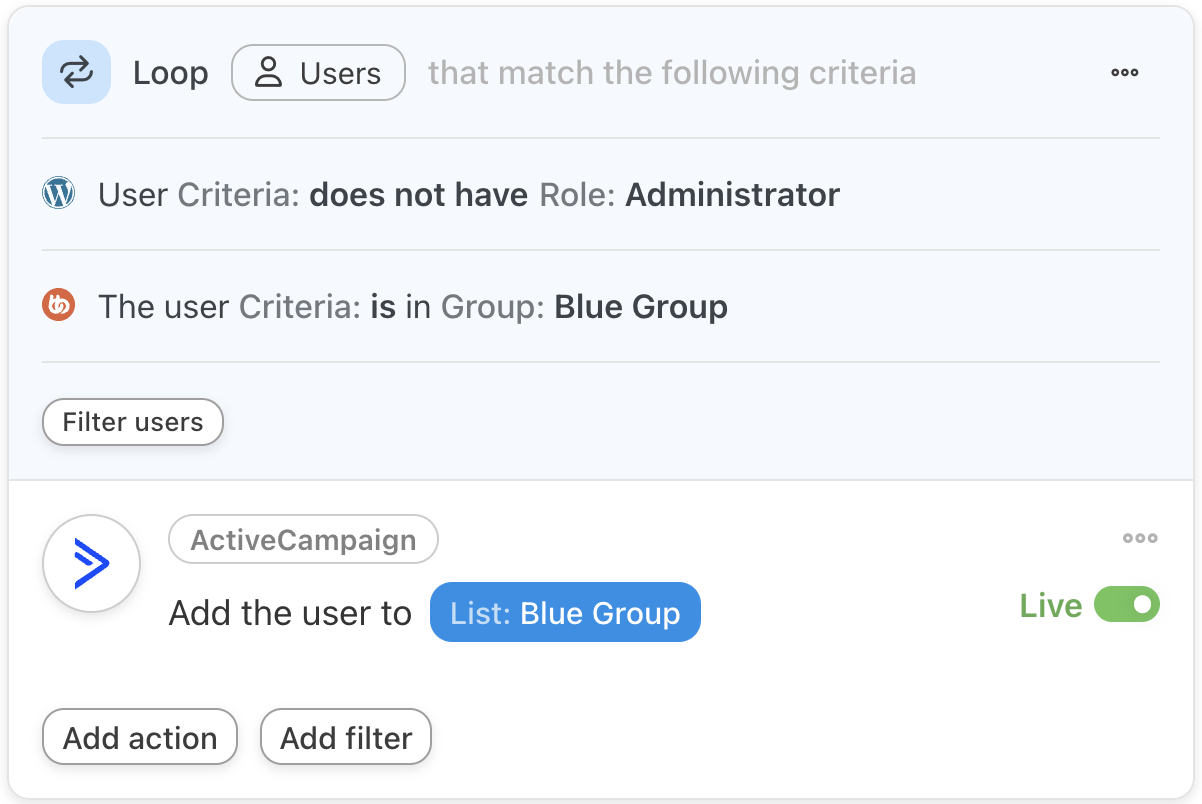
Simply click Add action within the Loop pane and select ActiveCampaign from the menu of available integrations. From the dropdown list that appears, select Add the user to a list, select the ActiveCampaign list to which you would like to add these users and click Save.
Once you’re finished, your Loop pane should look something like this:
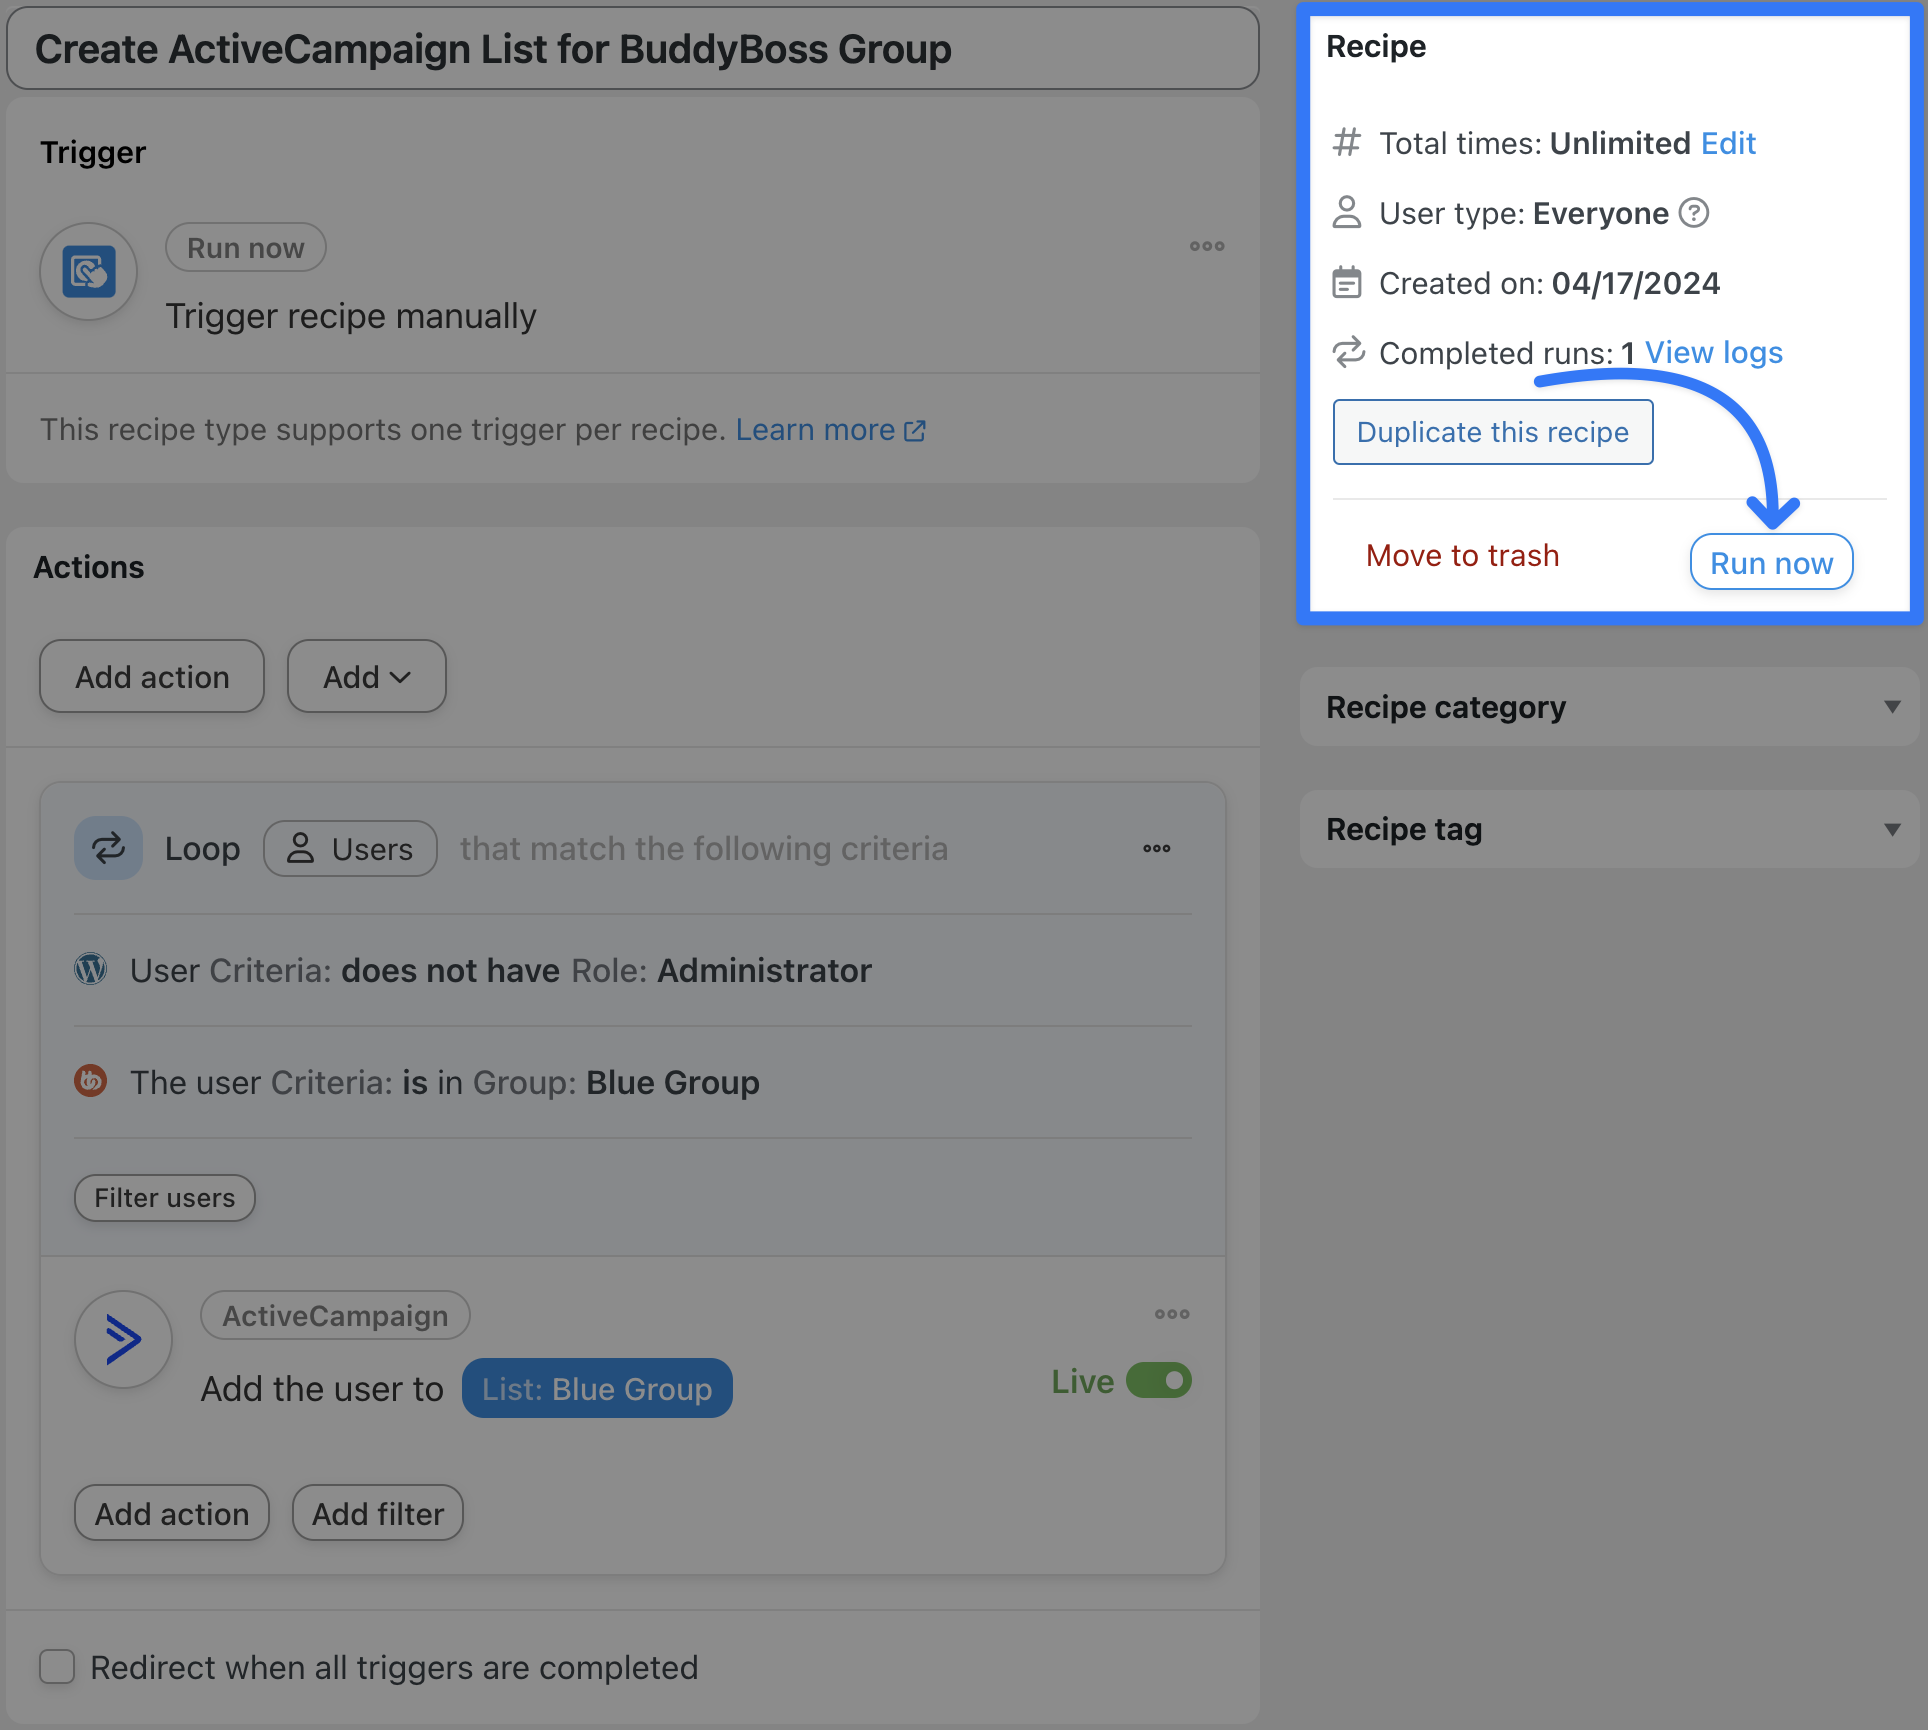
Step 5: Populate Your List!
You’re just about done. All that’s left for you to do is to click Run now and sit back as Automator populates your ActiveCampaign list!
Use this powerful automation to add contacts to ActiveCampaign, segment them and build your community!
Connect BuddyBoss to ActiveCampaign
So far, we’ve shown you how simple it is to connect ActiveCampaign to BuddyBoss. But what about connecting BuddyBoss to ActiveCampaign?
Automator supports ActiveCampaign triggers; meaning that changes you make to contacts in ActiveCampaign can affect changes on your WordPress website.
If you want to know how to set up these ActiveCampaign triggers, you can find a detailed guide in our Knowledge Base. Alternatively, find the abridged instructions below:
- From your WordPress Admin Dashboard, navigate to Automator > Settings > App integrations > ActiveCampaign.
- In the ActiveCampaign integration panel, toggle Enable triggers to the “on” position. Copy the Webhook URL provided to your clipboard.
- From your ActiveCampaign account, navigate to Settings > Developer and click Manage webhooks. In the new panel, click Add webhook and choose your webhook type (we recommend Standard).
- Fill out the fields, making sure to paste the Webhook URL from Automator into the URL field. When you’re finished, click Save.
- Return to your Automator window and click Save Settings. You can now find the ActiveCampaign triggers under the recipe type Everyone.
Ultimately, how you choose to use these triggers will depend on your workflows. For example, you could use the triggers to send a private subscribe/unsubscribe confirmation message to BuddyBoss members.
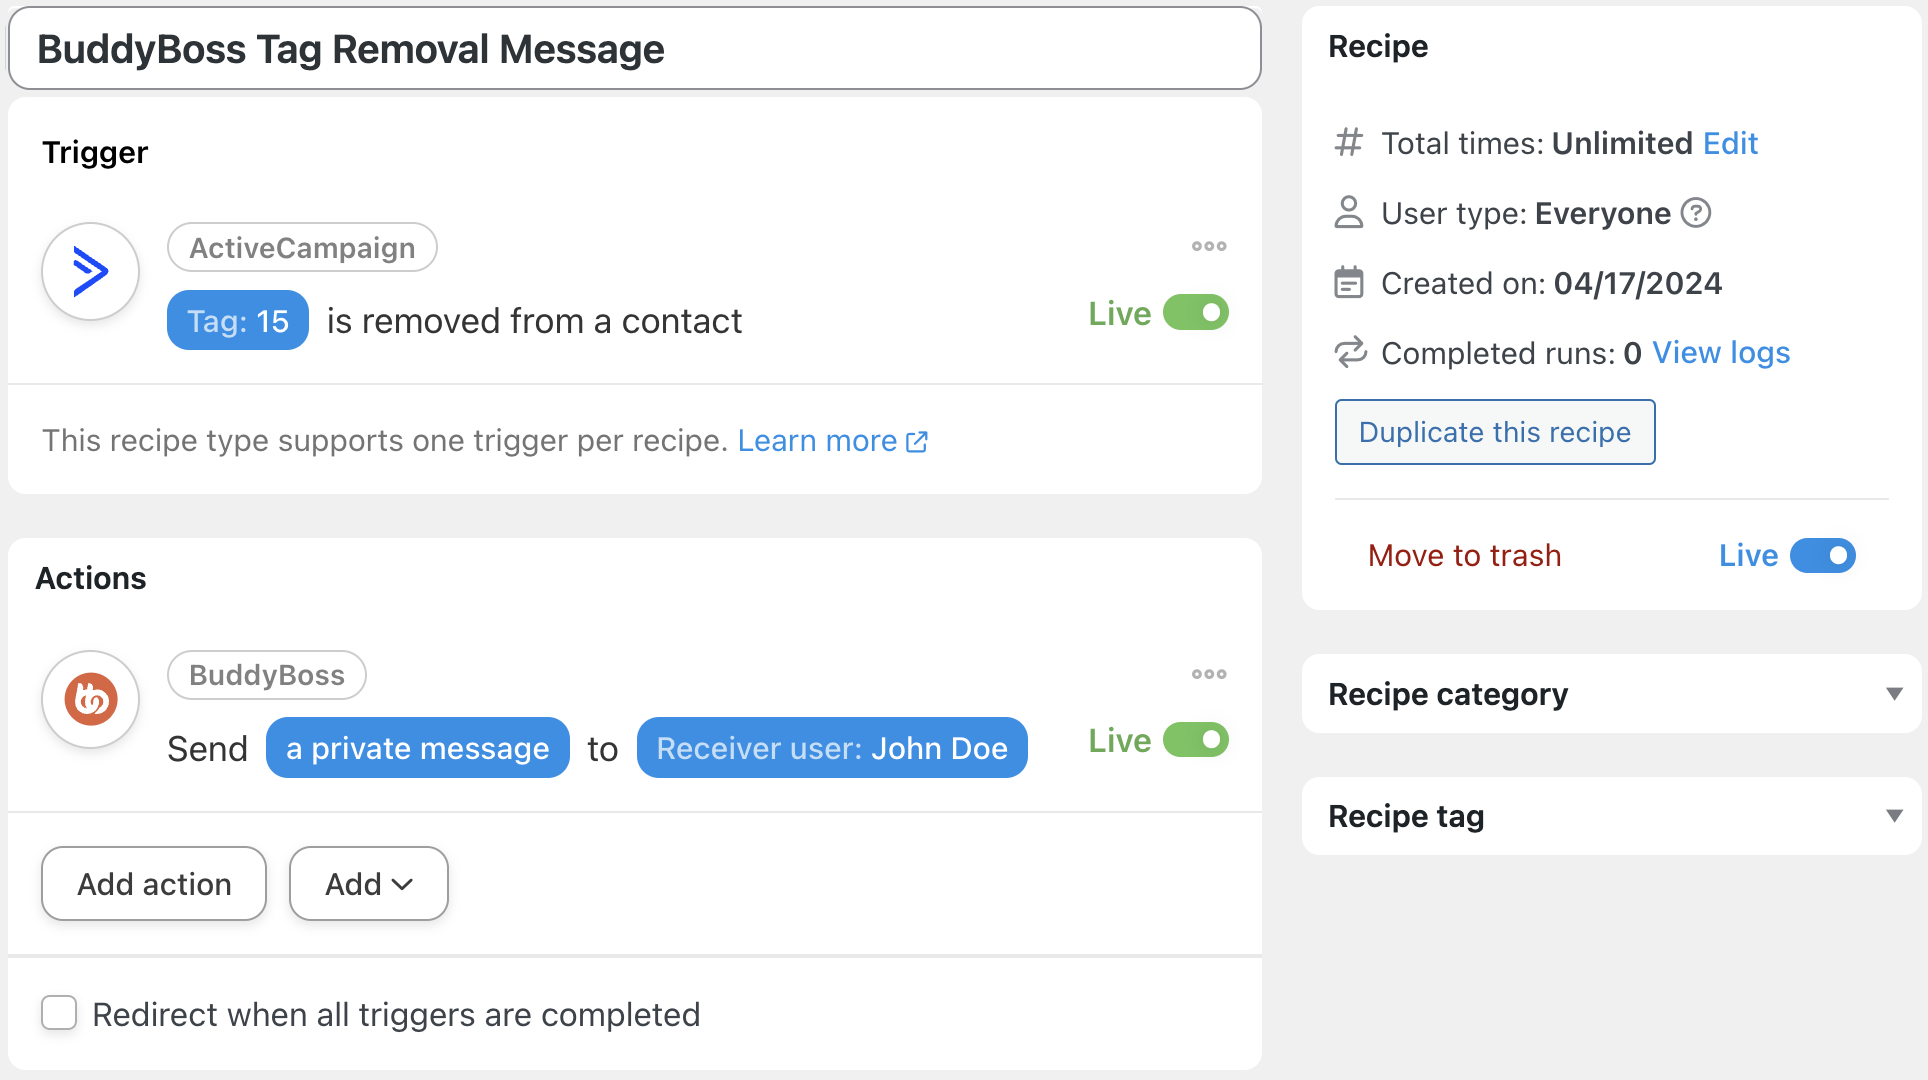
Now tell me that isn’t an awesome two-way integration!
Frequently Asked Questions
Conclusion
That’s all! You now know all there is to know about connecting ActiveCampaign to BuddyBoss—and vice versa!
In this detailed walkthrough, we showed you how to tag your ActiveCampaign contacts based on their BuddyBoss activity. We also showed you how to populate entire ActiveCampaign lists with nothing but the click of a button and a few nifty filters. Most importantly, however, we hope that we left you eager to try out some ActiveCampaign and BuddyBoss integrations of your own.
Have any other questions? Drop us a line in the comments section below.
Until next time, happy automating!

Related Posts


This Post Has 0 Comments