Revive old WordPress posts with AI and Uncanny Automator. Learn how to reverse content decay…
Connect Notion to WordPress: Create More Efficient Workflows with Automator
Seamlessly integrate Notion with WordPress using Uncanny Automator. Learn how to automate your workflows, manage content, and keep your tasks in sync across platforms in just a few clicks.
Are you looking to streamline your content management and task coordination workflows between Notion and your WordPress site? Look no further!
With Uncanny Automator, you can easily connect Notion to WordPress, creating a powerful integration that enhances your productivity and automates routine tasks.
In this step-by-step guide, we’ll show you how to set up this seamless integration in just a few clicks—no coding required. By the end of this tutorial, you’ll be able to automatically sync content, manage tasks, and much more, all while saving time and reducing manual effort.
Let’s dive in and unlock the full potential of Notion and WordPress together!
Connect Notion to WordPress with Automator
WordPress is the leading CMS for businesses, bloggers and entrepreneurs of all kinds. But, we probably don’t have to tell you: even with all of the tools that WordPress has, it’s a lot of content to manage. That’s where a web app like Notion comes in to help you manage your tasks, projects and workflows all while coordinating with your team.
Now, with a plugin like Uncanny Automator, you can harness Notion’s organizational power for your WordPress content.
You may already know Automator as the #1 automation and integration tool for WordPress websites. Using simple combinations of triggers and actions called recipes, you can connect all of your favorite apps and plugins to automate your workflows and save time and costs.
While Automator is unquestionably the best integration tool for WordPress users, there are some features that make it particularly adept at connecting Notion to WordPress.
- Accuracy: Automation means accuracy. When you connect Notion to WordPress with Automator, you can rest assured that all of the important information related to your content and projects is transferred with 100% accuracy. Features such as tokens ensure that your WordPress data is always handy and always accurate.
- Ease-of-Use: Automator is a seriously powerful plugin. But don’t worry. All of that power is packed into a user-friendly click-and-play interface with a learning curve so gentle that it’s barely a mound.
- Affordability: Automator’s pricing model is a significant advantage for users who need extensive automation without breaking the bank. Unlike other tools that charge per automation, Automator offers a straightforward pricing structure with no per-automation fees, meaning you can create as many workflows as you need without worrying about the cost.
- Customization: A bevy of powerful features such as tokens, filters, schedules and formatters means that you can tailor any Notion and WordPress integration to suit your workflows. No other integration tool offers as many ways to customize your integrations as Automator.
- Scalability: Automator’s Post Loops and User Loops features give you the ability to manage your WordPress content at scale. Whether you need to create, edit or update your Notion tasks in bulk, Automator can help you do it with the click of a button.
Ready to connect Notion to WordPress? Grab your Automator Pro license now and take advantage of these powerful features—and more>>>.
Not ready to go Pro quite yet? You can still follow the rest of this tutorial with Automator’s FREE FOREVER version. Simply download and activate the plugin then register your account for a limited number of app credits. You’ll be able to use these credits towards creating integrations with web-based apps such as Notion, OpenAI, ActiveCampaign, Slack and more!
Create a Database Item in Notion from a WordPress Post
Now that you have your Automator Pro license, let’s take a look at creating our first Notion and WordPress integration.
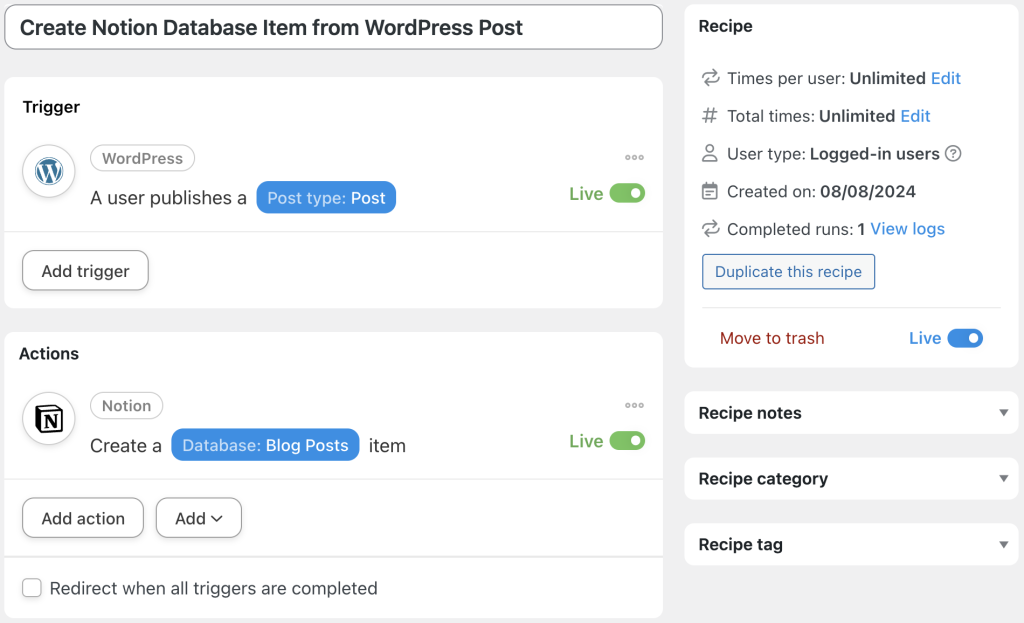
In the recipe pictured above, we’re able to create a database item in Notion, complete with all properties, whenever we publish a new blog post. You can, of course, change this recipe to include any type of WordPress post, from products to events to WooCommerce orders or even LearnDash courses and lessons.
Step 1: Create a New Recipe
From your WordPress Admin Dashboard, navigate to Automator > Add new recipe. In the popup window that appears, select Logged-in users.
Step 2: Name Your Recipe
Give your recipe a name that makes it easy to recognize at a glance. For example, we’ve named this recipe “Create Notion Database Item from WordPress Post”.
Step 3: Configure Your Trigger(s)
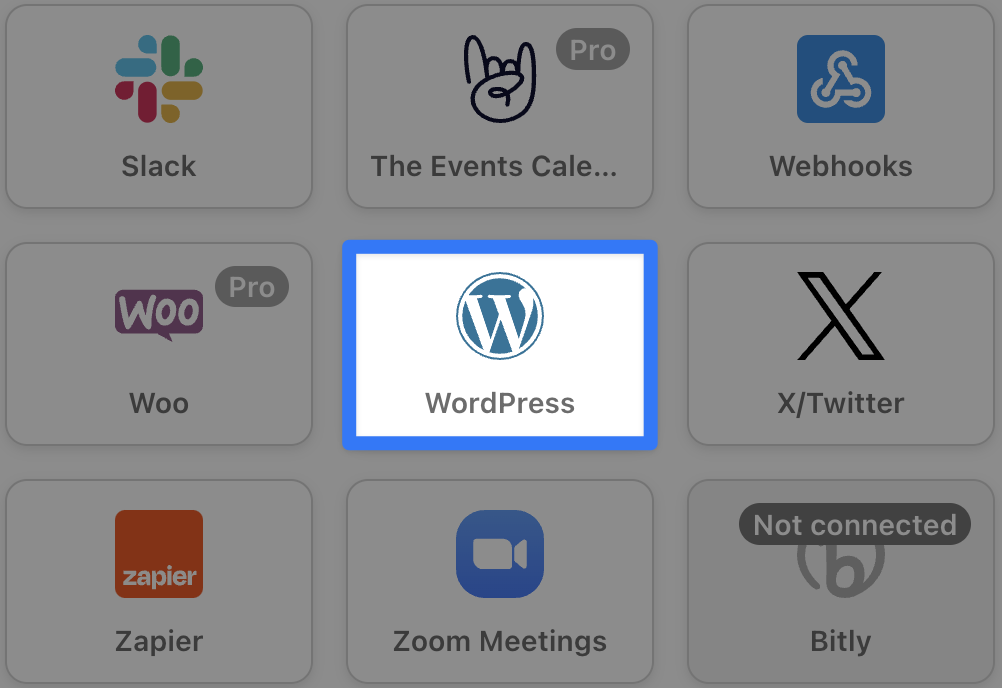
In the Trigger panel, from the menu of available integrations, select WordPress.
From the dropdown list that appears, select A user publishes a post.
Automator will then prompt you to select the Post type. You can select any type of post. For example, we have selected “Post”.
Once you’re finished, click Save. Your completed trigger should look something like this:
Step 4: Configure Your Action(s)
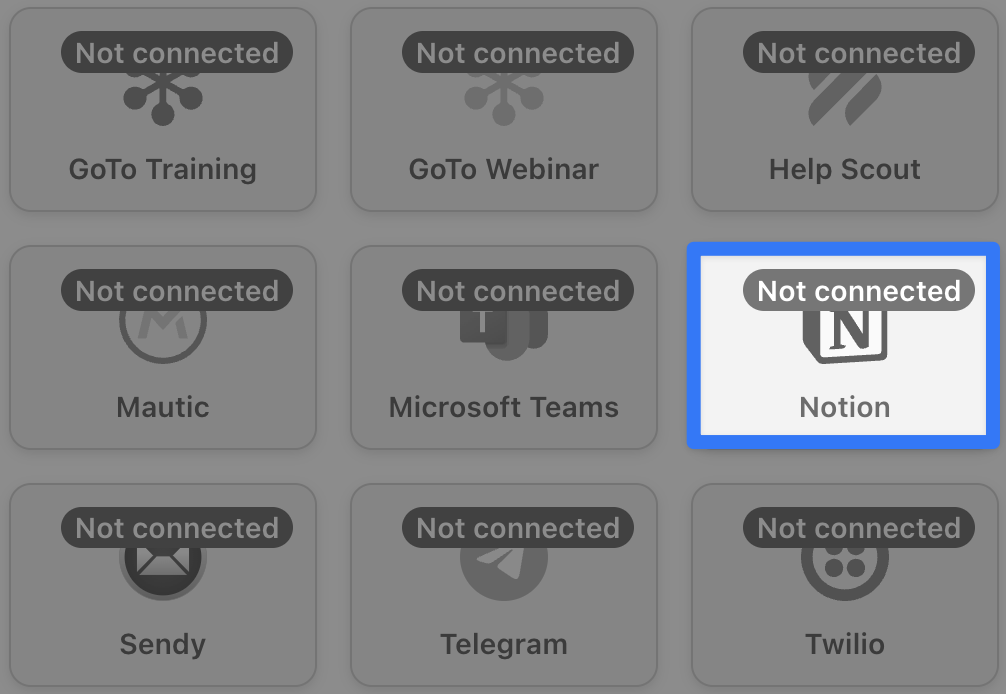
In the Actions panel, click Add action and select Notion.
If you haven’t already connected your Notion account, a modal will appear. Click Connect account and follow the prompts, including which Notion spaces, pages, etc. you want to grant Automator access to.
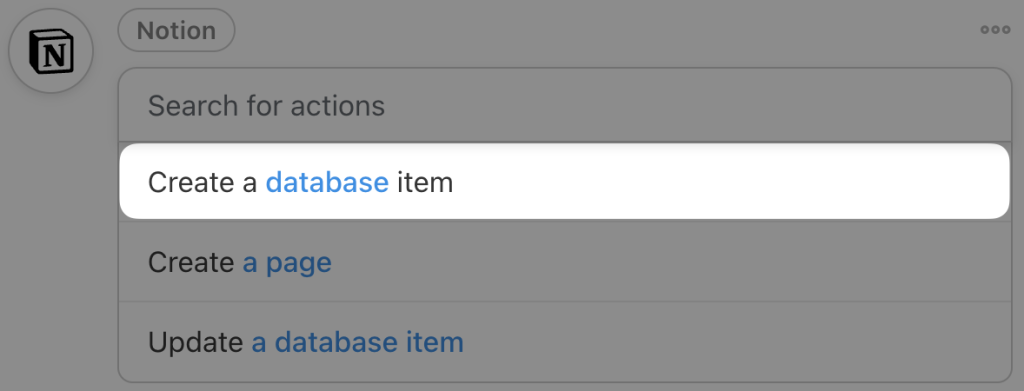
Once you’re finished, return to the recipe editor. From the dropdown list that appears, select Create a database item.
Automator will present you with a form. First, select the Database. Automator will then populate the Rows with fields for all of the database items’ properties.
We are going to use tokens (i.e., dynamic data pulled from your WordPress website and from within recipes) to fill out these fields.
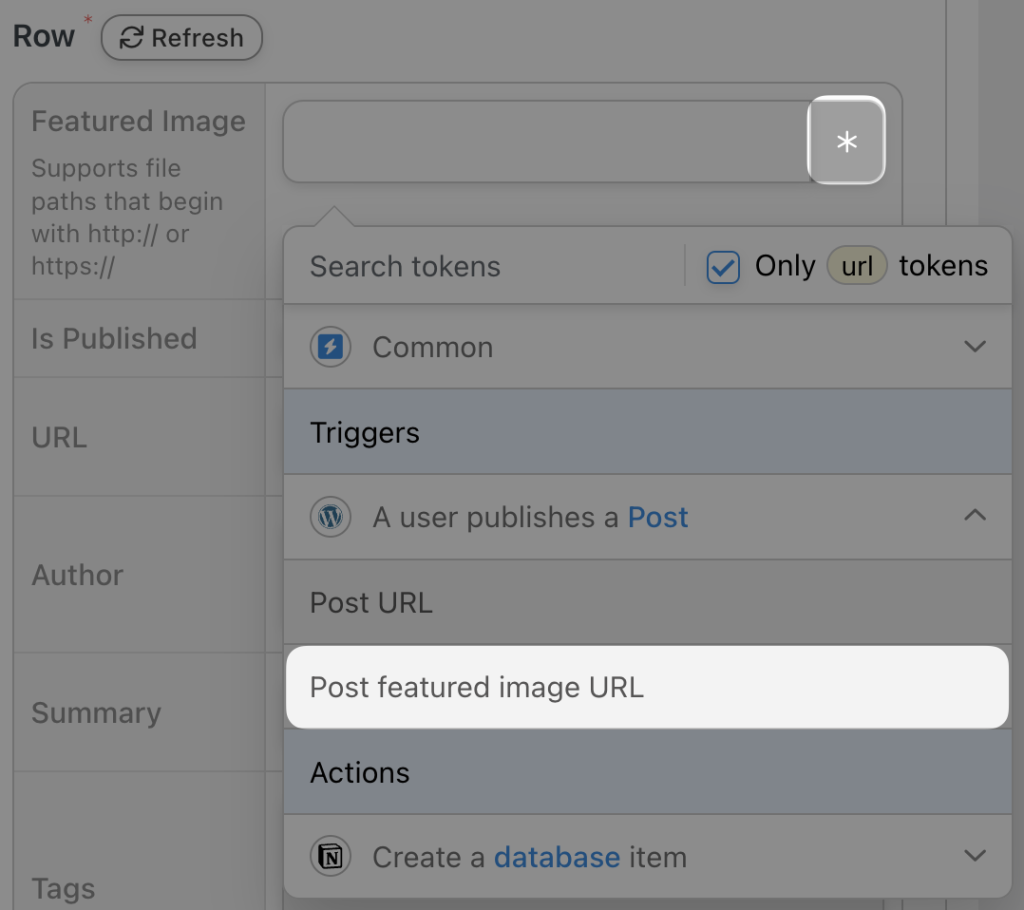
To use a token, click the Asterisk in a field and select the appropriate token from the dropdown list. For example, we have selected the token “Post featured image URL” for our “Featured Image” property.
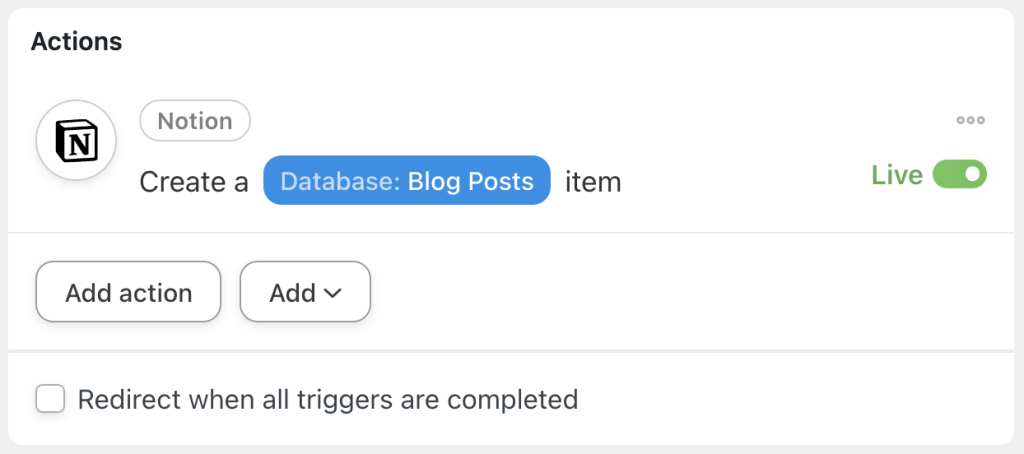
Fill out the remaining fields using tokens and/or static data. Once you’re finished, click Save. Your completed action should look something like this:
Step 5: Go Live!
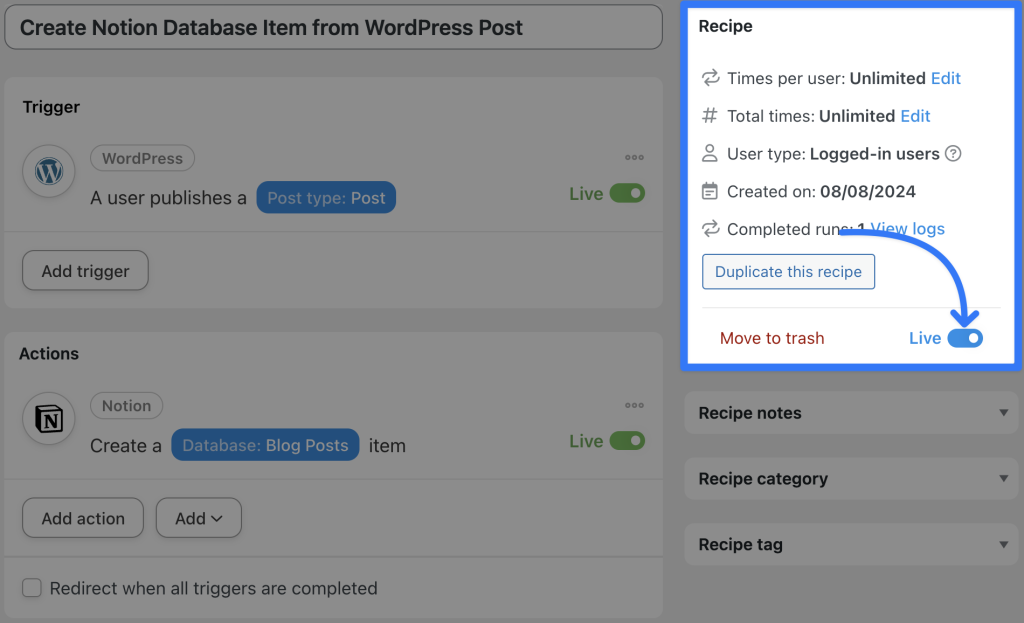
You’re just about ready to connect Notion to WordPress. All you need to do now is toggle the recipe from Draft to Live.
Update Notion Database Items in Bulk
As we’ve seen in the previous walkthrough, Automator can help you stay on top of your workflows. But, sometimes, the work piles up regardless.
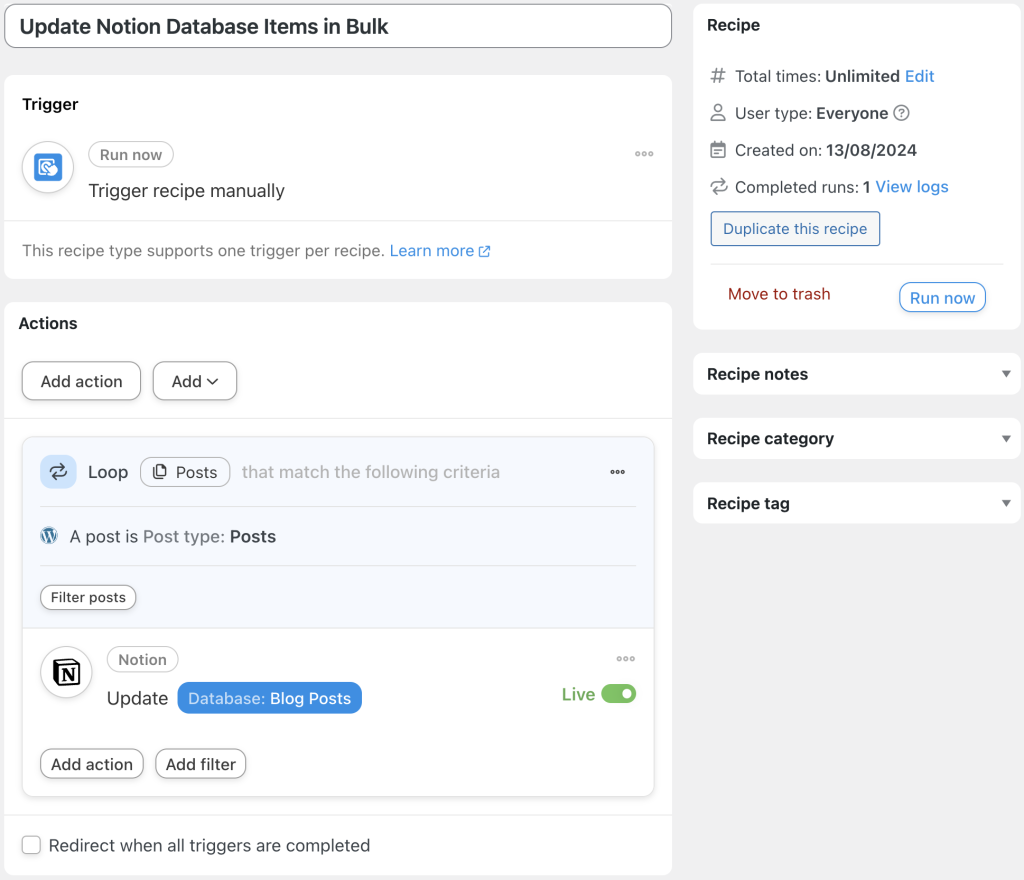
In the recipe pictured below, we used Automator’s Post Loops feature to update our Notion database items in bulk.
We can update any properties across hundreds or even thousands of database items with the click of a button. Follow the steps below to see how we did.
Step 1: Create a New Recipe
From your WordPress Admin Dashboard, navigate to Automator > Add new recipe. In the popup window that appears, select Everyone.
Step 2: Name Your Recipe
We’ve named this recipe “Update Notion Database Items in Bulk”.
Step 3: Configure Your Trigger(s)
In the Trigger panel, from the menu of available integrations, select Run now. From the dropdown list that appears, select Trigger recipe manually.
Your completed trigger should look like this:
Step 4: Configure Your Action(s)
In the Actions panel, click Add and select Post Loop.
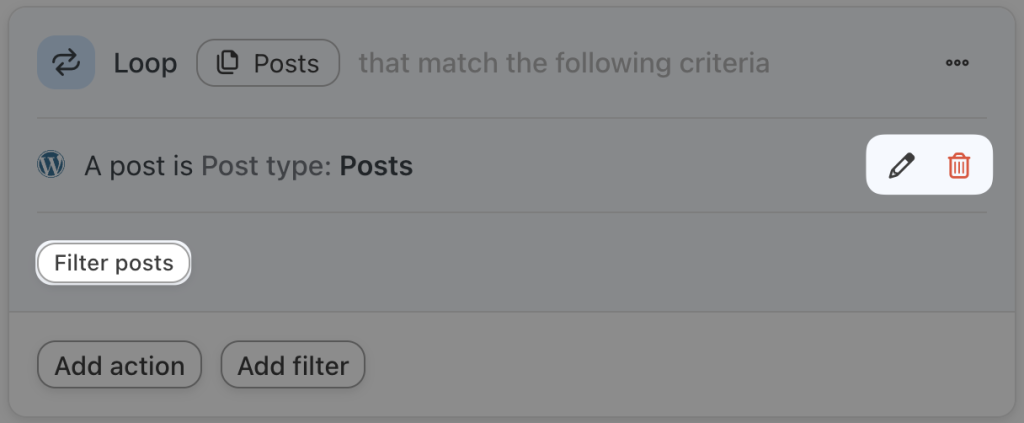
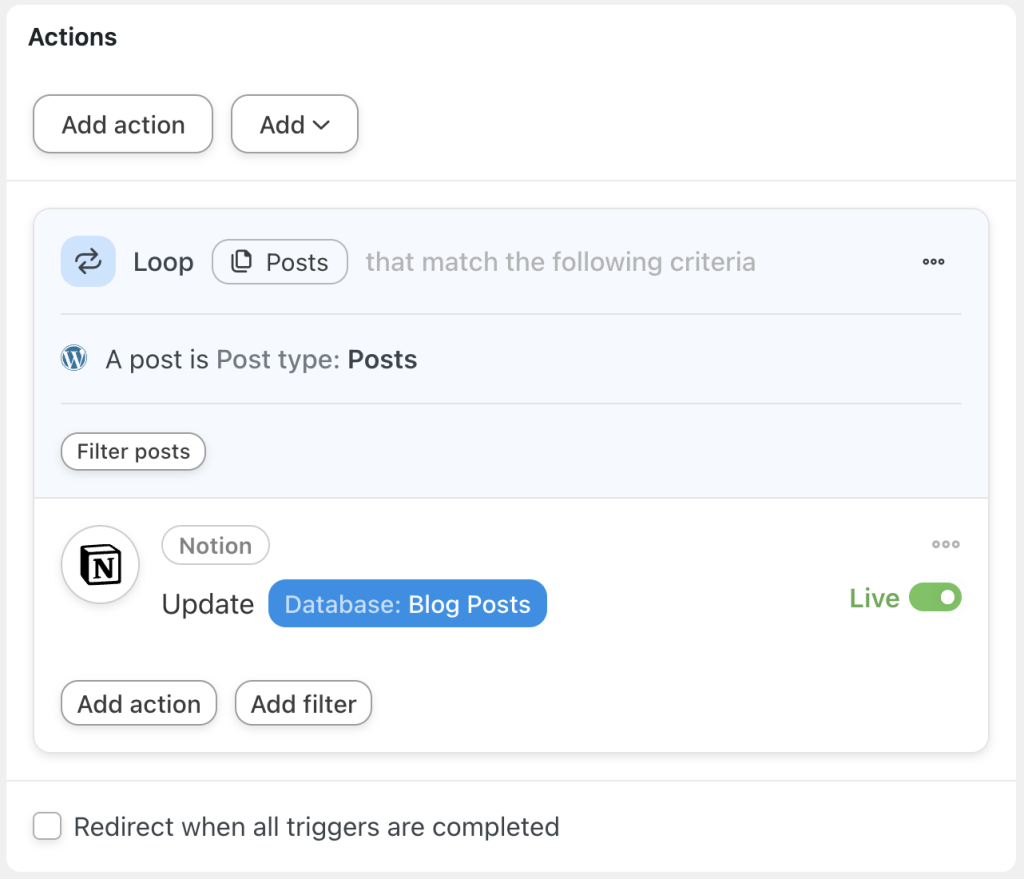
In the Loop pane, select a Loop filter. Automator will automatically have added a filter for WordPress post types “Posts”. You can edit or delete this filter by hovering over it and clicking the Edit or Delete icon. You can also add additional filters by clicking Filter posts.
Once you’re satisfied with your Loop filters, click Add action and select Notion. From the dropdown list that appears, select Update a database item.
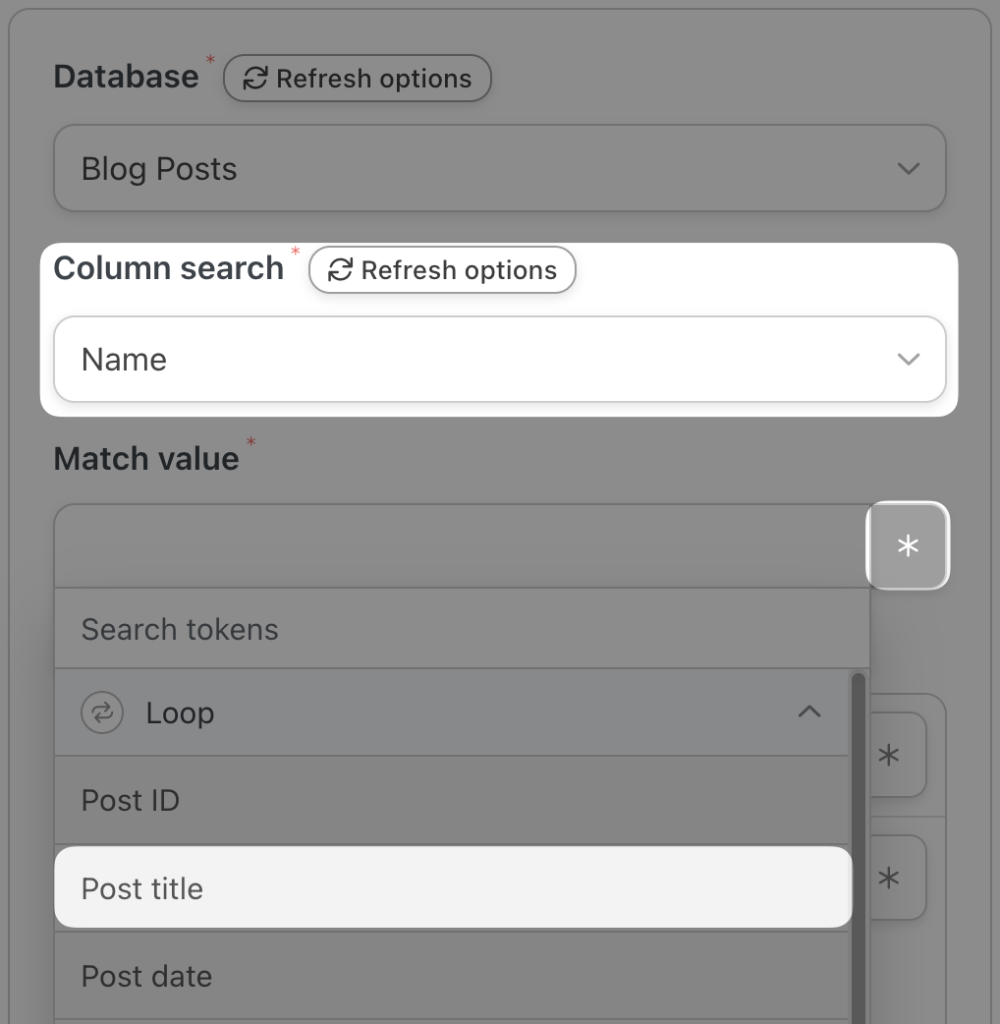
In order to update a database item in Notion, Automator will need to locate the item(s) by matching a value. For example, we have set the Column search to “Name” and told Automator to match that value to our WordPress “Post title” value.
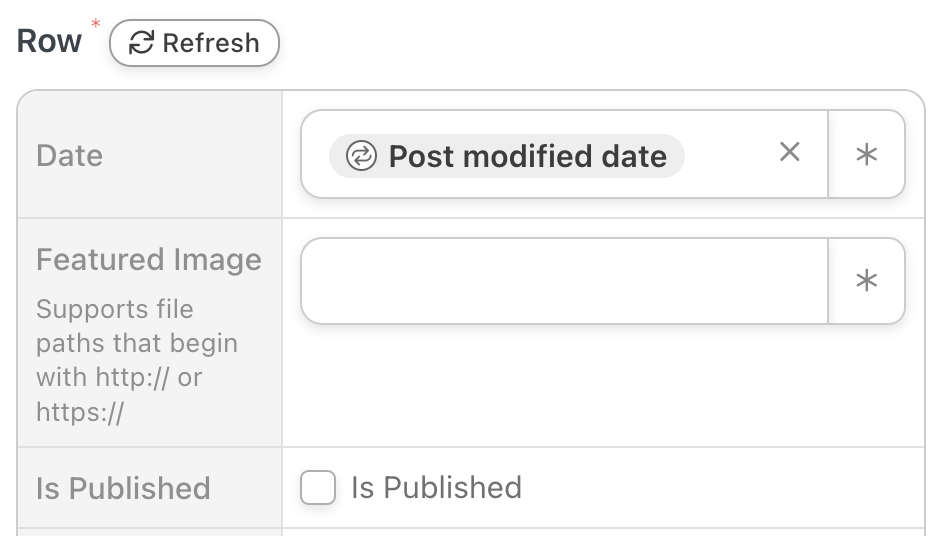
Next, enter tokens and/or static values in the field(s) that you want Automator to update. For example, we want to update the “Date” field with the “Post modified date” token.
(Note: Any field(s) that you leave empty will not be updated. Automator will not erase the data that already exists in that field in the Notion database item.)
Once you’re finished, click Save. Your Actions panel should now look something like this:
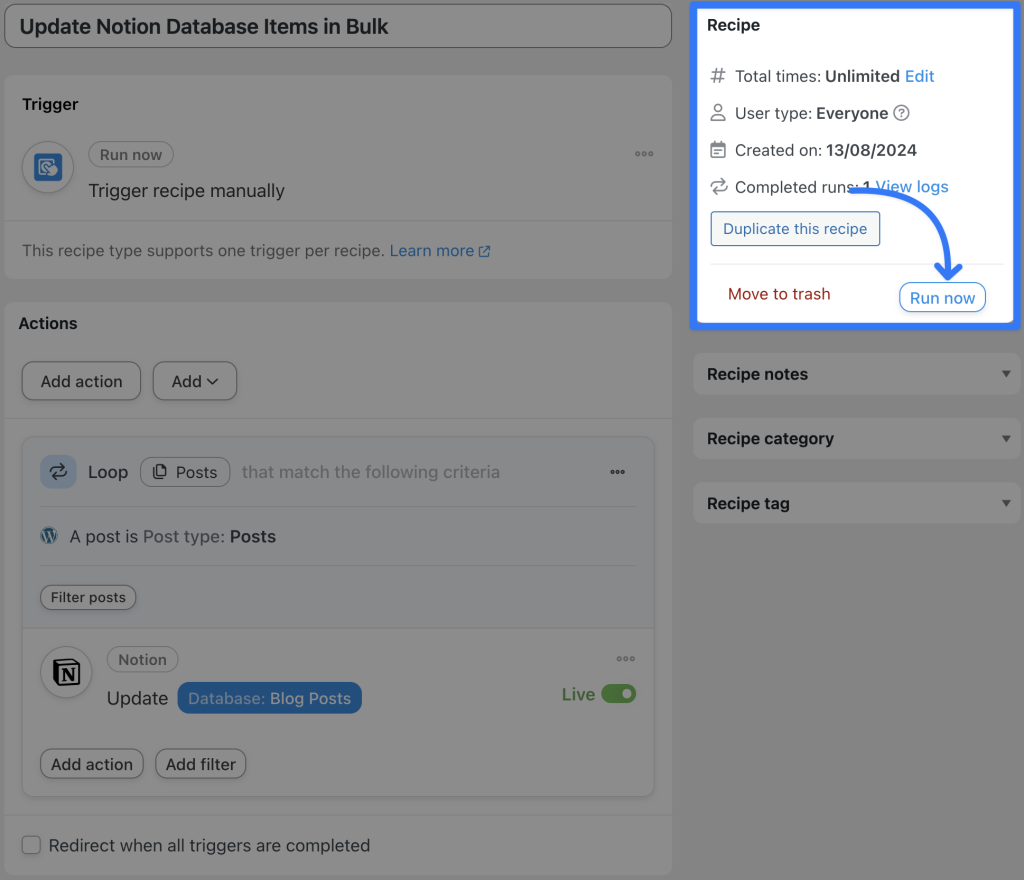
Step 5: Run Now
You’re just about ready to update your Notion items. All you have to do is click Run now and let Automator handle the rest.
Automator will cycle through all of the posts that match your filter criteria and update the corresponding database items in Notion.
Ready to save hours managing your content? Get Automator Pro now if you haven’t already>>>.
Frequently Asked Questions
Conclusion
Whether you’re managing a blog, an online store, or a learning platform, Automator makes it easier to keep your content and tasks in sync across Notion and WordPress.
In this post, we showed you how to connect Notion to WordPress using Uncanny Automator. We walked you through syncing your WordPress posts to Notion and showed you how to unlock some powerful time-saving automations.
By now, you’re ready to take on creating some even more powerful integrations of your own. If you haven’t already, grab your Automator Pro license to unlock all the advanced features and create even more powerful automations>>>.
Until next time, happy automating!








This Post Has 0 Comments