Revive old WordPress posts with AI and Uncanny Automator. Learn how to reverse content decay…
Connect Easy Digital Downloads to Zoho Campaigns
Connect Easy Digital Downloads to Zoho Campaigns the easy way: with Uncanny Automator. Create lists, subscribe and unsubscribe contacts and manage your GDPR compliance automatically.
Are you looking for a way to connect Easy Digital Downloads to Zoho Campaigns? Well, you’re in luck—you’ve landed on the right page.
In this post, we’ll show you the easiest way to create a seamless EDD and Zoho Campaigns integration: with Uncanny Automator.
By the end of this walkthrough, you’ll be able to create lists in Zoho Campaigns directly from your EDD-powered WordPress website, automatically subscribe and unsubscribe contacts and much more.
But that’s enough of an introduction for now. Let’s get into the good stuff
Why Connect EDD to Zoho Campaigns with Automator
Easy Digital Downloads is the best ecommerce platform for WordPress websites and businesses with downloadable and licensable content. Likewise, Zoho Campaigns is a leading CRM and email marketing platform that helps businesses connect with their customers.
By connecting EDD and Zoho Campaigns, WordPress businesses can generate more leads and build lasting relationships with their customers that increase lifetime value. But connecting these two powerful tools to realize those benefits can be a challenge.Unless you have Uncanny Automator!
You may already know Automator as the #1 automation and integration tool for WordPress websites. Using simple combinations of triggers and actions called recipes, you can connect any (or all) of your favorite apps and plugins.
While there are other tools that can connect EDD to Zoho Campaigns, Automator offers some key advantages.
- Affordability: Imagine having to pay an automation fee each time you want to add an EDD customer to a Zoho Campaigns list. The costs would be astronomical! Fortunately, unlike other automation and integration tools, Automator won’t charge you each time you run an automation. In other words, the more you automate and integrate, the more you save!
- Ease-of-Use: Automator’s user-friendly click-and-play interface means that you can automate complex workflows in just a few clicks—and even fewer minutes. Simply choose your integrations, select as many triggers and actions as you want and automate away!
- Seamlessness: Automator is fully-integrated with EDD and the Recurring Payments and Software Licensing addons. This means that you can connect your EDD customer data to Zoho Campaigns however you choose, whether it’s creating lists from active subscriptions or automatically moving contacts to different lists based on purchases, statuses, location, etc.
- Integrations: Automator has 214 integrations with more on the way all of the time. This means that you can connect EDD to Zoho Campaigns and a whole lot more.
- Scalability: As your EDD-powered business grows, you’ll appreciate Automator’s Post Loops and User Loops features. Loops give you the ability to manage hundreds or even thousands of your EDD customers in Zoho Campaigns with the click of a button.
Ready to connect EDD to Zoho Campaigns? Up your marketing automation game with an Automator Pro license now>>>.
Not ready to go Pro quite yet? You can still follow the rest of this tutorial with Automator’s FREE FOREVER version. Simply download and activate the plugin then register your account for a limited number of app credits. You’ll be able to use these credits towards creating integrations with web-based apps such as Zoom, OpenAI, Notion and more!
Subscribe EDD Customers to Zoho Campaigns Lists
Now that you have your Automator Pro license, it’s time to create your first EDD and Zoho integration.
In the recipe pictured above, we’re able to add our EDD customers to a Zoho Campaigns list whenever they purchase a download.
Want to know how we did it? Follow the steps below.
Step 1: Create a New Recipe
From your WordPress Admin Dashboard, navigate to Automator > Add new recipe. In the popup window that appears, select Logged-in users.
Step 2: Name Your Recipe
Give your recipe a name that makes it easy to recognize at a glance. For example, we’ve named this recipe, “Subscribe EDD Customers to Zoho List”.
Step 3: Configure Your Trigger(s)
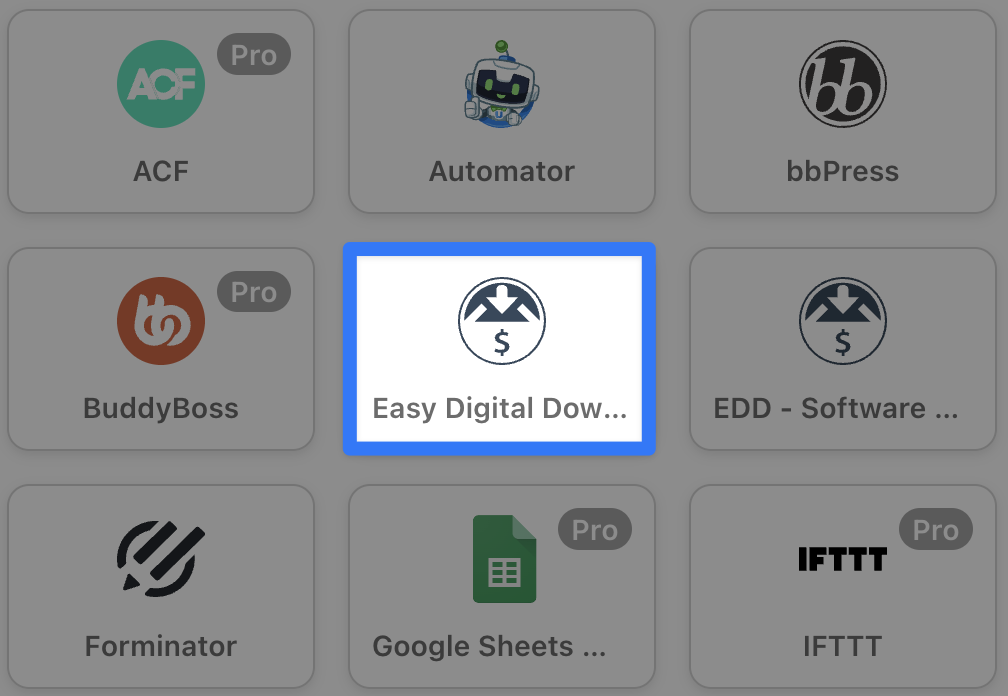
In the Triggers panel, from the menu of available integrations, select Easy Digital Downloads.
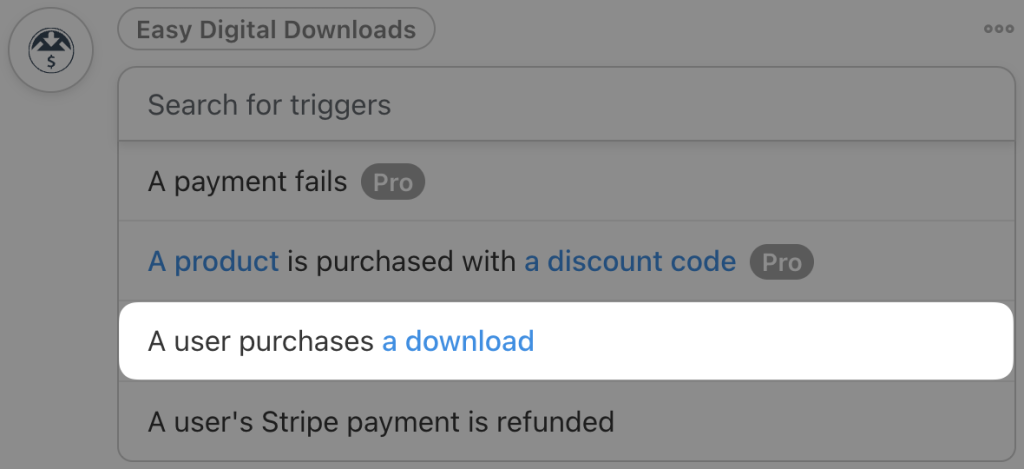
From the dropdown list that appears, select A user purchases a download.
Automator will prompt you to select one of your downloads. To capture as many of our EDD customers as possible, we have selected Any download.
Once you’re finished, click Save. Your completed trigger should look something like this:
Step 4: Configure Your Action(s)
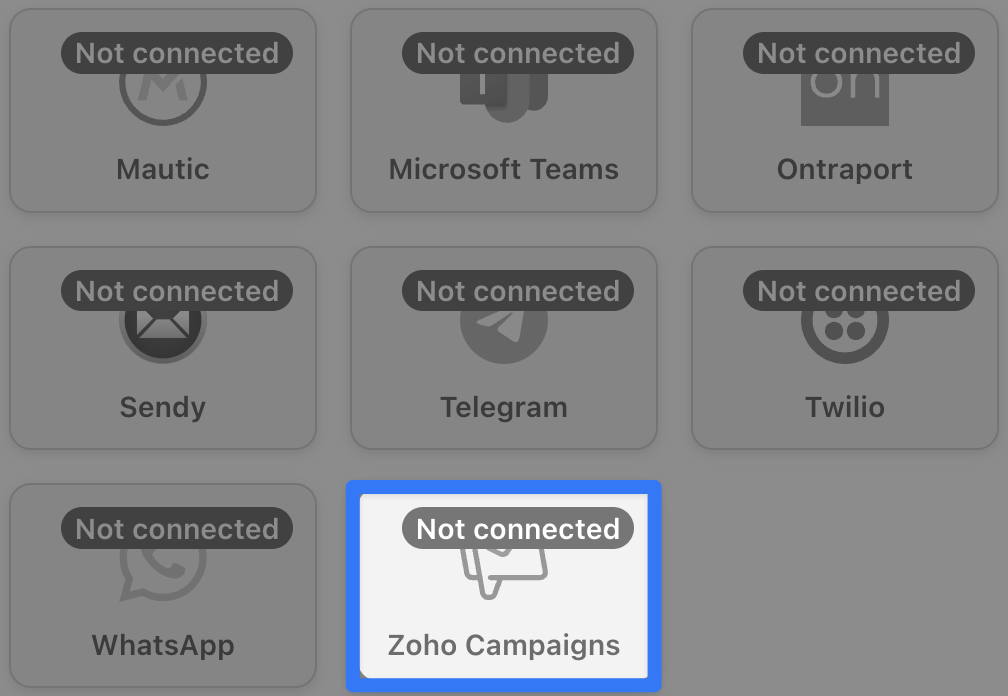
In the Actions panel, click Add action and select Zoho Campaigns.
If you haven’t already connected your Zoho Campaigns account, don’t worry. Click Connect account in the popup that appears and follow the prompts.
Once you’ve connected your account, return to the recipe editor and select Subscribe a contact to a list.
Automator will present you with a form where you can fill out the new contact’s details. First, select the list to which you would like to add your EDD customers. For example, we have selected our “Master List”.
Next, we are going to use tokens (i.e., dynamic data pulled from your WordPress website and from within recipes) to fill out our EDD customers’ data for Zoho Campaigns.
To use a token, click the Asterisk in a field. From the dropdown list that appears, select the token that corresponds to that field. For example, in the Email field, you can select the “User email” token.
You can fill out the remaining fields, such as “First Name”, “Last Name” and “Twitter Handle” with more tokens.
Want to sync more of your EDD customer information with Zoho Campaigns? The Custom Uses Fields Addon for Automator allows you to securely and easily store valuable lead information such as social media handles, phone numbers, associations and more. Get the CUF Addon with a Pro – Plus or Elite license>>>.
Once you’re finished, click Save. Your Actions panel should now look something like this:
That’s it! You’ve just created your first EDD and Zoho Campaigns integration. How easy was that?
Want to make more EDD and Zoho recipes like this one? Get your Automator Pro license now and up your email marketing game>>>.
Create Zoho Campaigns Lists from EDD Customers
With your first Automator recipe under your belt, it’s time to take a look at some of Automator’s more advanced features. But don’t worry—it’s just as easy to use.
In the recipe pictured above, we’re able to both create and populate a Zoho Campaigns list of EDD customers with the click of a button.
Does that sound too good to be true? Follow the steps below and try it out for yourself!
Step 1: Create and Name a New Recipe
From your WordPress Admin Dashboard, navigate to Automator > Add new recipe. In the popup window that appears, select Everyone.
Give your recipe a name that makes it easy to recognize at a glance. For example, we’ve named this recipe “Create Zoho Campaigns List from EDD Customers”.
Step 2: Configure Your Trigger(s)
In the Triggers panel, from the menu of available integrations, select Run now.
From the dropdown list that appears, select Trigger recipe manually. Once you’re finished, your Triggers panel should look like this:
Step 3: Configure Your Action(s)
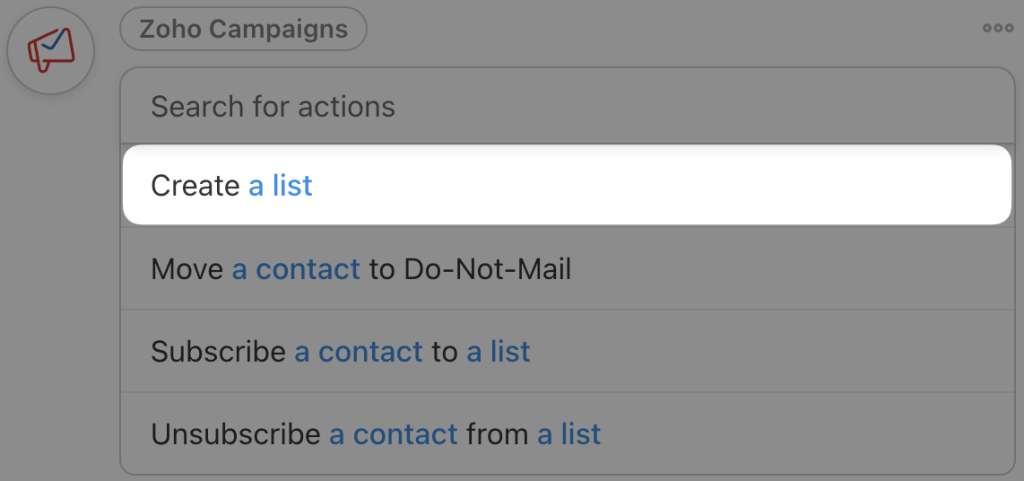
In the Actions panel, click Add action and select Zoho Campaigns. From the dropdown list that appears, select Create a list.
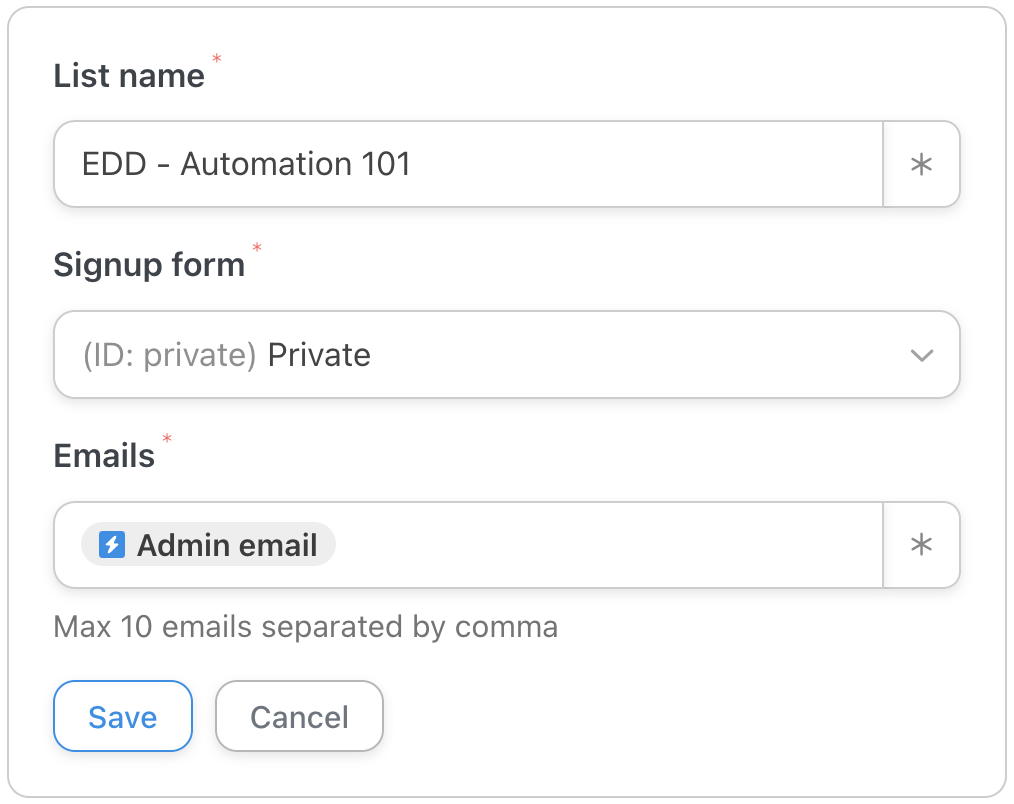
Automator will present you with a form with the fields List name, Signup form and Emails. Name your new list and set the Signup Form to either “Private” or “Public”. For example, we have named our list “EDD – Automation 101” and set it to “Private”.
To create the list, you will need to add at least one email address in the Email field. For simplicity, we have added our site’s “Admin email”.
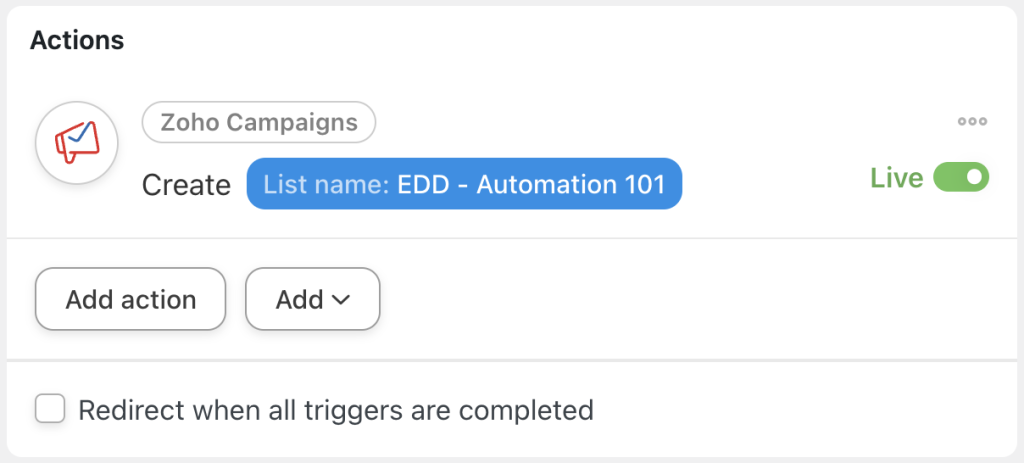
Once you’re finished, click Save. Your completed action should look something like this:
Step 4: Configure Your User Loop(s)
The action that we configured in the previous step will create our new Zoho Campaigns list. Now, we need to populate that list with some of our EDD customers. We’ll accomplish this using Automator’s User Loops feature and some nifty filters.
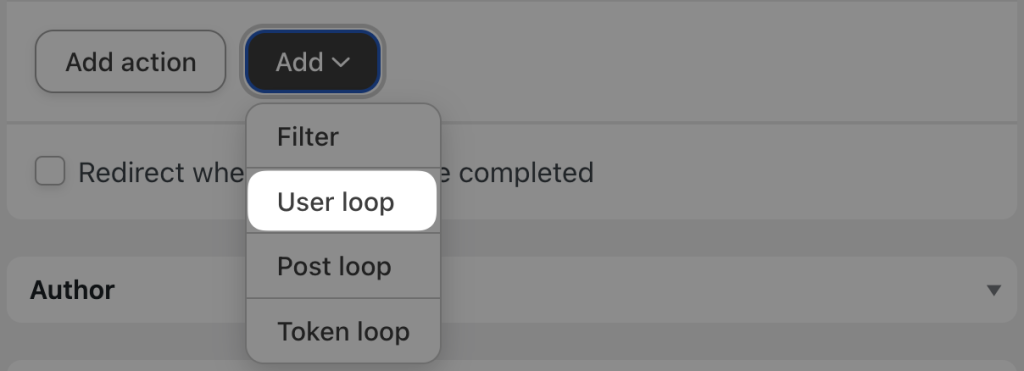
In the Actions panel, click Add and select User loop.
Within the Loop pane, click Add action and select Zoho Campaigns. From the dropdown list that appears, select Subscribe a contact to a list.
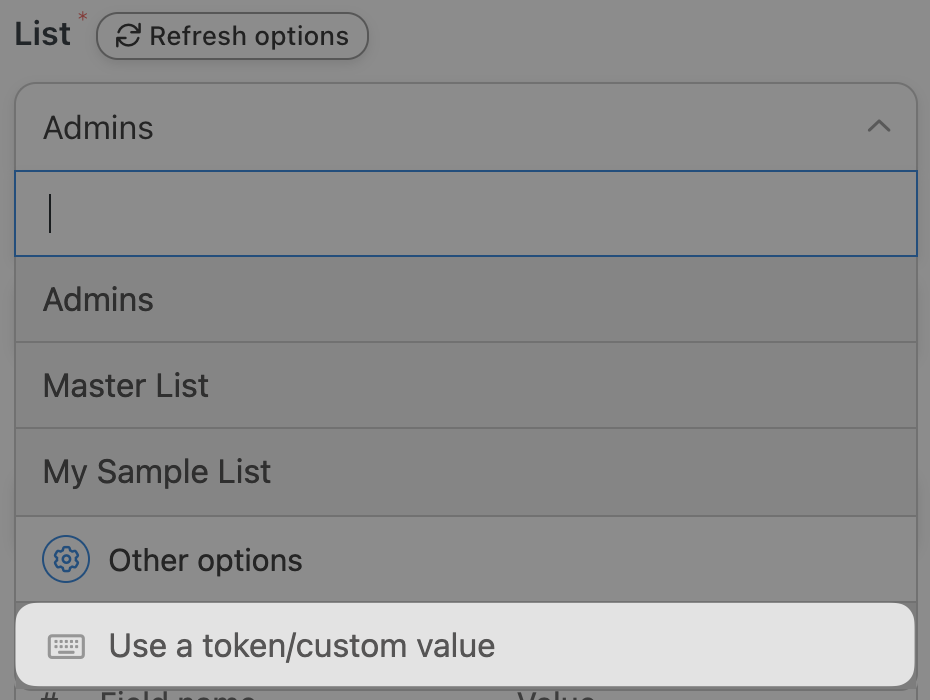
Automator will present you with a form. In the List field, we’re going to use a token to select our newly created list.
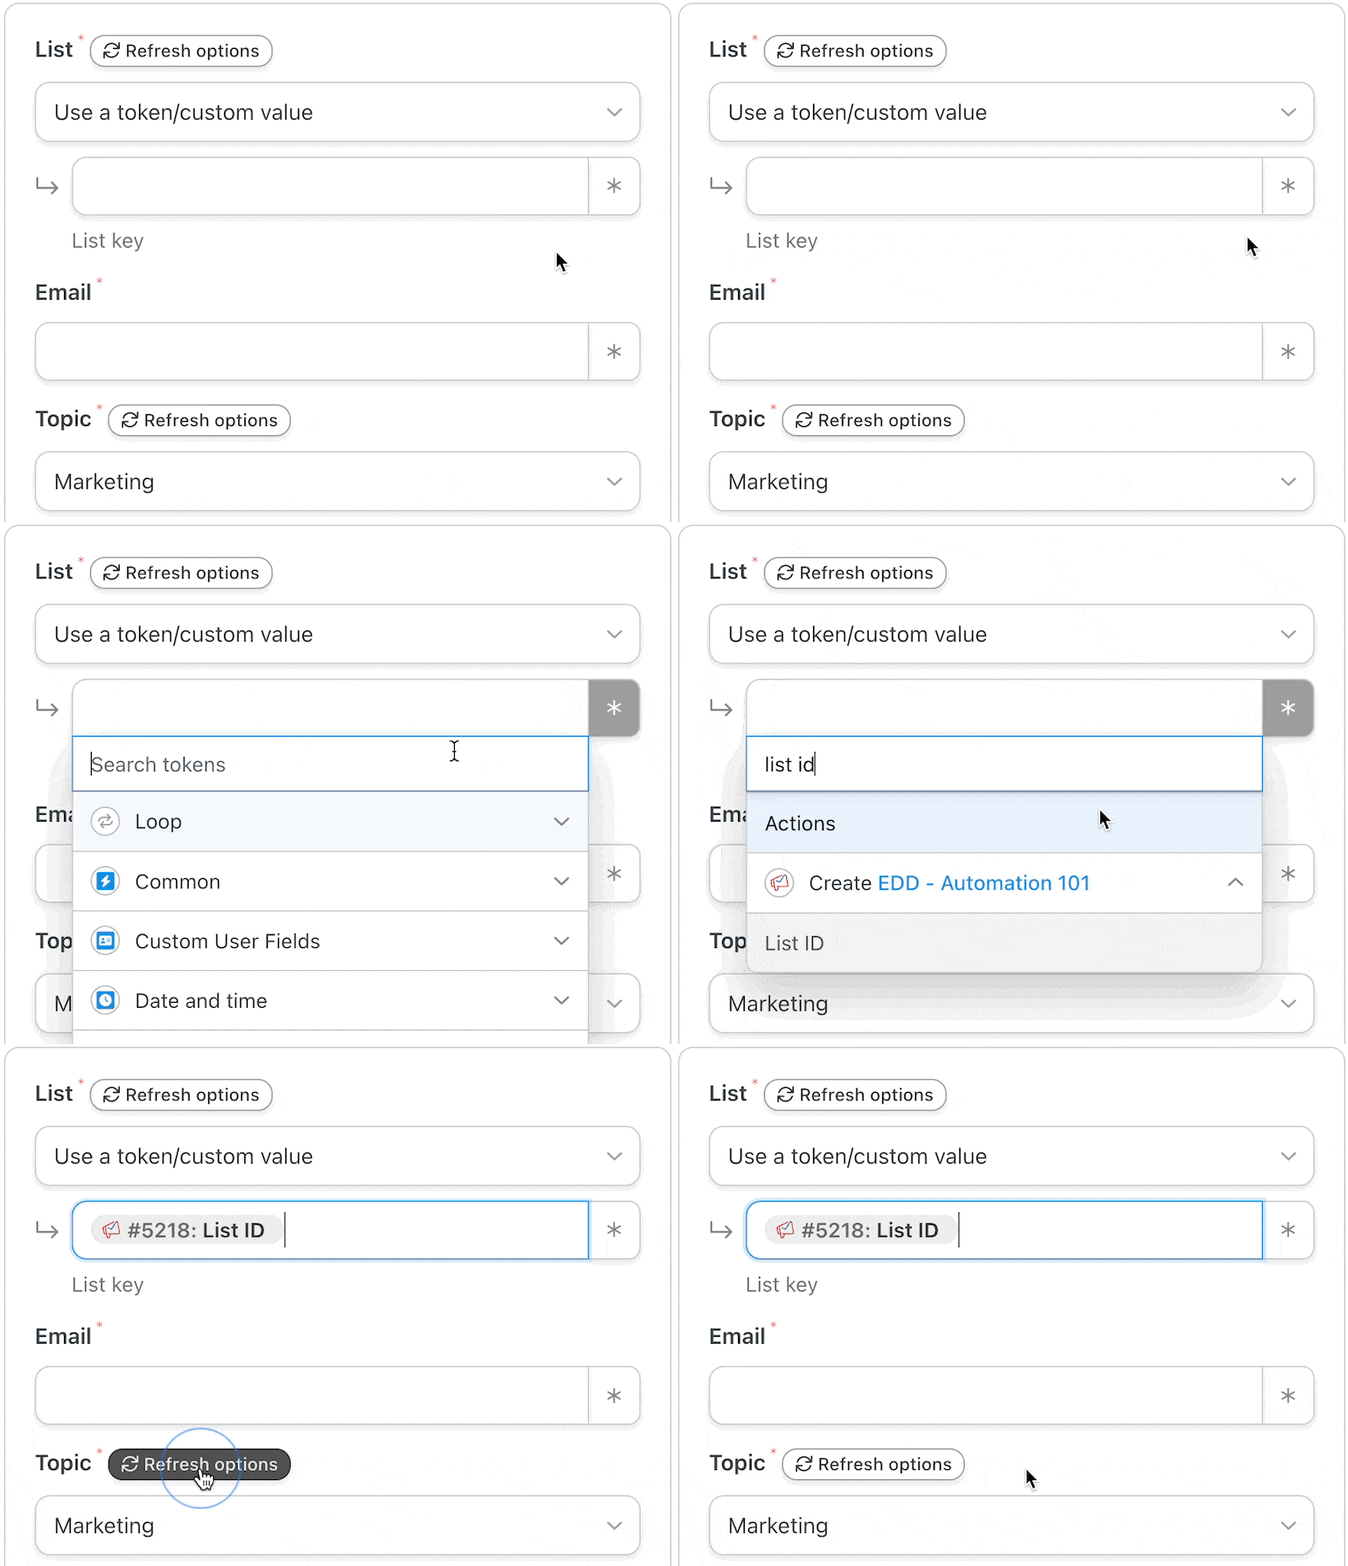
In the List field, from the dropdown, select Use a token/custom value.
In the subfield that appears, click the Asterisk and select the “List ID” token from the action that we created in Step 3. You can enter “list id” in the search bar to make finding this token easier.
(Note: You must use the “List ID” token. The value that this token represents corresponds to the List key that Zoho uses for API calls. Zoho will not be able to find the list to which you want to add your EDD customers if you choose the “List name” token.)
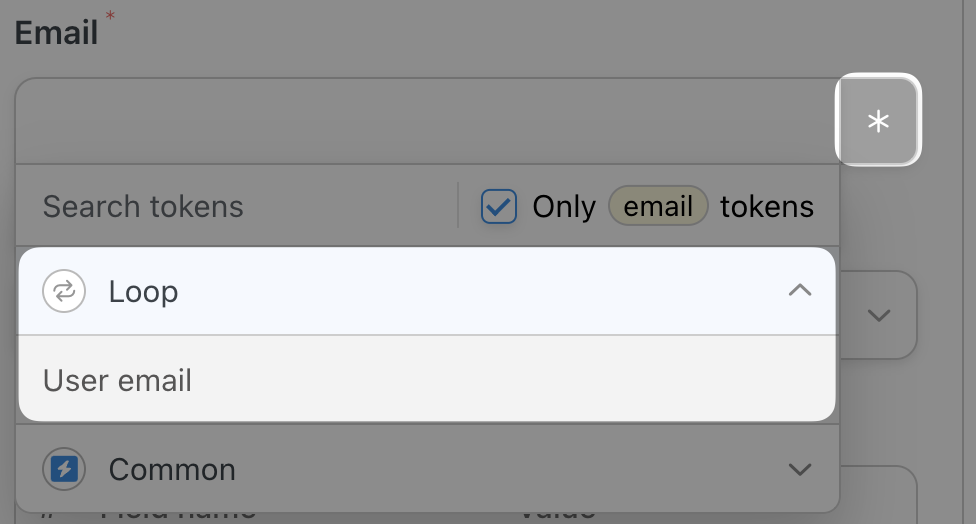
Next, in the Email field, select the “User email” token underneath the Loop dropdown.
Fill out the remaining fields using tokens from the Loop dropdown. Once you’re finished, click Save.
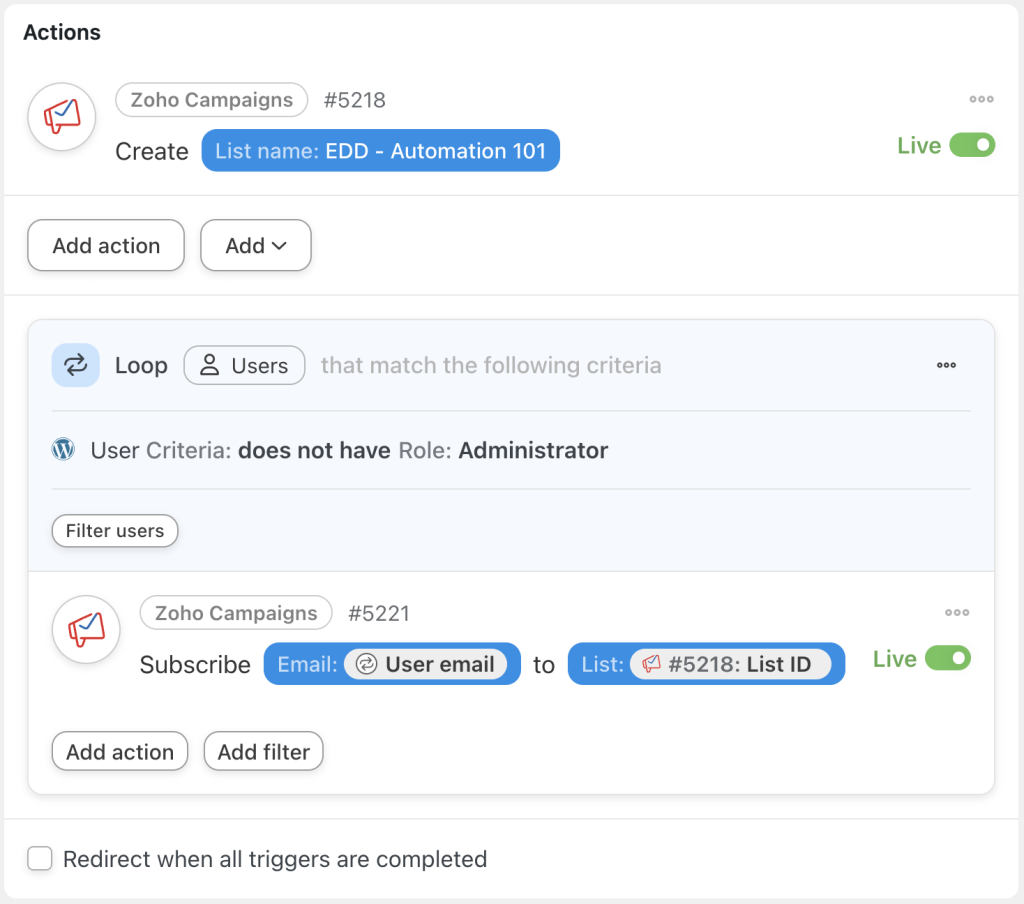
Your Actions panel, with your primary action and user loop should look something like this:
Step 5: Add an EDD Filter
Now that you have your action and user loop all set up, it’s time to determine which of your EDD customers to add to this list. We are going to accomplish this using Automator’s filters feature.
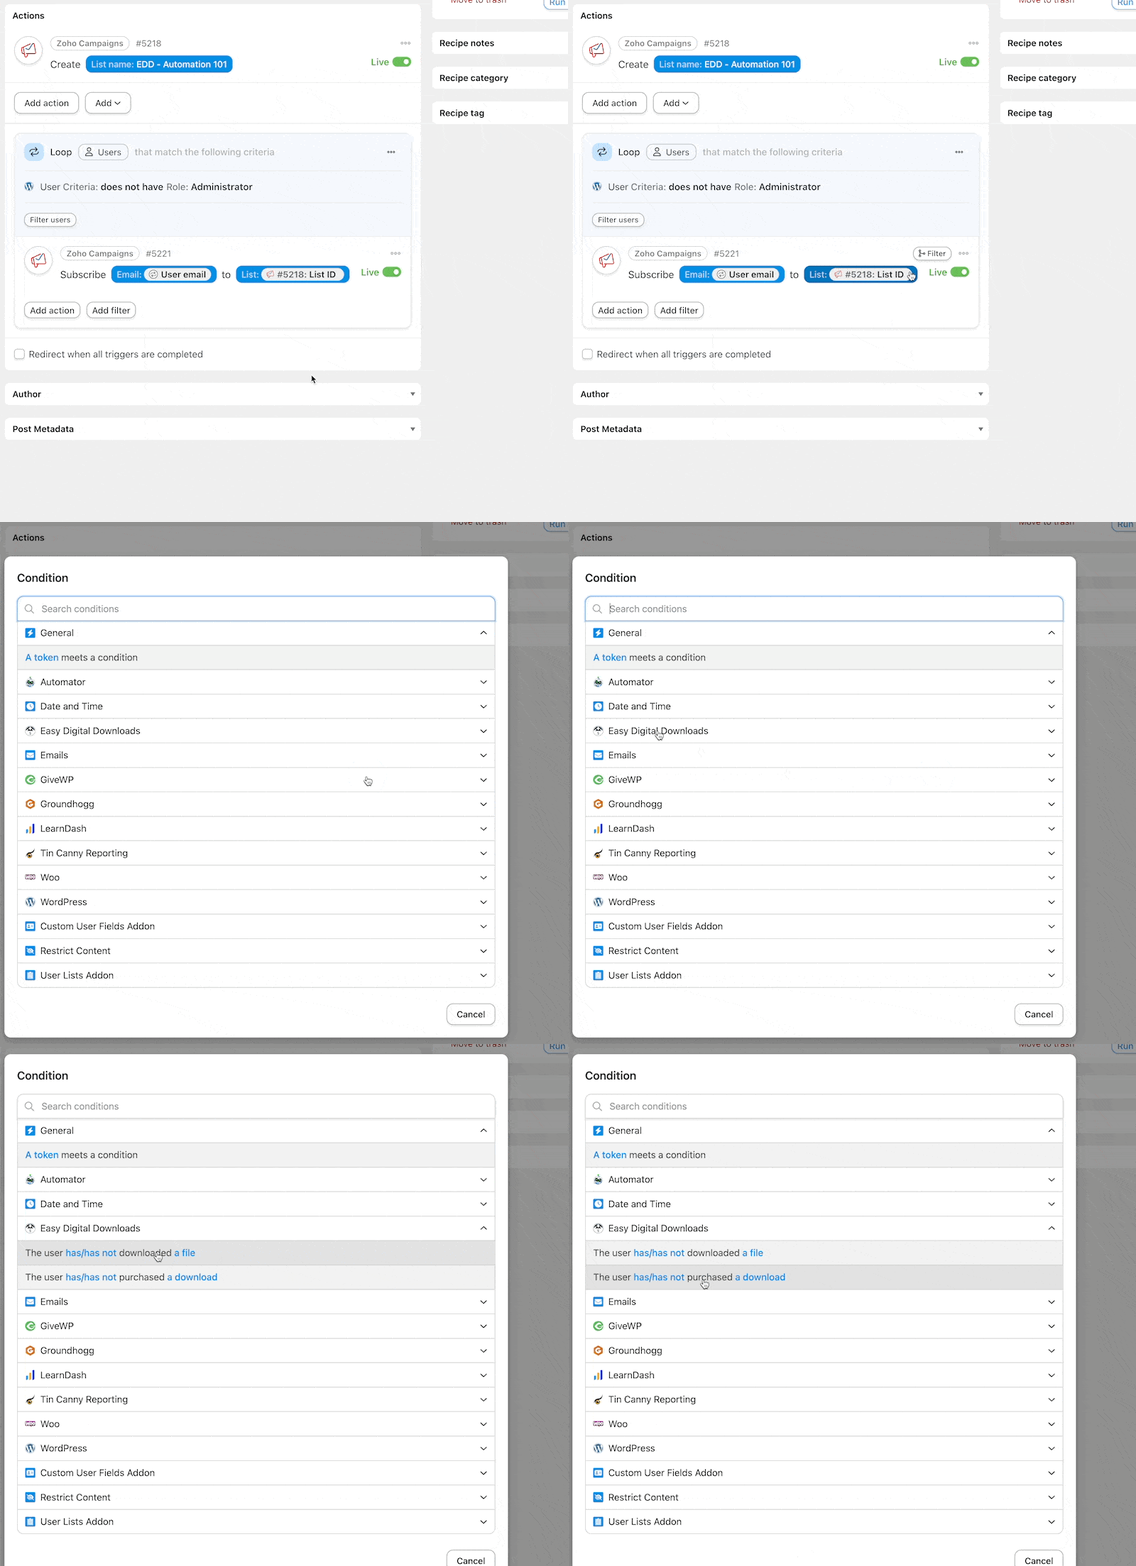
To add a filter, hover over the action within the Loop pane and click Filter. A modal will appear with various filters for different apps and plugins. Click Easy Digital Downloads.
(Note: If you have the EDD – Recurring Payments and/or Software Licensing Addons, you will see additional filters underneath Easy Digital Downloads.)
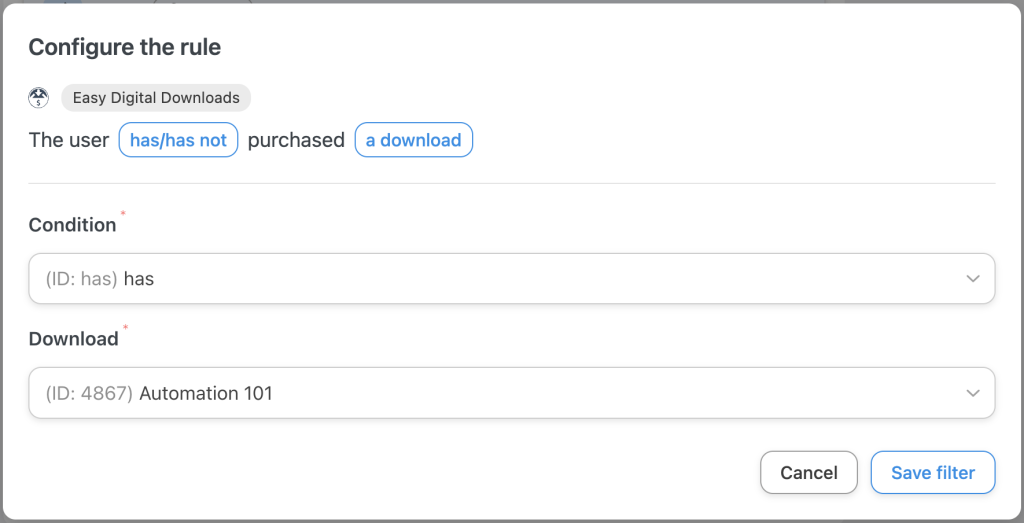
Select the filter that you want to use to define your newly created Zoho Campaigns list. For example, we want to create a list of our EDD customers who have purchased a specific download.
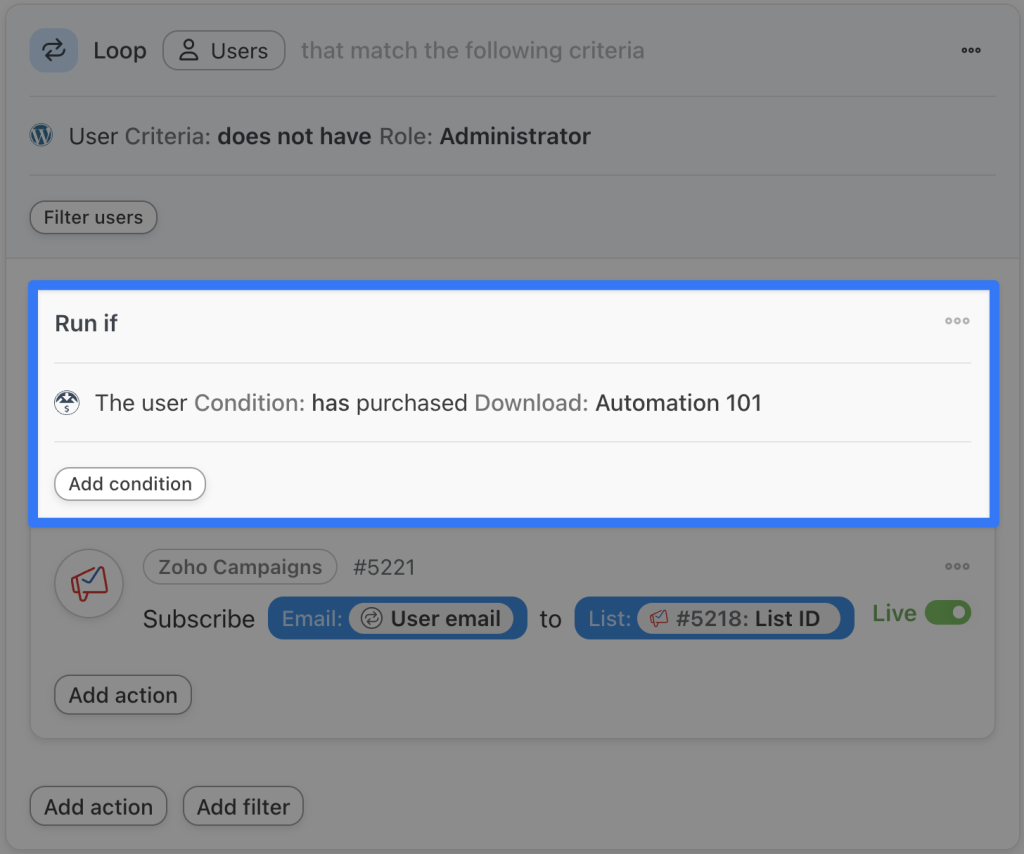
Once you’re finished, click Save filter. Your Loop pane should now include a filter that looks something like this:
Step 6: Run now
Ready to create and populate a brand new Zoho Campaigns list with your EDD customers? You’re just one click away. Click the Run now button and kick back as Automator handles the busywork.
Frequently Asked Questions
Conclusion
Connecting Easy Digital Downloads to Zoho Campaigns unlocks powerful marketing automation opportunities, streamlining your workflow and ensuring your customers are engaged right after purchase.
By leveraging the capabilities of Uncanny Automator, you can seamlessly integrate these platforms and create personalized, automated email campaigns that drive customer retention and sales.
If you’re ready to optimize your digital store’s marketing efforts, don’t hesitate to set up this integration today with Uncanny Automator>>>.
Until next time, happy automating!








This Post Has 0 Comments