Revive old WordPress posts with AI and Uncanny Automator. Learn how to reverse content decay…
How to Connect Notion to LearnDash
Connect Notion to LearnDash with Uncanny Automator. Track course completions, save enrollment data, help your students stay on track with database items and much more.
If you’ve been looking for a simple and effective Notion and LearnDash integration, then look no further. You’ve landed on the right page.
In this blog post, we’ll show you how to connect Notion to your LearnDash-powered WordPress website using Uncanny Automator. Follow a step-by-step tutorial for tracking course completions and saving enrollment data. Finally, we’ll leave you with some nifty ideas for creating Notion and LearnDash integrations of your own.
But that’s enough of an introduction for now. Let’s get started.
Why Connect Notion to LearnDash with Automator
You may already know Uncanny Automator as the #1 automation and integration tool for WordPress websites. But, in case you didn’t, here’s the gist:
Using simple combinations of triggers and actions called recipes, Automator allows you to connect all of your favorite apps and plugins. Streamline your workflows, automate repetitive tasks, manage your WordPress data in bulk and integrate your online ecosystem. All without ever having to write a single line of code.
Automator is, hands down, the best option for connecting any of your favorite apps and plugins. However, when it comes to connecting Notion and LearnDash, Automator offers some unique advantages over the alternatives.
- Ease-of-Use: Automator’s user-friendly click-and-play interface means that you can automate complex workflows in just a few clicks—and even fewer minutes. Simply select the integrations you want in your automated workflow, choose a few triggers and actions and let Automator do the work.
- Seamlessness: Automator is fully-integrated with LearnDash, meaning that you can incorporate data as macro as course enrollment or as micro as quiz scores into your Notion integrations. Click here for a full list of triggers, actions and filters for LearnDash.
- Affordability: Unlike other automation and integration tools, Automator doesn’t charge per automation fees. You can sync the enrollment and course data, update database items and more for thousands of LearnDash students at no extra cost. In other words, the more you automate and integrate, the more you save!
- Integrations: Automator has 214 integrations with more on the way all of the time. This means that you can connect Notion to LearnDash and a whole lot more.
- Scalability: As your LearnDash-powered business grows, you’ll appreciate Automator’s Post Loops and User Loops features. Loops give you the ability to manage hundreds or even thousands of LearnDash students with the click of a button.
Convinced yet? Get your Automator Pro license now and connect Notion to LearnDash with ease>>>.
Not ready to go Pro quite yet? You can still follow the rest of this tutorial with Automator’s FREE FOREVER version. Simply download and activate the plugin then register your account for a limited number of app credits. You’ll be able to use these credits towards creating integrations with web-based apps such as Zoom, OpenAI, ActiveCampaign, Slack and more!
Sync LearnDash Course Enrollment Data with Notion Database
Now that you have your Automator license, let’s take a look at creating our first Notion and LearnDash integration.
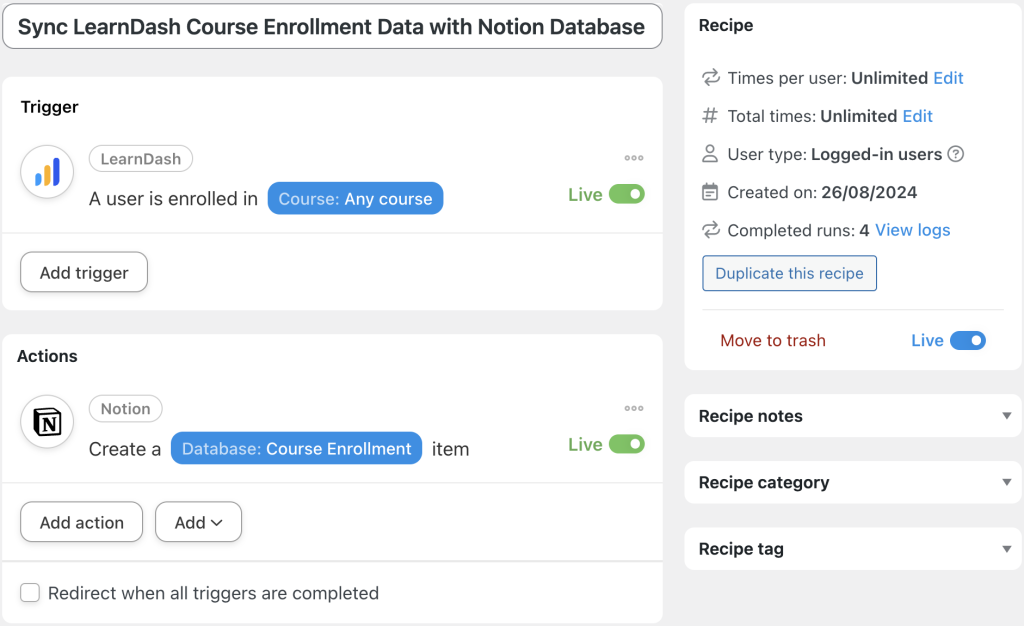
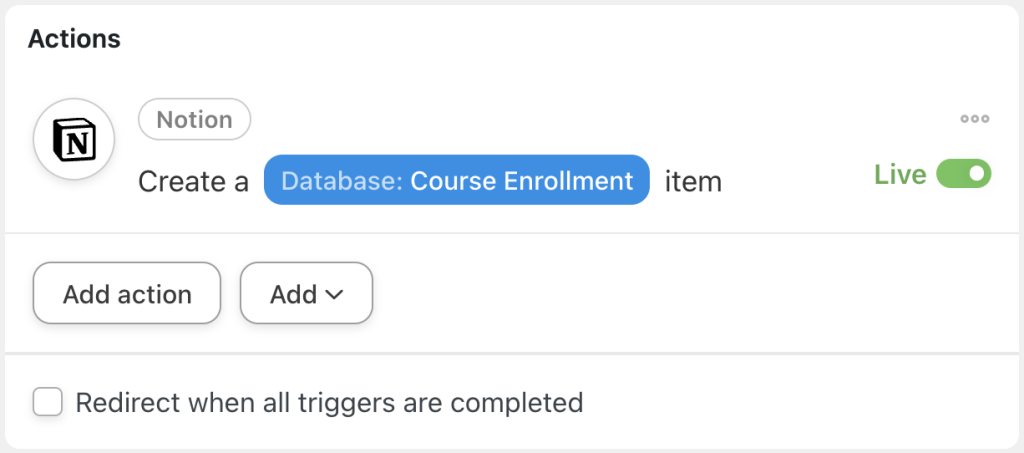
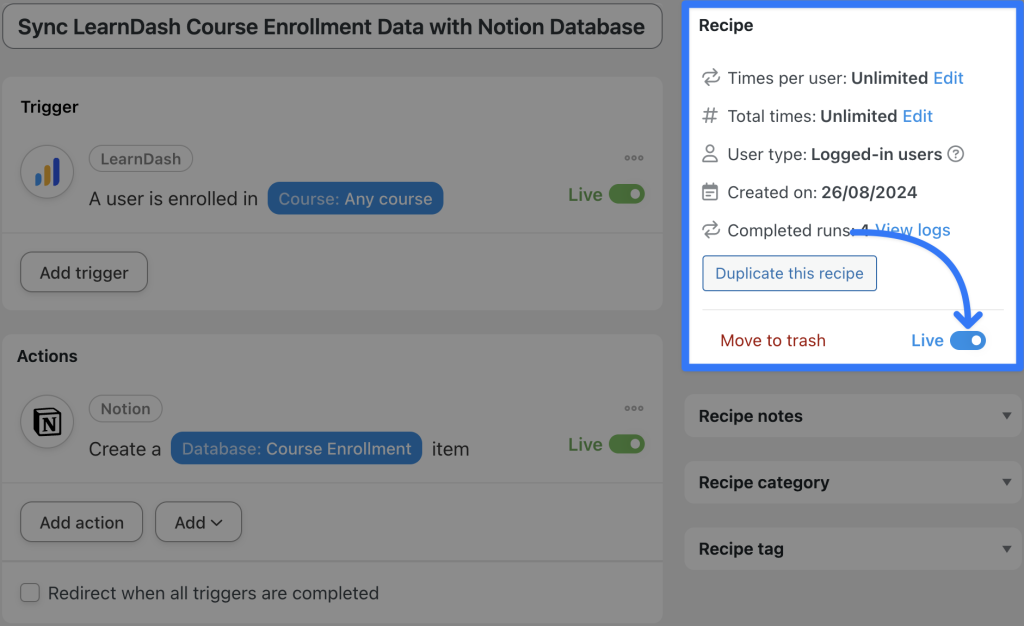
In the recipe pictured above, we’re able to create a database item in Notion whenever a student enrolls in a LearnDash course. We can then use this database item to track that student’s progress, engagement, instructor notes and much more.
Let’s take a look at how we did it.
Step 1: Create a New Recipe
From your WordPress Admin Dashboard, navigate to Automator > Add new recipe. In the popup window that appears, select Logged-in users.
Step 2: Name Your Recipe
Give your recipe a name that makes it easy to recognize at a glance. For example, you might name a recipe based on the integrations involved and workflow automated; “Notion and LearnDash: Create Database Item”.
Alternatively, you might use a more descriptive title. For example, we have named this recipe “Sync LearnDash Course Enrollment Data with Notion Database.”
Step 3: Configure Your Trigger(s)
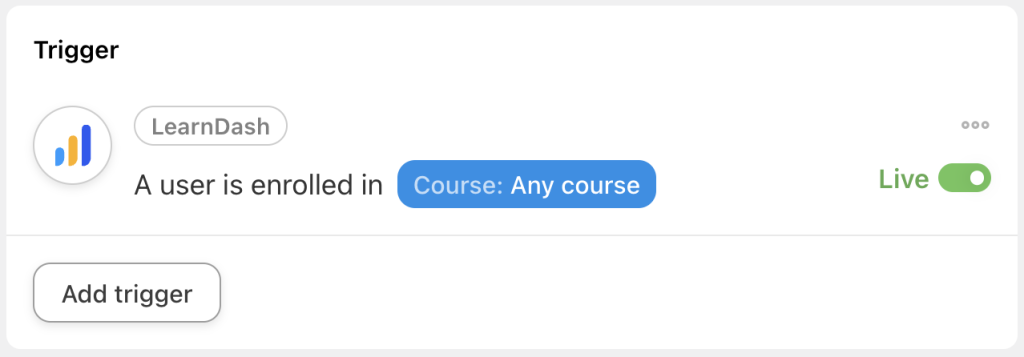
In the Triggers panel, from the menu of available integrations, select LearnDash.
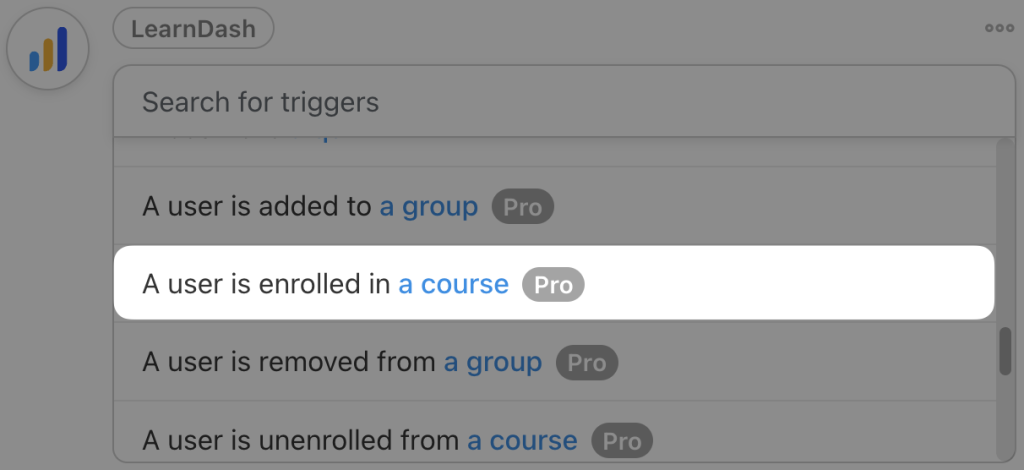
From the dropdown list that appears, select A user is enrolled in a course.
Automator will prompt you to select a course. Because we want to sync all of our course enrollment data with our Notion database, we have selected “Any course”.
Once you’re finished, click Save. Your completed trigger should look something like this:
Step 4: Configure Your Action(s)
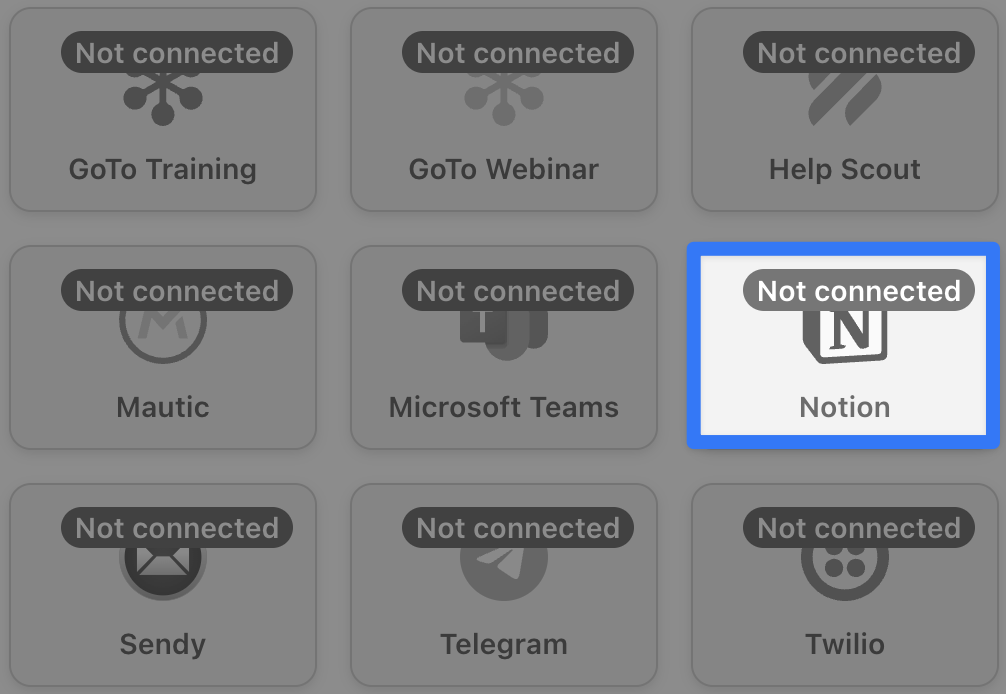
In the Actions panel, click Add action and select Notion.
If you haven’t already connected your Notion account, a modal will appear. Click Connect account and follow the prompts, including which Notion spaces, pages, etc. you want to grant Automator access to.
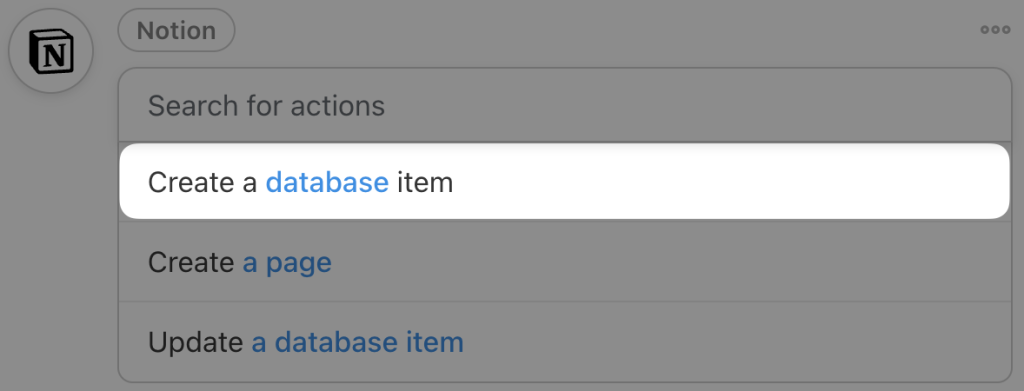
Once you’re finished, return to the recipe editor. From the dropdown list that appears, select Create a database item.
Automator will present you with a form. First, select the Database. Automator will then populate the Rows with fields for all of the database items’ properties.
We are going to use tokens (i.e., dynamic data pulled from your WordPress website and from within recipes) to fill out these fields.
To use a token, click the Asterisk in a field and select the appropriate token from the dropdown list. For example, we have selected the token “Course title” for our “Course Name” property.
Fill out the remaining fields using tokens and/or static data.
(Note: If you are selling your LearnDash courses with WooCommerce, you can include payment information such as payment status in this integration. Want to know how to sell LearnDash courses with the #1 ecommerce platform? Click here.)
Once you’re finished, click Save. Your completed action should look something like this:
Step 5: Go Live!
You’re just about ready to connect Notion to LearnDash. All that’s left for you to do is toggle the recipe from Draft to Live.
To keep your LearnDash enrollment data up-to-date, create more recipes with LearnDash and H5P triggers coupled with the “Update a database item” action for Notion.
Ready to make more recipes like this one? Get your Automator Pro license if you haven’t already>>>.
Create LearnDash Course Pages in Notion
Now that you’ve seen how easy it is to connect Notion to LearnDash with Automator, let’s take a look at one of Automator’s most powerful features.
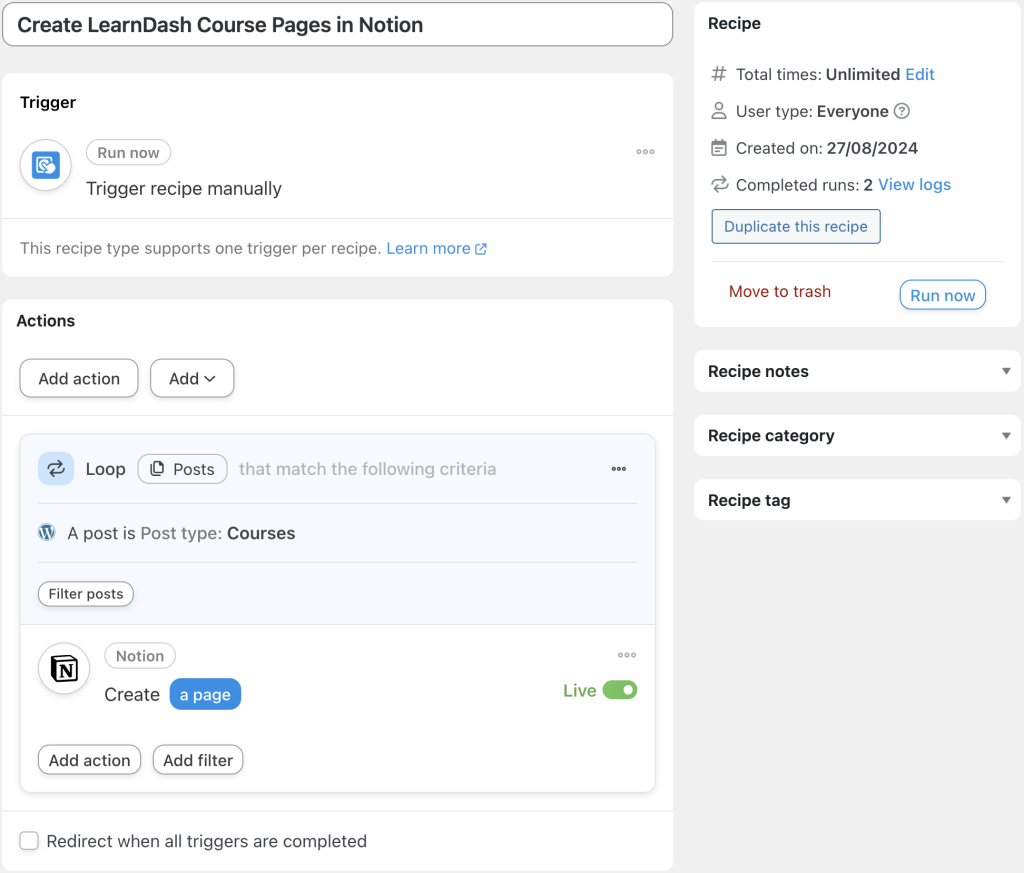
In the recipe pictured above, we’re able to create a page in Notion for all of our LearnDash courses with the click of a button. We can use these pages to organize and review course content, save older versions of courses and more.
Here’s how we did it.
Step 1: Create a New Recipe
From your WordPress Admin Dashboard, navigate to Automator > Add new recipe. In the popup window that appears, select Everyone.
Step 2: Name Your Recipe
We’ve named this recipe “Create LearnDash Course Pages in Notion”.
Step 3: Configure Your Trigger(s)
In the Trigger panel, from the menu of available integrations, select Run now. From the dropdown list that appears, select Trigger recipe manually.
Your completed trigger should look like this:
Step 4: Configure Your Post Loop
In the Actions panel, click Add and select Post loop.
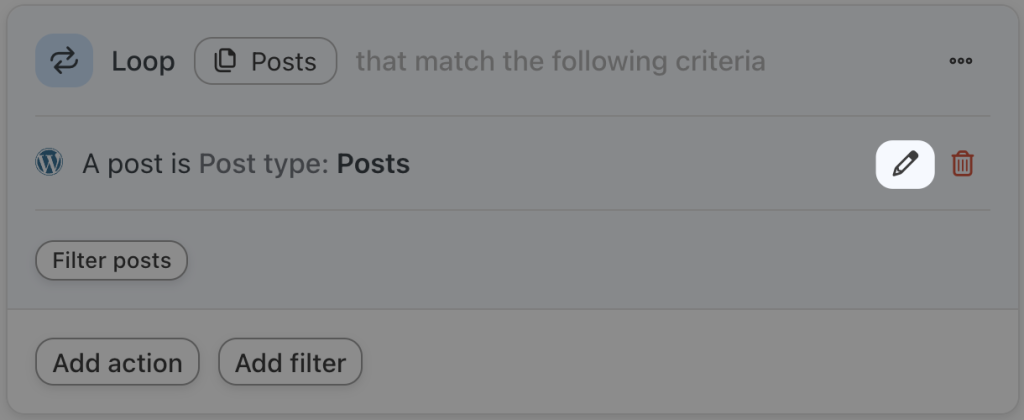
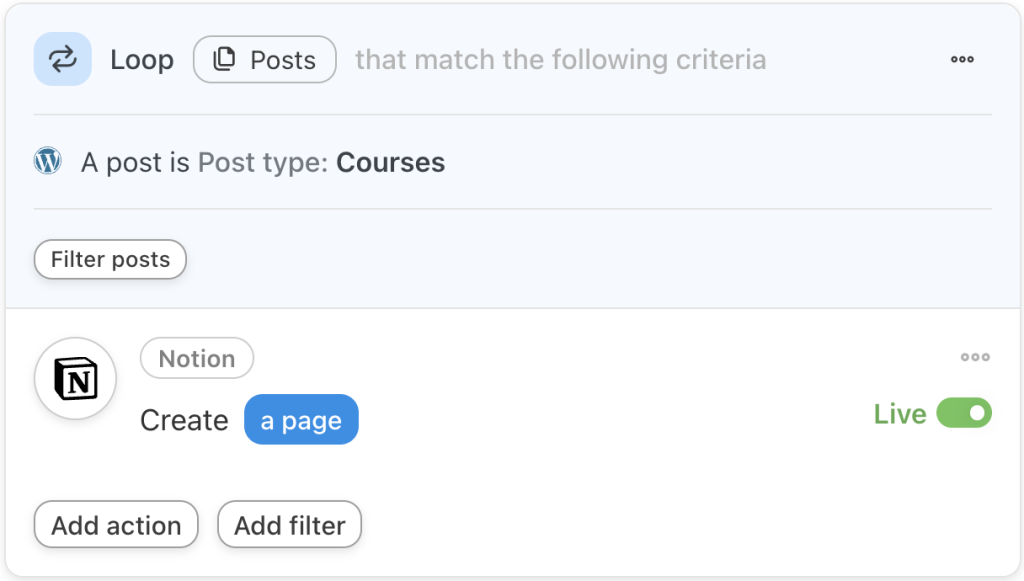
By default, in the Loop pane, Automator will have applied the Loop filter “Posts”. However, we want this recipe to run on our LearnDash courses.
To edit the Loop filter, hover over it and click the Edit icon.
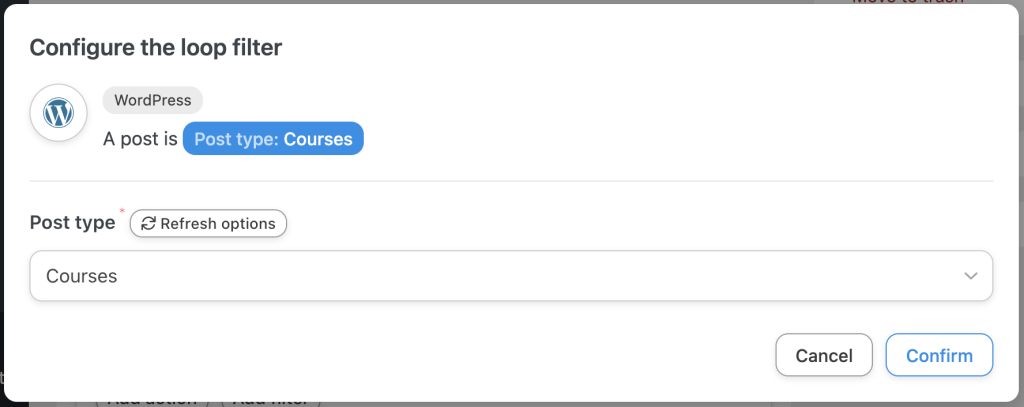
In the modal that appears, select the post type “Courses” and click Confirm.
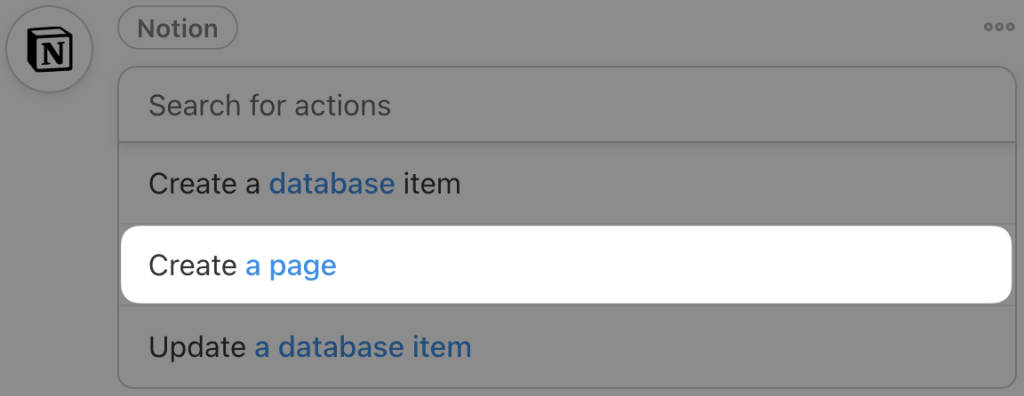
Now, in the Loop pane, click Add action and select Notion. From the dropdown list that appears, select Create a page.
Select a Parent page. (Note: You can later recipes to create pages within pages to include more course content, such as lessons and quizzes.)
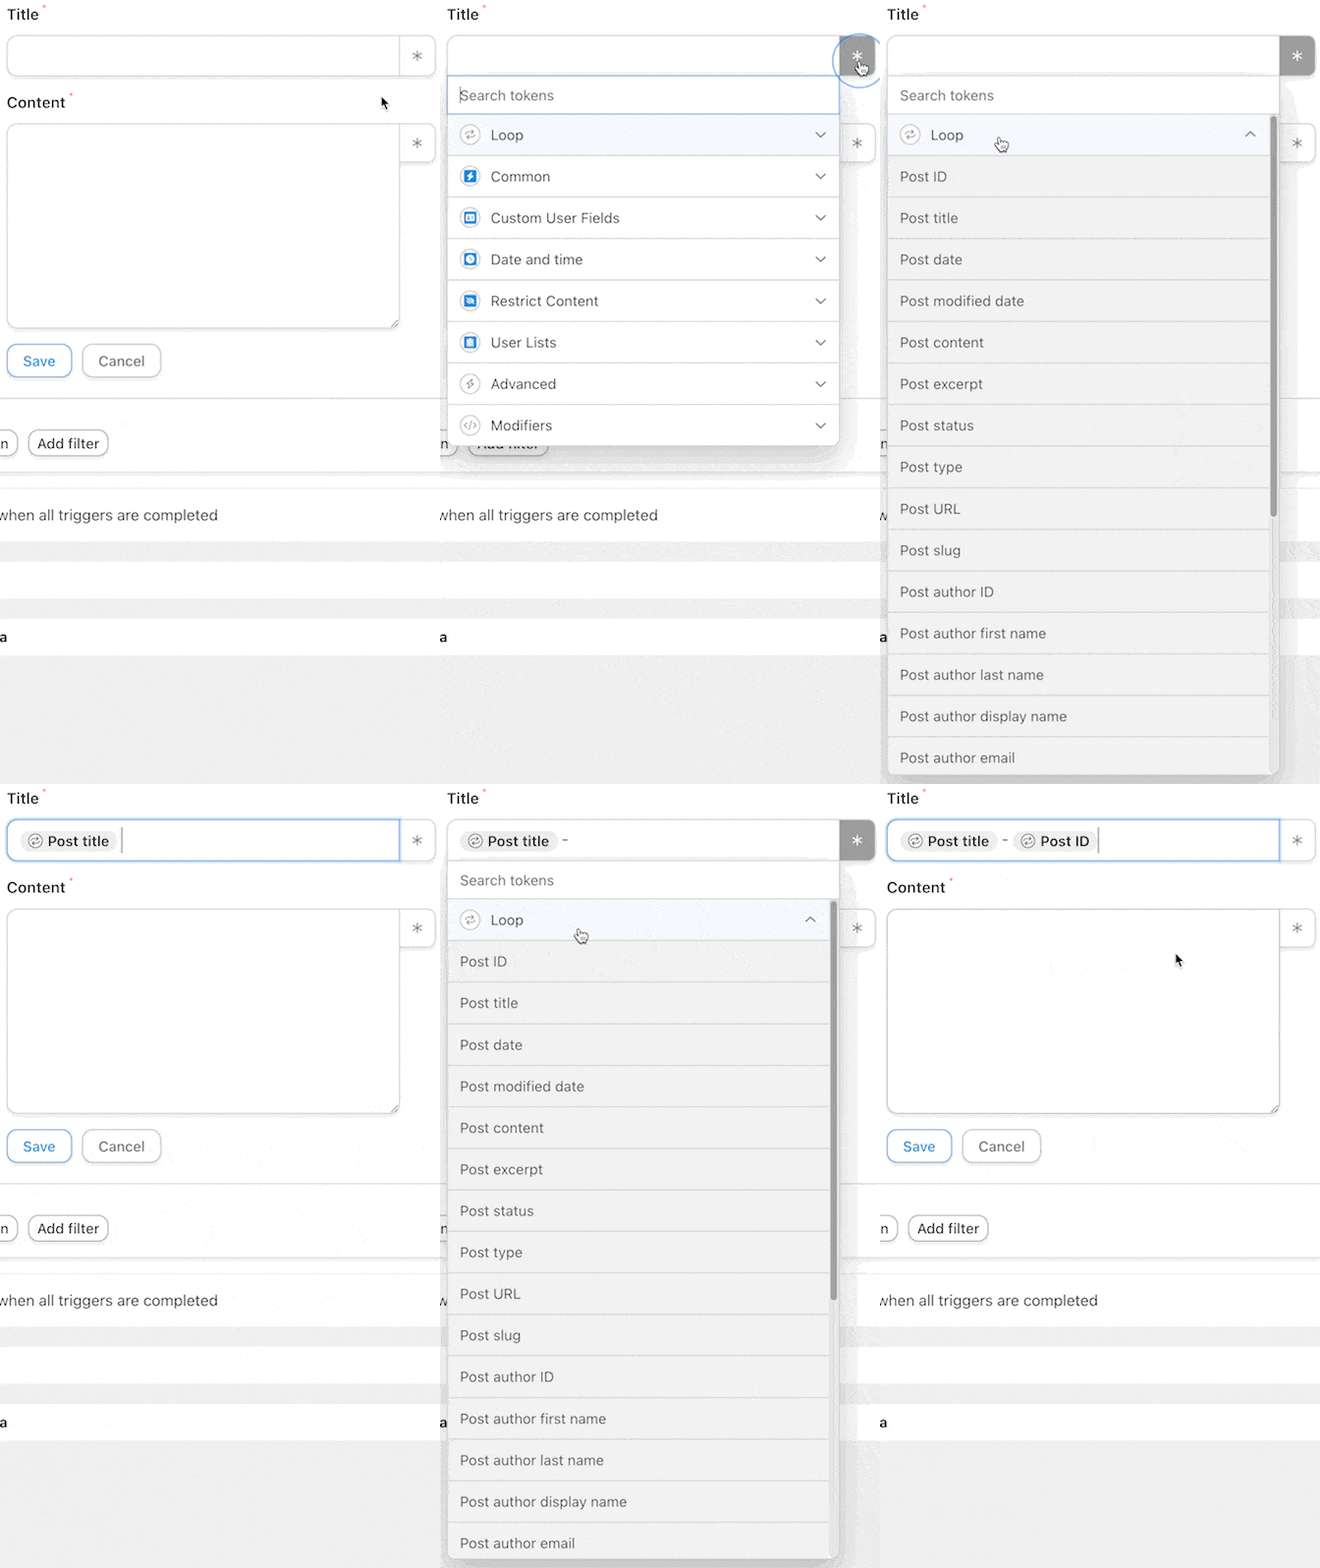
Fill out the Title and Content fields using tokens from the Loop dropdown.
Once you’re finished, click Save. Your Loop pane should now look like this:
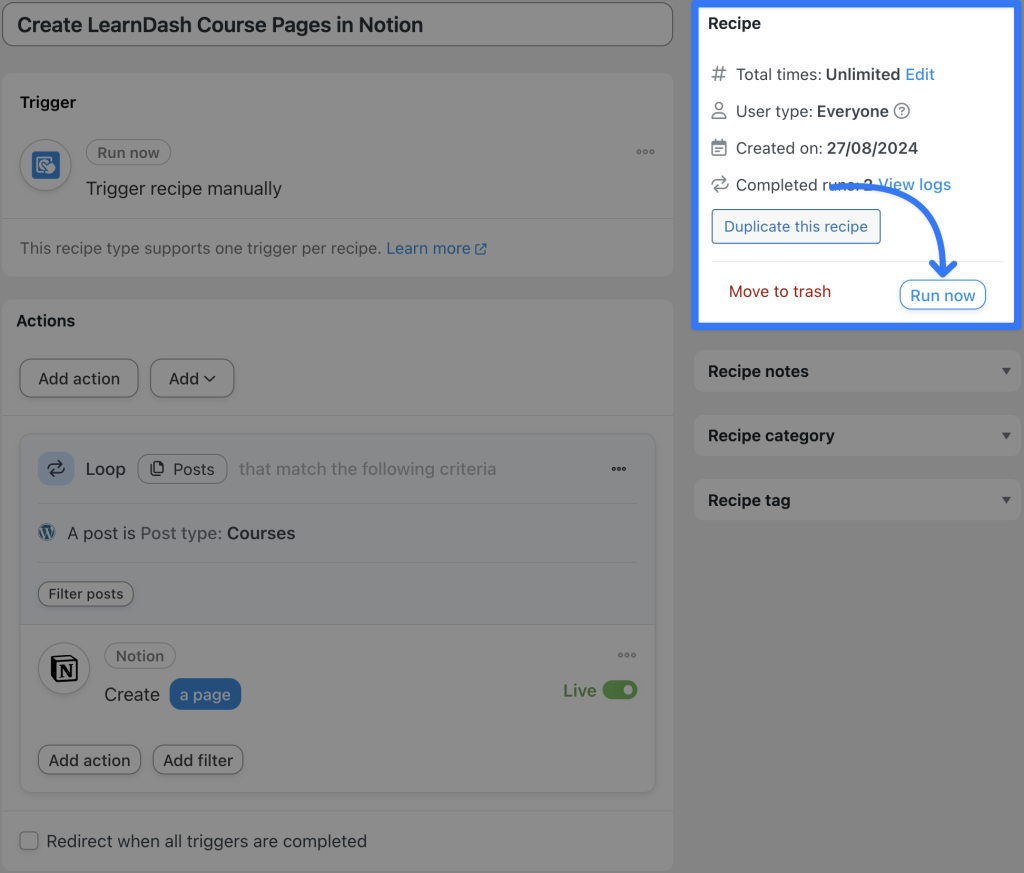
Step 5: Run Now
You’re just about ready to send your LearnDash course content to Notion. All you have to do is click Run now and kick back as Automator handles the rest.
Automator will create the pages in Notion with the LearnDash course content that we specified using our post loop tokens.
Make more time-saving recipes like this one that connect Notion to LearnDash with Uncanny Automator>>>.
Frequently Asked Questions
Conclusion
Connecting Notion to LearnDash with Uncanny Automator opens up a world of possibilities for course administrators, educators, and students alike.
By automating the transfer of enrollment data, tracking course completions, and even managing tasks and deadlines, this integration streamlines your workflow and enhances the learning experience. Whether you’re looking to keep detailed records, monitor student progress, or simply stay organized, integrating these powerful tools can transform how you manage your e-learning platform.
If you’re ready to elevate your LearnDash courses with seamless Notion integration, Uncanny Automator is the tool you need. With its easy-to-use interface, extensive integrations, and cost-effective automation, it’s never been simpler to connect and automate your favorite apps.
Start building your automated workflows today, and take your e-learning management to the next level>>>.
Until next time, happy automating!






This Post Has 0 Comments