Revive old WordPress posts with AI and Uncanny Automator. Learn how to reverse content decay…
How to Connect EDD to MailPoet: A Simple Guide
Upgrade your email marketing and boost your digital product sales. Connect EDD to MailPoet with Uncanny Automator and unlock powerful new integrations.
Are you looking to upgrade and automate your email marketing? Maybe you want to boost your digital product sales with personalized email campaigns? Connecting Easy Digital Downloads to MailPoet might just be the solution you need.
EDD is one of the most popular plugins for selling digital products on WordPress, while MailPoet makes creating and managing email campaigns directly from your WordPress dashboard a breeze.
By integrating these two powerful tools, you can automate your marketing, engage customers with targeted emails, and take your sales to the next level.
In this guide, we’ll show you how to integrate EDD and MailPoet using Uncanny Automator. By the end of this walkthrough, you’ll be able to synchronize your EDD customers with your MailPoet lists, and even carry out GDPR compliance.
So what are we waiting for? Let’s get started!
Why Connect EDD to MailPoet with Automator
Uncanny Automator is the #1 automation and integration tool for WordPress websites. Using simple (yet powerful) combinations of triggers and actions called recipes, Automator allows you to connect all of your favorite apps and plugins—such as EDD and Mailpoet.
Automating workflows across your various platforms and tools is, however, just the tip of the iceberg when it comes to Automator’s capabilities.
Specifically, when it comes to connecting EDD to MailPoet, there are some key features that make Automator the clear choice:
- Affordability: Unlike other automation and integration tools, Automator doesn’t charge per automation fees. That means you can sync dozens, hundreds or even thousands of contacts between EDD and MailPoet without incurring any additional costs. The more you automate and integrate, the more you save!
- Ease-of-Use: Automator’s user-friendly click-and-play interface means that you can automate complex workflows in just a few clicks—and even fewer minutes. Simply select the integrations you want in your automated workflow, choose a few triggers and actions and let Automator do the work.
- Seamlessness and GDPR Compliance: Automator integrates fully with your WordPress website and your chosen apps and plugins. Using tokens, you can segment your MailPoet subscribers using any data from your WordPress website, including order information, course progress, social links, login dates, and anything else you can think of. Moreover, because Automator is fully integrated with your WordPress website and apps, you can automate your GDPR compliance.
- Integrations and Addons: Automator has 214 integrations with more on the way all of the time. In case that wasn’t enough, Automator’s Custom User Fields, Restrict Content and User Lists addons makes managing your WordPress content that much easier.
- Scalability: Want to migrate or edit thousands of contacts? As your WordPress business grows and your user and subscriber lists get longer, you’ll appreciate Automator’s Post Loops and User Loops features. Loops give you the ability to create and manage countless contacts with the click of a button. You can also import user/subscriber lists from XML, CSV, and JSON files.
Ready to connect EDD to MailPoet? Get your Automator Pro license >>>
Not sure that Automator is for you? No worries. Download the FREE FOREVER version of Automator then register your account. You’ll get a limited number of app credits so you can connect Ontraport to WordPress—and so much more!
Add EDD Customers to MailPoet Lists
Now that you have Automator installed on your WordPress website, let’s take a look at creating our first recipe to connect EDD to MailPoet.
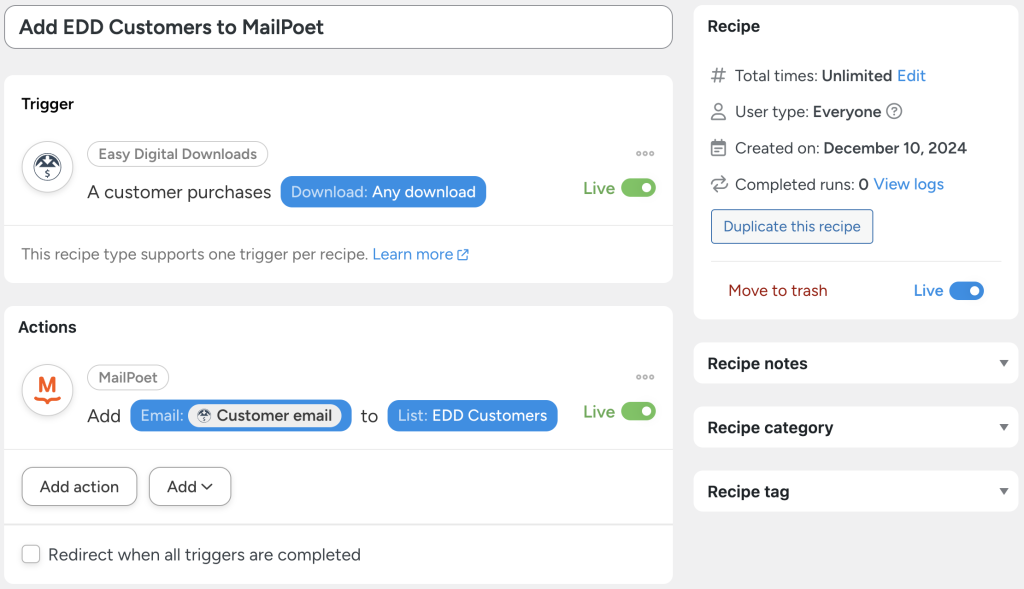
In the recipe pictured above, whenever a customer purchases a download, we can add them to a MailPoet list of our choosing. This recipe is easy to configure and you can recreate it with the free version of Automator.
Here’s how we did it.
Step 1: Create a New Recipe
From your WordPress Admin Dashboard, navigate to Automator > Add new recipe. In the popup window that appears, select Everyone.
Step 2: Name Your Recipe
Give your recipe a name that makes it easy to recognize at a glance. For example, we have named this recipe “Add EDD Customers to MailPoet Lists”.
Step 3: Configure Your Trigger(s)
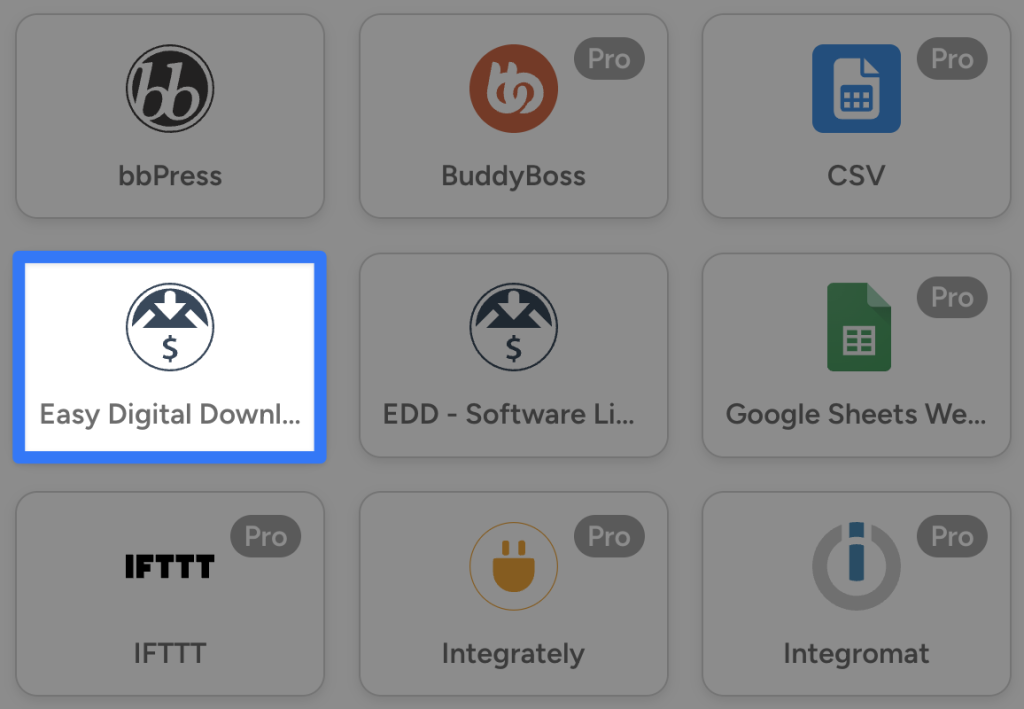
In the Trigger panel, from the menu of available integrations, select Easy Digital Downloads.
From the dropdown list that appears, select A customer purchases a download.
Automator will prompt you to select a download. Because we want to capture all of our EDD customers in this recipe, we have left the default selection, “Any download”.
Once you’re finished, click Save. Your completed trigger should look like this:
Step 4: Configure Your Action(s)
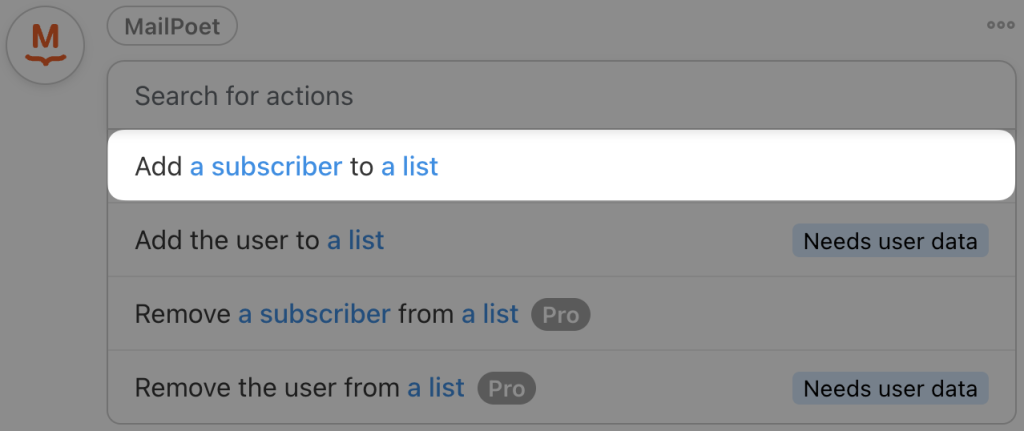
In the Actions panel, click Add action and select MailPoet.
From the dropdown list that appears, select Add a subscriber to a list.
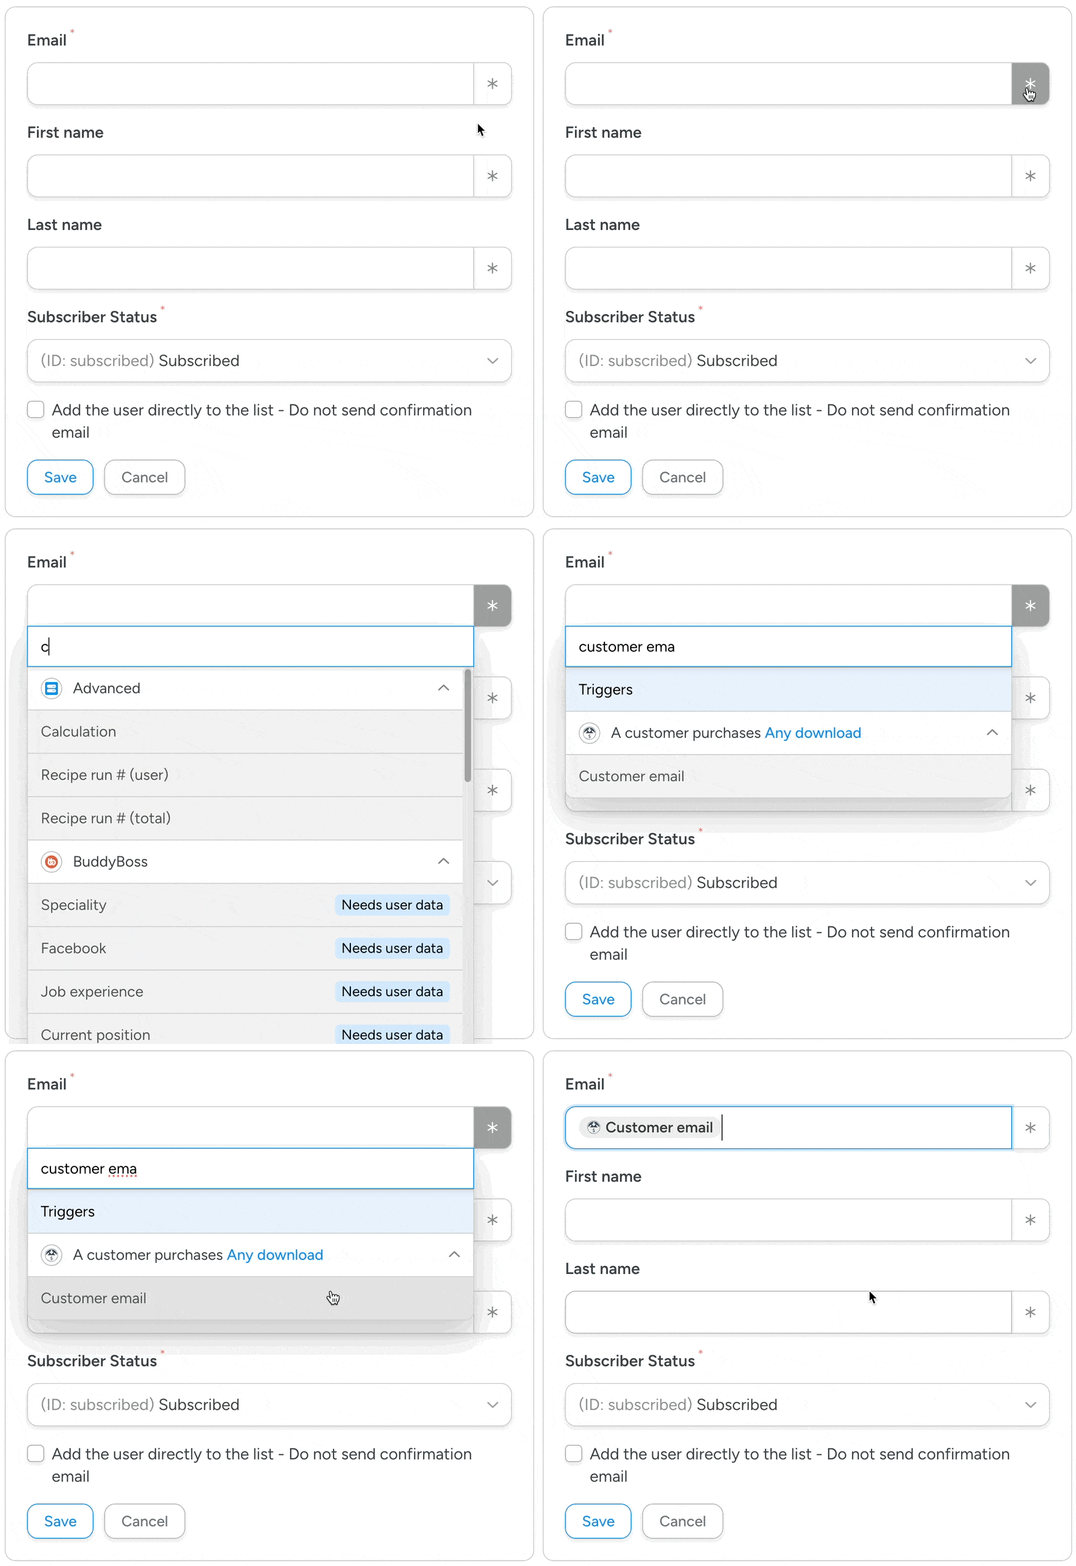
Automator will present you with a form to fill out the subscriber’s details. We will fill out these details using tokens, i.e., dynamic data pulled from your WordPress website and from within recipes.
To use a token, click the Asterisk in any given field and select the corresponding token. For example, in the Email field, select the “Customer email” token from the EDD trigger.
Fill out the remaining fields using tokens and/or static data. You can also determine the subscriber’s status and whether or not they will receive a confirmation email.
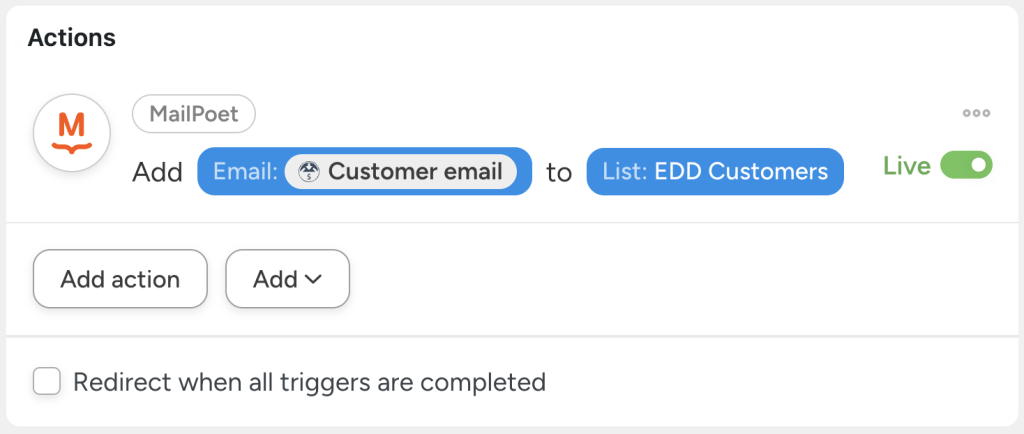
Automator will then prompt you to select the MailPoet list to which you would like to add EDD customers. Once you’re finished, click Save.
Your completed action should look something like this:
Step 5: Go Live!
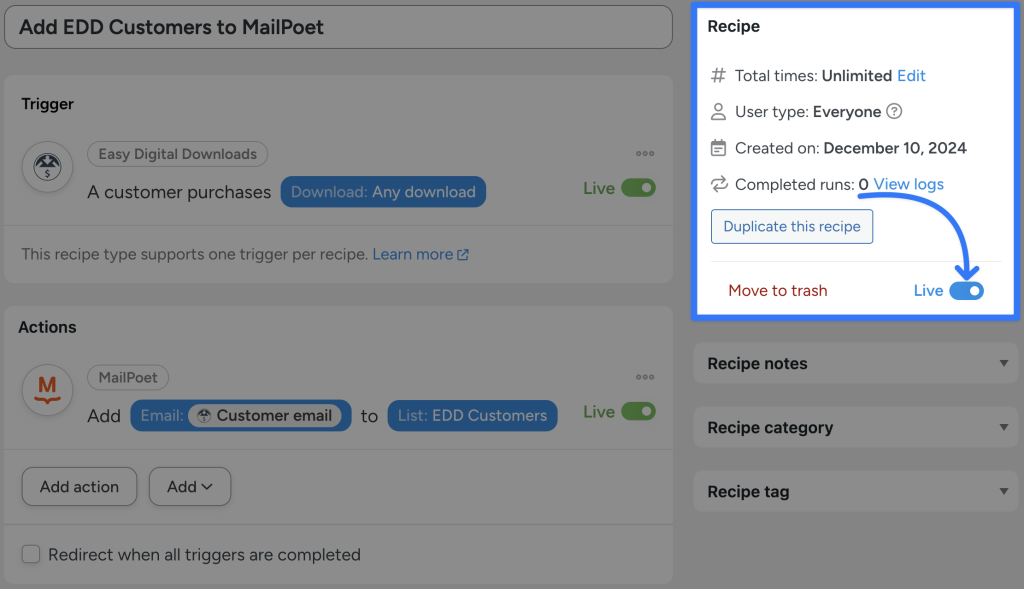
You’re just about ready to connect EDD to MailPoet. All that you have to do now is toggle the recipe from Draft to Live.
That’s it! You’ve successfully created an EDD and MailPoet integration in just five easy steps.
But what if you wanted to add the customer to multiple MailPoet lists based on their purchase? Or how about creating a WordPress user whenever a customer purchases a digital product, so that MailPoet can add them to your WordPress Users List?
You can do all of that and more with Automator Automator Pro.
Move EDD Customers Between MailPoet Lists
If you’re using EDD – Recurring Payments or EDD – Software Licensing, then you’ll love this Automator recipe.
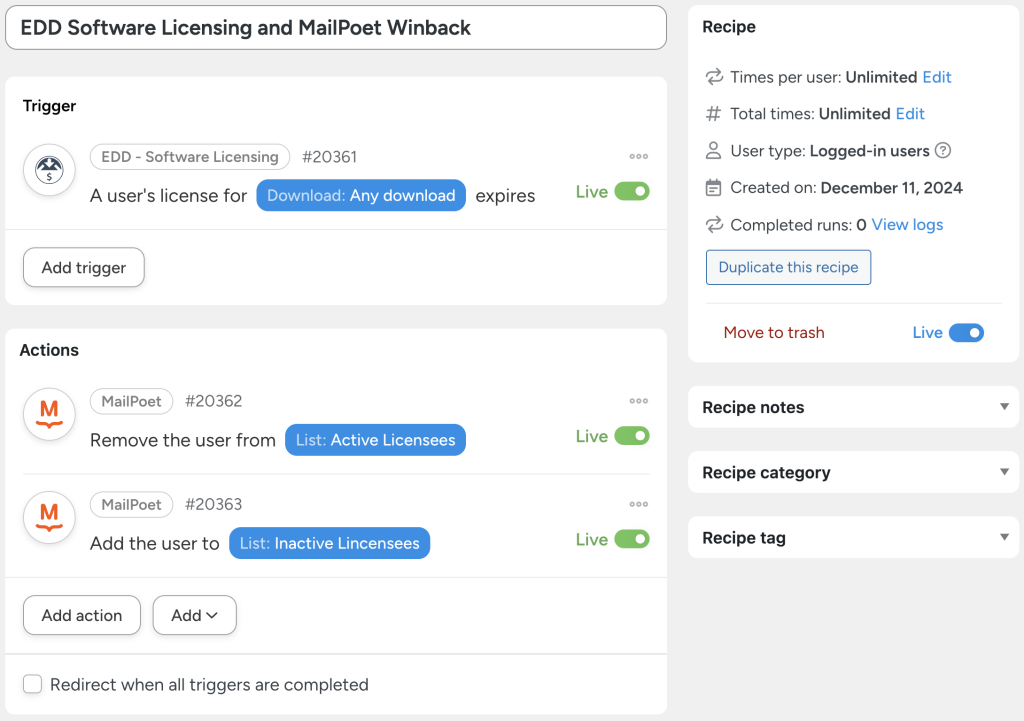
In the recipe pictured above, whenever a customer’s software license expires, we’re able to remove them from one list and then add them to another one. This way, we can target our “lapsed” customers with highly-engaging winback campaigns.
Here’s how we did it.
Step 1: Create a New Recipe
From your WordPress Admin Dashboard, navigate to Automator > Add new recipe. In the popup window that appears, select Logged-in users.
Step 2: Name Your Recipe
Give your recipe a name that makes it easy to recognize at a glance. For example, we have named this recipe “EDD Software Licensing and MailPoet Winback”.
Step 3: Configure Your Trigger(s)
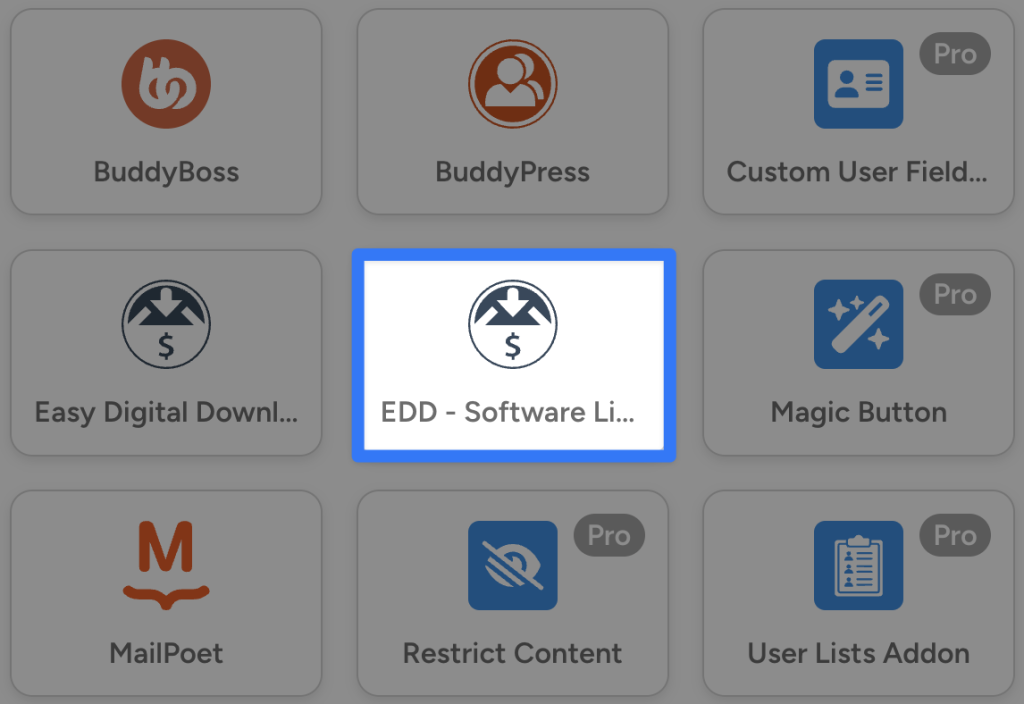
In the Trigger panel, from the menu of available integrations, select EDD – Software Licensing.
From the dropdown list that appears, select A user’s license for a download expires.
Automator will prompt you to select a download. Once you’re finished, click Save.
Step 4: Configure Your Action(s)
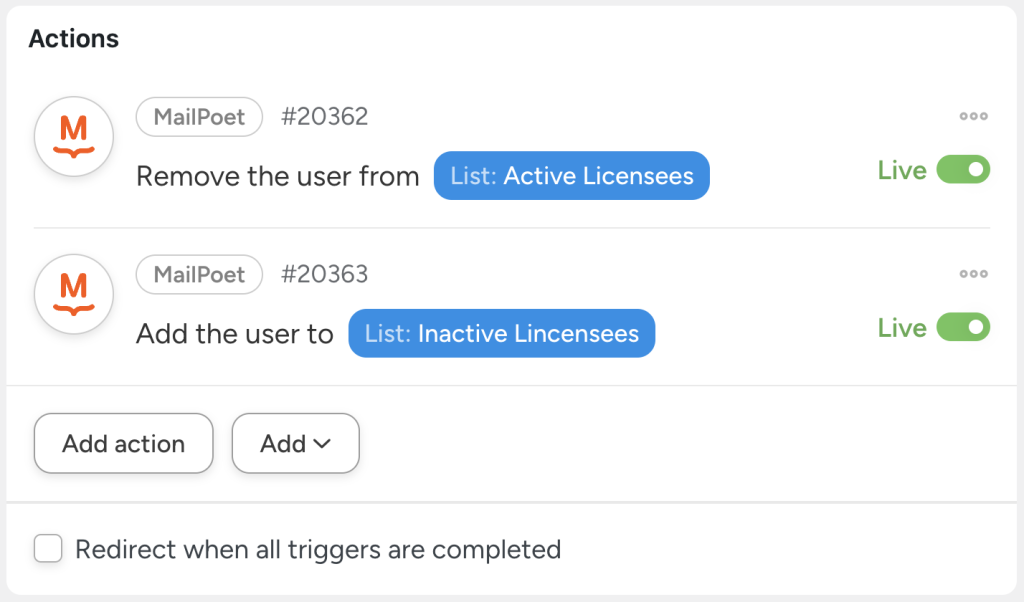
In the Actions panel, click Add action and select MailPoet. From the dropdown list that appears, select Remove the user from a list.
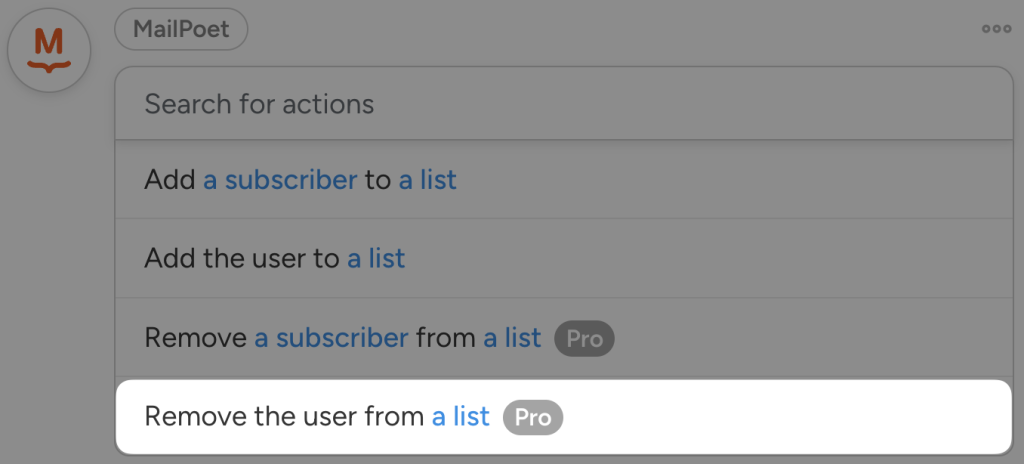
Automator will prompt you to select the list from which you would like to remove the user. Once you’re finished, click Save.
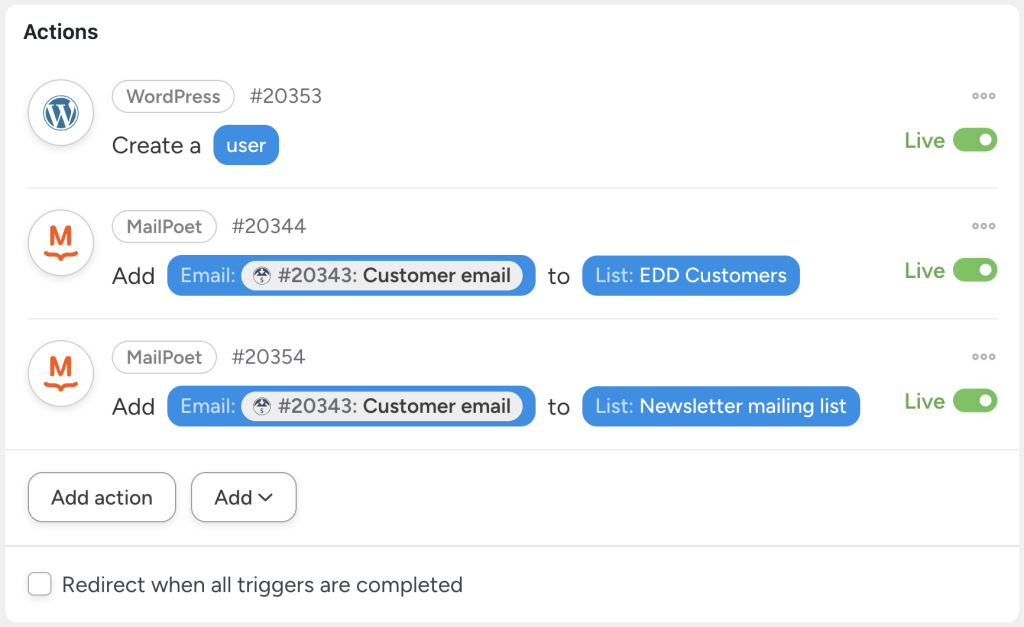
To add a second action, click Add action and select MailPoet. From the dropdown list that appears, select Add the user to a list. Automator will prompt you to select a list.
Once you’re finished, click Save. Your Actions panel should now look something like this:
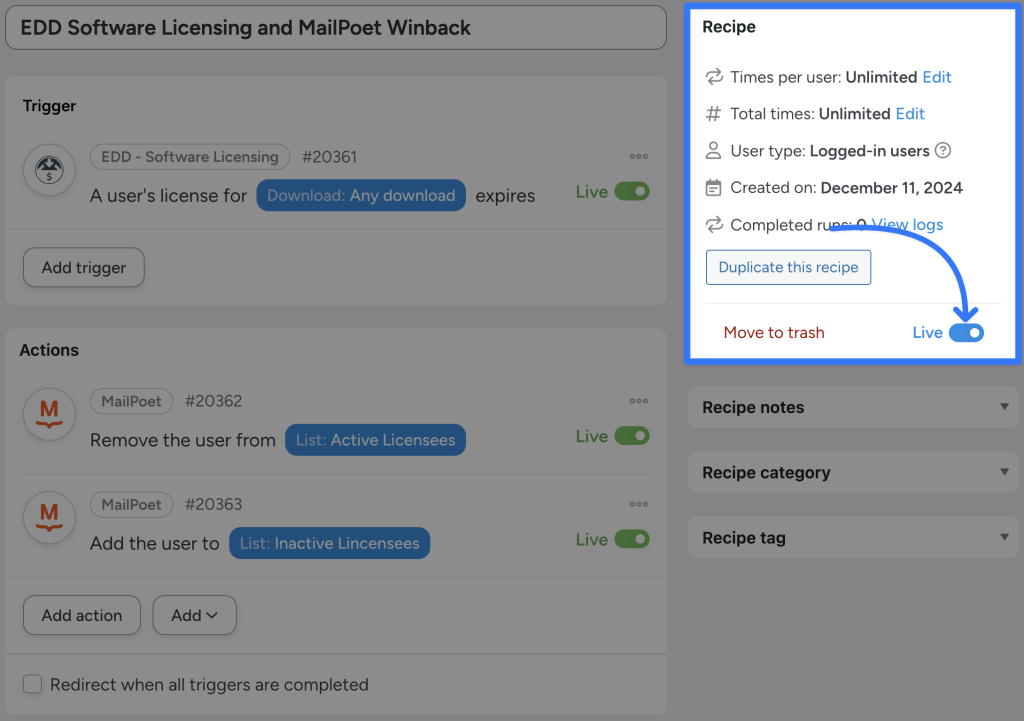
Step 5: Go Live!
Once again, all that’s left for you to do is toggle the recipe from Draft to Live.
Want to make managing your EDD customers and MailPoet lists even easier? Automator’s Custom User Fields and User Lists addons can help you upgrade your email marketing game.
Get 3 FREE Addons with a Pro – Plus or Elite License >>>
More Ways to Connect EDD to MailPoet
Now that you’ve gotten the hang of creating Automator recipes, you can connect EDD to MailPoet anyway you choose. Here are just a few examples to get you started.
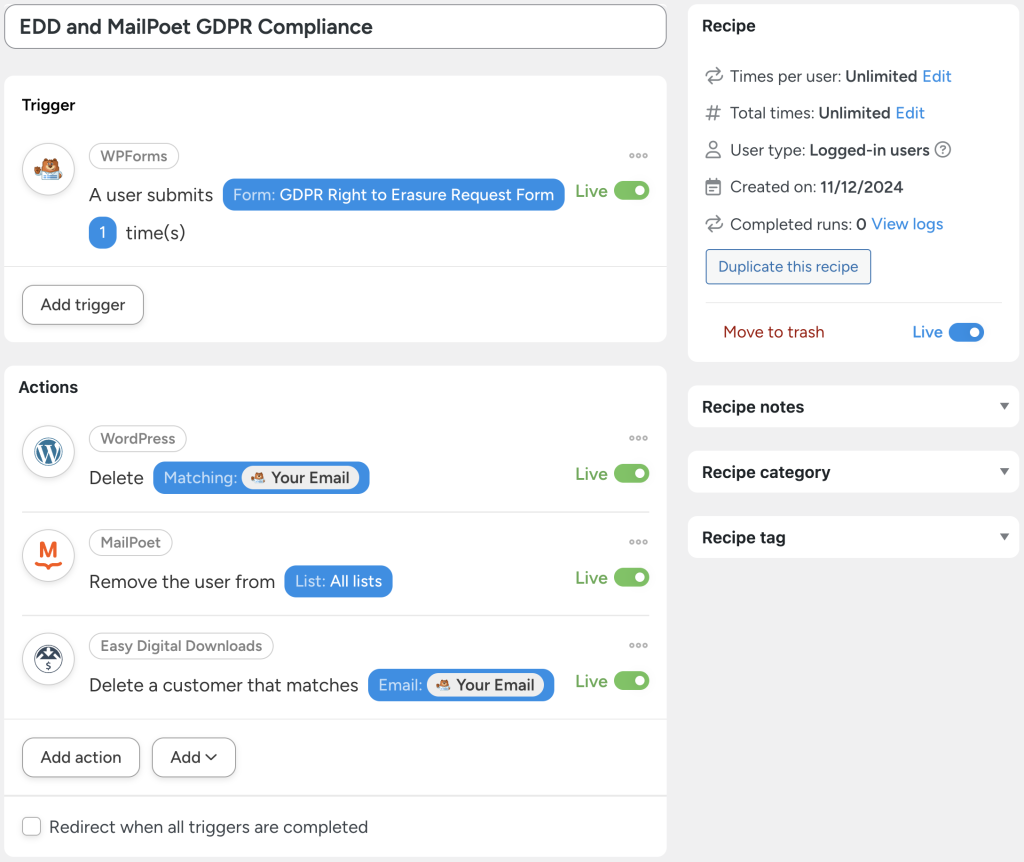
EDD and MailPoet GDPR Compliance
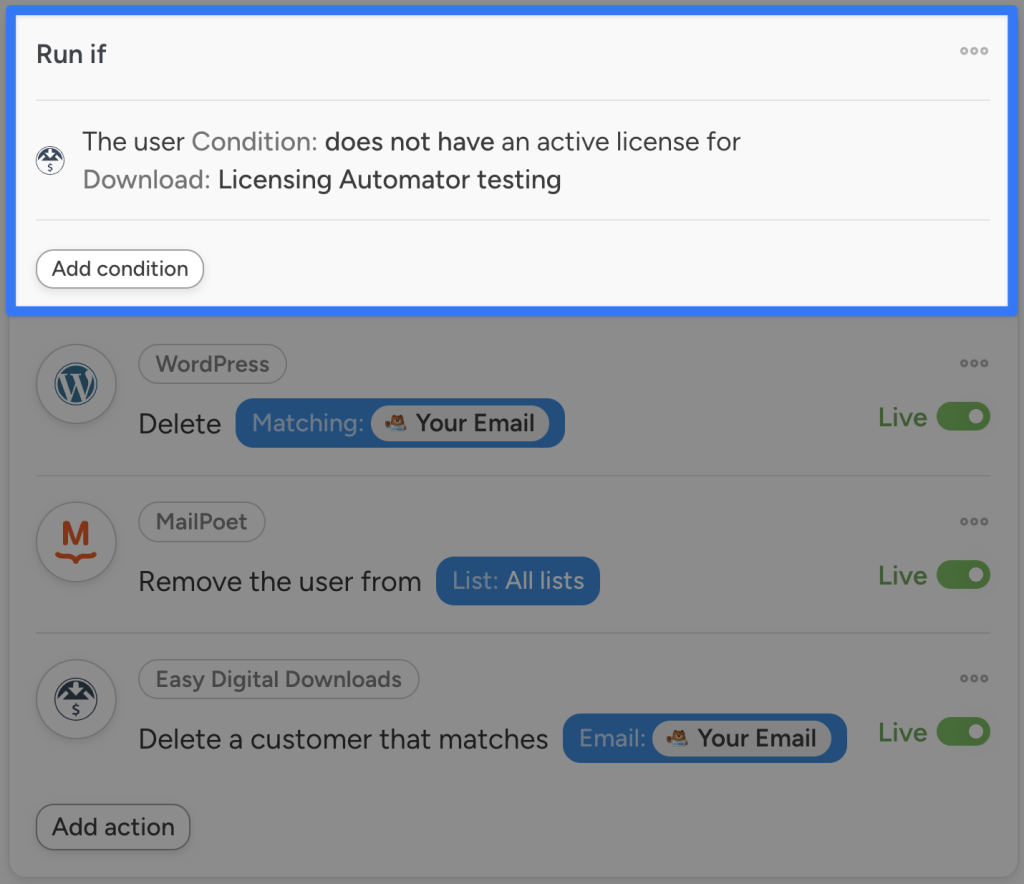
Automatically process GDPR Right to Erasure requests. Better yet, only process the request if a user does not have an active subscription or license, ensuring smooth and responsive workflows.
(Note: MailPoet forms are strictly registration forms. In other words, all MailPoet forms necessarily add subscribers to lists. Therefore, we are using WPForms to process data erasure requests.)
Bulk Add EDD Customers to MailPoet Lists
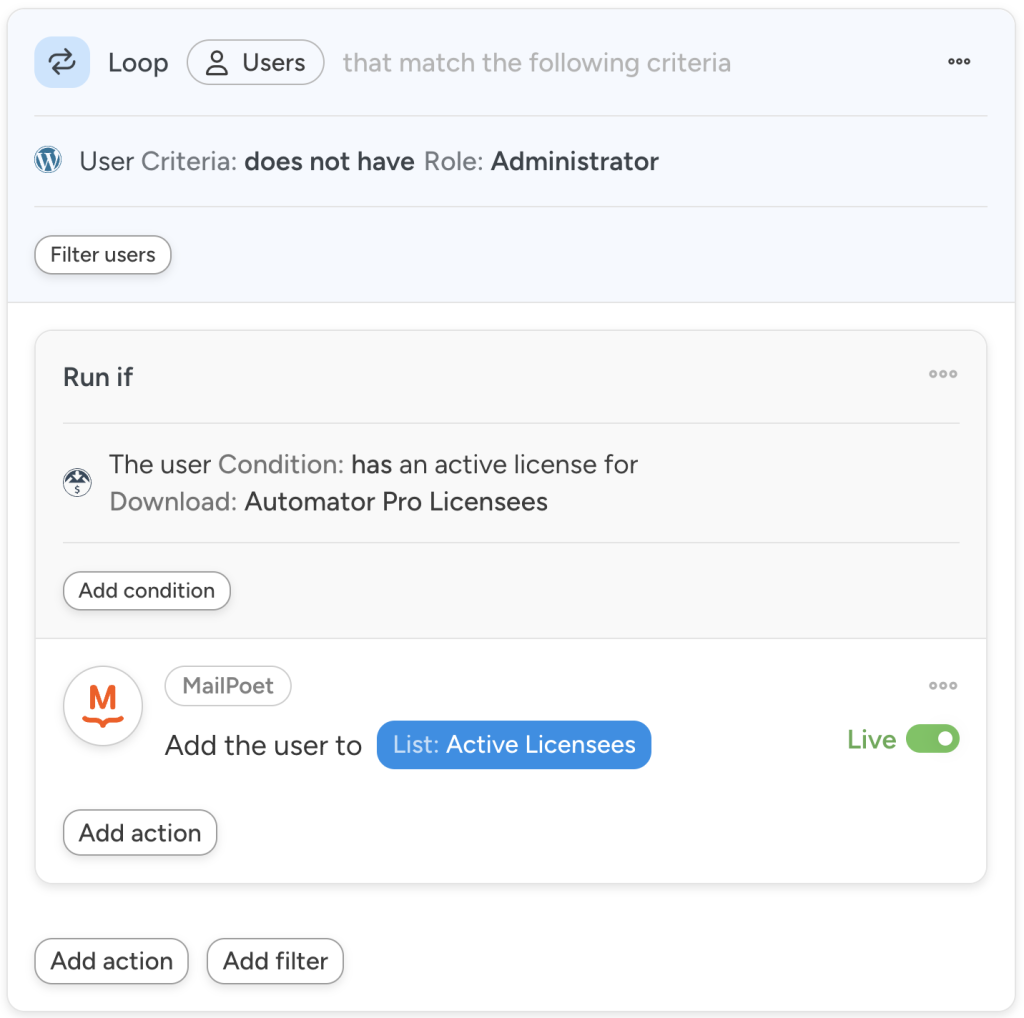
Using Automator’s Loops feature, we can populate entire MailPoet lists with subsets of our EDD customers with the click of a button.
In the recipe pictured above, for example, we target all of our EDD customers with an active license and add them to a MailPoet list. With automations like this one, you can simplify and enhance your email marketing workflows.
Frequently Asked Questions
Conclusion
Connecting Easy Digital Downloads to MailPoet is a game-changer for anyone looking to streamline email marketing and boost digital product sales.
With Uncanny Automator, you can set up powerful automations in just a few clicks—no coding, no headaches. Whether you’re sending personalized welcome emails, running win-back campaigns, or segmenting your audience for better targeting, this integration makes it all easy and efficient.
Ready to take your email marketing to the next level? Download the free version of Uncanny Automator to get started today. Need even more features? Upgrade to Automator Pro and unlock advanced workflows that save time and drive results.
Until next time, happy automating!









This Post Has 0 Comments