Revive old WordPress posts with AI and Uncanny Automator. Learn how to reverse content decay…
How to Create an Automated Welcome Email Drip Campaign in WordPress (Without a CRM)
Learn how to set up an automated welcome email drip campaign in WordPress—all without a CRM. Build trust, boost engagement, and drive conversions with Uncanny Automator.
First impressions matter—especially in business. When someone joins your email list, they’re raising their hand and saying, “I’m interested in what you have to offer.”
That moment is your golden opportunity to turn a new subscriber into a loyal reader, customer, or community member. And the best way to do that? With an automated welcome email drip campaign.
If you’re running a small WordPress business, you might think you need an expensive CRM to pull it off. But here’s the good news: you don’t.
With the right tools, you can create professional, automated welcome emails right inside WordPress—no extra platforms, no complicated setup, and no monthly “success tax.”
In this guide, you’ll learn exactly what an automated welcome series is, why you don’t need a CRM to get started, and how to set one up in WordPress with Uncanny Automator.
I’ll also walk you through best practices and give you a proven drip campaign you can copy for your own business. By the end, you’ll have everything you need to make new subscribers feel welcome, build trust from day one, and set the stage for lasting growth.
Let’s get started.
What Is an Automated Welcome Email Drip Campaign?
An automated welcome email drip campaign is a set of pre-written emails that are automatically sent to new subscribers when they join your list.
Instead of manually sending an email every time someone signs up, automation ensures that each new subscriber receives the right message at the right time—consistently.
The purpose of a welcome series is simple: nurture new relationships, build trust, and guide subscribers toward meaningful actions. Whether that’s reading your blog, buying a product, or joining your community. And it works.
Welcome emails generate 320% more revenue on average than other promotional emails, thanks to their higher open and engagement rates.
Automation is what makes this powerful marketing workflow run smoothly.
“An automated welcome email drip campaign is a set of pre-written emails that are automatically sent to new subscribers when they join your list.”
It ensures that no matter when someone subscribes, they always receive your carefully planned sequence. It also allows you to personalize messages at scale—adding names, tailoring offers, and even adjusting timing based on subscriber behavior.
For small businesses, this means you can deliver a polished, reliable experience that feels personal, while saving hours of manual work.
What’s the Ideal Welcome Email Drip Campaign?
Now that we’ve established what an automated welcome drip campaign is, the next question is: what does it actually look like?
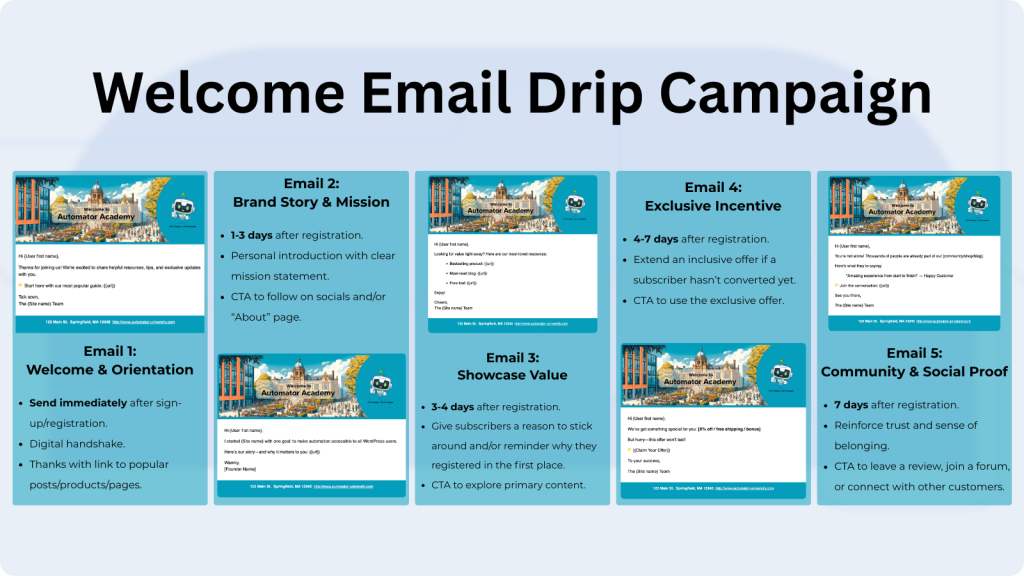
You don’t need to reinvent the wheel. Every effective welcome email drip campaign usually follows the same structure. Whether you’re growing a blog audience, driving first sales, or building a member community, the typical email sequence is:
- Email 1: Welcome & Orientation
- Email 2: Brand Story & Mission
- Email 3: Showcase Value
- Email 4: Exclusive Offers/Incentives
- Email 5: Community & Social Proof
Small WordPress businesses can adapt this typical email sequence to match their own goals and audience.
Why Create an Automated Welcome Drip Campaign Without a CRM?
If you’ve been looking into email marketing (especially automated email marketing), you’ve probably heard the same advice everywhere you turn: “You need a CRM.” But for many small WordPress businesses, that’s simply not feasible—or true.
CRMs can be expensive, complicated, and often more than you really need.
They come with advanced segmentation tools, analytics dashboards, and scaling fees. These are great features for enterprise teams, but overwhelming (and costly) for a solopreneur, blogger, or small ecommerce shop.
In fact, many small businesses end up paying for features they never use, or wasting time wrestling with unnecessary complexity.That’s where Uncanny Automator comes in. By building your welcome series directly in WordPress, you:
- Own and control your data—no middlemen or third-party lock-in.
- Avoid scaling fees—no hidden costs just because your list grows.
- Keep everything in one system—your website, ecommerce platform, email automation, and subscriber records all under one roof, all integrated.
This setup is perfect for small ecommerce stores, bloggers, and membership sites. If you, like me, want low-cost yet professional automated email marketing without the expensive frills of a CRM, Automator is your ideal tool.
But that’s enough talk for now. Let’s start building your automated welcome email drip campaign together.
What You’ll Need to Send Automated Welcome Drip Campaigns
Before you start building your welcome series, let’s make sure you’ve got the right tools in place. Don’t worry—you won’t need a pricey CRM or an enterprise tech stack.
Everything can be done right inside WordPress with just a couple of essentials.
Uncanny Automator
Uncanny Automator is the #1 automation and integration tool for WordPress sites. With a built-in email integration and features such as delays and filters, you can build simple drip campaigns.
Whether you are running a WooCommerce business or an online blog, here’s how Automator can help you with your email marketing:
- Instantly share new posts, products, etc.
- Integrate with your ecommerce platform (Woo, EDD, and others).
- Generate email copy with AI.
- Create simple segments with user meta.
- Send email campaigns with the click of a button.
Automator Pro Plus and Elite licenses (starting at just $249/year) also give you access to powerful addons to help you manage email lists and subscriber statuses within WordPress.
I’ll show you more of those features later on, but for now grab your Automator Pro license >>>.
WP Mail SMTP Pro
WP Mail SMTP Pro is the leading WordPress email deliverability and tracking plugin. While you don’t necessarily need WP Mail SMTP Pro to create automated welcome email campaigns, it will greatly enhance the practicality and functionality of your WordPress emails.
When paired with Automator, WP Mail SMTP Pro lets you create custom metrics by integrating your email sequences with tools such as Google Sheets and Airtable.
I’m a big fan of WP Mail SMTP Pro myself and highly recommend using it if you’re sending any emails from your WordPress site.
Want some help getting started with SMTP Pro? Check out our guides below:
That’s it—no complicated dashboards, no steep learning curve. With these tools, you’ll have everything you need to launch a professional automated welcome series right from your WordPress site.
Step-by-Step: How to Build an Automated Welcome Series in WordPress
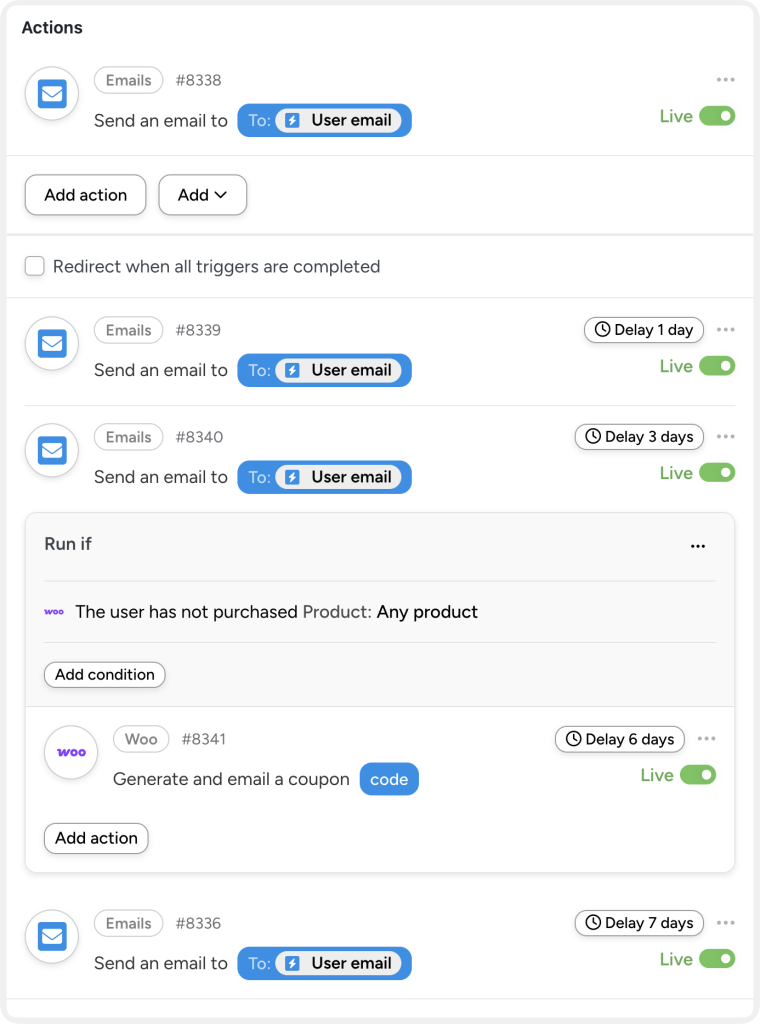
Now that you have everything you need, let’s build this welcome campaign together. Once we’re finished, you’ll have an automated welcome email sequence that looks something like this:
Let’s get started.
Step 1: Create and Name a New Recipe
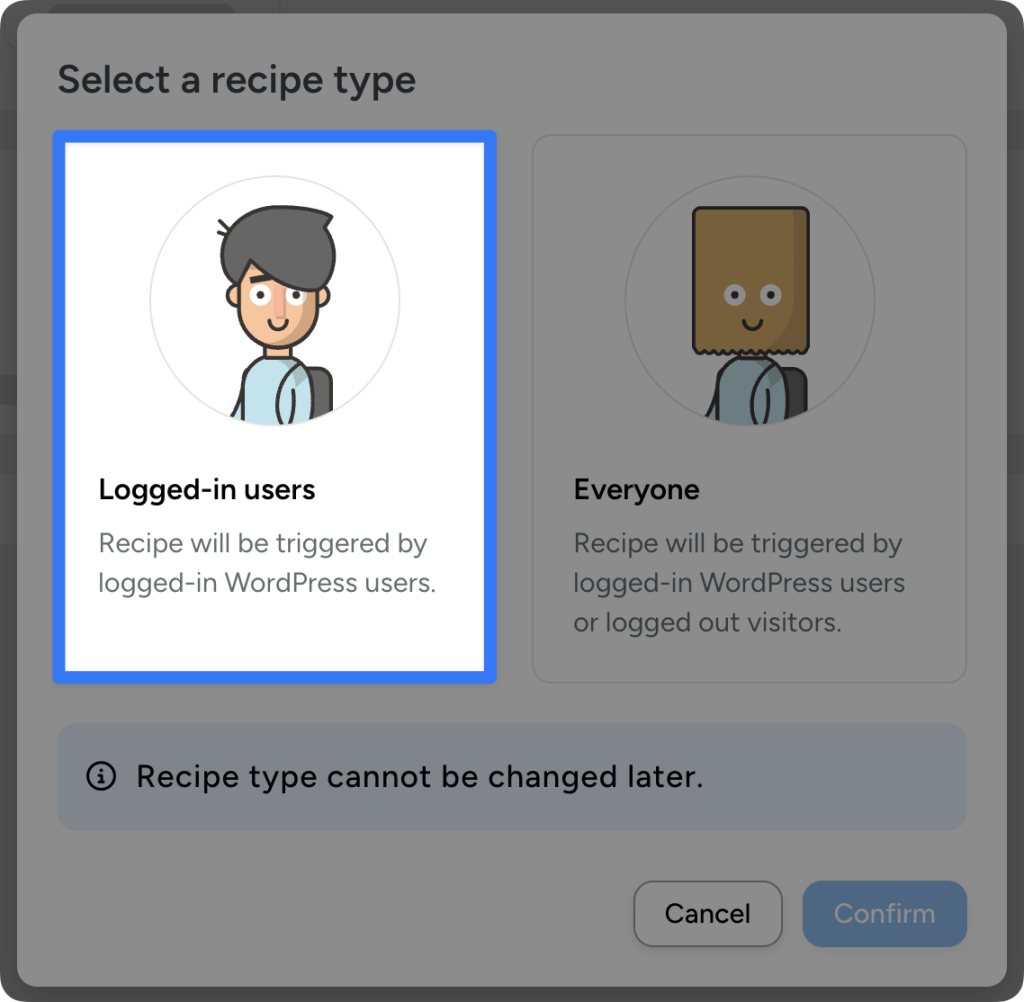
From your WordPress Admin Dashboard, navigate to Automator > Add new recipe. In the modal that appears, select Logged-in users.
Give your recipe a name that makes it easy to recognize at a glance. For example, I named my recipe “Welcome Email Drip Campaign”.
Step 2: Configure Your Trigger(s)
You have some flexibility in determining what specific behavior triggers your welcome series. It could be a form submission from a plugin like WPForms or a first-time login.
The best trigger, however, would be upon the user’s registration on your site.
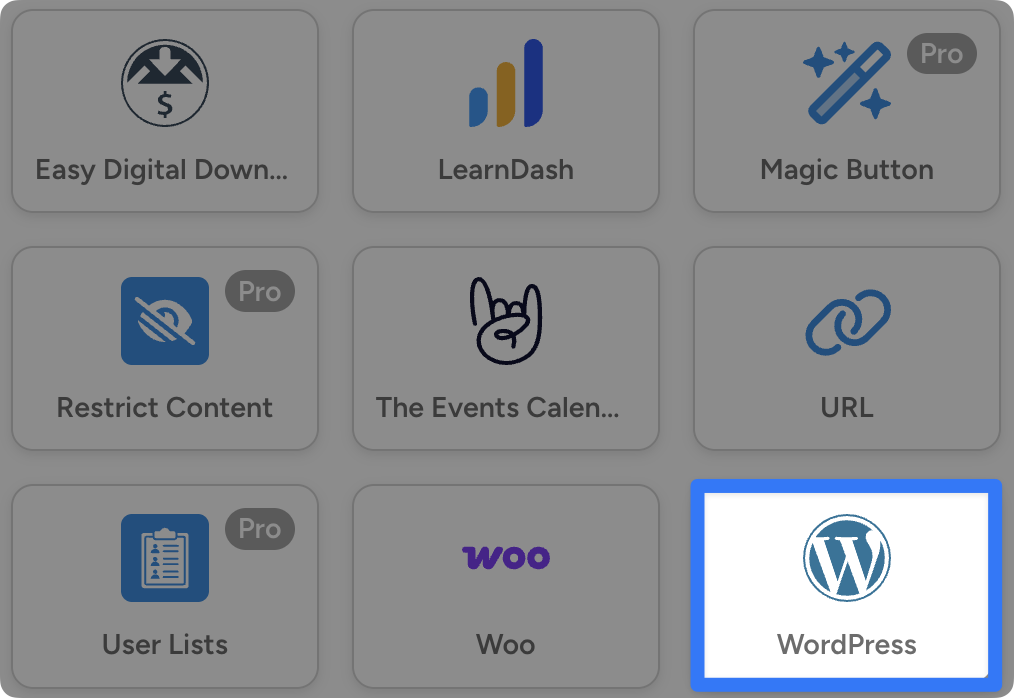
In the Trigger panel, from the menu of available integrations, select WordPress.
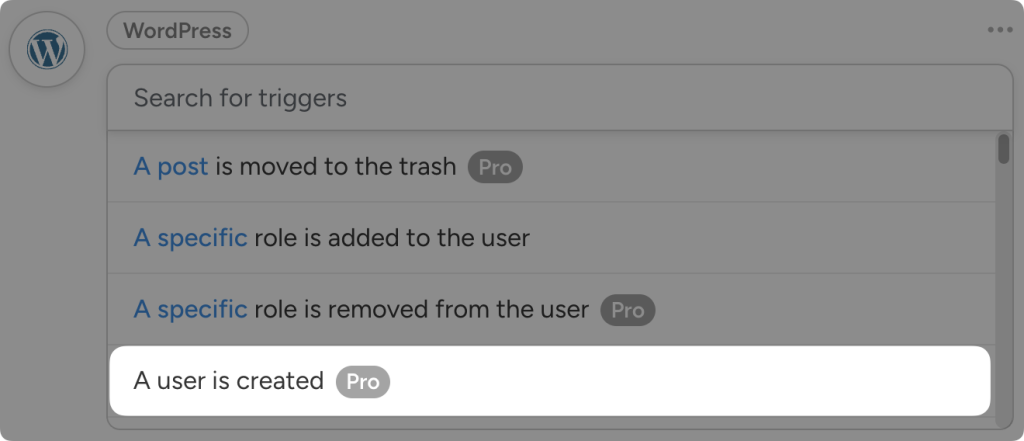
From the dropdown list that appears, select A user is created.
Want to find out how to encourage more sign-ups? Check out our guide on automating lead generation and boosting your subscriber numbers >>>.
Step 3: Draft Your First Welcome Email
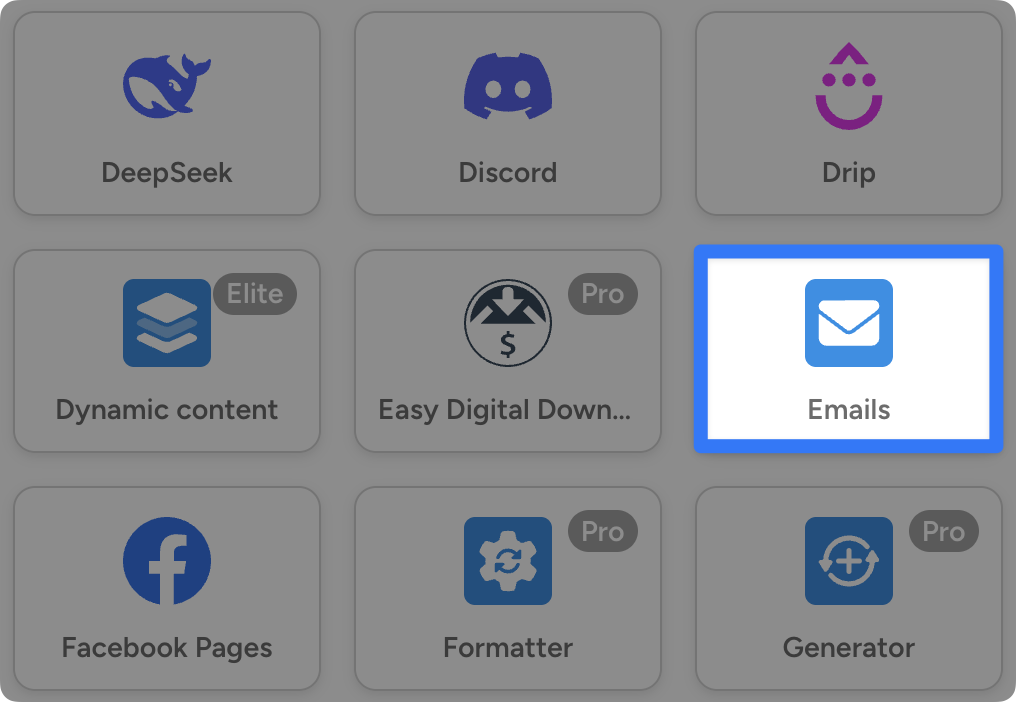
In the Actions panel, click Add action and select Emails.
From the dropdown list, select Send an email.
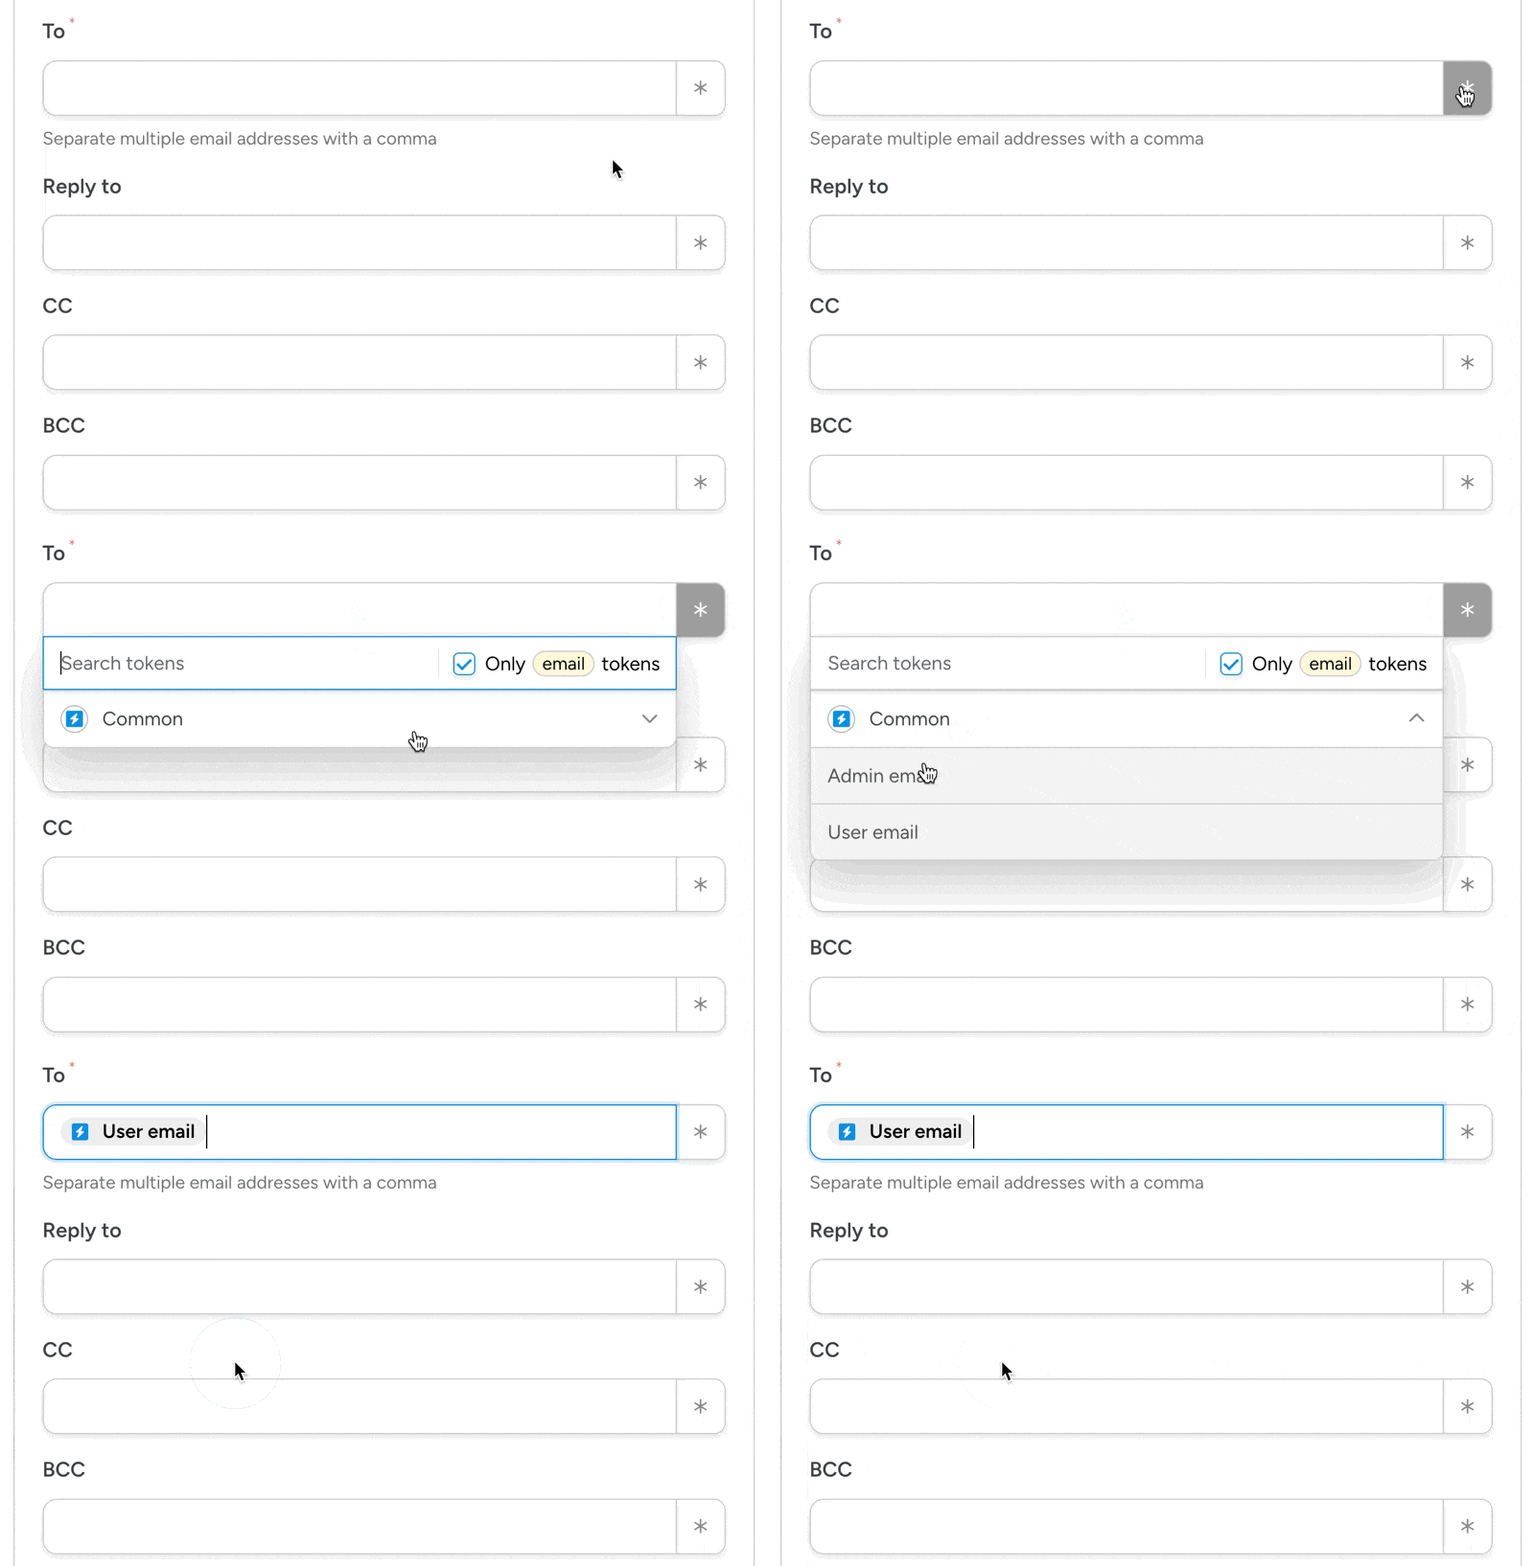
Automator will present you with a form to draft your email and its settings. We’re going to fill out these fields with a combination of static text and tokens (i.e., dynamic data from your WordPress site).
In the To field, click the Asterisk and select “User email”.
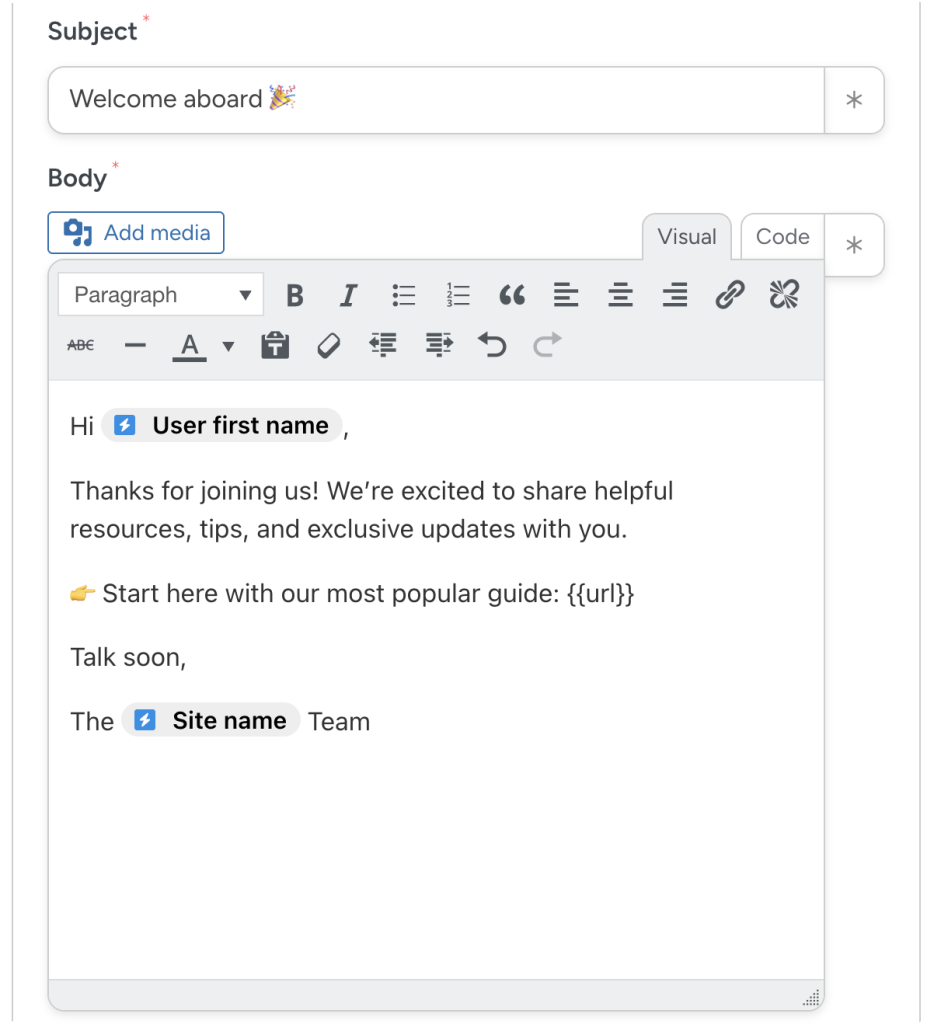
Next, set your Reply to email, draft your subject line, and compose your “Welcome & Orientation” email.
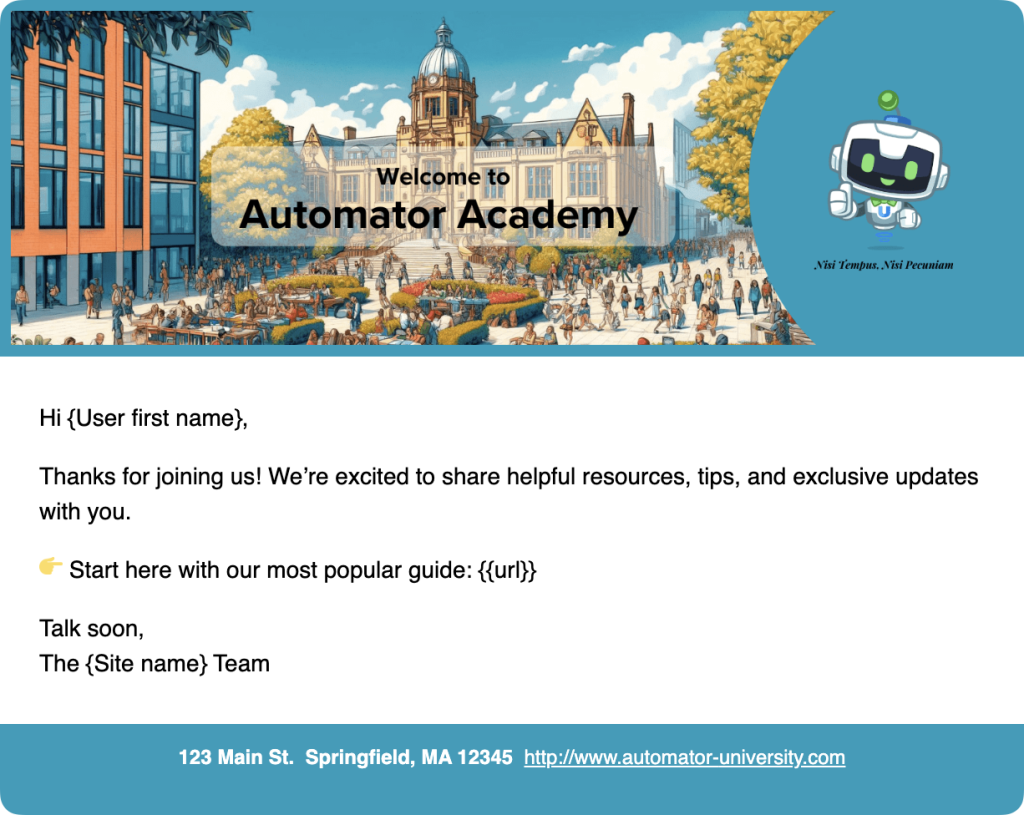
For example, here’s a very straightforward email:
Send a test to yourself to see how your email looks on desktop and mobile. Once you’re satisfied with your email, click Save.
Want to know how we made a visually appealing email straight in WordPress? Check out our guide on branding and formatting your WordPress emails >>>.
Step 4: Draft Your Second Welcome Email
The first email that we just created together will go out to your new WordPress users right after they sign up.
Now, let’s focus on creating the next email in the sequence: the “Brand Story & Mission”.
Configure this action just as you did with the first email. Emails > Send an email > Draft your email > Test > Save.
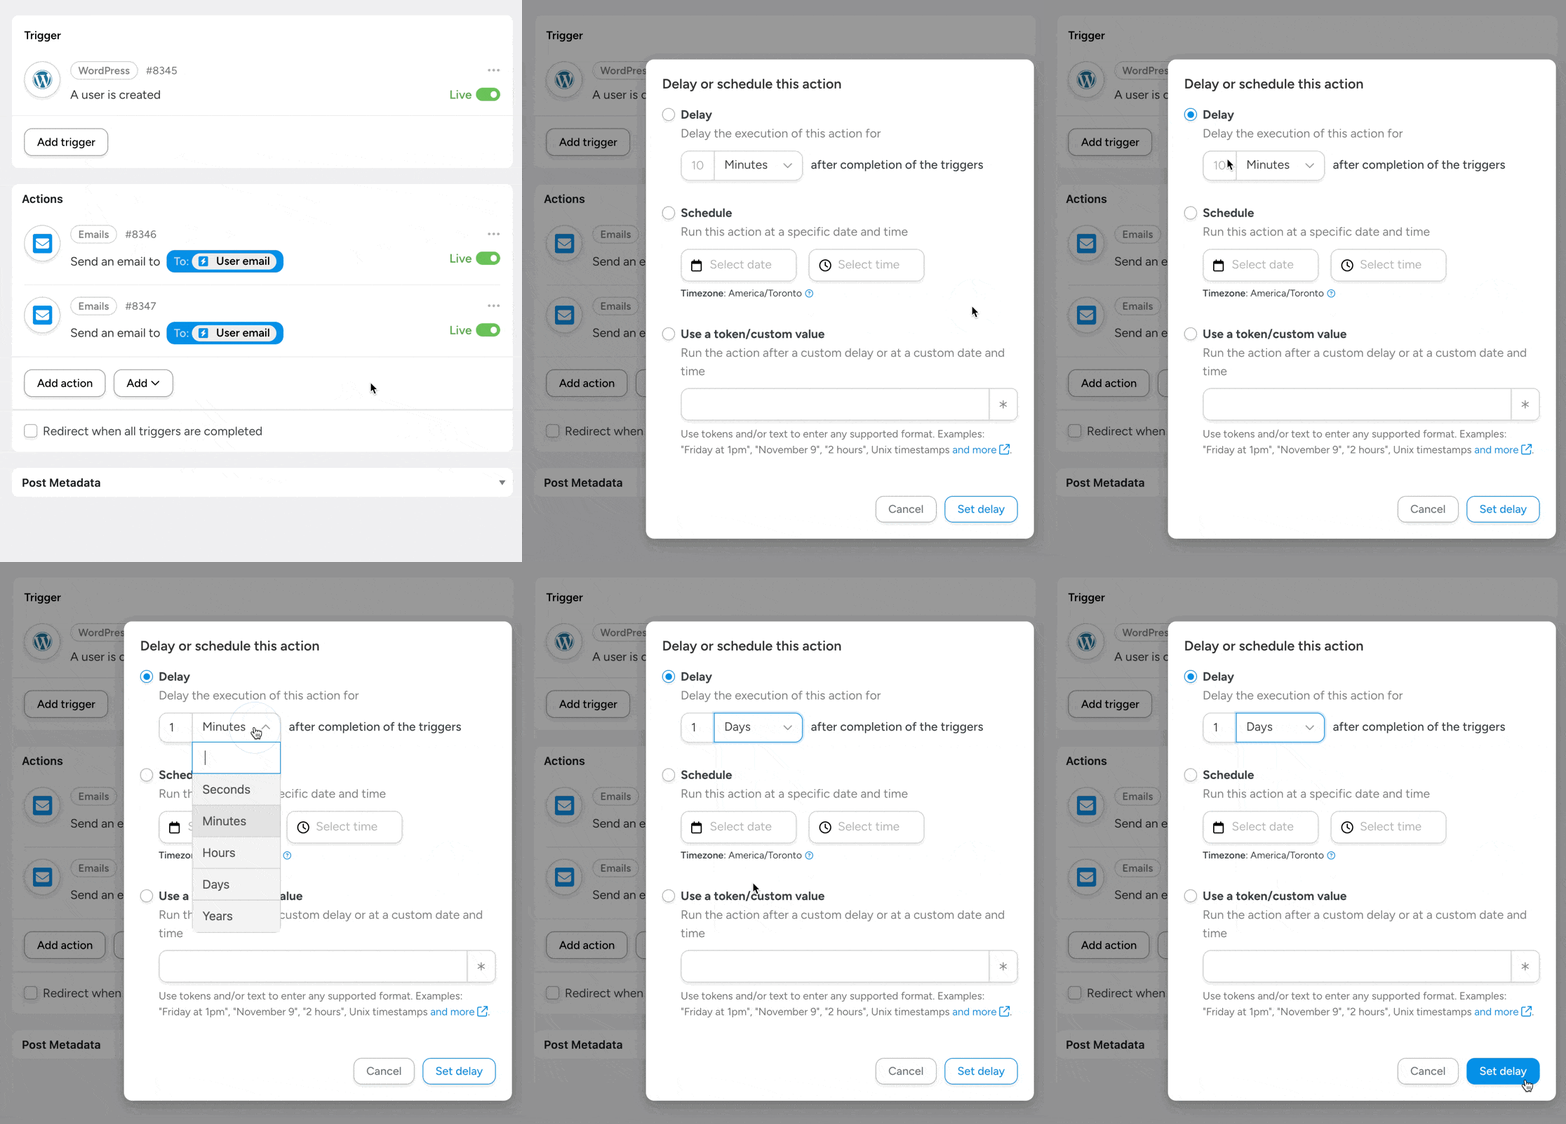
Once you’ve saved the second email action, hover over it and click Delay.
In the modal that appears, set your optimal delay for the first second email. Once you’re finished, click Set delay.
Step 5: Send Personalized Discounts
You can continue using Automator’s Emails integration along with delays to complete your automated welcome email campaign. However, if you’re running a WooCommerce store, you can have additional features at your fingertips.
The fourth email in a sequence usually contains an exclusive offer or discount for subscribers who haven’t already converted into customers.
Here’s how you can generate this email with Automator.
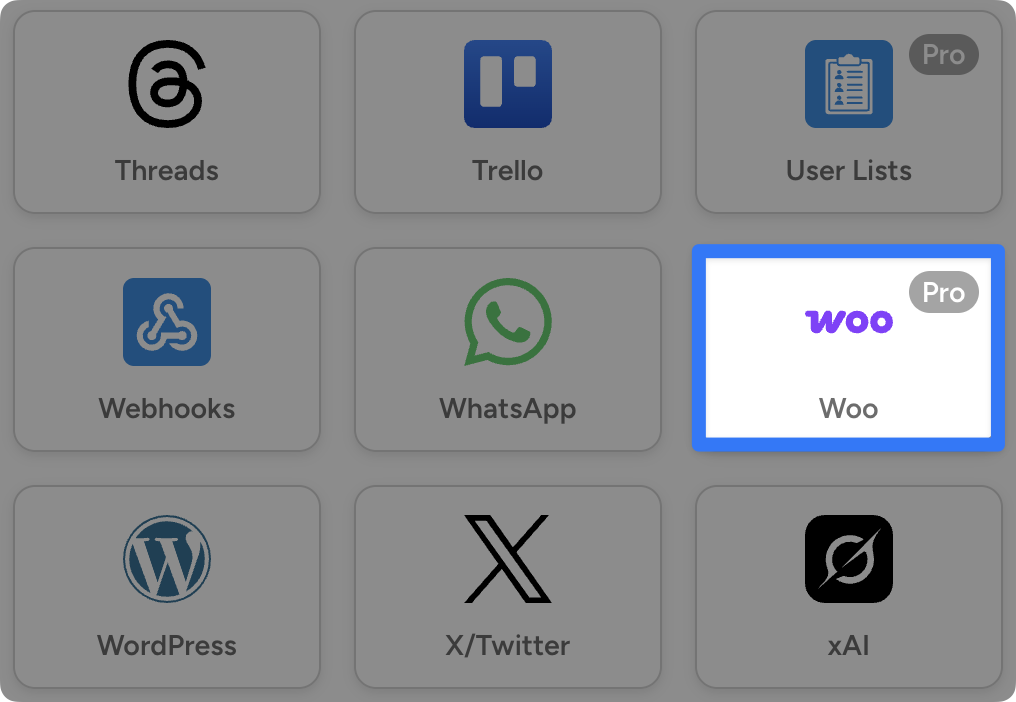
In the Actions panel, click Add action and select Woo.
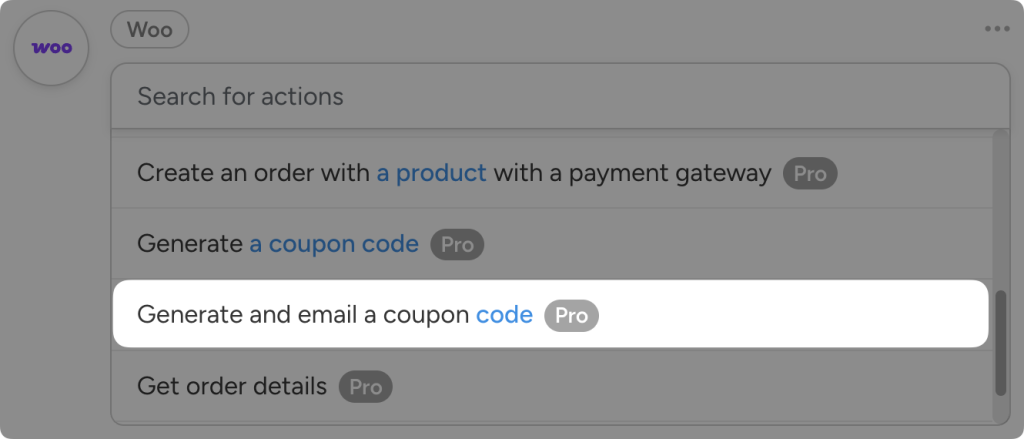
From the dropdown list that appears, select Generate and email a coupon code.
Automator will present you with a form for configuring the details of your exclusive offer (type and amount of discount, products, expirations, etc.) and drafting your email.
Once you’re finished, click Save.
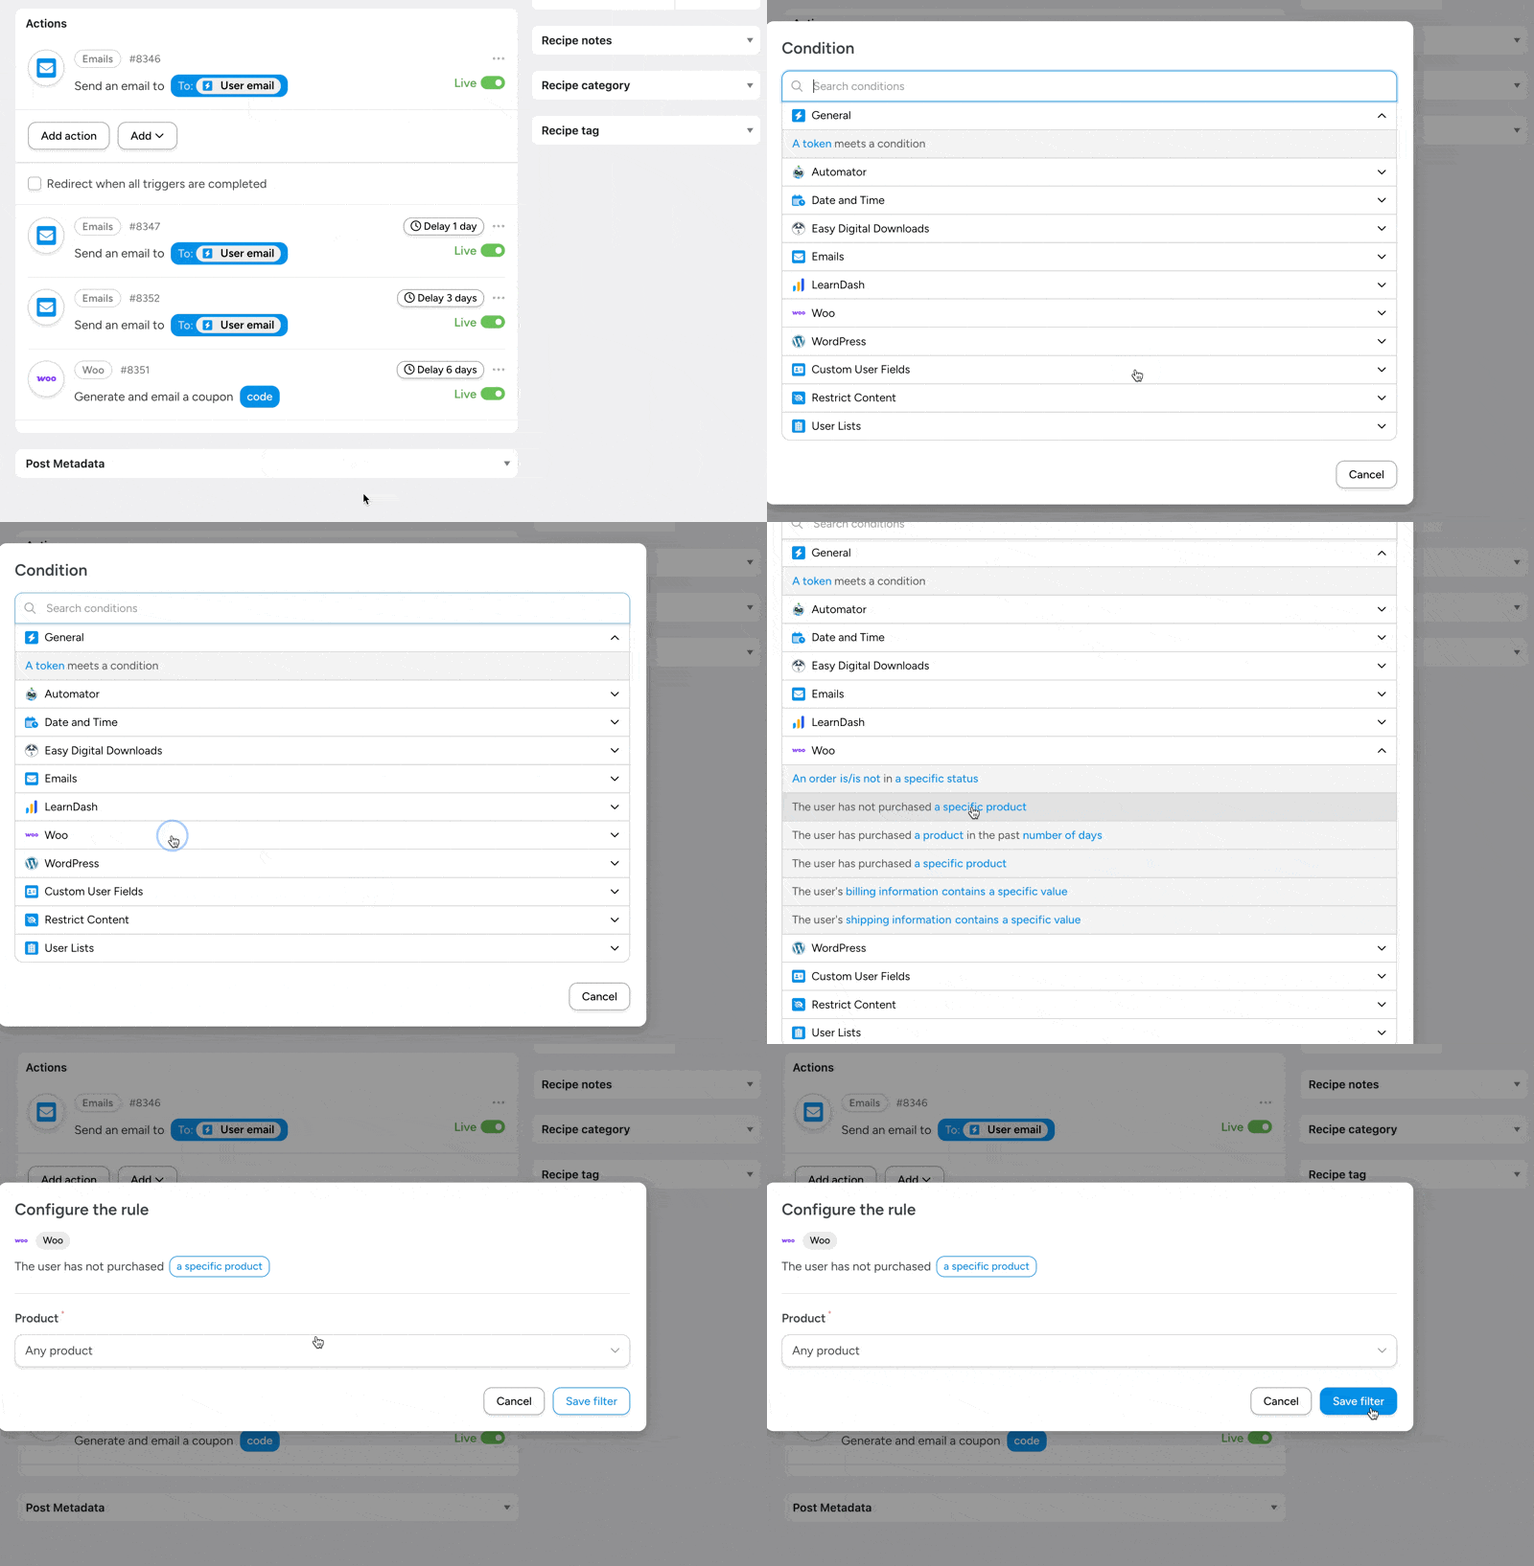
Next, you’ll want to add a delay and a filter so that the email only goes out to subscribers who haven’t become customers yet.
To add a filter, hover over the action and click Filter.
In the modal that appears, select Woo > The user has not purchased a specific product > Any product.
Once you’re finished, click Save filter.
Step 6: Go Live!
Your drip campaign doesn’t have to match the one we made together exactly. You can add as many emails to the sequence as you want and time them for your audience and industry.
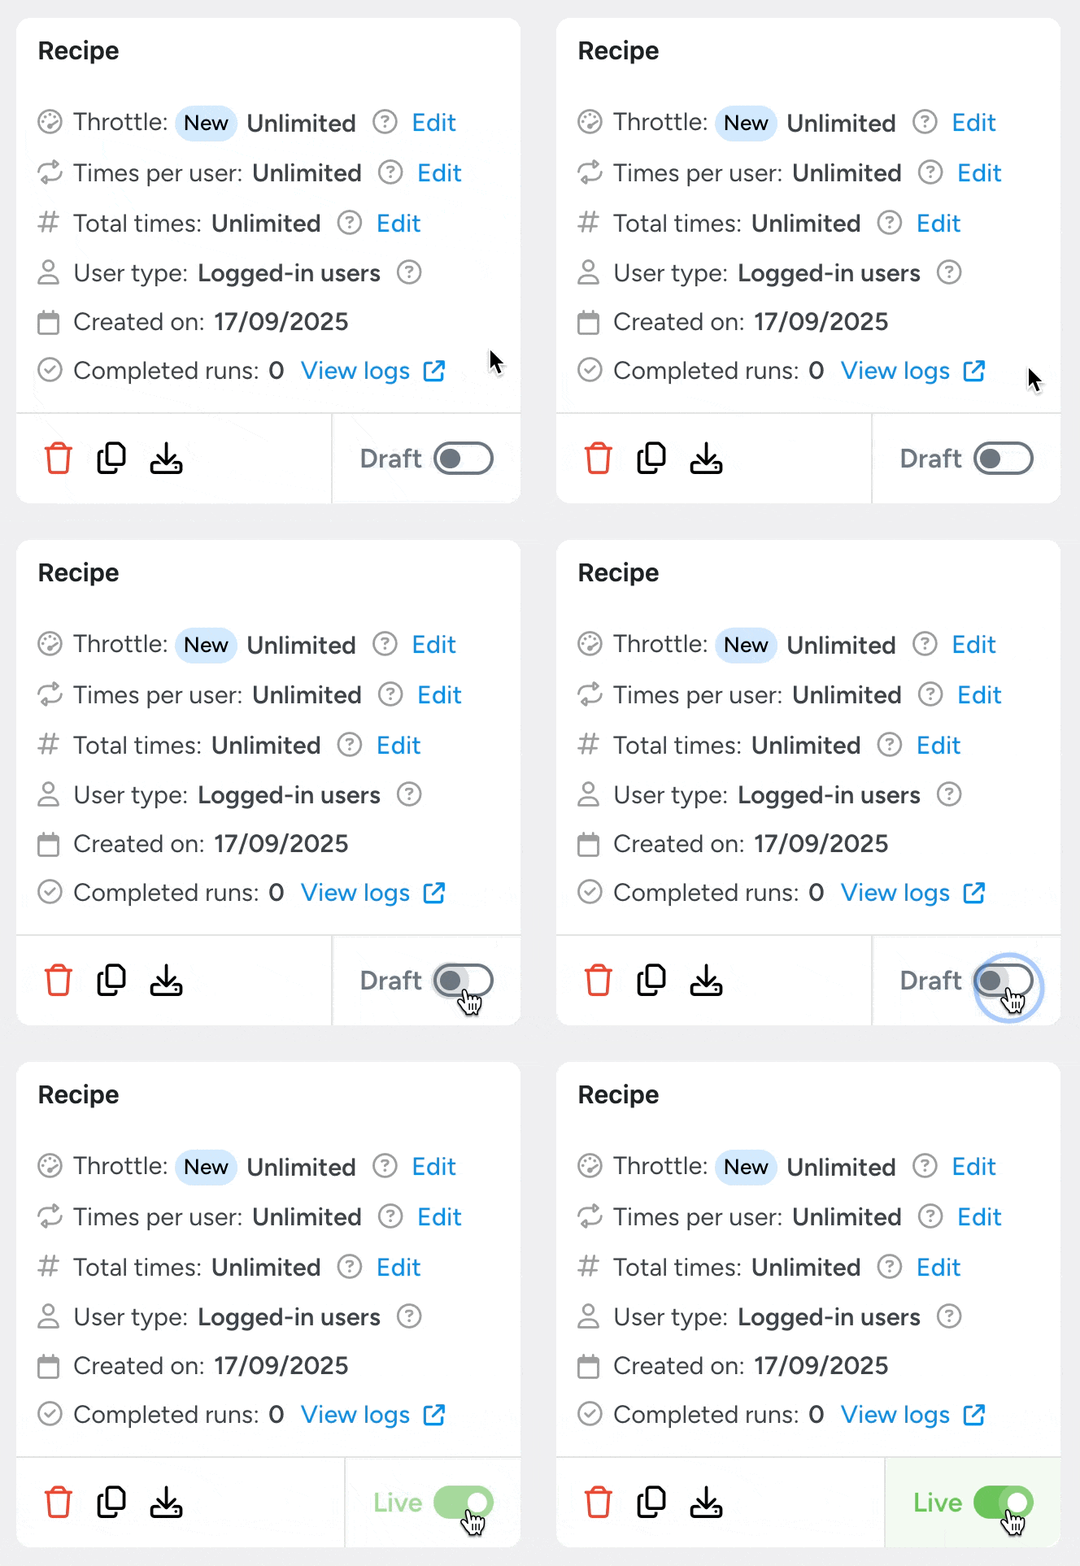
Once you’re finished building the drip campaign, all you have to do is toggle the recipe from Draft to Live.
That’s it! You’ve just built a fully-automated welcome email drip campaign directly in WordPress! No CRM needed, no code required, and no hidden fees!
Automator will continue rolling out the welcome wagon to your new WordPress users without a hitch.
Best Practices for a High-Performing Welcome Email Drip Campaign
Now that you’ve created your first automated welcome email campaign in WordPress, let’s talk about making it the best it can be.
Think of this like fine-tuning a recipe: the ingredients are important, but so is the way you mix them together.
Here are some best practices to keep your welcome emails engaging, effective, and compliant.
Timing & Cadence
Nobody likes being spammed. Space your emails out every 2–3 days so new subscribers have time to breathe and engage with your content. This cadence keeps your brand top-of-mind without overwhelming inboxes.
Occasionally mix up the timing of your emails to find out what works best for your particular audience.
Subject Lines
Your subject line is the doorway to your message—make it inviting! Keep it short, clear, and curiosity-driven. Value statements like “Your free guide inside” or friendly teases like “Let’s get to know each other” work wonders.
Personalization
Generic emails feel… well, generic. Instead, use names, behavior-based triggers, and tokens to make each message feel tailored. For example, you can greet subscribers by name or link them to resources based on what they’ve signed up for.
Use welcome emails as an opportunity to gather more information about your new subscribers (i.e., progressive profiling).
Branding
Consistency builds trust. With a plugin like WP HTML Mail, you can design branded templates that match your site’s style—colors, fonts, and even your logo. This way, every email looks professional and on-brand from the very first hello.
If you haven’t already, check out our guide on branding and formatting your WordPress emails >>>.
Segmentation
Not every subscriber has the same goals.
Using Automator’s Custom User Fields and User Lists addons, you can segment subscribers just like you would in a CRM. Want to send one sequence to customers and another to blog readers? Easy. This light segmentation ensures the right people get the right content at the right time.
When you pair these addons with the Restrict Content addon (also included for free in the Pro – Plus and Elite plans), you have everything you need to attract, engage, and convert subscribers.
Deliverability
Even the best email is useless if it never arrives. That’s where WP Mail SMTP Pro comes in. I know that I already recommended it, but it really pays to have peace of mind. Don’t let your hard work and good intentions get lost in the digital void.
WP Mail SMTP Pro boosts deliverability by authenticating your emails, giving them a far better chance of hitting inboxes instead of spam folders.
Mobile Optimization
More than half of all emails are opened on mobile. Use short paragraphs, large tappable buttons, and a single clear CTA to make your messages easy to read on the go.
When you test your emails, check them on both desktop and mobile devices.
Compliance
Finally, don’t forget the legal stuff. Always use double opt-in and provide a clear unsubscribe link. If your business operates within the European Union, don’t forget to stay GDPR-compliant.
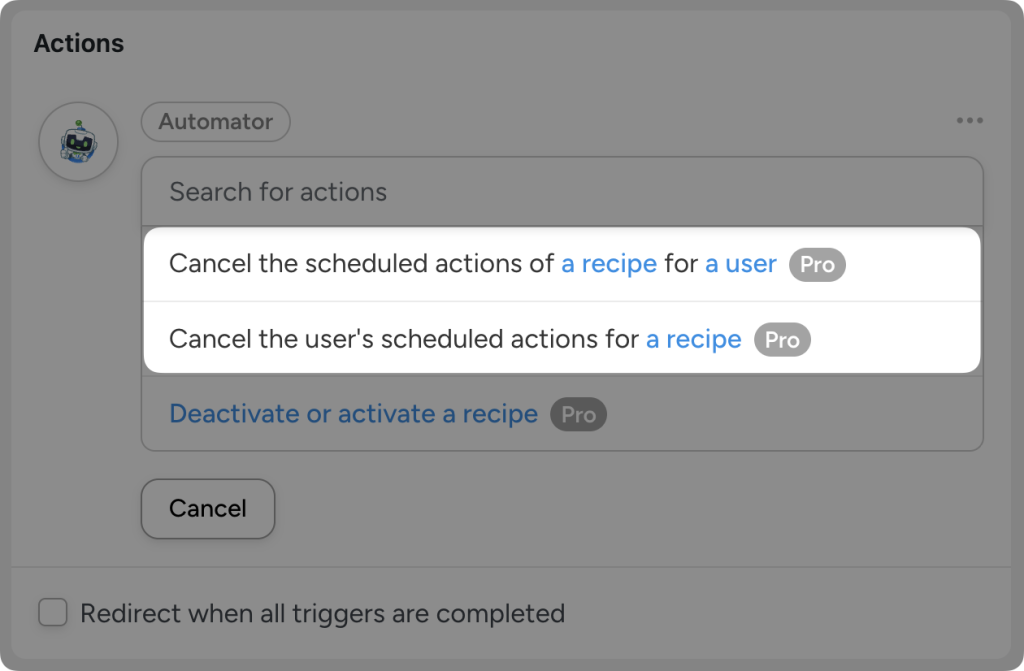
Automator makes this easier with features like the URL integration (that can unsubscribe users with a click in the email), the Magic Button, form integrations, and recipe management actions (pictured below). These tools help you respect your subscribers’ choices while keeping your list healthy and happy.
By following these best practices, you’ll turn your welcome campaign into more than just a hello. It’ll be the start of a long, productive relationship with your subscribers.
Measuring Success & When to Get a CRM
So you’ve launched your automated welcome campaign—great job! Now comes the fun part: measuring the impact.
Tracking the performance of your emails will help you understand how your subscribers are engaging with your content. Use open and click rates to determine what resonates with your subscribers and, ultimately, what drives their decisions.
Here are the key metrics to watch:
- Open Rates: Welcome emails typically perform much better than standard campaigns, averaging around 80% open rates. A strong open rate means your subject lines and timing are working.
- Click-Through Rates (CTR): Are subscribers clicking your links? High CTR shows that your content and CTAs are hitting the mark. Welcome emails have an average CTR of about 27%, so anything around that figure means you’re doing well..
- Conversion Rates: This is the big one. Whether it’s redeeming a coupon, filling out a survey, or joining your membership site, conversions tell you if your sequence is doing its job. Conversion rates will vary by industry, so check your industry’s benchmarks.
- Unsubscribe Rates: A few unsubscribes are normal, but a high percentage is a red flag that your frequency or content might need adjusting.
Need help keeping track of your statistics? If you’re using WP Mail SMTP Pro, you can export open and engagement metrics to Google Sheets and Airtable. Learn how to connect your WordPress site to Google Sheets with Automator to create custom reports >>>.
As powerful as Automator is, it isn’t a dedicated CRM. Eventually, your email list will grow into the thousands and you may need a dedicated email platform for managing your contacts and campaigns.
But, how do you know when it’s time to get a CRM?
- You need A/B testing functionality to experiment with subject lines and content.
- You need advanced segmentation features to target users with laser precision.
- You need comprehensive customer profiles to keep track of multiple touch points, complex relationships, and detailed notes.
For many small businesses, Automator + WordPress is more than enough to handle email marketing automation. But I know that your business will grow—that’s what Automator is designed to help you do.
When you’re ready, check out our list of the best CRMs for WordPress sites along with a guide for determining which one suits your needs best >>>.
Frequently Asked Questions
Warm Welcomes to Gracious Goodbyes
A great first impression sets the tone for every customer relationship—and your welcome email drip campaign is the perfect way to do it.
By greeting new subscribers with warmth, sharing your story, and offering genuine value, you’re building trust that lasts far beyond that initial sign-up. Pair those messages with smart automation, thoughtful timing, and reliable deliverability, and you’ll transform a simple “hello” into long-term loyalty.
The best part? You don’t need an expensive customer relationship management (CRM) platform to get started. All you need is Uncanny Automator and your awesome brand voice.
In this guide, I’ve shared with you the tools and strategies you need to create personalized, automated welcome campaigns that feel effortless—for both you and your subscribers.
So go ahead: set up your first welcome workflow, add your brand’s unique personality, and let Automator handle the busywork while you focus on what matters most: connecting with your audience.
From warm welcomes to gracious goodbyes.
Until next time, happy automating!


This Post Has 0 Comments