Revive old WordPress posts with AI and Uncanny Automator. Learn how to reverse content decay…
Connect LearnDash to Zoom Webinars and Meetings
Connect LearnDash to Zoom the easy way: with Uncanny Automator. Host webinars with your students, conduct meetings with your group leaders and much more.
Are you looking for a way to connect LearnDash to Zoom? If you’ve been trying to figure out how to add a live webinar component to your elearning platform, then look no further.
In this step-by-step tutorial, we’ll show you the easiest way to create a seamless LearnDash and Zoom integration using the #1 integration tool on the market: Uncanny Automator.
You’ll be able to add and remove your learners to Zoom webinars and meetings as they register for courses and progress through lessons and topics. We’ll even show you how to register students in bulk to create more dynamic learning opportunities.
Without further ado, let’s get started.
Why Connect LearnDash to Zoom with Uncanny Automator
When it comes to integrating your favorite apps and plugins, there’s no shortage of options. However, there’s a reason (or, rather, several reasons) that Uncanny Automator is #1 integration and automation tool for WordPress websites.
Specifically, when it comes to connecting LearnDash to Zoom, these are the features that make Automator the best tool for the job:
- Ease-of-Use: Using simple combinations of triggers and actions called recipes, Automator connects all of your favorite apps and plugins. A user-friendly click-and-play interface means that you can automate complex workflows in just a few clicks—and even fewer minutes.
- Seamlessness: Automator is fully-integrated with LearnDash, meaning that you can incorporate data as macro as course enrollment or as micro as quiz scores into your Zoom integrations. Click here for a full list of triggers, actions and filters for LearnDash.
- Affordability: Imagine having to pay an automation fee to add your LearnDash students to a Zoom webinar each time they register for a course or complete a lesson. The costs would be astronomical! Fortunately, unlike other automation and integration tools, Automator won’t charge you each time you run an automation. In other words, the more you automate and integrate, the more you save!
- Integrations: Automator has 214 integrations with more on the way all of the time. This means that you can connect LearnDash to Zoom Meetings and Webinars and a whole lot more.
- Scalability: As your LearnDash-powered business grows, you’ll appreciate Automator’s Post Loops and User Loops features. Loops give you the ability to add and/or remove hundreds or even thousands of your LearnDash students from Zoom Webinars and Meetings with the click of a button. We’ll explore this powerful feature in more detail later on in this tutorial.
Ready to start hosting LearnDash webinars? Get your Automator Pro license now so you can follow along the rest of the tutorial>>>.
Not ready to go Pro quite yet? You can still follow the rest of this tutorial with Automator’s FREE FOREVER version. Simply download and activate the plugin then register your account for a limited number of app credits. You’ll be able to use these credits towards creating integrations with web-based apps such as Zoom, OpenAI, ActiveCampaign, Notion and more!
How to Build Your Zoom Apps—Without Coding!
Before we can connect LearnDash to Zoom, we first need to create some Zoom apps; one for Zoom Webinars and one for Zoom Meetings.
Now, you might be thinking, “I don’t know the first thing about creating apps!” Good news: you don’t need to know anything about coding to create your Zoom apps. In fact, if you can copy and paste, you can easily set up as many Zoom apps as you want.
In this tutorial, we’re going to give a brief overview of how to create Zoom apps and connect them to LearnDash with Automator. However, if you would like a more detailed walkthrough, you can follow the links below:
For the abridged version of the instructions you’ll find in the links above, follow these steps:
Step 1: Build Your Zoom App
From the Zoom App Marketplace, navigate to Develop > Build App and select Server to Server OAuth App.
Step 2: Follow Zoom Instructions
Zoom will walk you through the steps of creating your app.
Step 3: Enter Scopes
When you reach the “Scopes” page, you’ll have to enter these scopes:
- For Zoom Webinars, enter these scopes:
- webinar:read:list_registration_questions:admin
- webinar:read:list_webinars:admin
- webinar:delete:registrant:admin
- webinar:write:registrant:admin
- For Zoom Meetings, enter these scopes:
- user:read:user:admin
- user:read:list_users:admin
- meeting:read:list_meetings:admin
- meeting:read:list_registration_questions:admin
- meeting:write:registrant:admin
- meeting:delete:registrant:admin
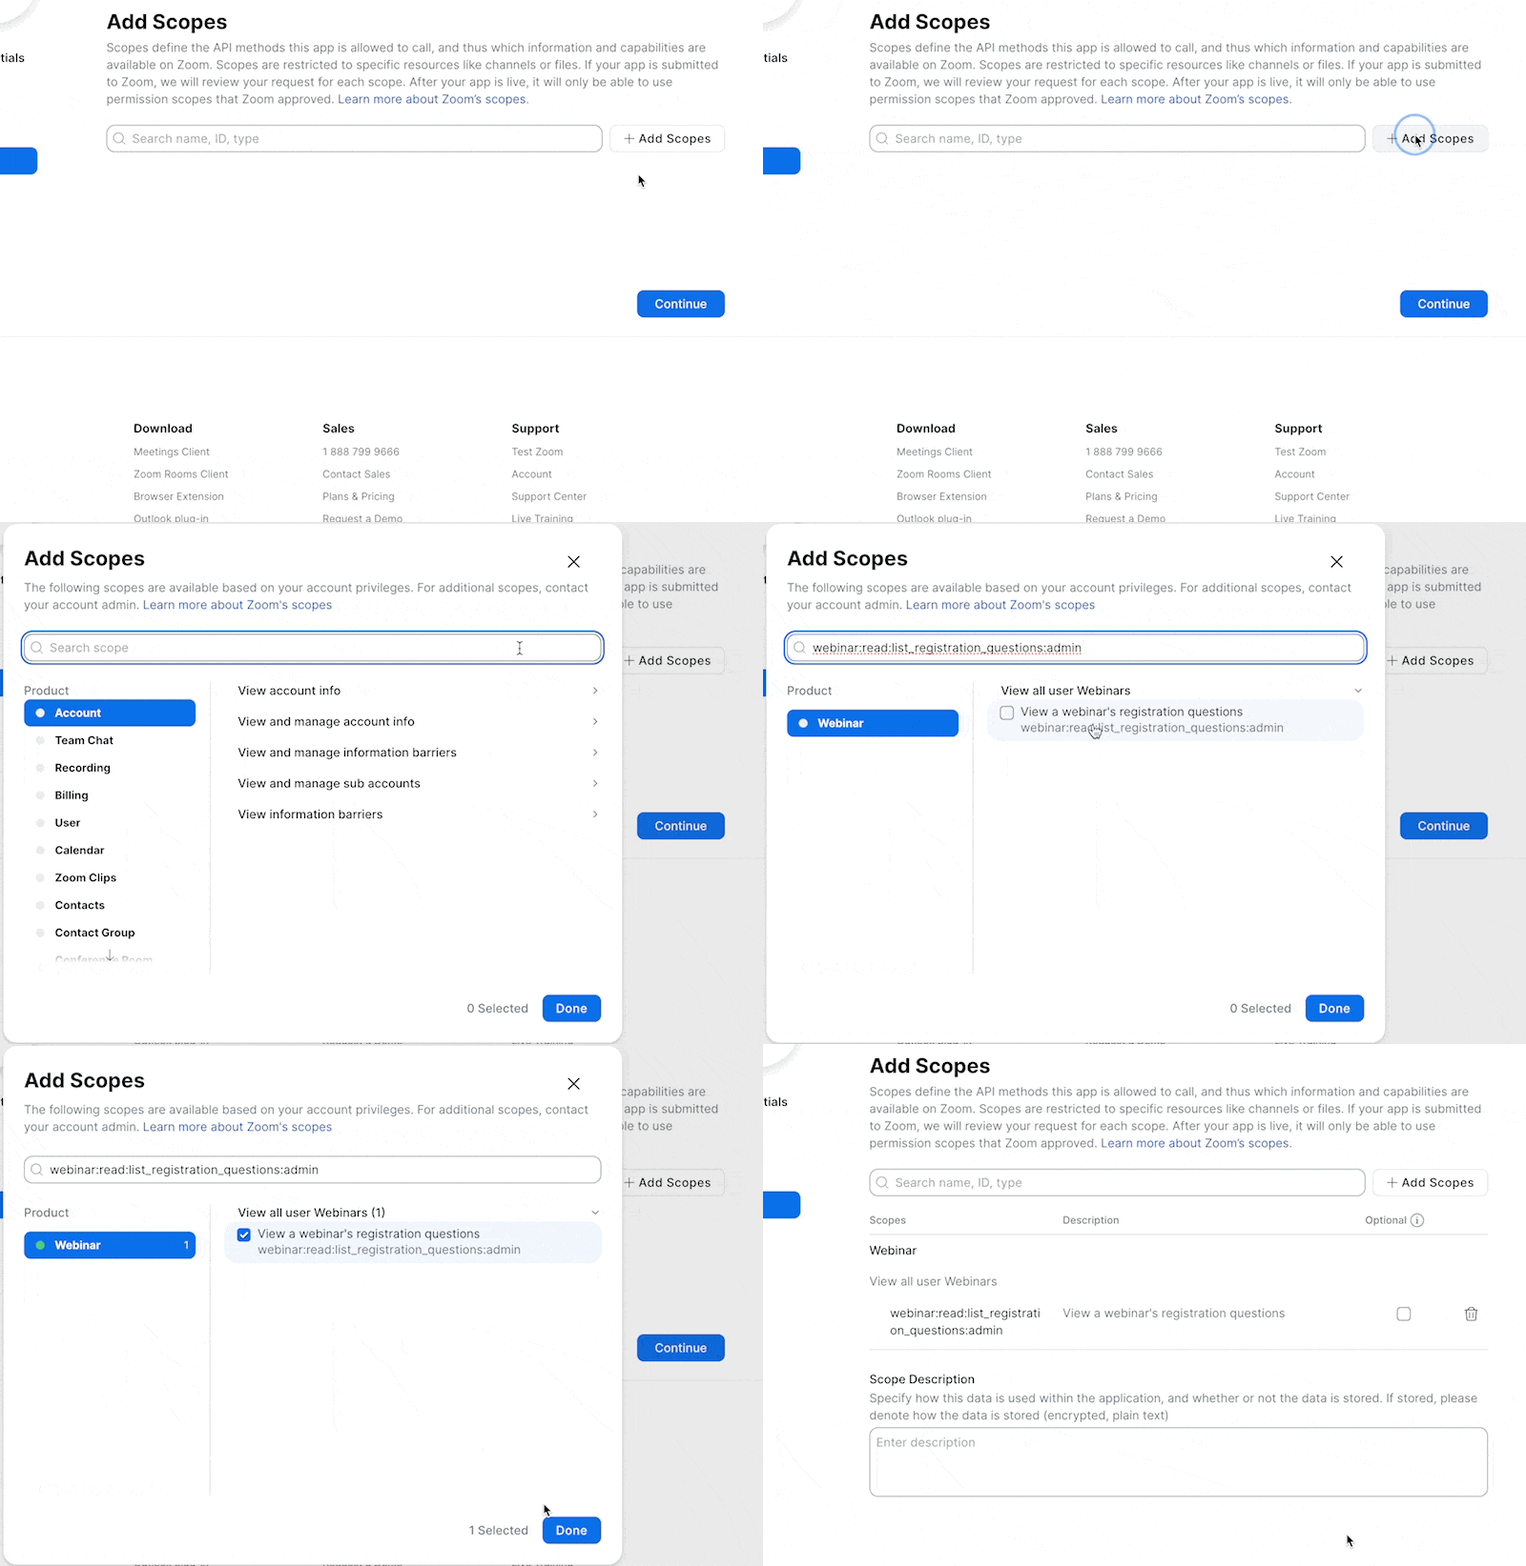
If you’re uncertain how to enter a scope, follow the instructions in the gif below:
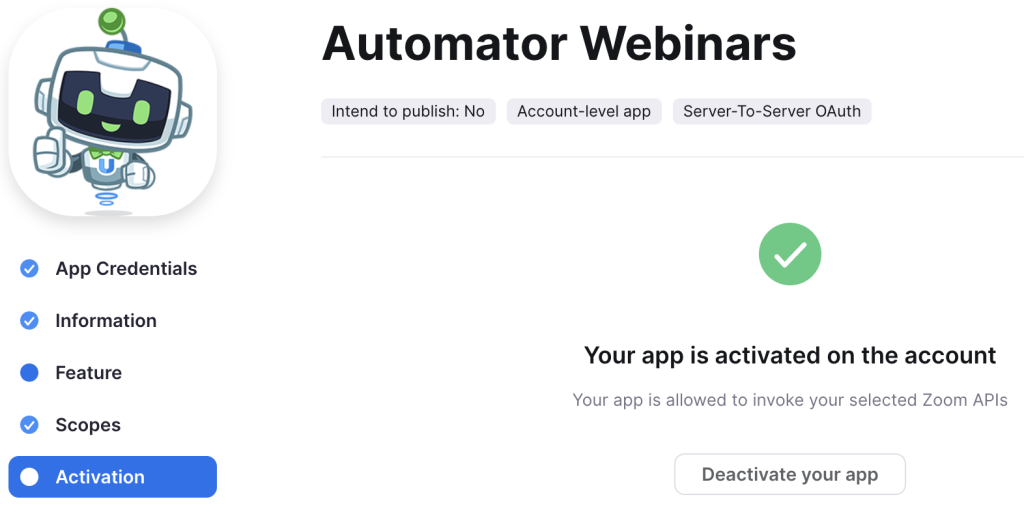
Step 4: Activate Your App
Once you have successfully created and activated your app, you should see this screen:
Step 5: Connect Zoom to WordPress with Automator
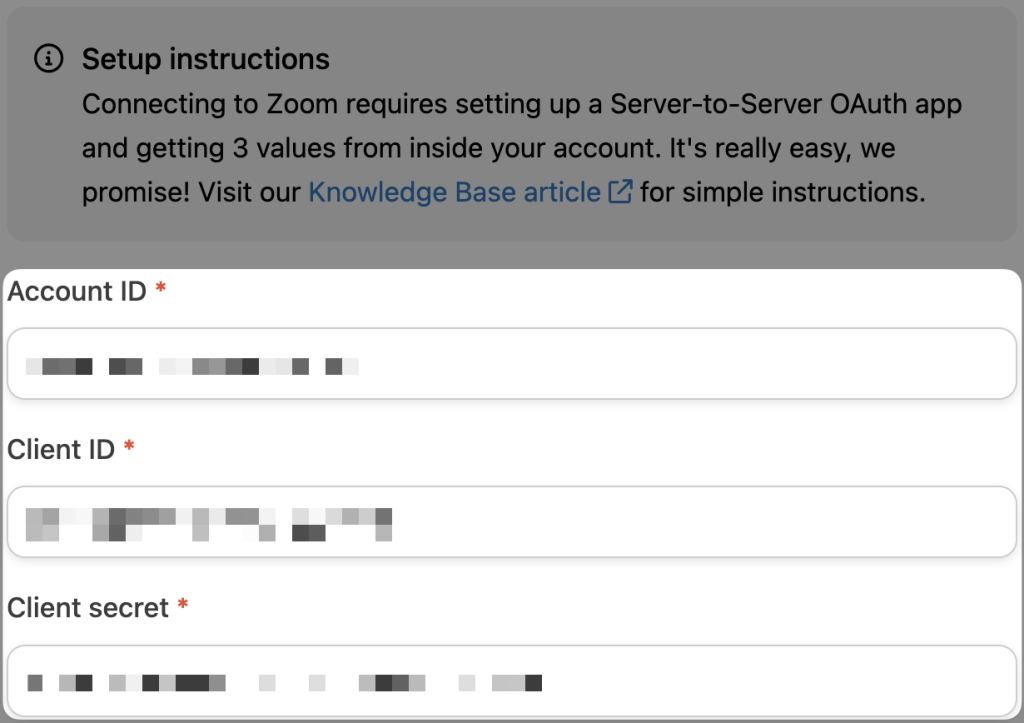
In a new window, open your WordPress Admin Dashboard and navigate to Automator > Settings. Under the App integrations tab, scroll down to Zoom Meetings or Zoom Webinars.
Copy and paste the Account ID, Client ID and Client secret from your new Zoom app into the fields.
Once you’re finished, click Connect Zoom Webinars account.
That’s it! You’re ready to connect LearnDash to Zoom. In the next few sections, we’ll walk you through creating your first LearnDash and Zoom recipes in Automator.
(Note: You must have at least a Zoom Pro account.)
Register LearnDash Students for Zoom Webinars
Now that you have your Automator Pro license as well as your Zoom web apps all set up, let’s take a look at creating our first LearnDash and Zoom integration.
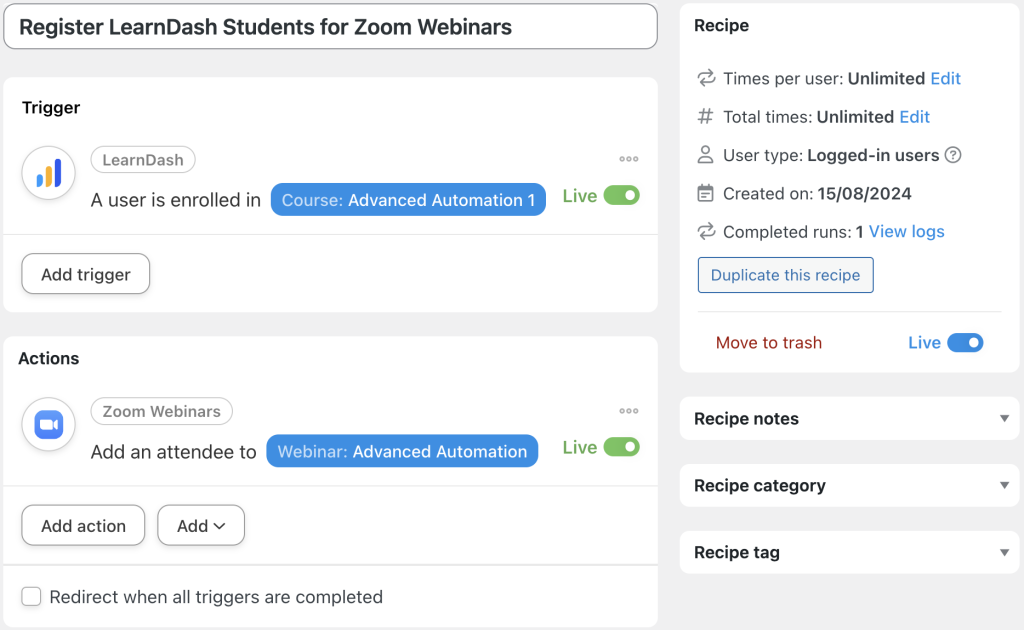
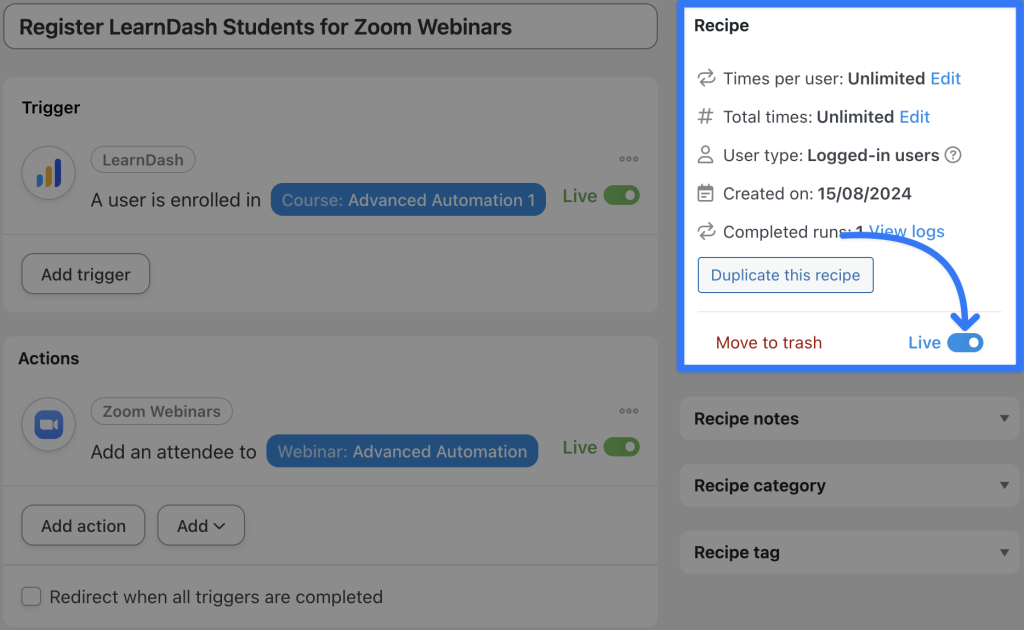
In the recipe pictured above, we’re able to register our LearnDash students for a Zoom webinar whenever they enroll in a specific course.
Here’s how we did it:
Step 1: Create a New Recipe
From your WordPress Admin Dashboard, navigate to Automator > Add new recipe. In the popup window that appears, select Logged-in users.
Step 2: Name Your Recipe
Give your recipe a name that makes it easy to recognize at a glance. For example, we’ve named this recipe “Register LearnDash Students for Zoom Webinars”.
Step 3: Configure Your Trigger(s)
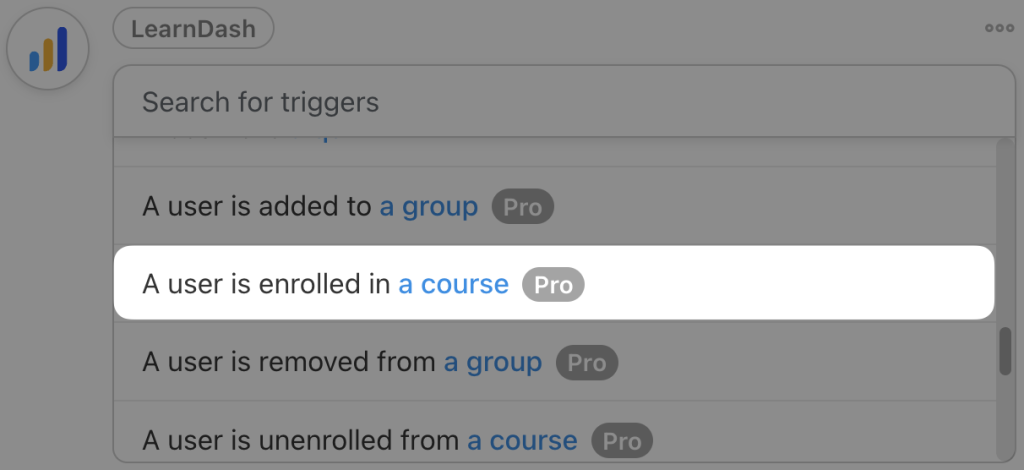
In the Trigger panel, from the menu of available integrations, select LearnDash.
From the dropdown list that appears, select A user is enrolled in a course.
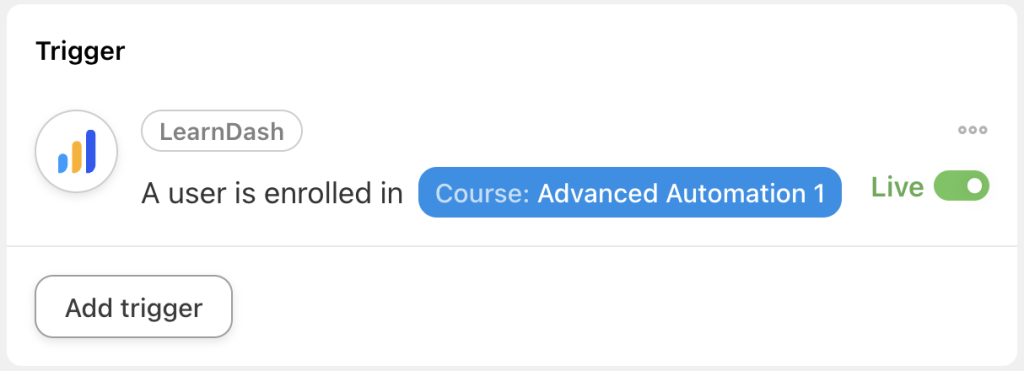
Automator will prompt you to select a course. Once you’re finished, click Save. Your completed trigger should look something like this:
Step 4: Configure Your Action(s)
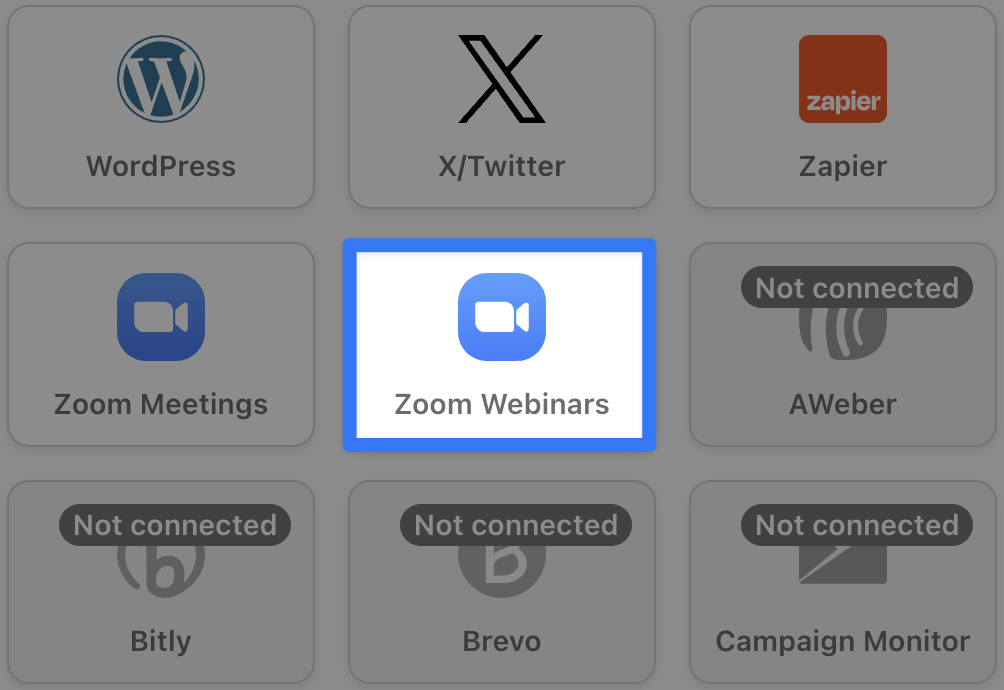
In the Actions panel, click Add action and select Zoom Webinars.
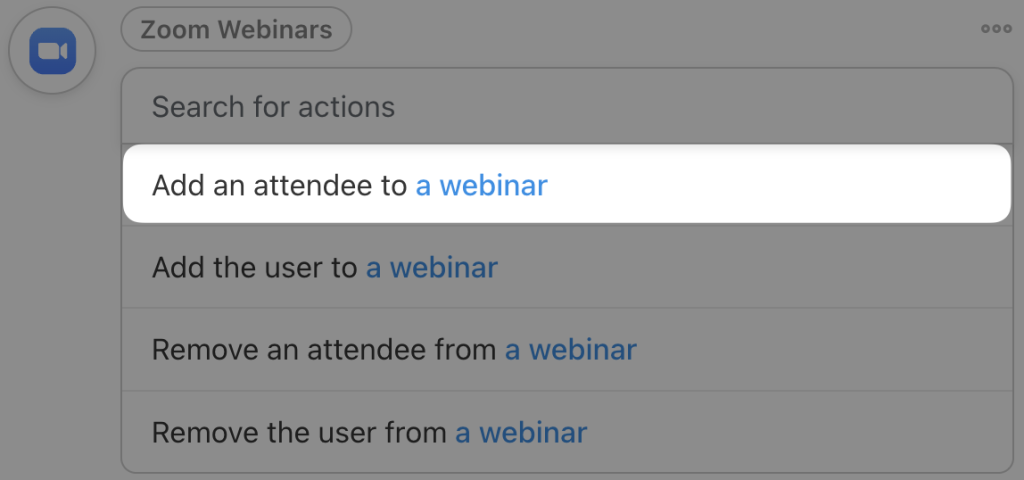
From the dropdown list that appears, select Add an attendee to a webinar.
Automator will present you with a form to fill out the attendees’ information. We’re going to fill in these fields using tokens, i.e., dynamic data pulled from your WordPress website and from within recipes.
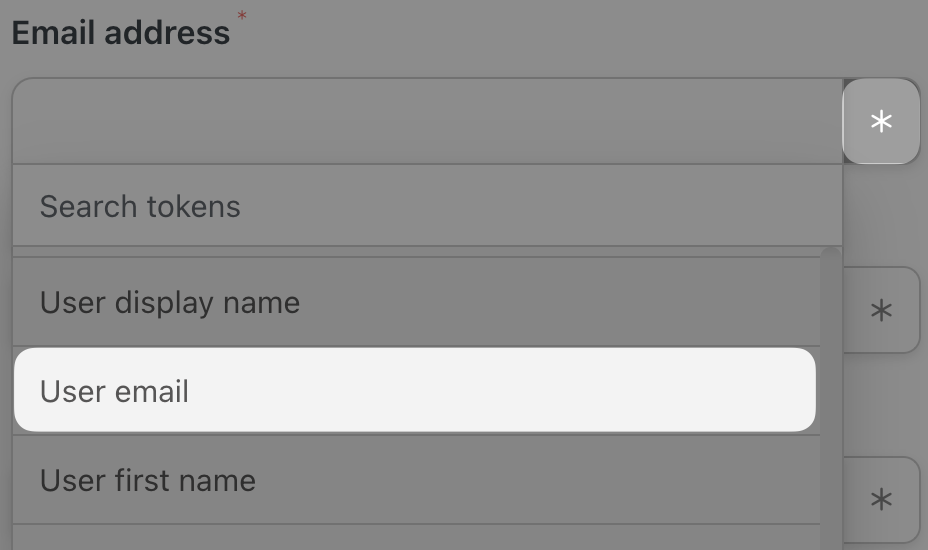
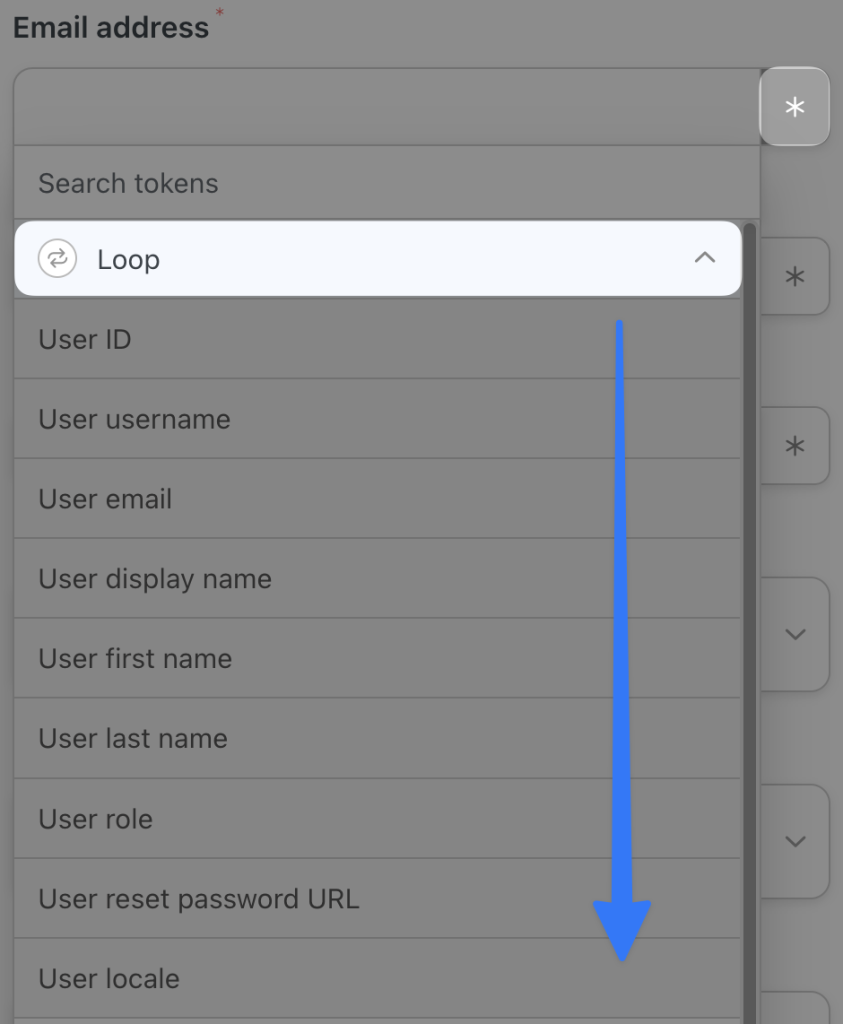
To use a token, click on the Asterisk in a field and select the corresponding token. For example, in the Email address field, you may select the “User email” token.
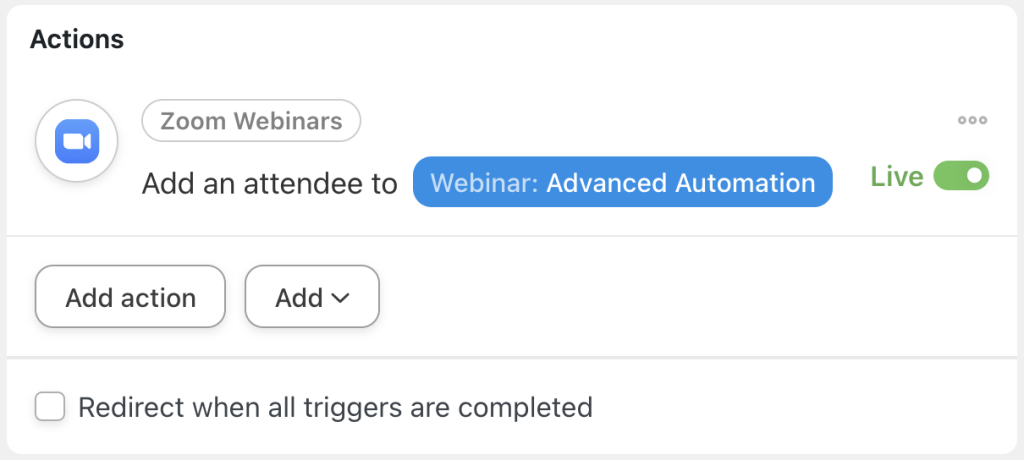
Fill in the remaining fields using tokens and/or static values. Automator will then prompt you to select the Account user as the Webinar to which you want to add your LearnDash students. For example, we have selected our webinar “Advanced Automation”.
(You can also get your webinar questions by clicking Get webinar questions.)
Once you’re finished, click Save. Your completed action should look something like this:
Step 5: Go Live!
You’re just about ready to connect LearnDash to Zoom. All you have to do now is toggle the recipe from Draft to Live.
That’s it! You’ve just successfully made your first LearnDash and Zoom integration.
Want to make more engagement-boosting recipes like this one? Get your Automator Pro license now if you haven’t already and host the best webinars on the web>>>.
Add LearnDash Students to Zoom Meetings in Bulk
Now that you’ve created your first Automator recipe connecting LearnDash to Zoom, let’s take a look at something a little bit more advanced. But don’t worry—it’s just as easy.
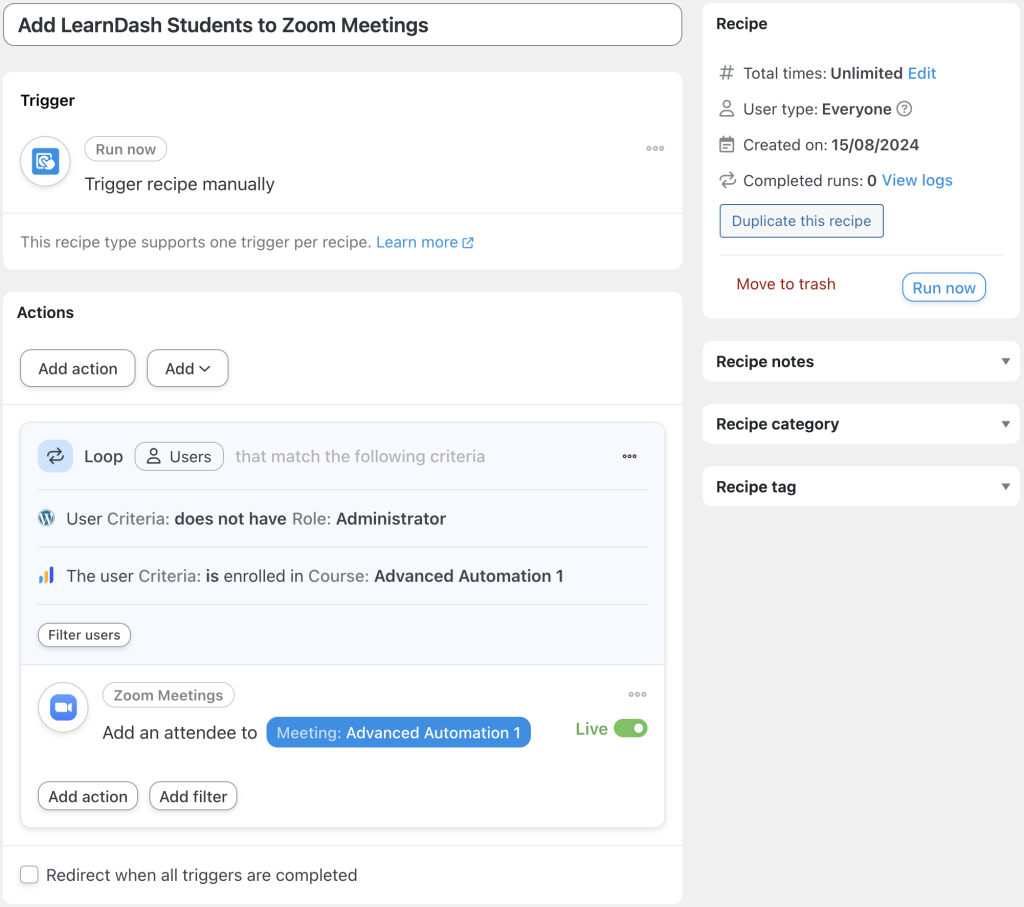
In the recipe pictured above, we’re able to use Automator’s User Loops feature to add all of the students enrolled in a course to a Zoom meeting. Here’s how we did it.
Step 1: Create and Name a New Recipe
From your WordPress Admin Dashboard, navigate to Automator > Add new recipe. In the popup window that appears, select Everyone.
Give your recipe a name. For example, we’ve named this recipe “Add LearnDash Students to Zoom Meetings”.
Step 2: Configure Your Trigger(s)
In the Trigger panel, from the menu of available integrations, select Run now.
From the dropdown list that appears, select Trigger recipe manually. Your completed trigger should look like this:
Step 3: Configure Your User Loop(s)
In the Actions panel, click Add and select User loop.
Within the Loop pane, click Add action and select Zoom Meetings. From the dropdown list that appears, select Add an attendee to a meeting.
Just as before, Automator will present you with a form to fill out the attendees’ information. Once again, we’re going to use tokens to fill out these values. However, make sure that you select the tokens underneath the Loop option.
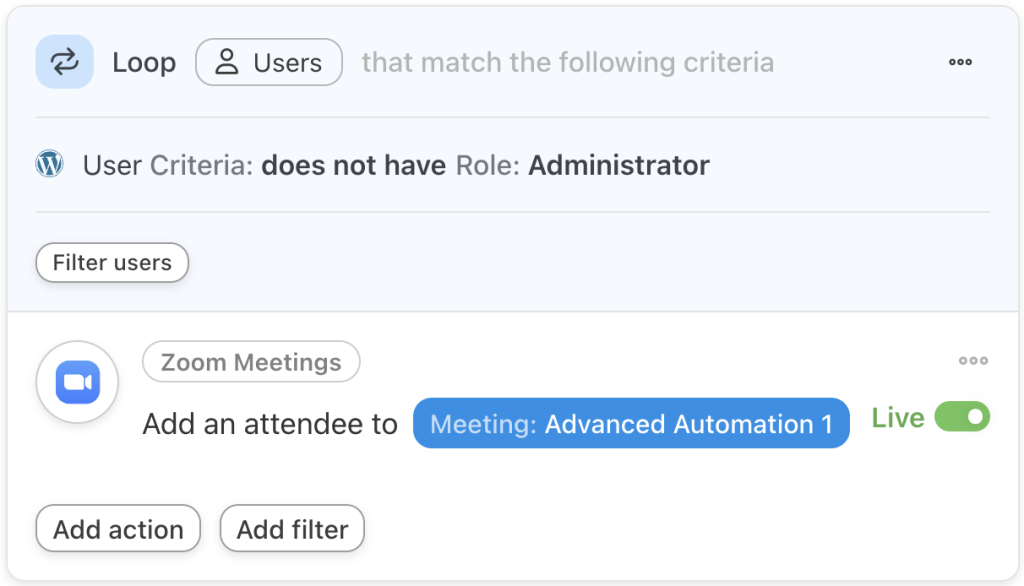
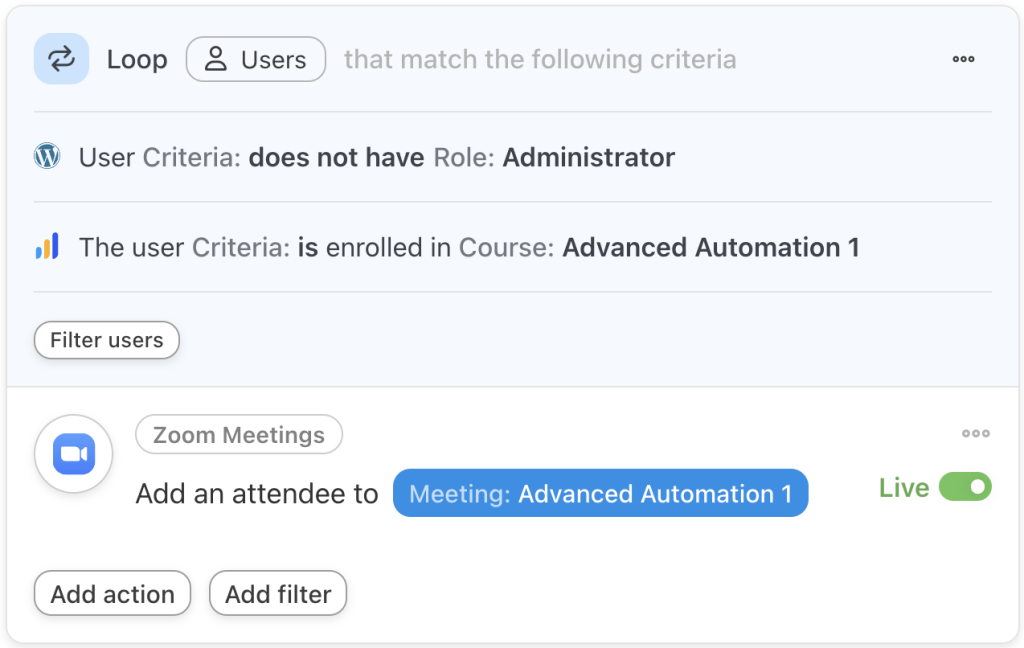
Once you’re finished and you’ve selected the Meeting and Meeting questions, click Save. Your Loop pane should now look something like this:
Step 4: Configure Your Loop Filter(s)
As it stands, Automator will add every user on our site who is not an Administrator to the Zoom meeting. Needless to say, that’s not exactly the meeting we’re trying to set up. We can use Loop filters to narrow down the users we invite.
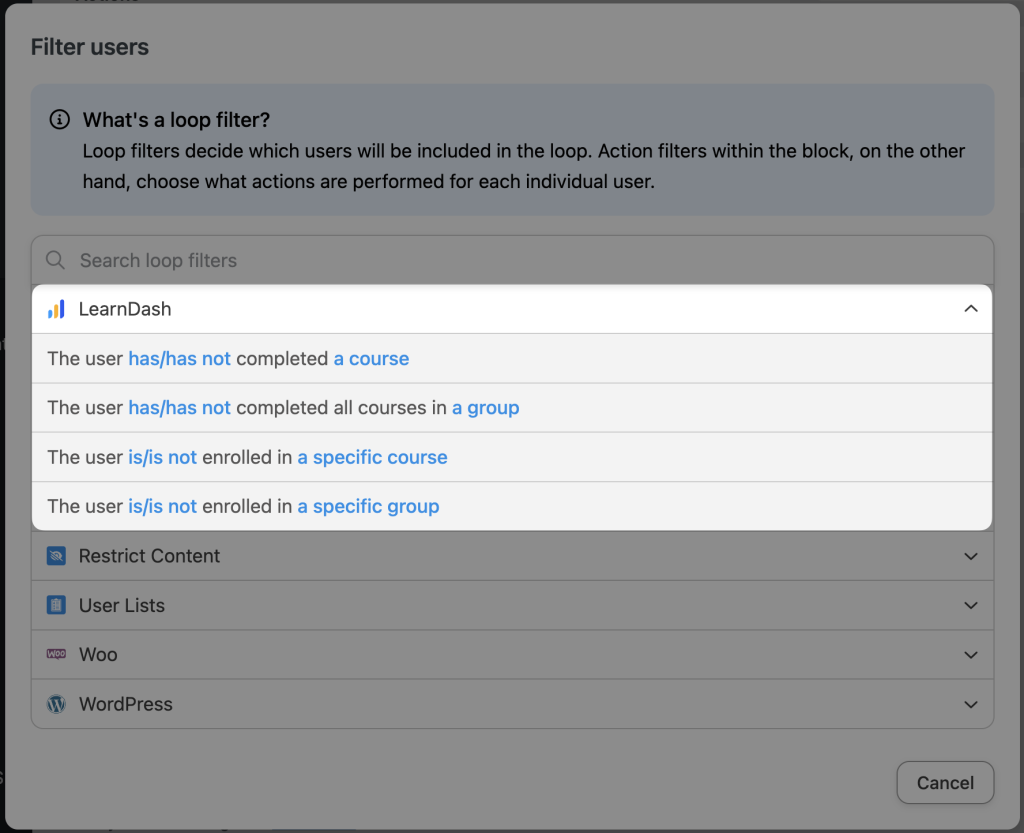
To add a loop filter, click Filter users. In the modal that appears, you will see a number of LearnDash-specific filters. Select the filter that best suits your needs.
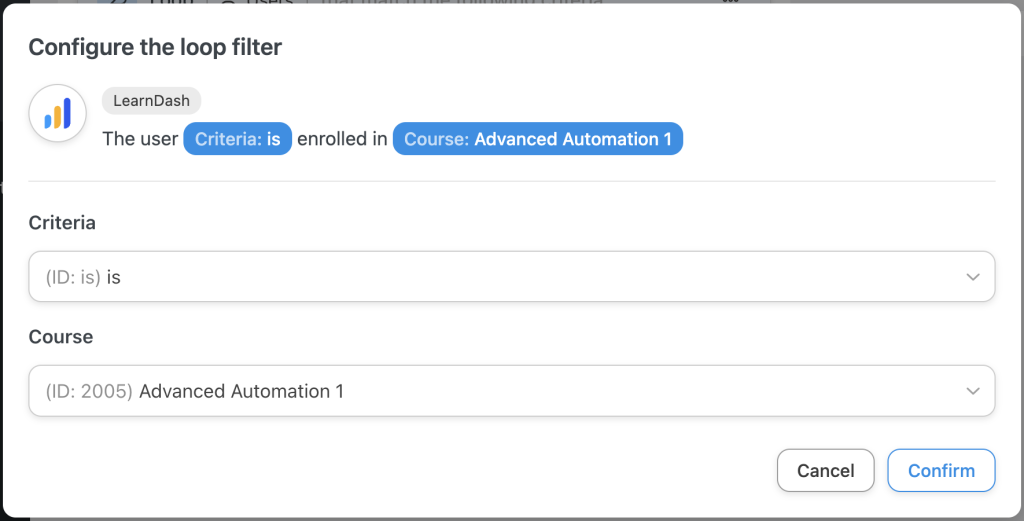
For example, we have selected the filter “The user is/is not enrolled in a specific course”. In the next modal, Automator will ask you to configure the filter conditions.
Once you’re finished, click Confirm. Your Loop pane should now look something like this:
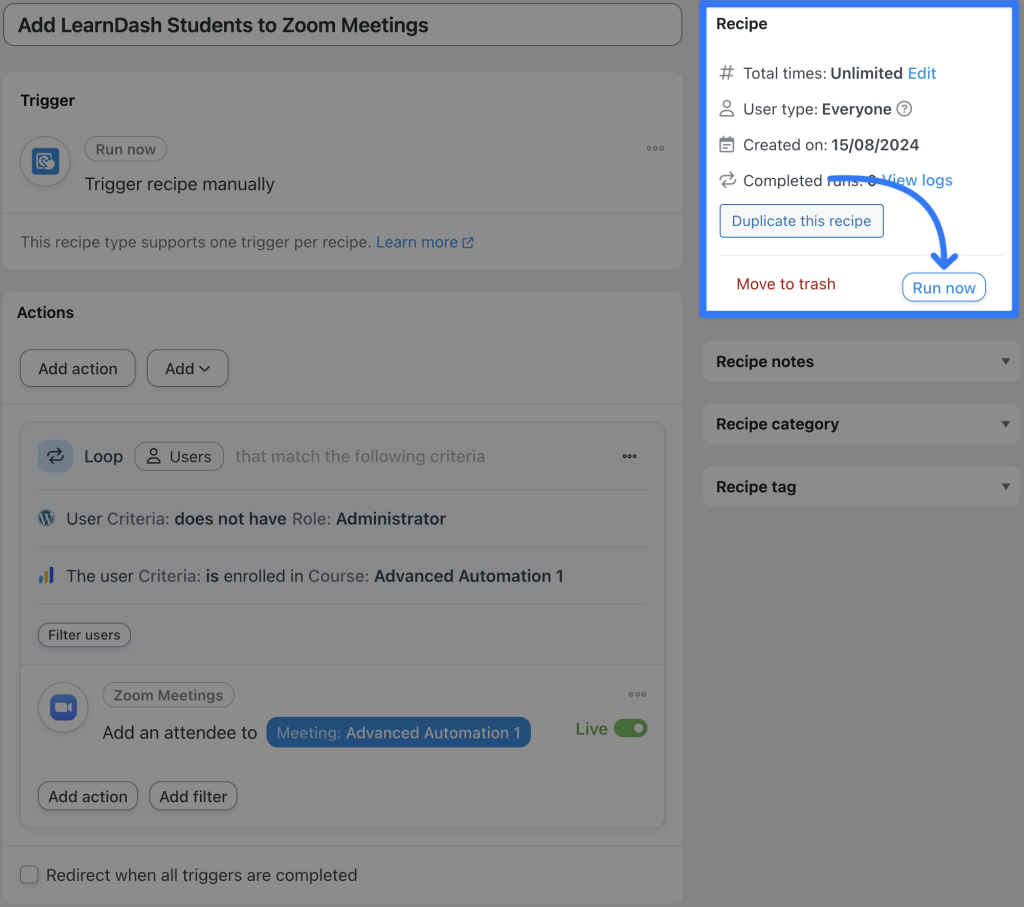
Step 5: Run now!
With just the click of a button, you can easily convene a meeting of your LearnDash students in any course or group. Don’t believe us?
Click Run now and kick back as Automator adds your LearnDash students to your Zoom meetings.
Believe it or not, but you’ve just mastered the basics of creating Automator recipes. From here on, the more you automate and integrate, the more cost and time savings you’ll have.
Want to make more time-saving recipes like this one? Grab your Automator Pro license and spend more time educating and less time administrating>>>.
Frequently Asked Questions
Conclusion
In this post, we’ve covered how integrating LearnDash with Zoom can enhance your online learning environment.
By leveraging tools like Uncanny Automator, you can create a seamless and engaging experience for your learners, combining the best of online courses with live interaction.
Ready to streamline your e-learning process? Get started with Uncanny Automator today and effortlessly connect LearnDash to Zoom for a more dynamic and interactive learning experience>>>.
Want to find more ways to create interactive and engaging content for your learners? Check out this post on integrating H5P and xAPI content into your LearnDash courses.
Until next time, happy automating!






This Post Has 0 Comments