Revive old WordPress posts with AI and Uncanny Automator. Learn how to reverse content decay…
How to Connect Multiple WordPress Websites Together
Connect ecommerce, elearning, membership and other WordPress sites together in minutes using simple Uncanny Automator recipes.
Do you have multiple WordPress websites that you want to connect together? Maybe you have an ecommerce website that you want to connect to your LMS. Or, maybe you have multiple sites for different regions but want to keep one cohesive online ecosystem.
Whatever your reason, you’ve landed on the right page. In this simple step-by-step guide, we’ll walk you through connecting two (or more) WordPress websites together using Uncanny Automator.
By the end of this article, you’ll be able to:
- connect as many WordPress website together as you want,
- choose the information that you want to share across websites,
- automate the integration of multiple WordPress websites, apps and plugins, and,
- have a ton of fun in the process!
Now, without further ado, let’s divide and conquer then connect and automate!
Why Have Multiple WordPress Websites
Having more than one website to support your business goals has several advantages.
1. Target Different Audiences and Markets
Your business may operate across multiple niches or serve diverse customer segments. Creating separate websites allows you to tailor the content, design, and marketing strategies to better resonate with each specific audience or market.
2. Differentiate Your Products and Services
One benefit of using multiple sites is that you can better group or segment your products and services based on your customers’ demands. If you have a wide range of products or services that appeal to distinct customer groups, having separate websites for each product line or service category can help highlight the unique features and benefits of each offering.
3. Localize Your Operations and Marketing
If your business operates in different regions or countries, having multiple WordPress websites allows you to address cultural and linguistic differences. Your localized websites can provide content in the native language, showcase region-specific offerings, and adhere to local business practices.
4. Diversify Your Brand
If your business has multiple brands, having multiple WordPress websites can help you build and reinforce brand identity and strengthen your market positioning. Creating separate websites for each brand helps maintain brand consistency and enables targeted marketing efforts.
5. Streamline Your Operations + Improve Security
Having two or more WordPress websites can help you streamline your operations and keep each site lean, fast, focused and secure. Spreading your operations out across multiple sites allows you to streamline your workflows and create a more secure online ecosystem.
We can’t really think of any disadvantages to having multiple WordPress websites. Certainly, if one is good, then more must be better! Nevertheless, you might be thinking that more websites means more headaches.And if it wasn’t for Uncanny Automator, then we’d probably say that you’re right.
Introduction to Uncanny Automator
Uncanny Automator is the #1 automation and integration plugin for WordPress websites. With 214 integrations and more on the way all of the time, Automator can create seamless workflows between all of your favorite apps and plugins.
More importantly, however, Automator can create seamless site-to-site integrations!

Using simple, click-and-play combinations of triggers and actions, Automator allows you to connect as many WordPress websites together as you desire.
Because we’ll need to have Automator Pro features on all of the websites that we’re seeking to connect, an Automator Elite license (with 50 sites) offers the best value.
Grab your Automator Plus or Elite license so you can follow along.>>>
Why Connect WordPress Websites with Uncanny Automator
If you’re already connecting multiple WordPress sites together, you might ask, “Why not use Zapier or another automation app or plugin?”
We could give you an endless list of uncanny reasons why Uncanny Automator is the best option for connecting WordPress websites together. But we have a tutorial to get to so here are just three major advantages of using Uncanny Automator over other integration tools:
Data security: With Automator, your data never goes through a third-party service. This means that your data and customers’ data is more secure in the capable hands of Automator’s U-Bot.
Cost savings: As compared to other integration tools, there is no per-automation cost with Automator. Say goodbye to complicated pricing tables, hidden fees, and service cut-offs. Create as many recipes as you want and run them as many times as you need without incurring any charges!
Flexible and scalable: Uncanny Automator is the only plugin that can create fully customizable integrations between 214 integrations such as Zoom, BuddyBoss, LinkedIn and LearnDash. With so many integrations and so many ways to customize them, there’s no limit to what you can do.
With all of that said, we hope you’re excited to connect your WordPress websites with Uncanny Automator. So let’s get to it!
Connect Multiple WordPress Websites Together in 5 Steps
Throughout this article, we’ll be using the example of a learning and development company with two websites: an online store to sell courses on one site (Site 1) and a LMS to run them on another (Site 2). We’ll want to enroll our customers from “Site 1” into the corresponding courses and groups on “Site 2” whenever they make a purchase.
Over the next “5” steps, we’ll show you how easy it is to connect these two WordPress websites with Uncanny Automator.
Step 1: Create a New Recipe on “Site 1”
In this example, “Site 1” is our WooCommerce-powered website. (This recipe works just as easily with Easy Digital Downloads, or another ecommerce platform of your choosing.)
From the WordPress Admin Dashboard on “Site 1”, navigate to Automator > Add New. In the pop-up window that appears, select Logged-in users.

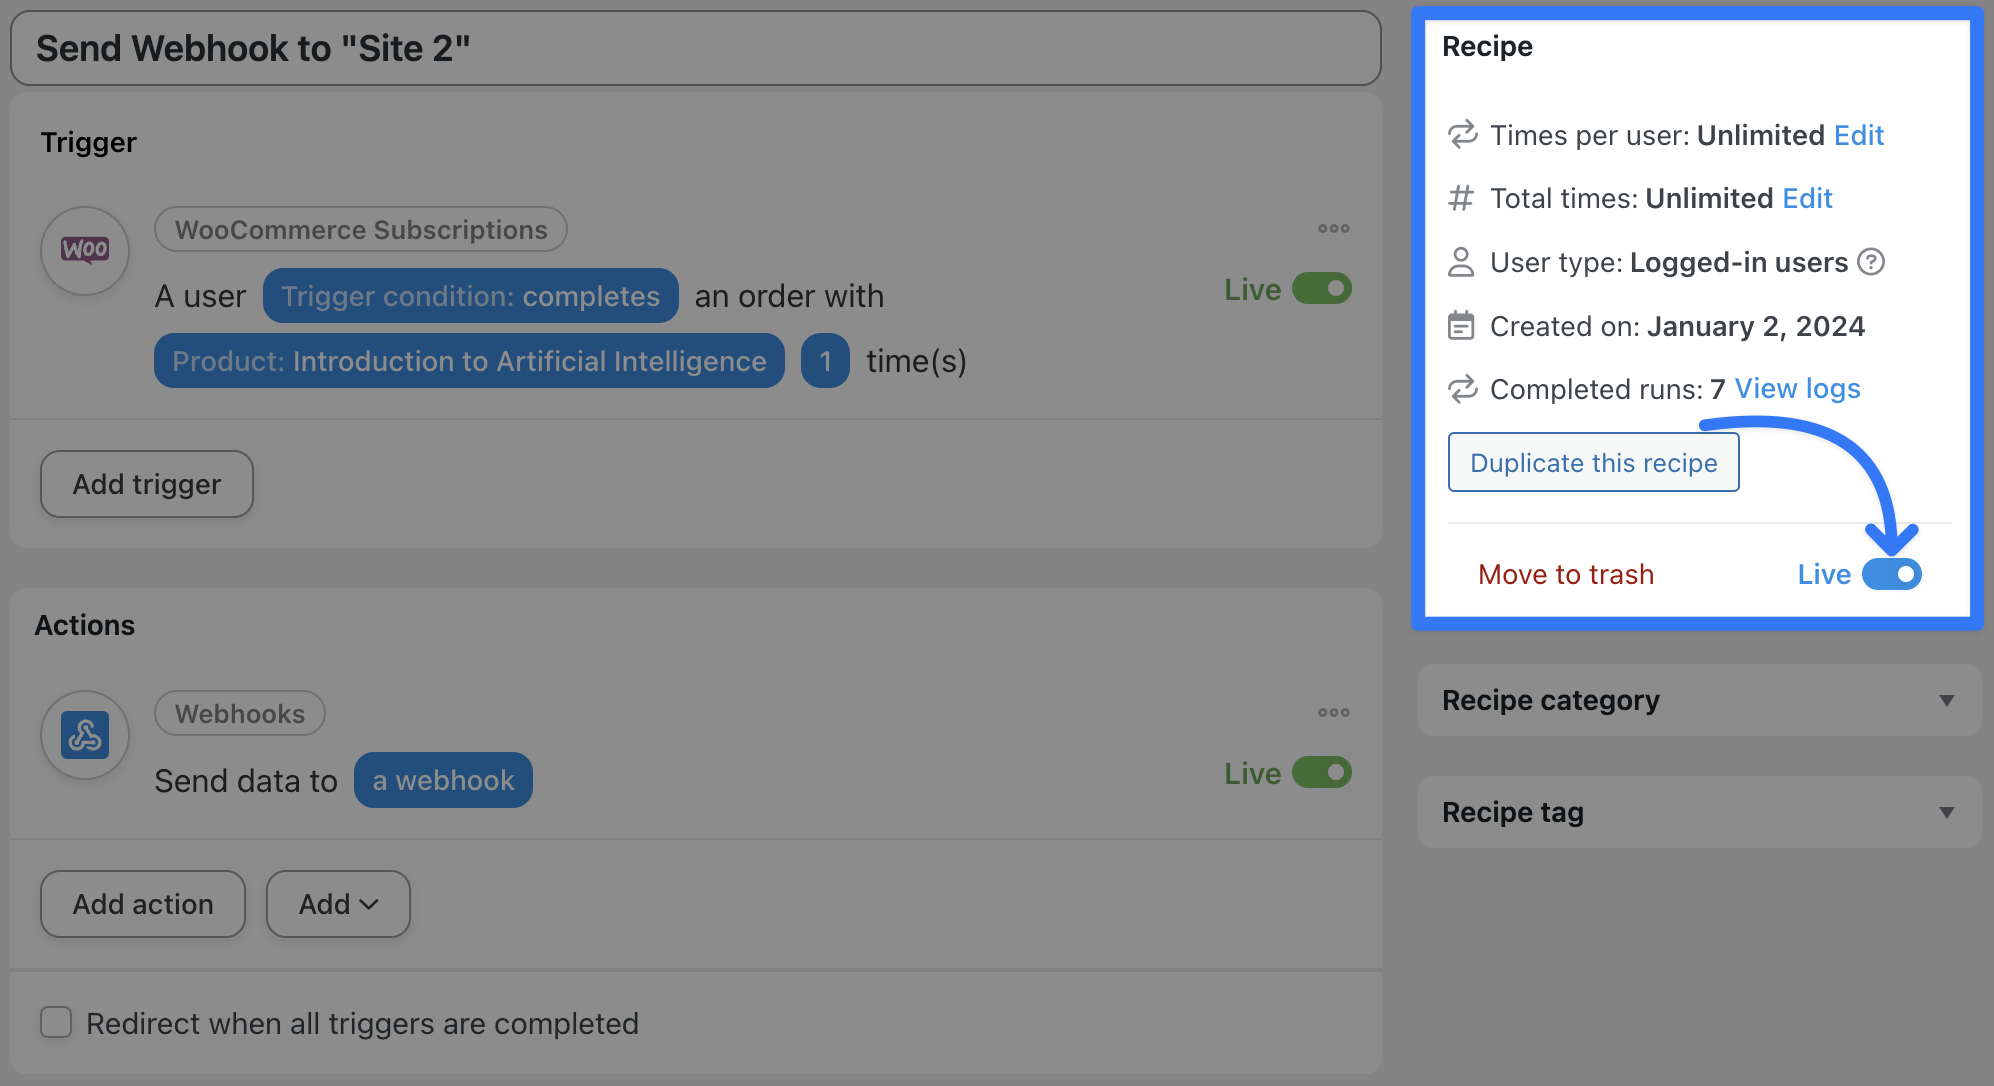
Give your recipe a name that makes it easy to recognize at a glance. For example, we’ve named this recipe “Send Webhook to ‘Site 2’”.
In the Triggers panel, from the menu of available integrations, select WooCommerce.

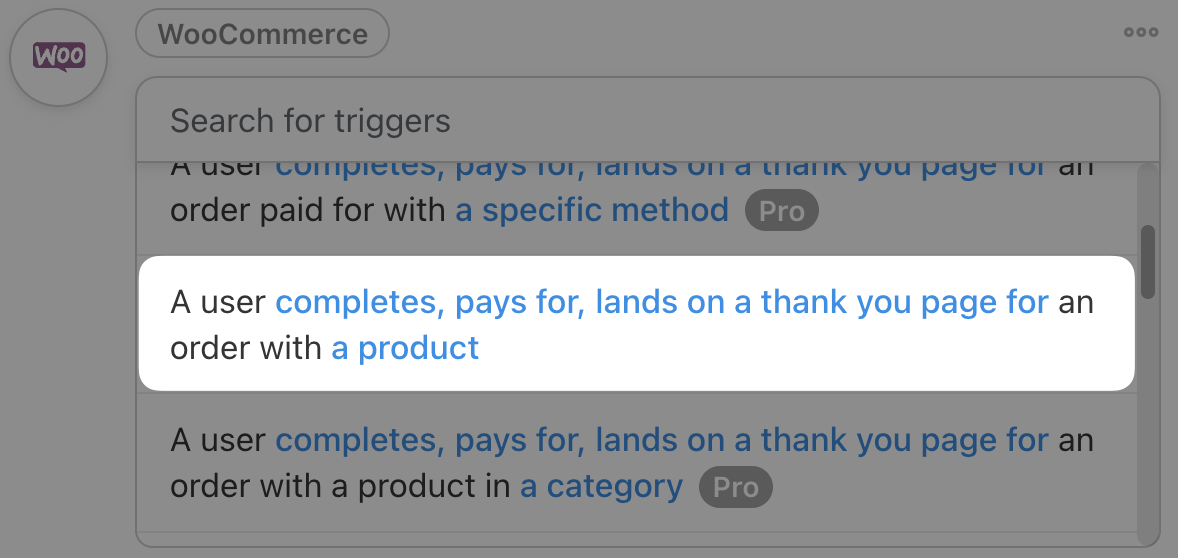
From the drop-down list that appears, select A user completes, pays for, lands on a thank you page for an order with a product.
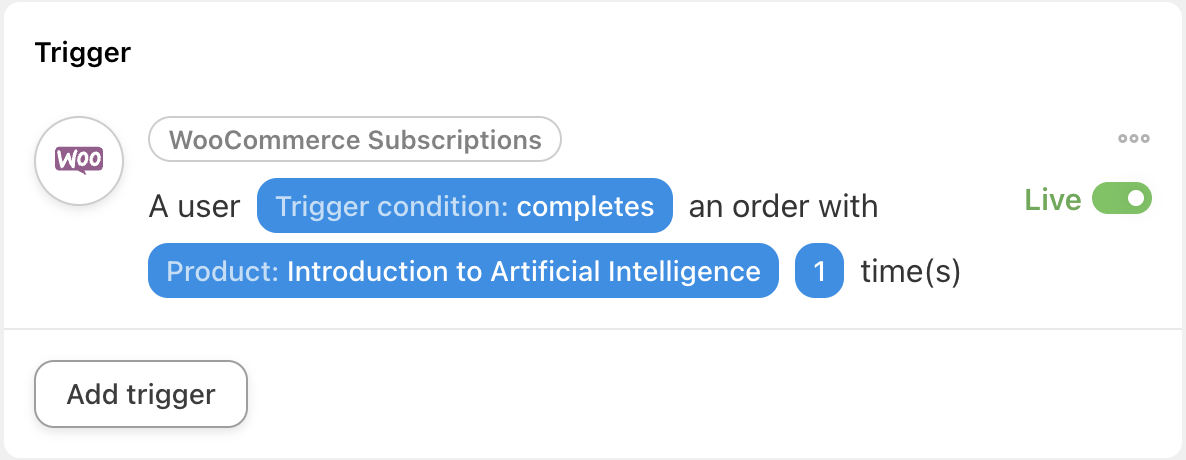
Automator will prompt you to select the Trigger condition and Product. For example, we have selected “completes” and our course product, “Introduction to Artificial Intelligence”.
When you’re finished, click Save. Your completed trigger should look something like this:
Step 2: Create a New Recipe on “Site 2”
In our example, “Site 2” is our LearnDash-powered website. (This recipe works just as easily with LearnPress or LifterLMS.)
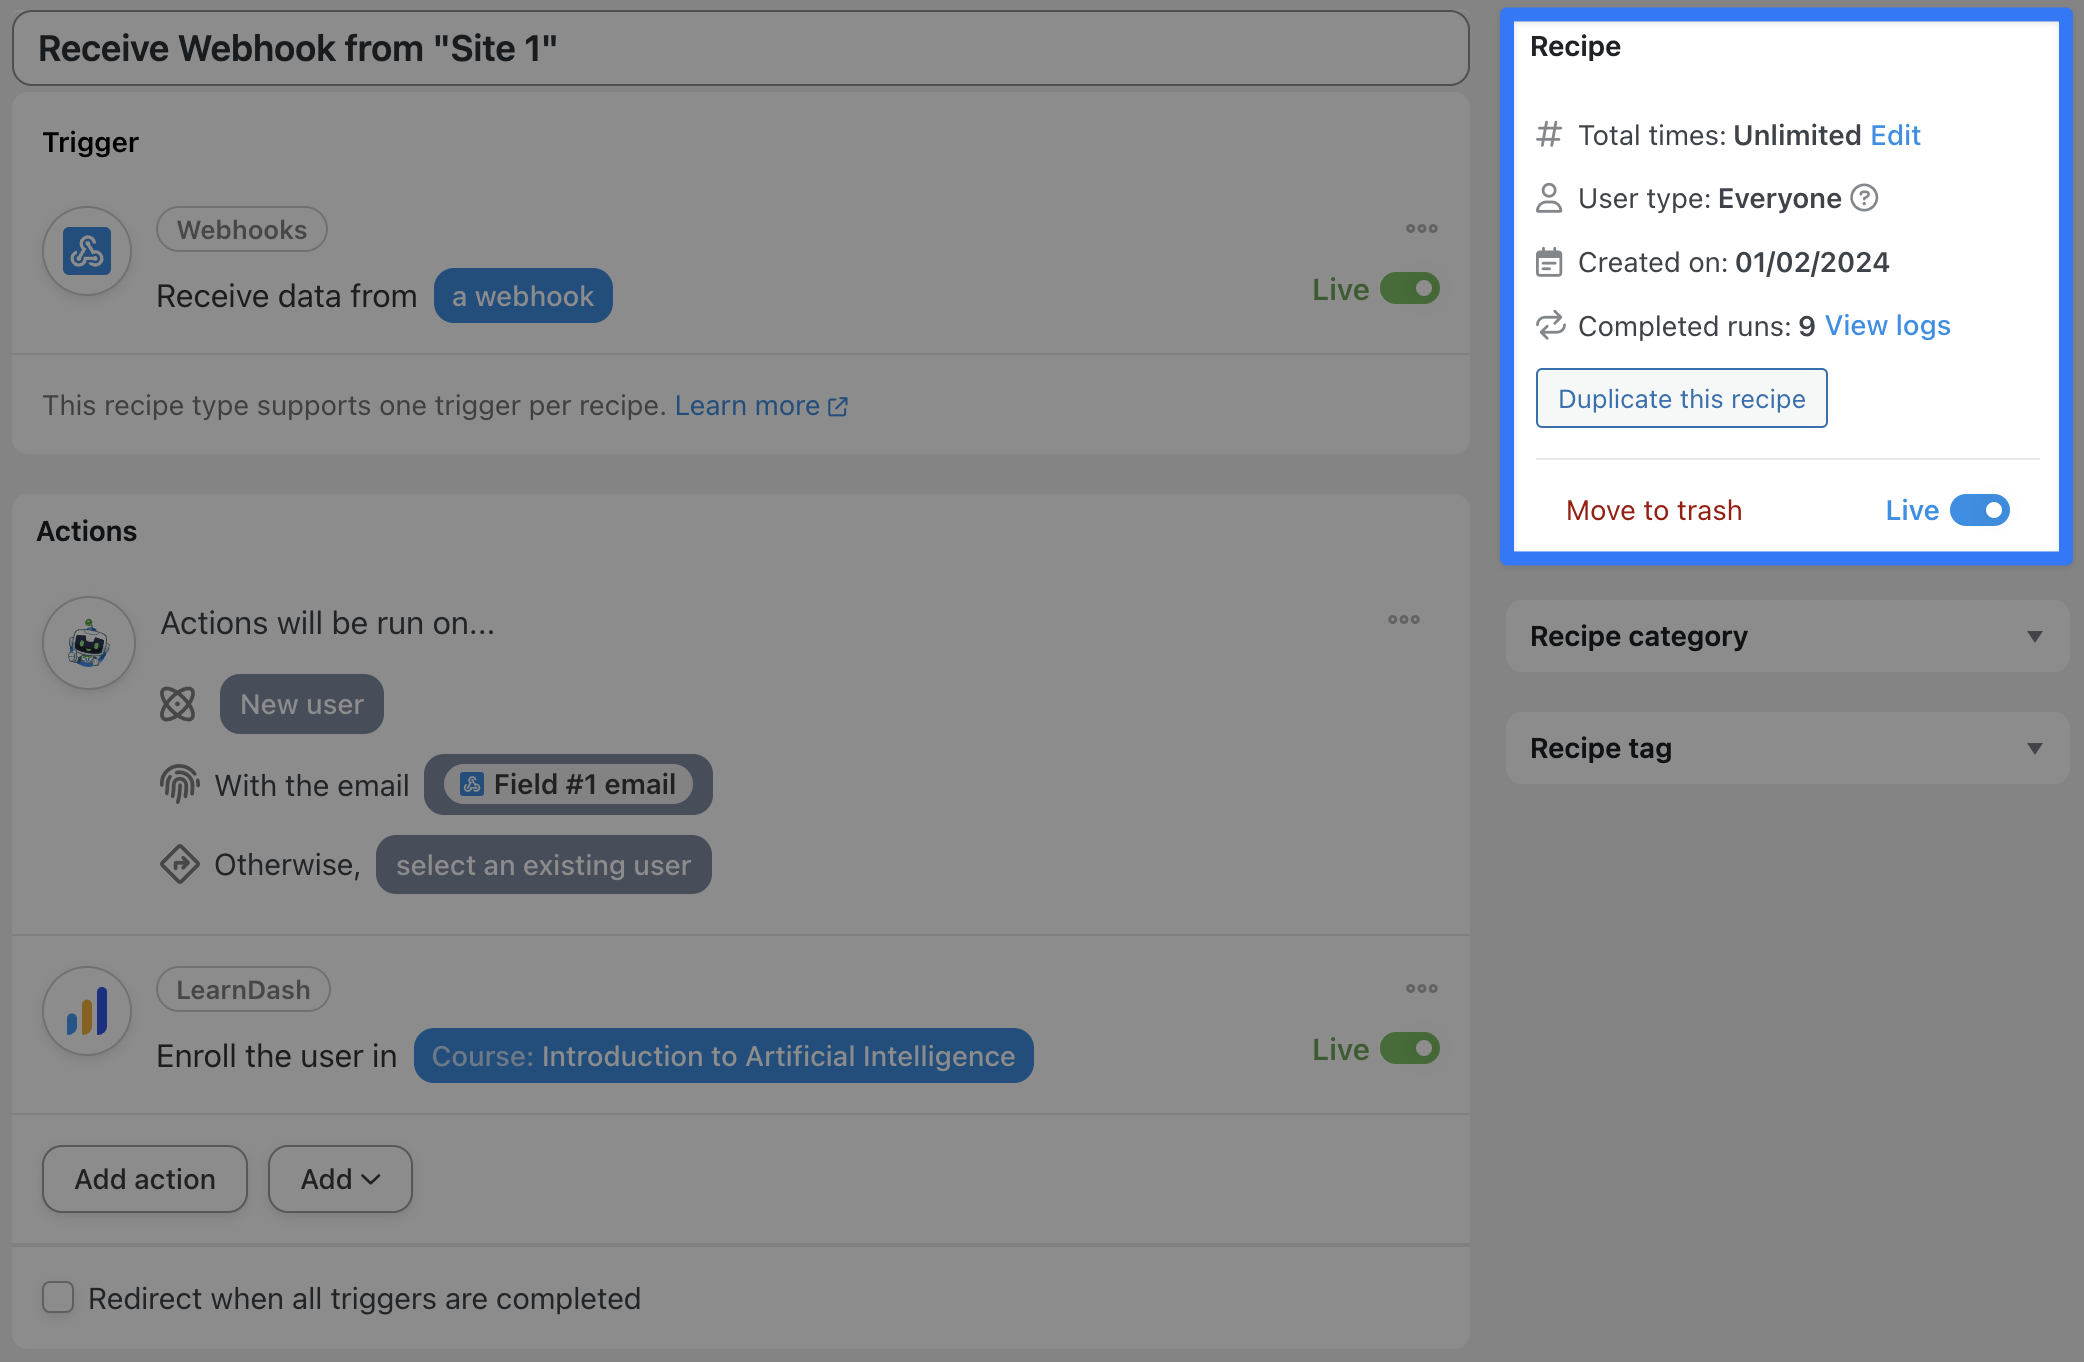
From the WordPress Admin Dashboard on “Site 2”, navigate to Automator > Add New. In the pop-up window that appears, select Everyone. (We have to select this recipe type as the incoming trigger will come from another website, not a user on this site.)

Give your recipe a name that makes it easy to recognize at a glance. For example, we’ve named this recipe “Receive Webhook from ‘Site 1’”.
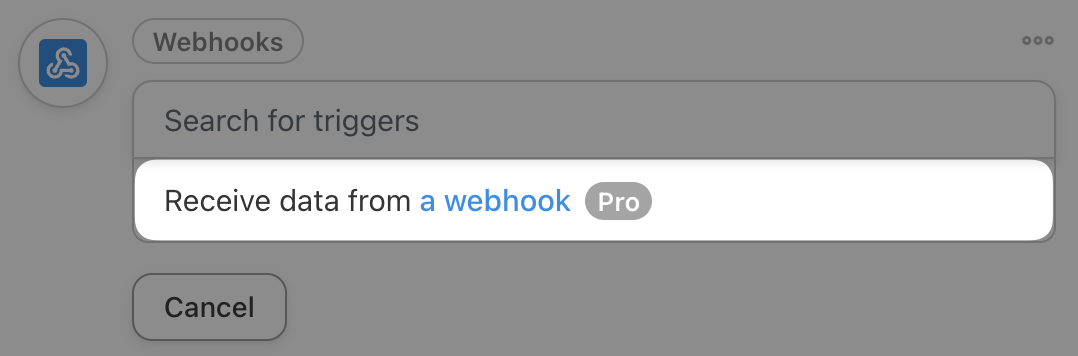
In the Triggers panel, from the menu of available integrations, select Webhooks.

From the drop-down list that appears, select Receive data from a webhook.
Automator will open a webhook form within the Triggers panel. Highlight and copy the contents of the first field, Webhook URL.

With the webhook url saved to your clipboard, return to “Site 1” and the recipe that we were creating.
Step 3: Connect “Site 1” and “Site 2” with Webhook URL
Webhooks are the secret ingredient that will connect multiple WordPress websites together.
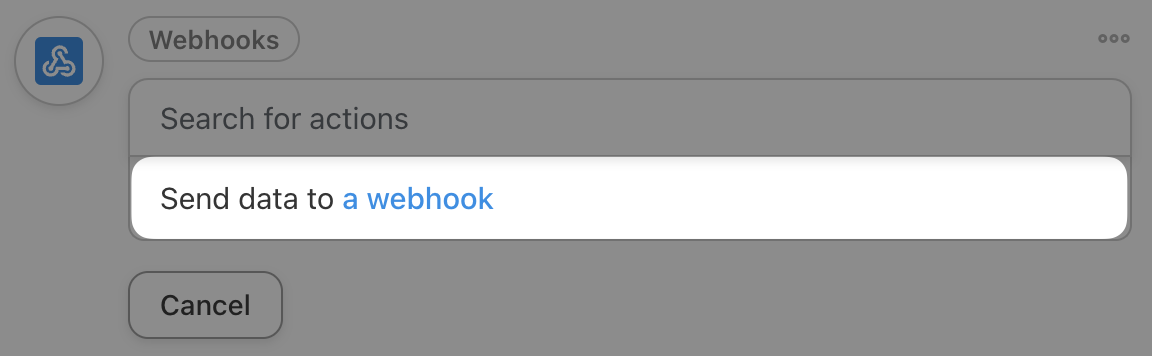
In the recipe editor of the recipe we had titled “Send Webhook to ‘Site 2’” click on Add action and select Webhooks from the menu of available integrations.
In the drop-down list that appears, select Send data to a webhook.
Once again, Automator will open up a webhook form within the Actions panel. In the first field, URL, paste the webhook url from “Site 2”.

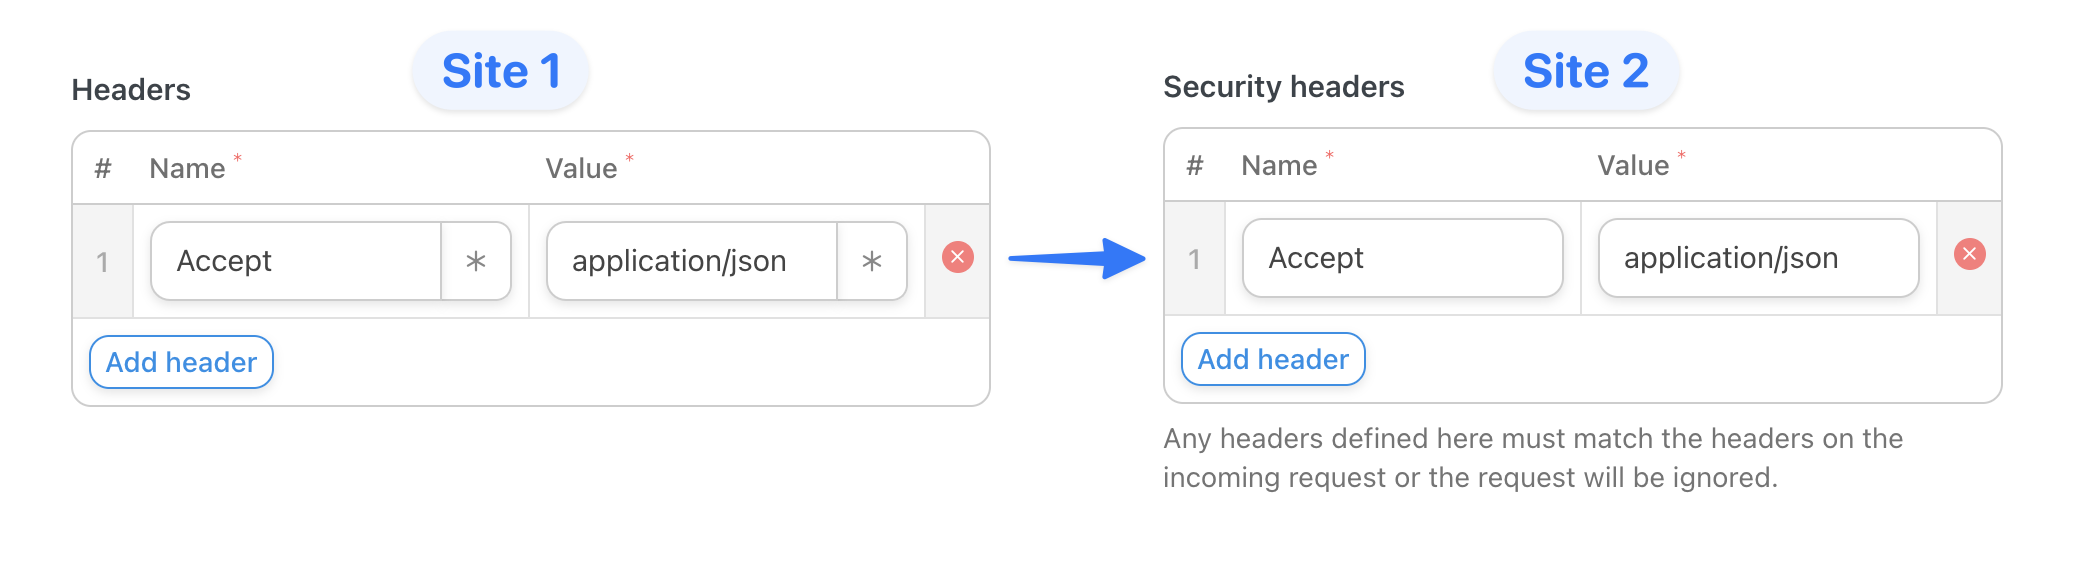
Next, copy and paste the values from the Headers field(s) on “Site 1” into the Security headers field(s) on “Site 2”.
We’re now going to send the email address that our WooCommerce customer provided at checkout on “Site 1” to “Site 2”.
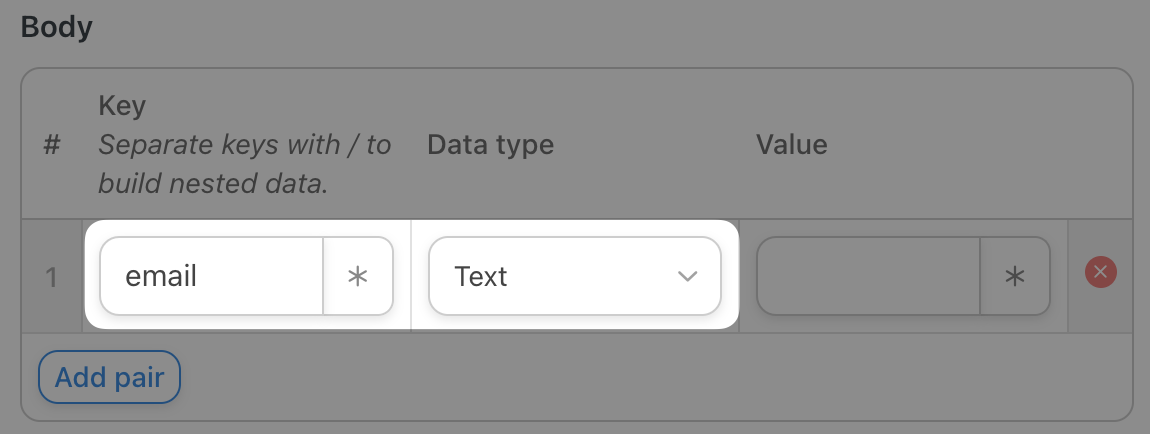
Return to “Site 1”. In the Body field near the bottom of the webhook form, enter email and text into the first two fields.
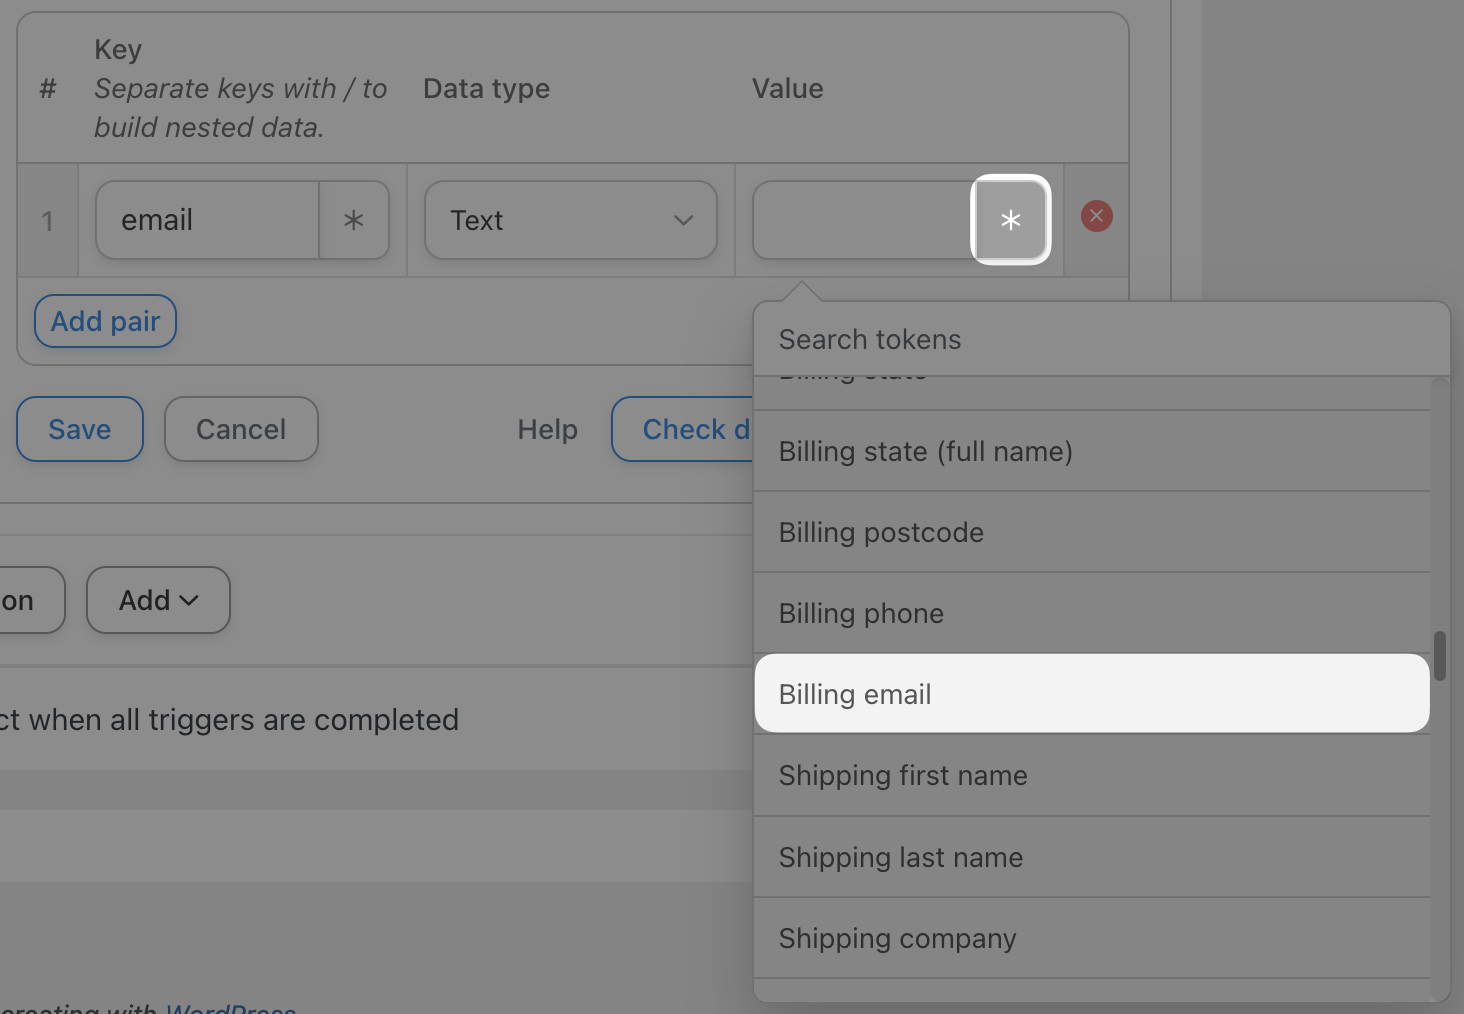
In the third field, we’re going to use a token (i.e., dynamic data pulled from your WordPress website and from within recipes) to retrieve the user’s email.
To select a token, click the Asterisk in the third field. From the drop-down list that appears, select the Billing email token under the WooCommerce trigger.
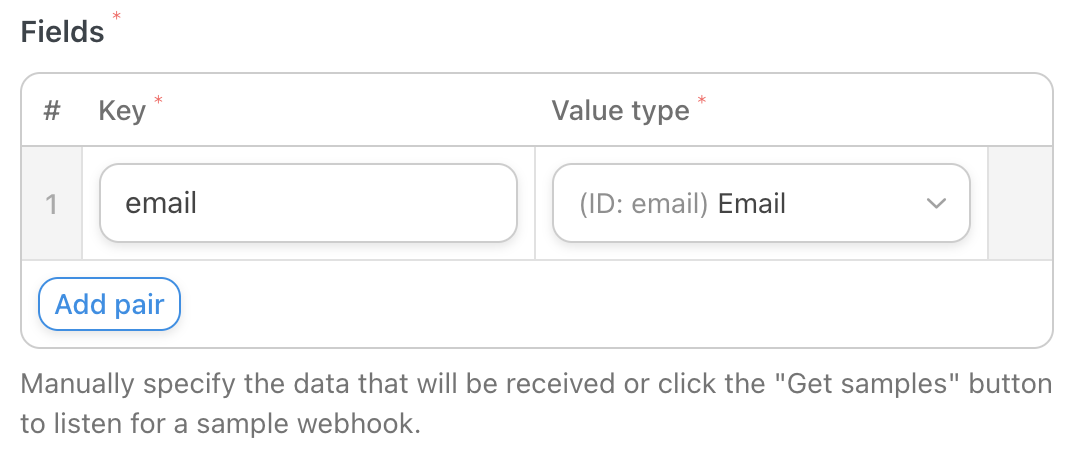
Return to “Site 2” and fill out the Fields section of the webhook form by manually entering “email” into the Key field and selecting “Email” as the Value type.
Alternatively, you can automatically populate the Fields section of your webhook form on “Site 2” while testing the connection. To do this, simply click Get samples on “Site 2” then click Send test on “Site 1”. Automator will return the results of the test and allow you to populate the Fields section of the webhook form on “Site 2” with the test results.
Add as many key/value pairs as you want. For example, we’ve added some additional fields such as “first name” and “last name”.
Once you’re finished, click Save on both sites.The recipe on “Site 1” is now complete. All you need to do is toggle the recipe from Draft to Live.
Step 4: Register and Enroll “Site 1” Customer on “Site 2”
Return to “Site 2”.
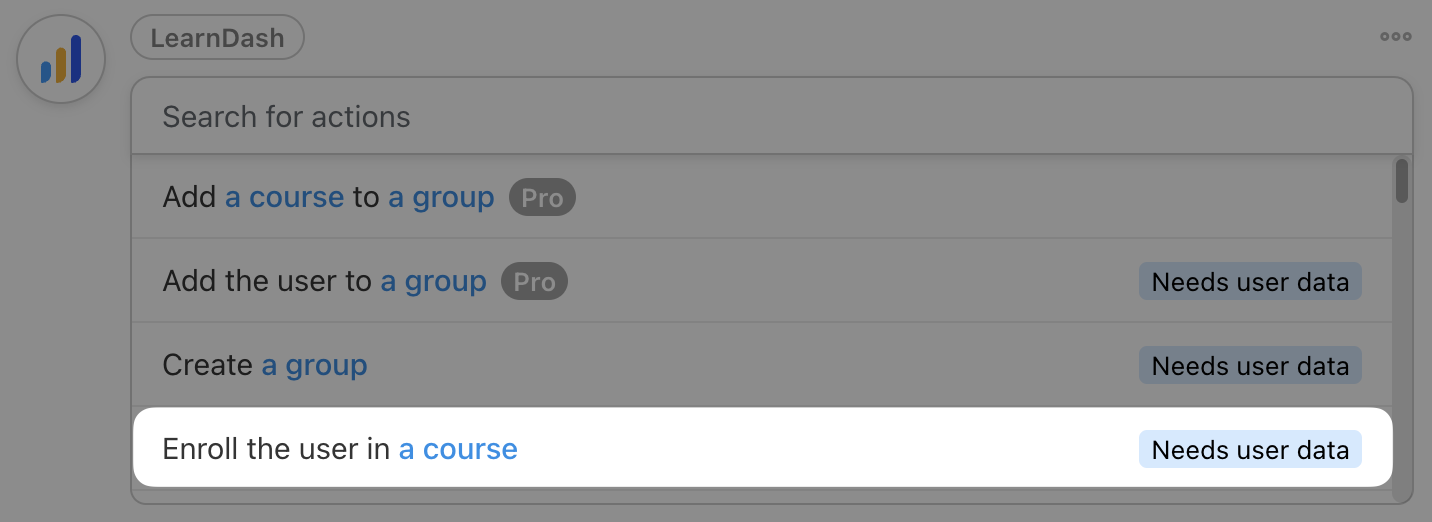
In the Actions panel of the recipe editor, click Add action and select LearnDash from the menu of available integrations. (Keep in mind, if you’re using another LMS like LifterLMS or LearnPress, you can still follow these steps.)

From the drop-down list that appears, select Enroll the user in a course.

Because we selected the recipe type Everyone, Automator will need some user data to complete the action.
In the pop-up window that appears, click Set user data.

At the top of the Actions panel, click New user.

Automator will present you with a form to enter the details of the new user(s). We’re going to use tokens to fill out the form and enter the new user’s information dynamically.

At the bottom of the user form, select the option “Select existing user” and Email as the prioritized field. This will ensure that the recipe runs smoothly for our customers from “Site 1” who have already purchased and/or registered for a course on “Site 2”.
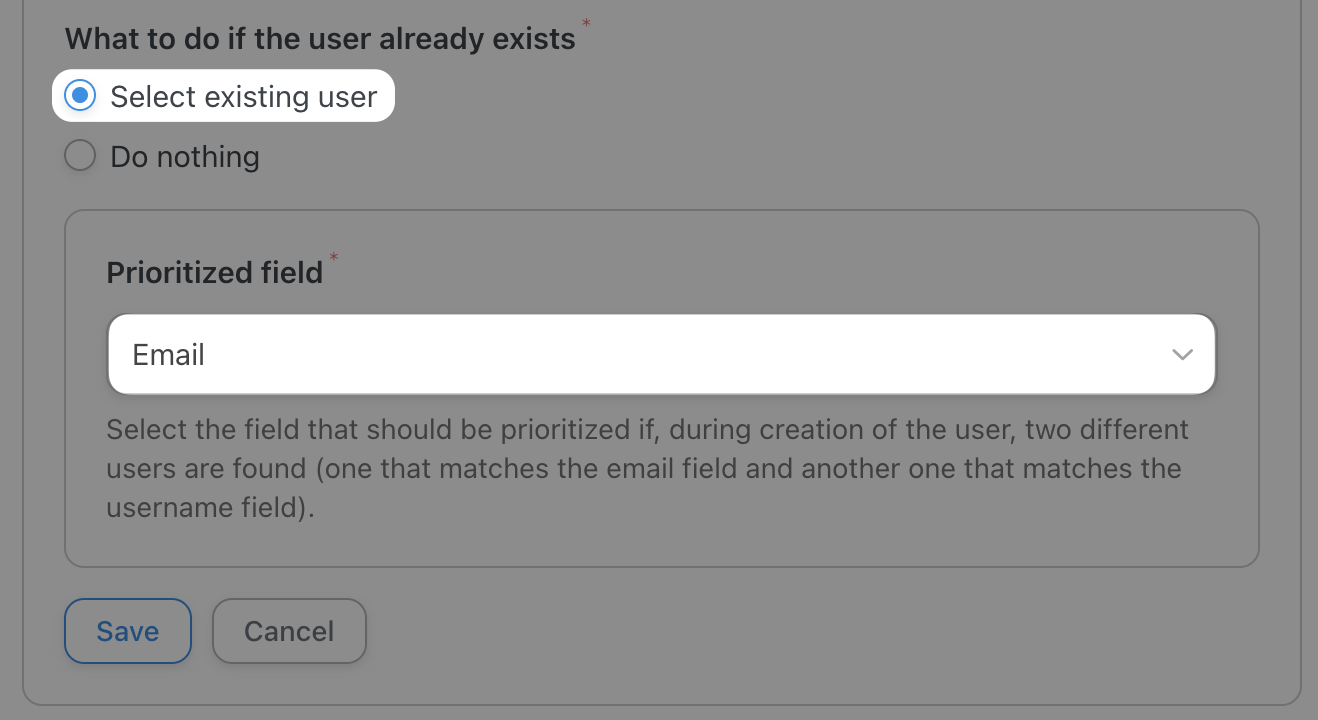
When you’re finished, click Save.
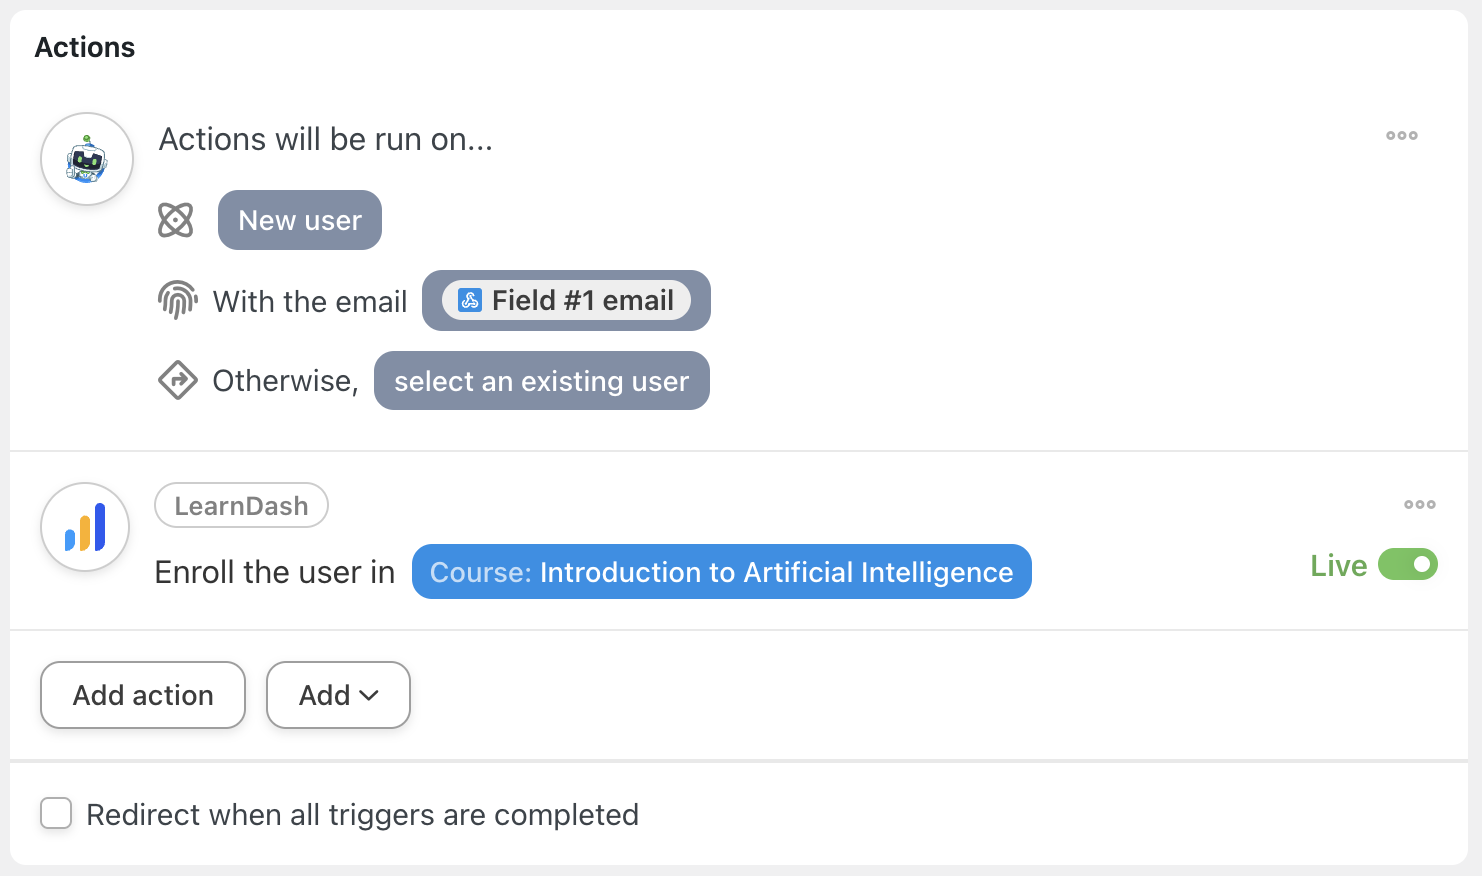
Next, return to the LearnDash action and select the course that corresponds to the product the user purchased on “Site 1”. For us, that is the “Introduction to Artificial Intelligence” course.
When you’re finished, click Save. The actions panel should now look something like this:
All that’s left for you to complete this seamless connection between your WordPress websites is to toggle the recipe from Draft to Live.
As we discussed before, Automator has tons of integrations. This means that you can create even more seamless workflows across your multiple WordPress websites. Let’s take a look.
Step 5: Add More Actions
Now that we’ve enrolled our “Site 1” customer into the course on “Site 2”, it’s time for us to roll out the welcome wagon.
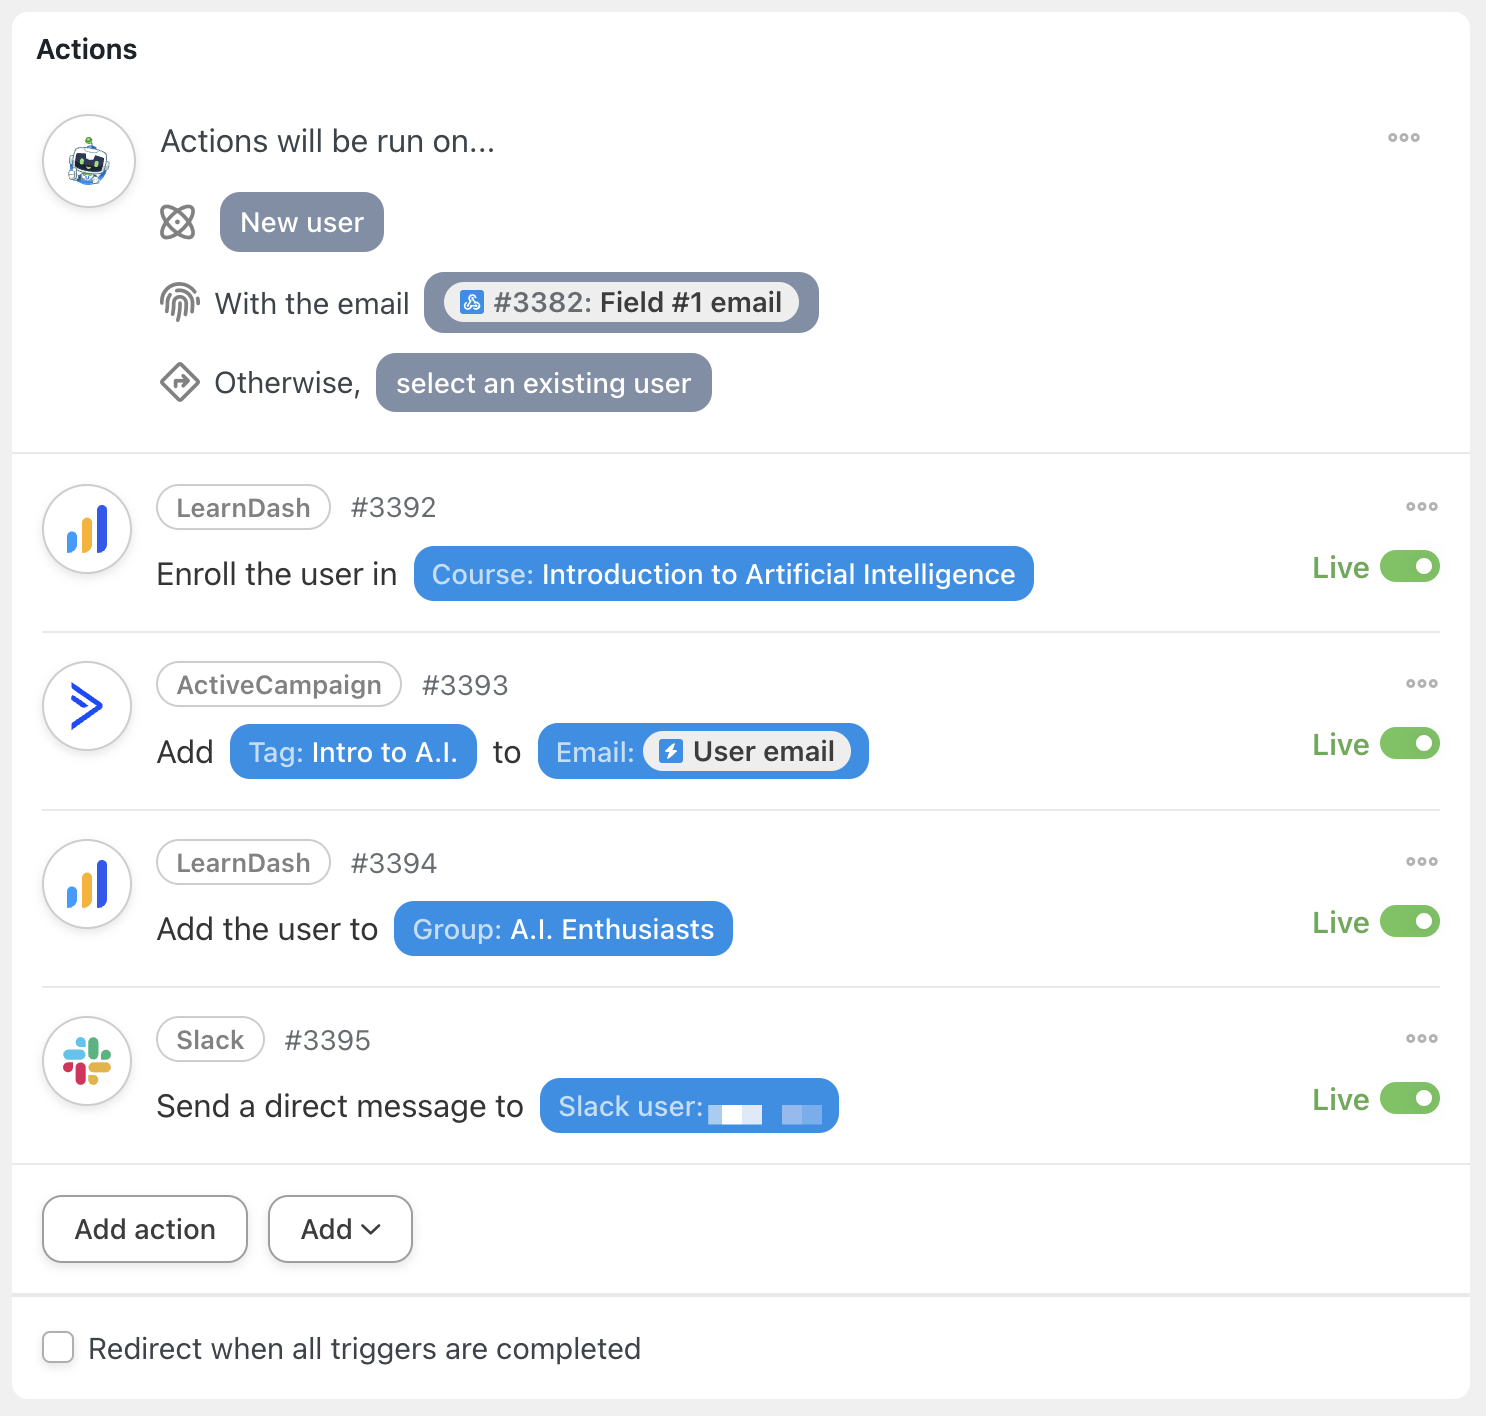
In the expanded Actions panel pictured above, we’ve added some actions to further integrate our two websites. We’ve added this new customer to our LearnDash group (or you could choose a BuddyBoss group/activity stream) and ActiveCampaign CRM platform. Finally, we sent a message in Slack to the course instructor to let them know someone else has enrolled in their course.
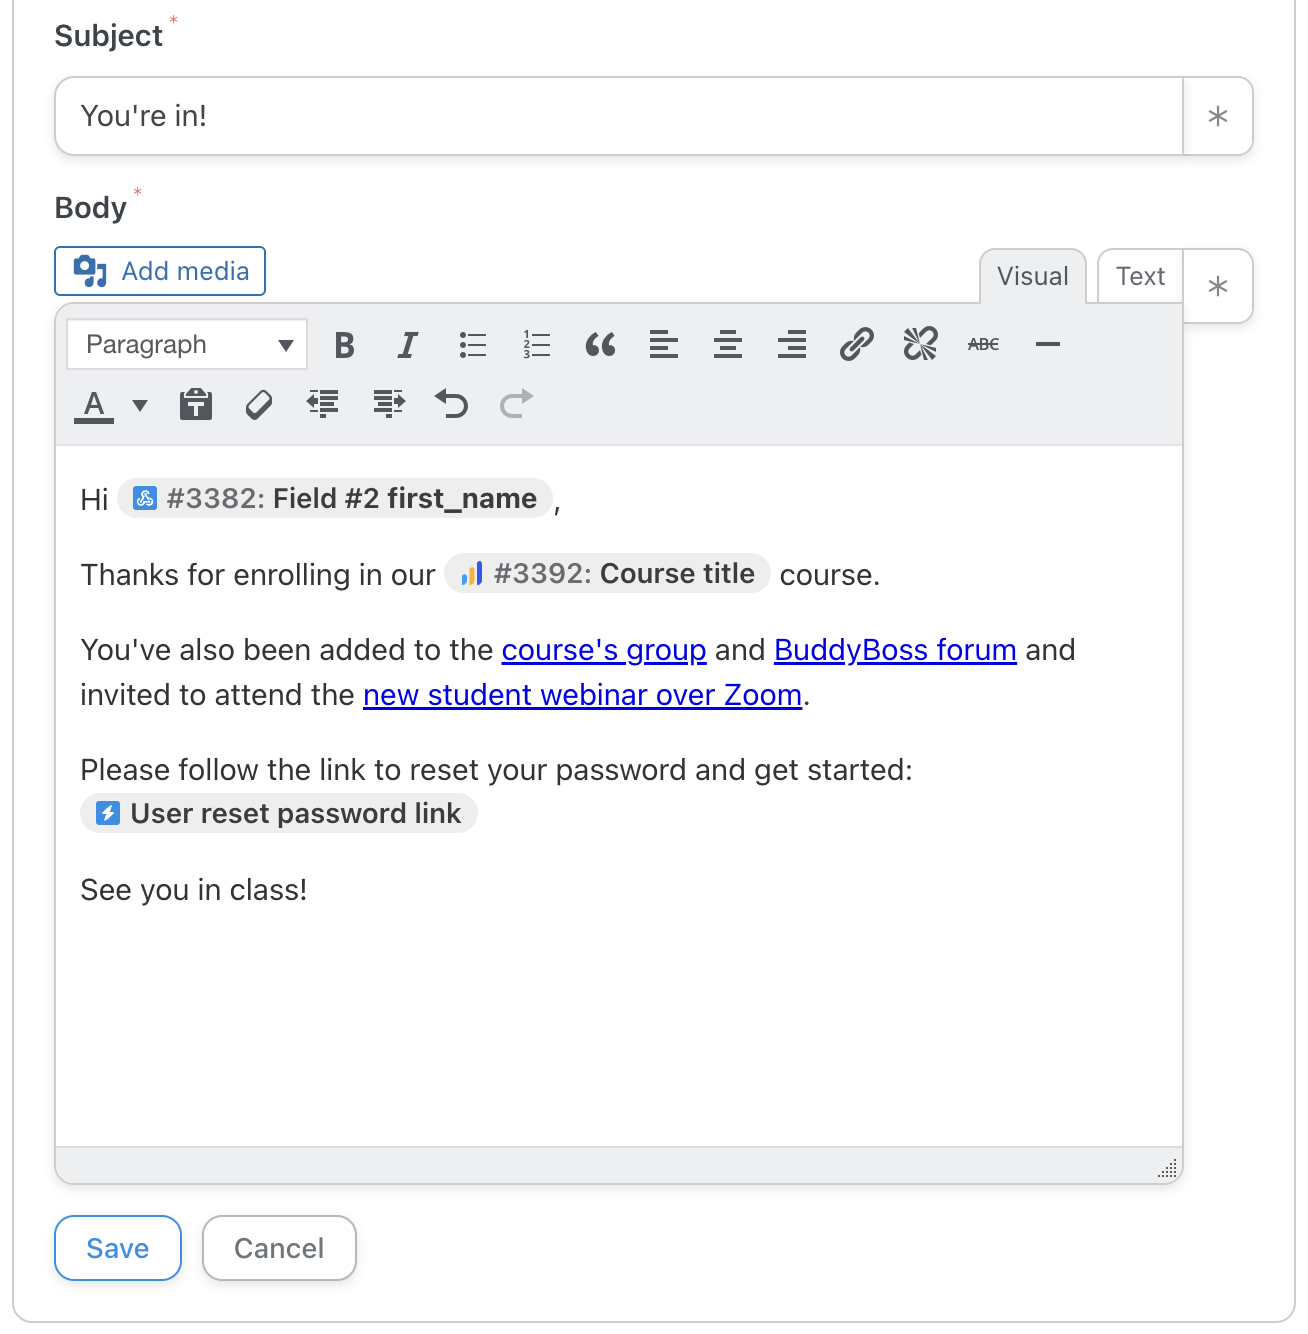
Alternatively, Automator has a native Email integration, just in case you wanted to keep the entire workflow within the recipe.
There’s no reason you should stop at just connecting two WordPress websites. As we’ve just shown, Automator allows you to create multiple actions—as many as you want! Simply add an action for each website you want to connect to another and build your own network of WordPress websites!
Thanks to Automator, it’s that easy.
Conclusion
In this walkthrough, we looked at a real-world scenario of how a company might leverage multiple websites to meet their demands and improve their operations. Then, we discussed how Uncanny Automator can provide an elegant and seamless way for multiple sites to work together.
Lastly, we went through a step-by-step on how to:
- create an Automator recipe on one WordPress website that sends data to a webhook on another WordPress website,
- create an Automator recipe on a second WordPress website to receive data from an incoming webhook from the first website,
- integrate our favorite apps and plugins to provide a comprehensive yet simple end-user experience and,
- connect as many WordPress websites together as we want using more Automator webhook actions.
For demonstration purposes, our tutorial covered only one possible combination of connecting WordPress sites. The real power of Automator is that you can connect any number and any type of WordPress website that you want. At no additional cost and with no hidden fees!
We hope that you feel comfortable and confident in setting up your own WordPress website connections. Nevertheless, we’re always happy to help.
Drop us a line in the comments section below and let us know how we can help you build a whole network of WordPress websites.

Related Posts


I love the possibility that this combination creates. I recently split my WooCommerce store from my Learndash LMS and found that using Uncanny Automator worked a treat. I didn’t know that I could send an automatic email to reset the password on the LMS site so I am going to set that up now.
Thanks for a great plugin and for the fast support your company provides when needed. If you are looking to set up a similar scenario I absolutely recommend Uncanny Automator for this process.
Does it support Woocommerce Subscription on one website and access to the course based on that subscription on the other website?
Hi Rina,
Yes, you can have subscriptions on one site grant access to a course on another site. Please note that you will need multiple recipes, as you’ll want to assign access on purchase AND revoke access on expiration/cancellation/etc. Have a look at the triggers over at https://automatorplugin.com/integration/woocommerce/ that are subscription related; you’ll need a recipe for each condition on both websites.
I’ve just downloaded and in the process of setting it up. It seems there a couple of changes to the software since this documentation was created.
I can’t find a way to add the Value as per the example above ‘Purchases _____ 1 time isn’t a clickable field, only the individual components. ie – ‘{{142:WCPURCHPROD:WOOPRODUCT_ID}} {{142:WCPURCHPROD:NUMTIMES}}’
“Under Fields, enter email for the Key and User purchases How to make a website 1 times for the Value.”