Revive old WordPress posts with AI and Uncanny Automator. Learn how to reverse content decay…
Connect WooCommerce to HubSpot
Create the perfect WooCommerce to HubSpot integration with Uncanny Automator. Keep your contacts updated, keep your lists fresh, and much more!

Are you looking for a way to connect WooCommerce to HubSpot? We certainly hope so, because you’ve just found the perfect solution!
With Uncanny Automator you can create a seamless Woo + HubSpot integration in just a few clicks—and even fewer minutes! Whether you want to keep your contacts up-to-date or manage your various lists, Automator can help you do it.
We’ll even show you a way to make changes in your Woo store from HubSpot! Ever wanted to send unique, automated offers to a few of your Woo shoppers on a HubSpot list? Automator can make it happen and we’ll show you how!
But that’s enough teasing for now. Let’s get into it.
Introduction
In this step-by-step guide, we’ll show you how to connect WooCommerce to HubSpot using Uncanny Automator. We’ll also reveal to you why Automator is the best option for making this powerful integration.
By the end of this walkthrough, you’ll be able to update your HubSpot contact data based on activity in your Woo store. You’ll also be able to manage your static lists, making segmentation a whole lot easier.
As a little bonus, at the very end, we’ll show you how to use webhooks to connect HubSpot to Woo! We promise, this is one integration that you don’t want to miss out on.
Why Connect Woo to HubSpot with Automator
WooCommerce is the leading ecommerce platform for WordPress websites. Similarly, HubSpot is one of the most popular—and certainly one of the most powerful—CRMs out there. And a pairing like this deserves nothing but the best.
Enter Uncanny Automator!
Automator is the #1 automation and integration tool for WordPress websites. But don’t take our word for it—trust the 5-star rating and tens of thousands of active installations!

Even so, when it comes to integration tools, we know that you have tons of options to choose from. But there are some key factors that set Automator apart from the rest.
- Affordability: Automator doesn’t just help you save time—it also helps you save money. Unlike other integration and automation tools on the market, Automator doesn’t charge a per automation fee. Do you have thousands, tens of thousands or even hundreds of thousands of contacts in HubSpot? How many transactions are you processing in your Woo store every week? With Automator, it doesn’t matter! The more you integrate and automate, the more you save!
- Ease-of-Use: Don’t let Automator’s click-and-play interface fool you—there’s serious power packed into this plugin. Creating these powerful integrations—what we like to call recipes—is as simple as selecting triggers and actions (as many as you want). From there, add filters and delays/timers, select from a massive range of dynamic data using easily searchable tokens and even set recipe run limits. We’ll walk you through setting up some Automator recipes so you’ll see firsthand how simple it is.
- Integrations: With 214 integrations (and counting), you can connect Woo and HubSpot to a lot more than just each other. Want to connect Woo to Google Sheets? Or how about connecting HubSpot to LearnDash or ClickUp? Why stop there? Auto-generate Woo product descriptions with OpenAI or condense your HubSpot contact data into a simple QR code that you can embed into an email.Convinced? Get your Automator license now so you can follow along.>>>
Convinced? Get your Automator license now so you can follow along.>>>
Keep Your HubSpot Contact Data Up-to-Date
Keeping your HubSpot contact data up-to-date is crucial for protecting the value of your CRM. Of course, no one really has time to go over the details of hundreds (far less thousands) of contacts. That’s why we’ve created the recipe pictured below.
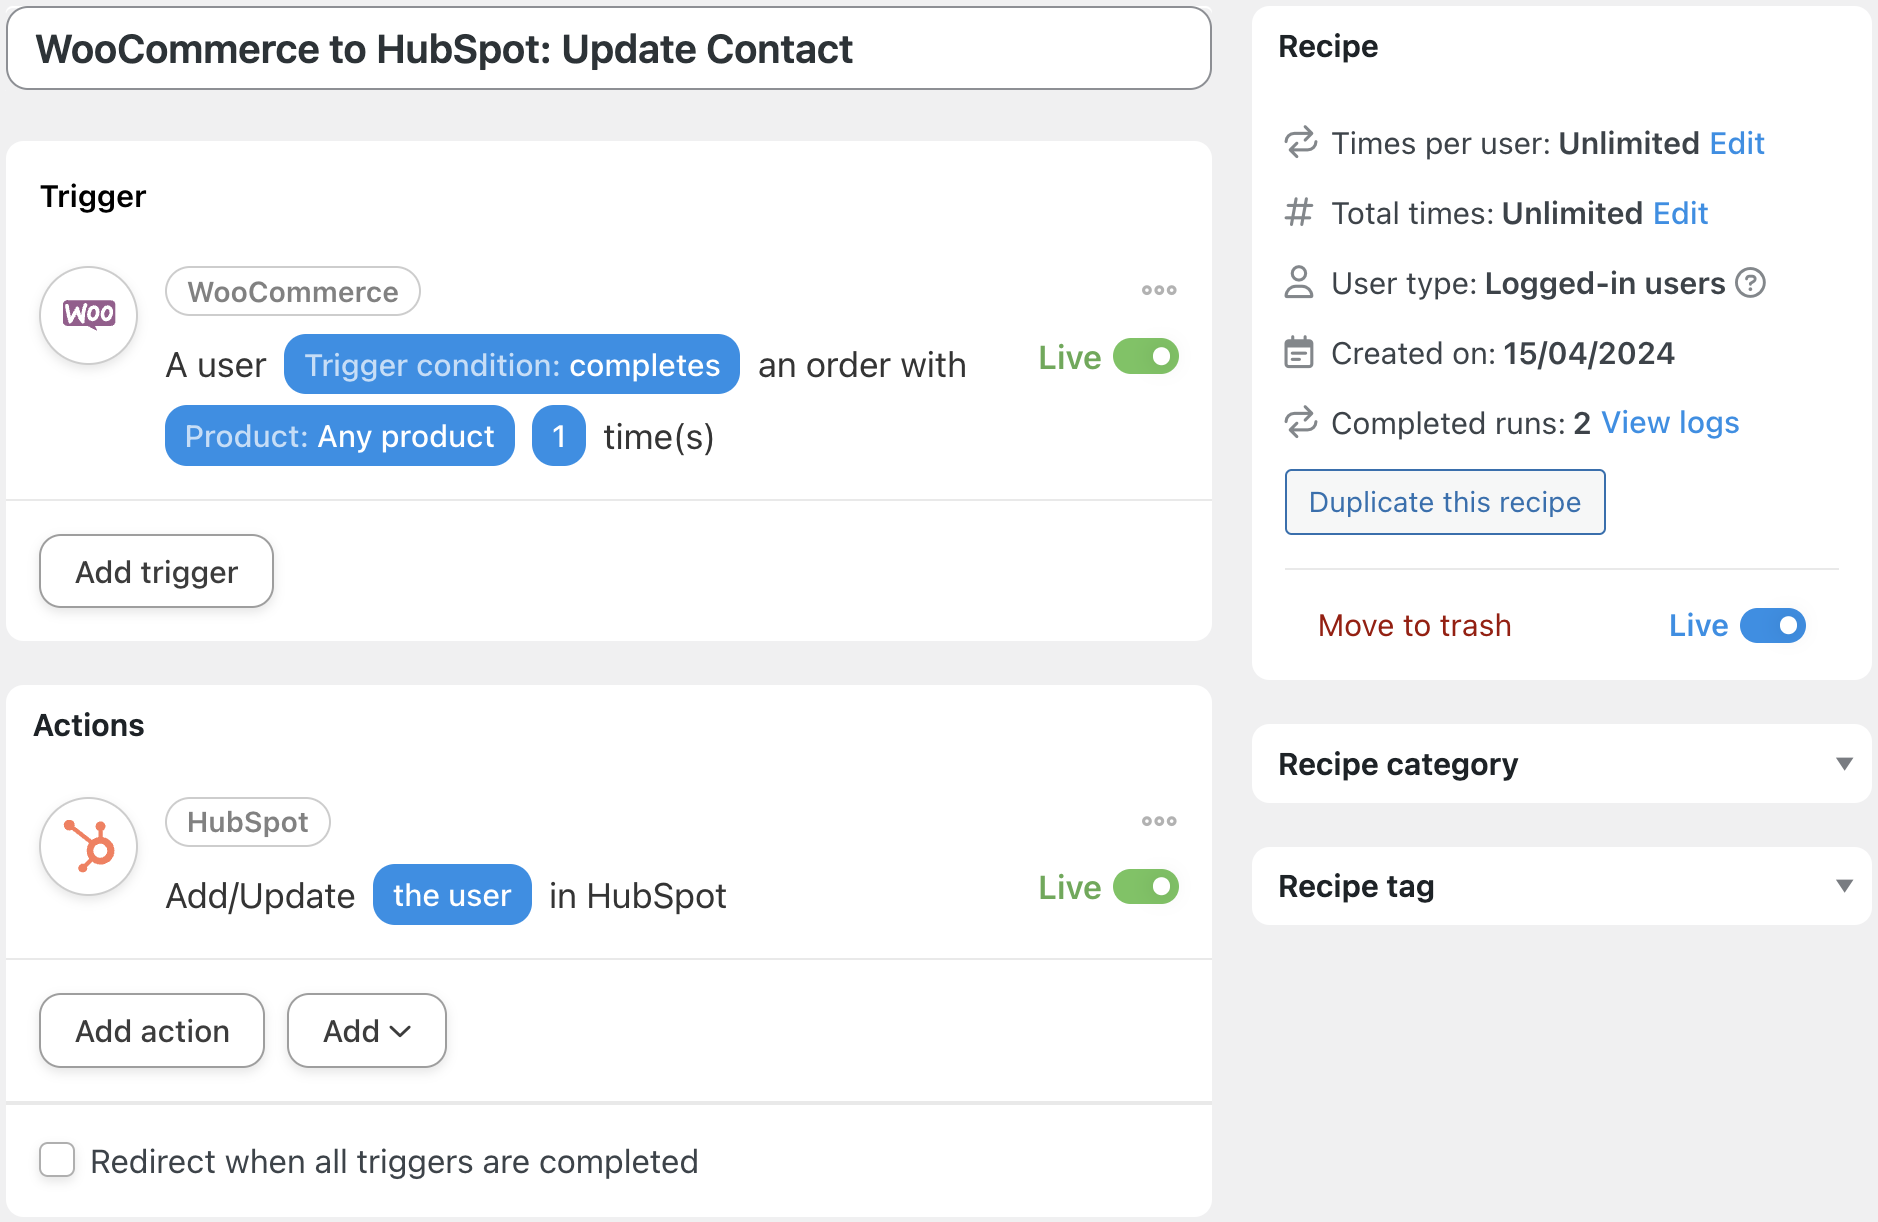
In that Automator recipe, every time one of our Woo shoppers makes a purchase, we will update their HubSpot contact with the latest information from their checkout form. Here’s how we did it.
Step 1: Create a New Recipe
From your WordPress Admin Dashboard, navigate to Automator > Add new recipe. In the pop-up window that appears, select Logged-in users.

(Note: We selected Logged-in users because we have configured our Woo settings to require account login or creation at checkout. If you do not have this setting enabled in your Woo store and you still want to add/update contacts to HubSpot, select Everyone and we will include notes throughout the walkthrough for you.)
Step 2: Name Your Recipe
Give your recipe a name that makes it easy to recognize at a glance. For example, we’ve named this recipe “WooCommerce to HubSpot: Update Contact”.
Step 3: Configure Your Trigger(s)
In the Trigger panel, from the menu of available integrations, select WooCommerce.

From the dropdown list that appears, select A user completes, pays for, lands on a thank you page for an order with a product.

(Note: If you selected the recipe type Everyone, your trigger should be A guest completes, pays for, lands on a thank you page for an order with a product.)
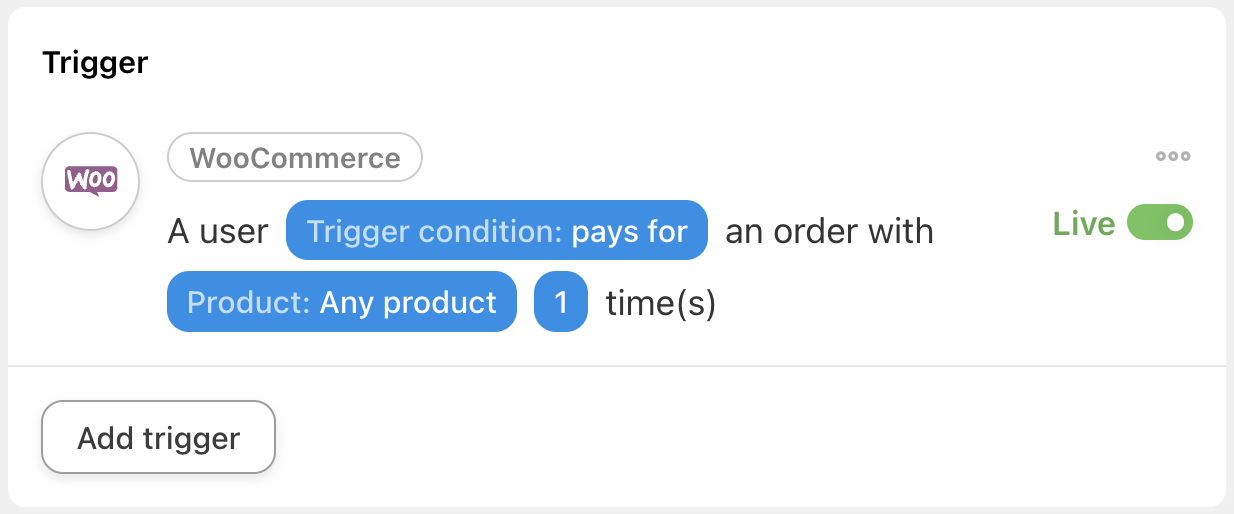
Automator will prompt you to select the Trigger condition and Product. Because we want to capture as many customers as possible, we have selected pays for and Any product.
When you’re finished, click Save. Your completed trigger should look like this:
Step 4: Configure Your Action(s)
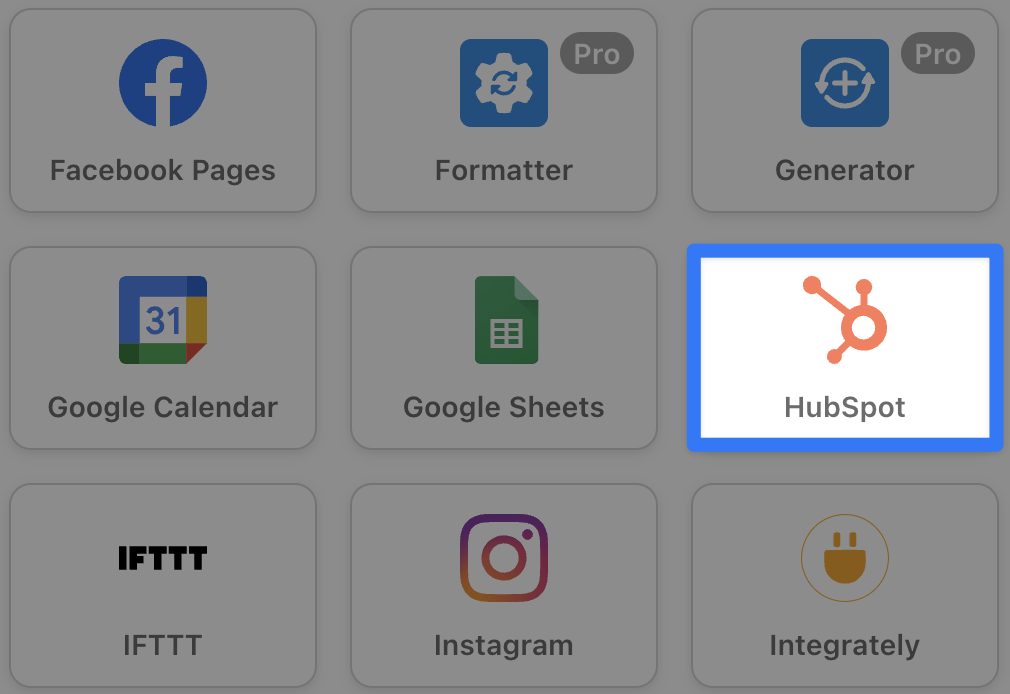
In the Actions panel, click Add action and select HubSpot from the menu of available integrations.
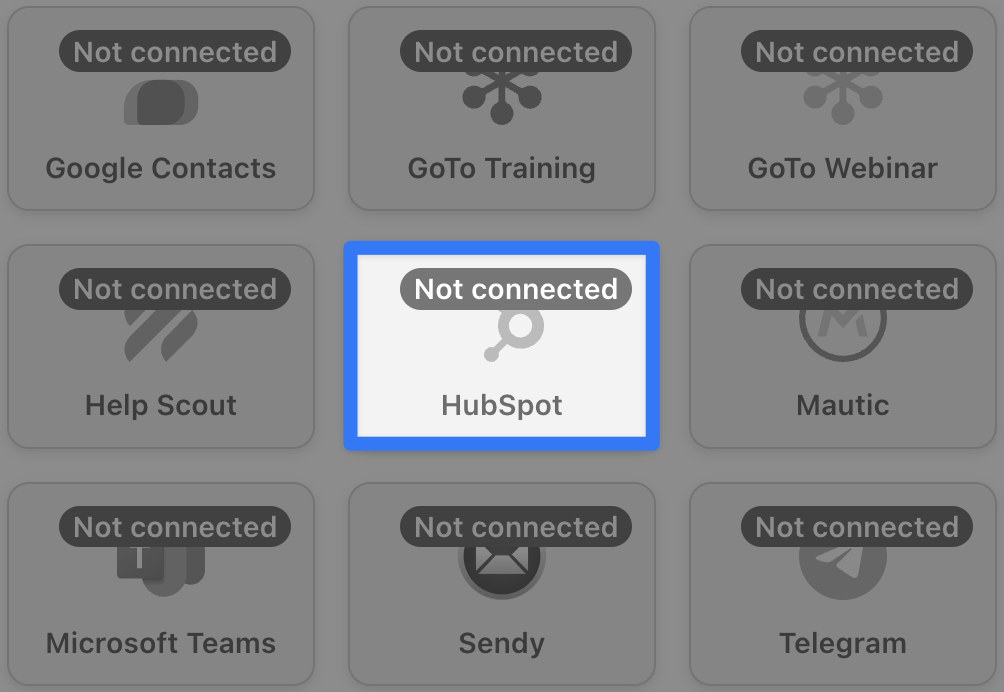
If your HubSpot account is not yet connected, scroll down to the bottom of the integrations menu. The HubSpot integration will be grayed out with the label “Not connected”.
A pop-up window will appear where you can connect your HubSpot account. Click Connect account and follow the prompts.

Once your account has been connected, return to the recipe editor. From the dropdown list that appears under the HubSpot integration, select Add/Update the user in HubSpot.

(Note: If you selected the recipe type Everyone, your action will be Create/Update a contact in HubSpot.)
Automator will prompt you to fill out the custom field(s) that you want to update. Also, the box marked If the contact already exists, update their info should be checked by default. If not, check the box.
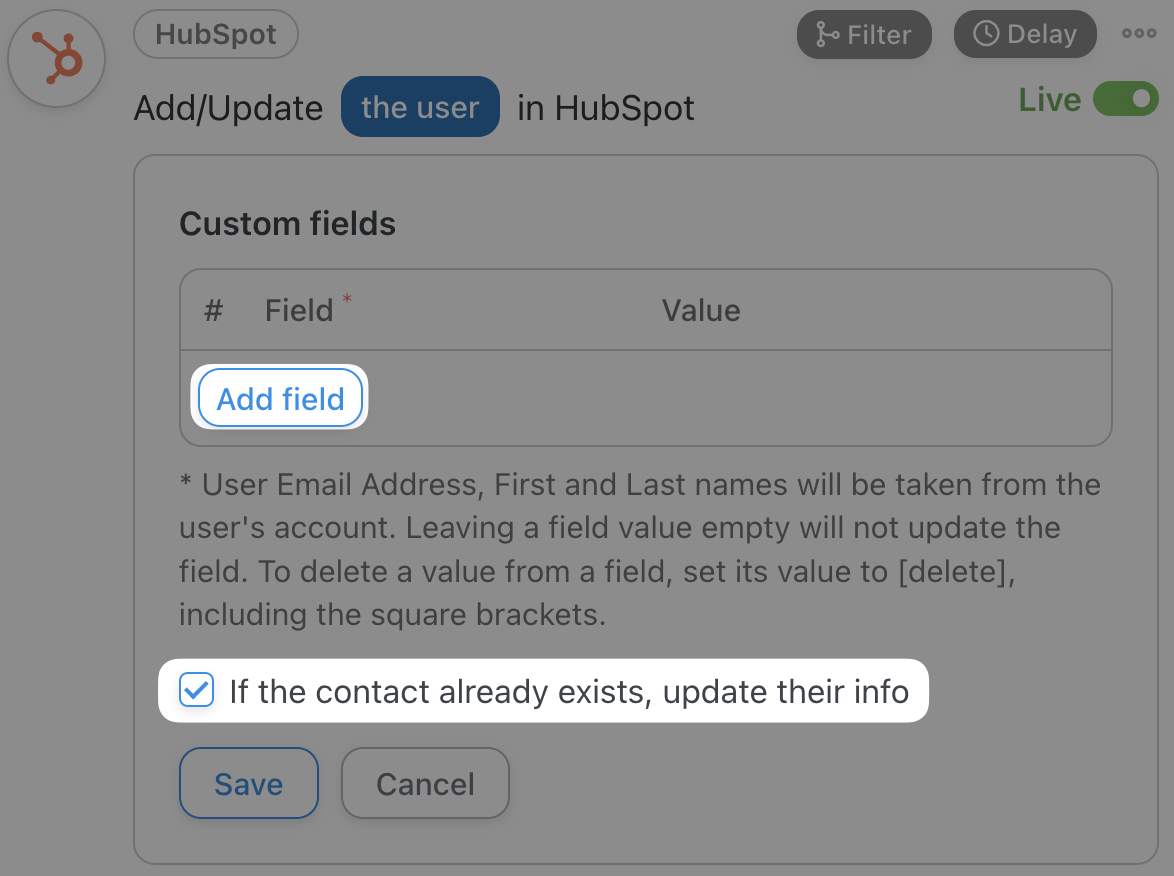
(Note: If you selected the recipe type Everyone, you will see an Email address field in addition to the Custom fields. You can fill out that field using tokens as we will show you below.)
To add a field, simply click Add field. Automator will have retrieved your contact fields from HubSpot, making it easy for you to select the field(s) you want to update.
For example, we have selected the fields Street Address, City, State/Region and the custom field Last Purchase.
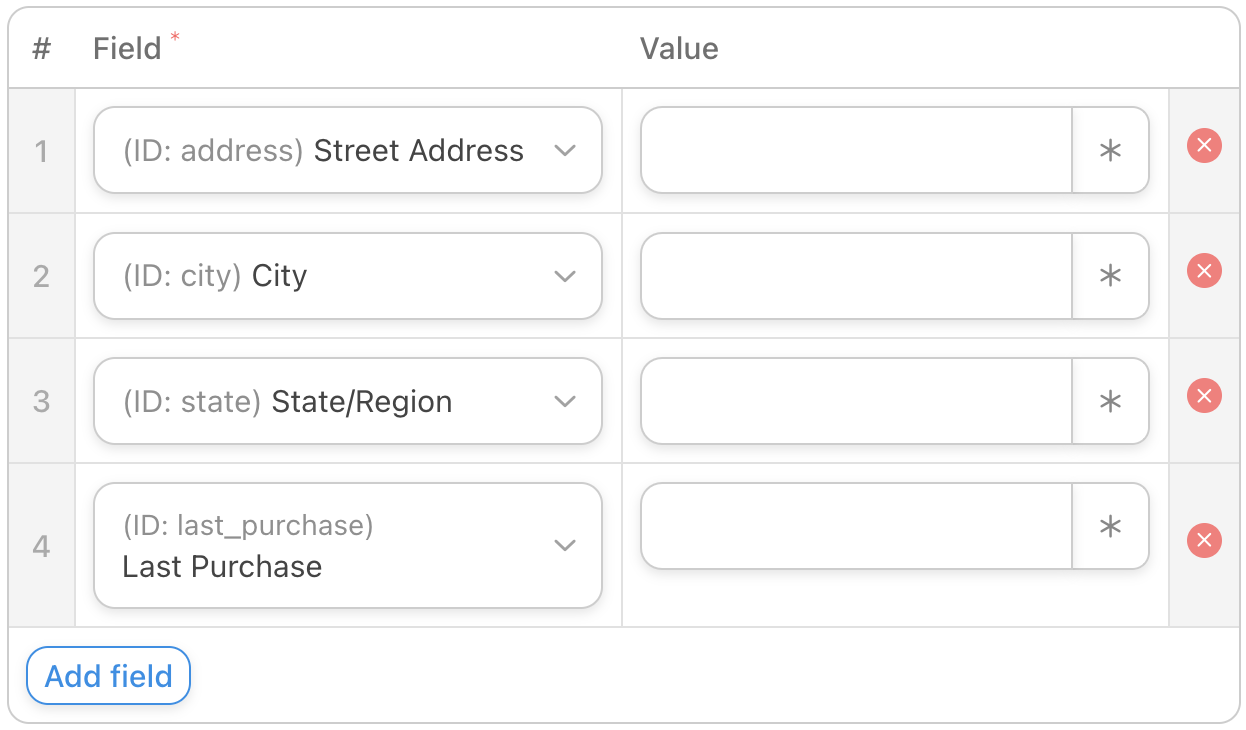
(Note: If you do not see a HubSpot property listed in the dropdown list, you may not have edit access to that property. If you want to add or edit custom properties or change their permissions, go to your HubSpot account and navigate to Settings > Data Management > Properties.)
We can now fill out these fields using tokens, i.e., dynamic data pulled from your WordPress website and from within recipes.
To select a token, simply click on the Asterisk and select the corresponding token from the dropdown list. For simplicity, type the token you’re looking for into the search bar. For example, we searched for “address” to find the correct WooCommerce token.
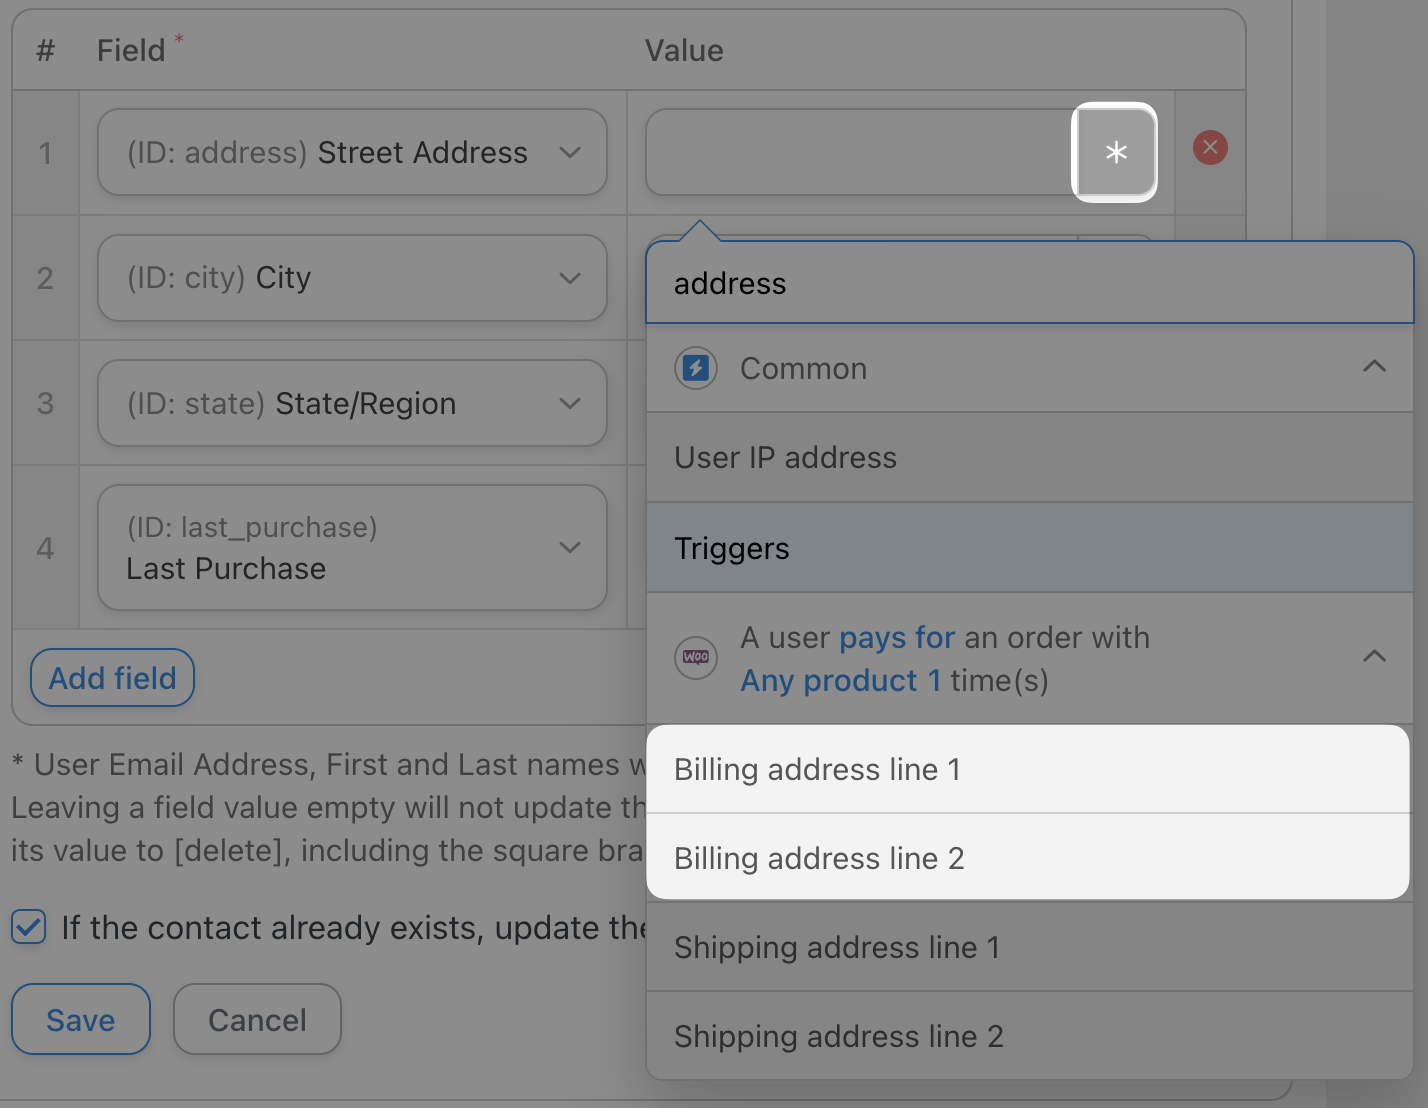
Fill out the remaining fields with tokens or simply type something in to use static values.

When you’re finished click Save. Your completed action should look like this:

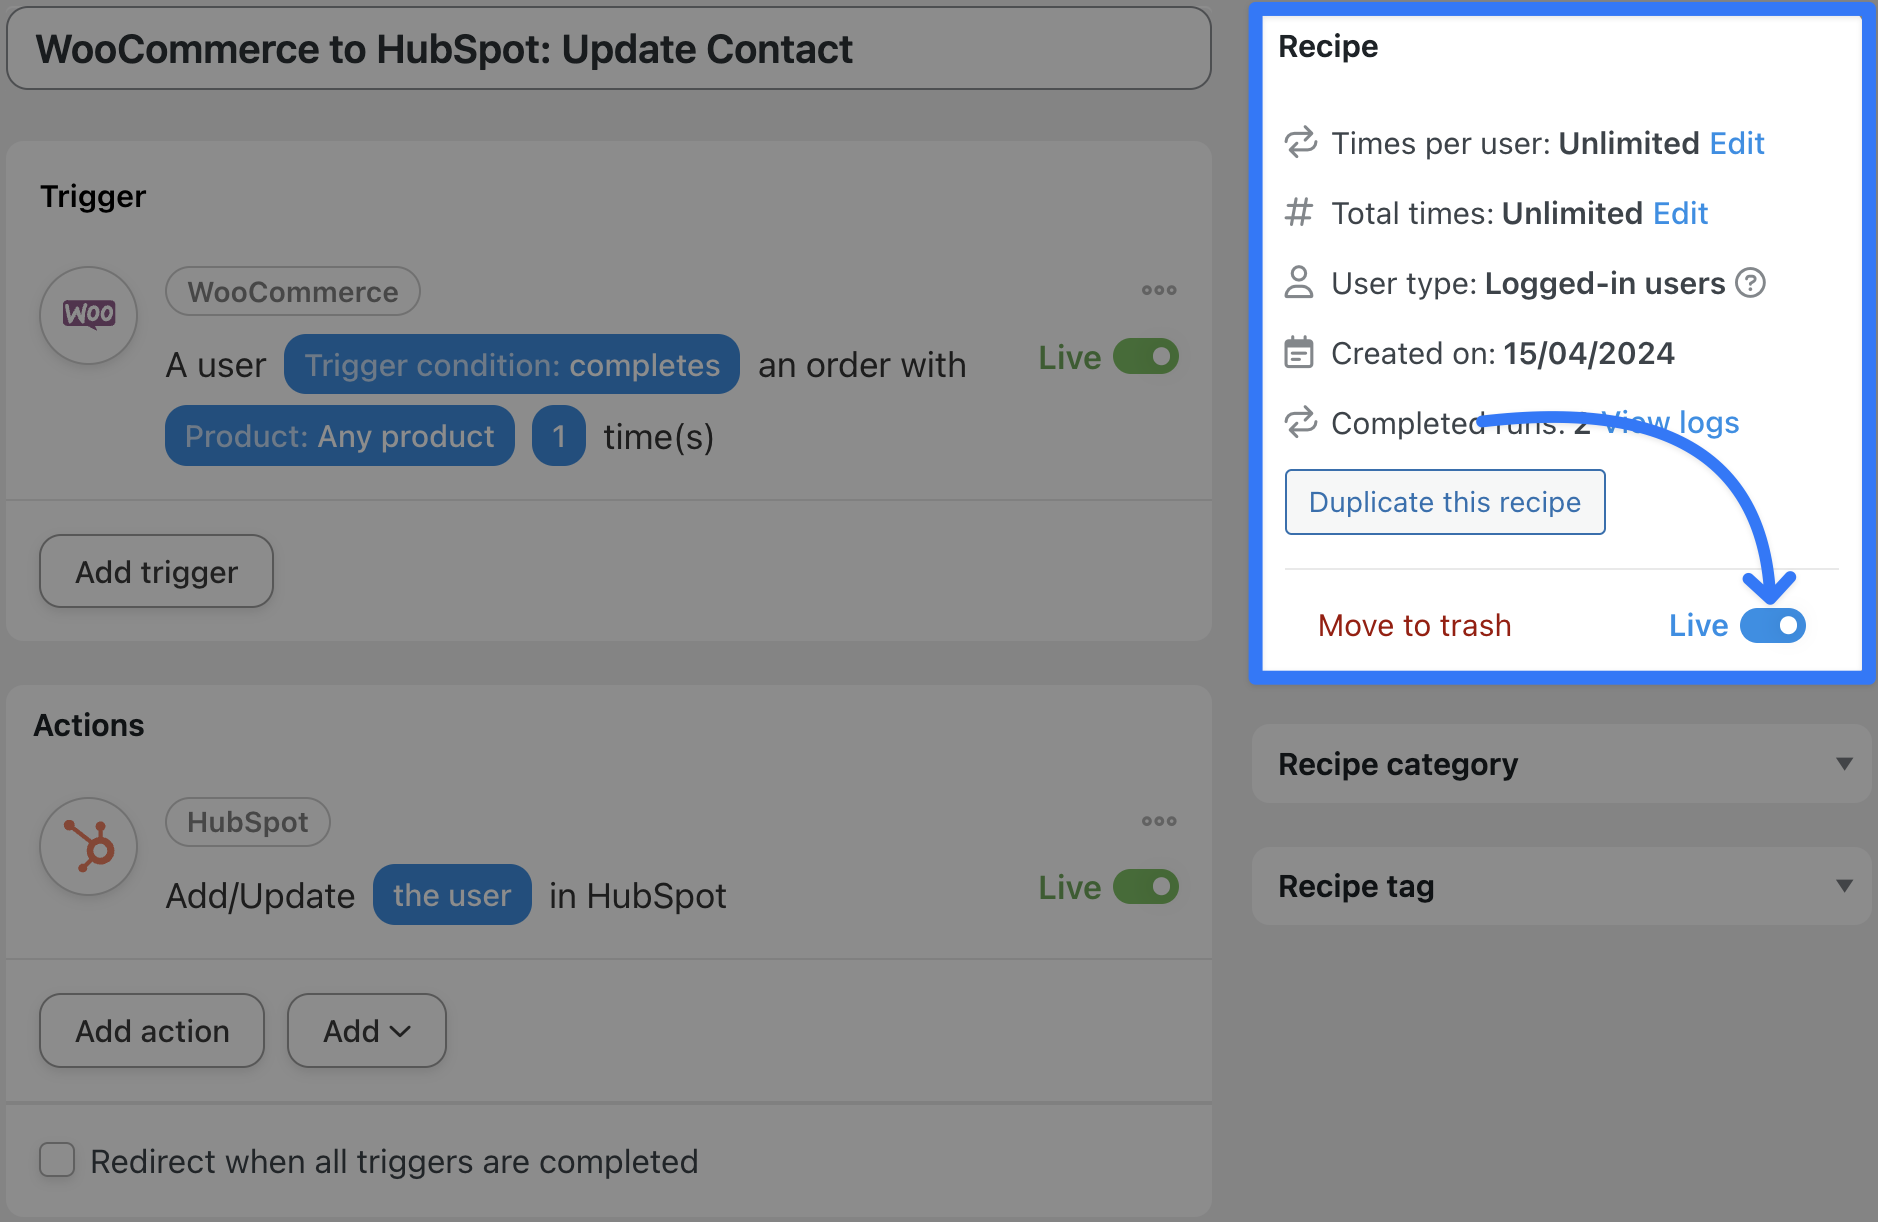
Step 5: Go Live!
You’ve almost completed your first WooCommerce and HubSpot integration! All that’s left for you to do now is toggle the recipe from Draft to Live!
It’s that simple! Now that you’ve gotten the hang of creating Woo and HubSpot integrations with Automator, let’s take a look at something a bit more advanced. (But still incredibly simple!)
Manage Your Static Lists
HubSpot’s static lists are kind of a misnomer. While you don’t necessarily want to add and remove contacts from these lists dynamically as you would from active lists, it would still be nice to add and remove them automatically.
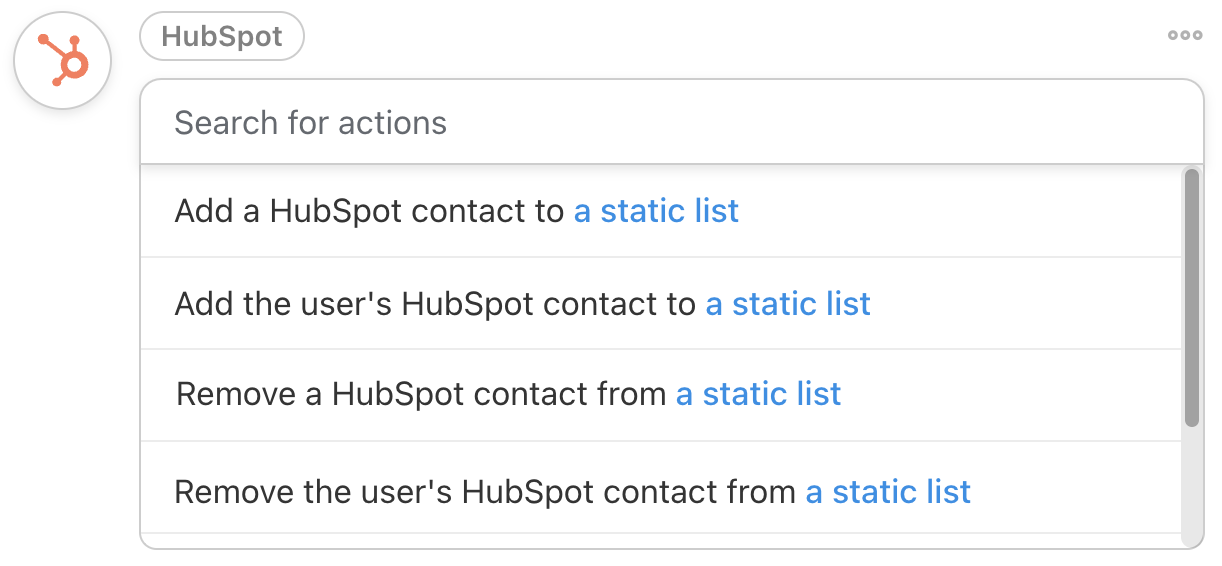
This is pretty simple to accomplish with Automator’s HubSpot actions such as Add a HubSpot contact to a static list and Remove the user’s HubSpot contact from a static list.
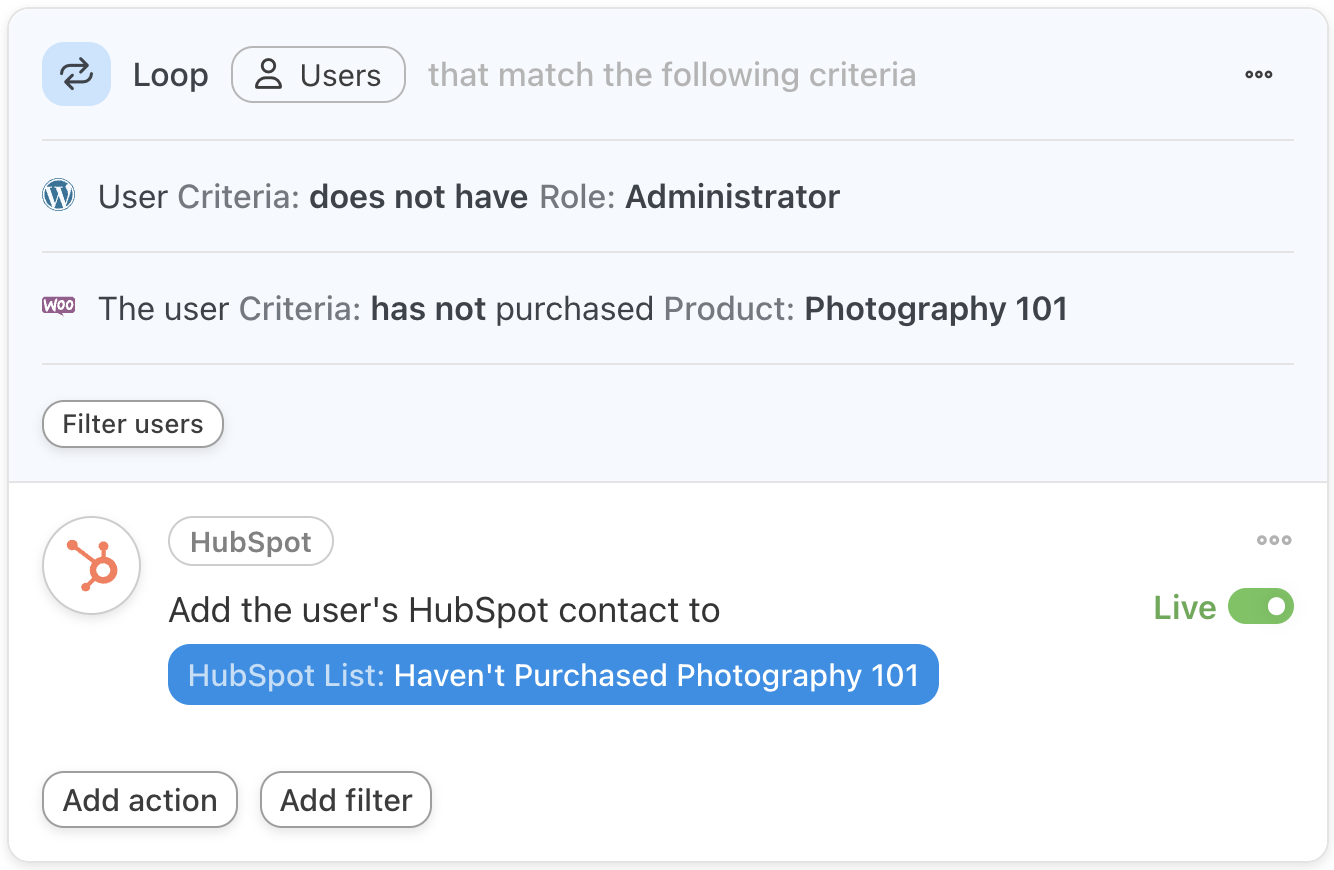
With Automator, you can populate entire static lists with the click of a button. For example, in the recipe pictured below, we’ve added all of our Woo customers who haven’t yet made a purchase of a specific product to a static list.
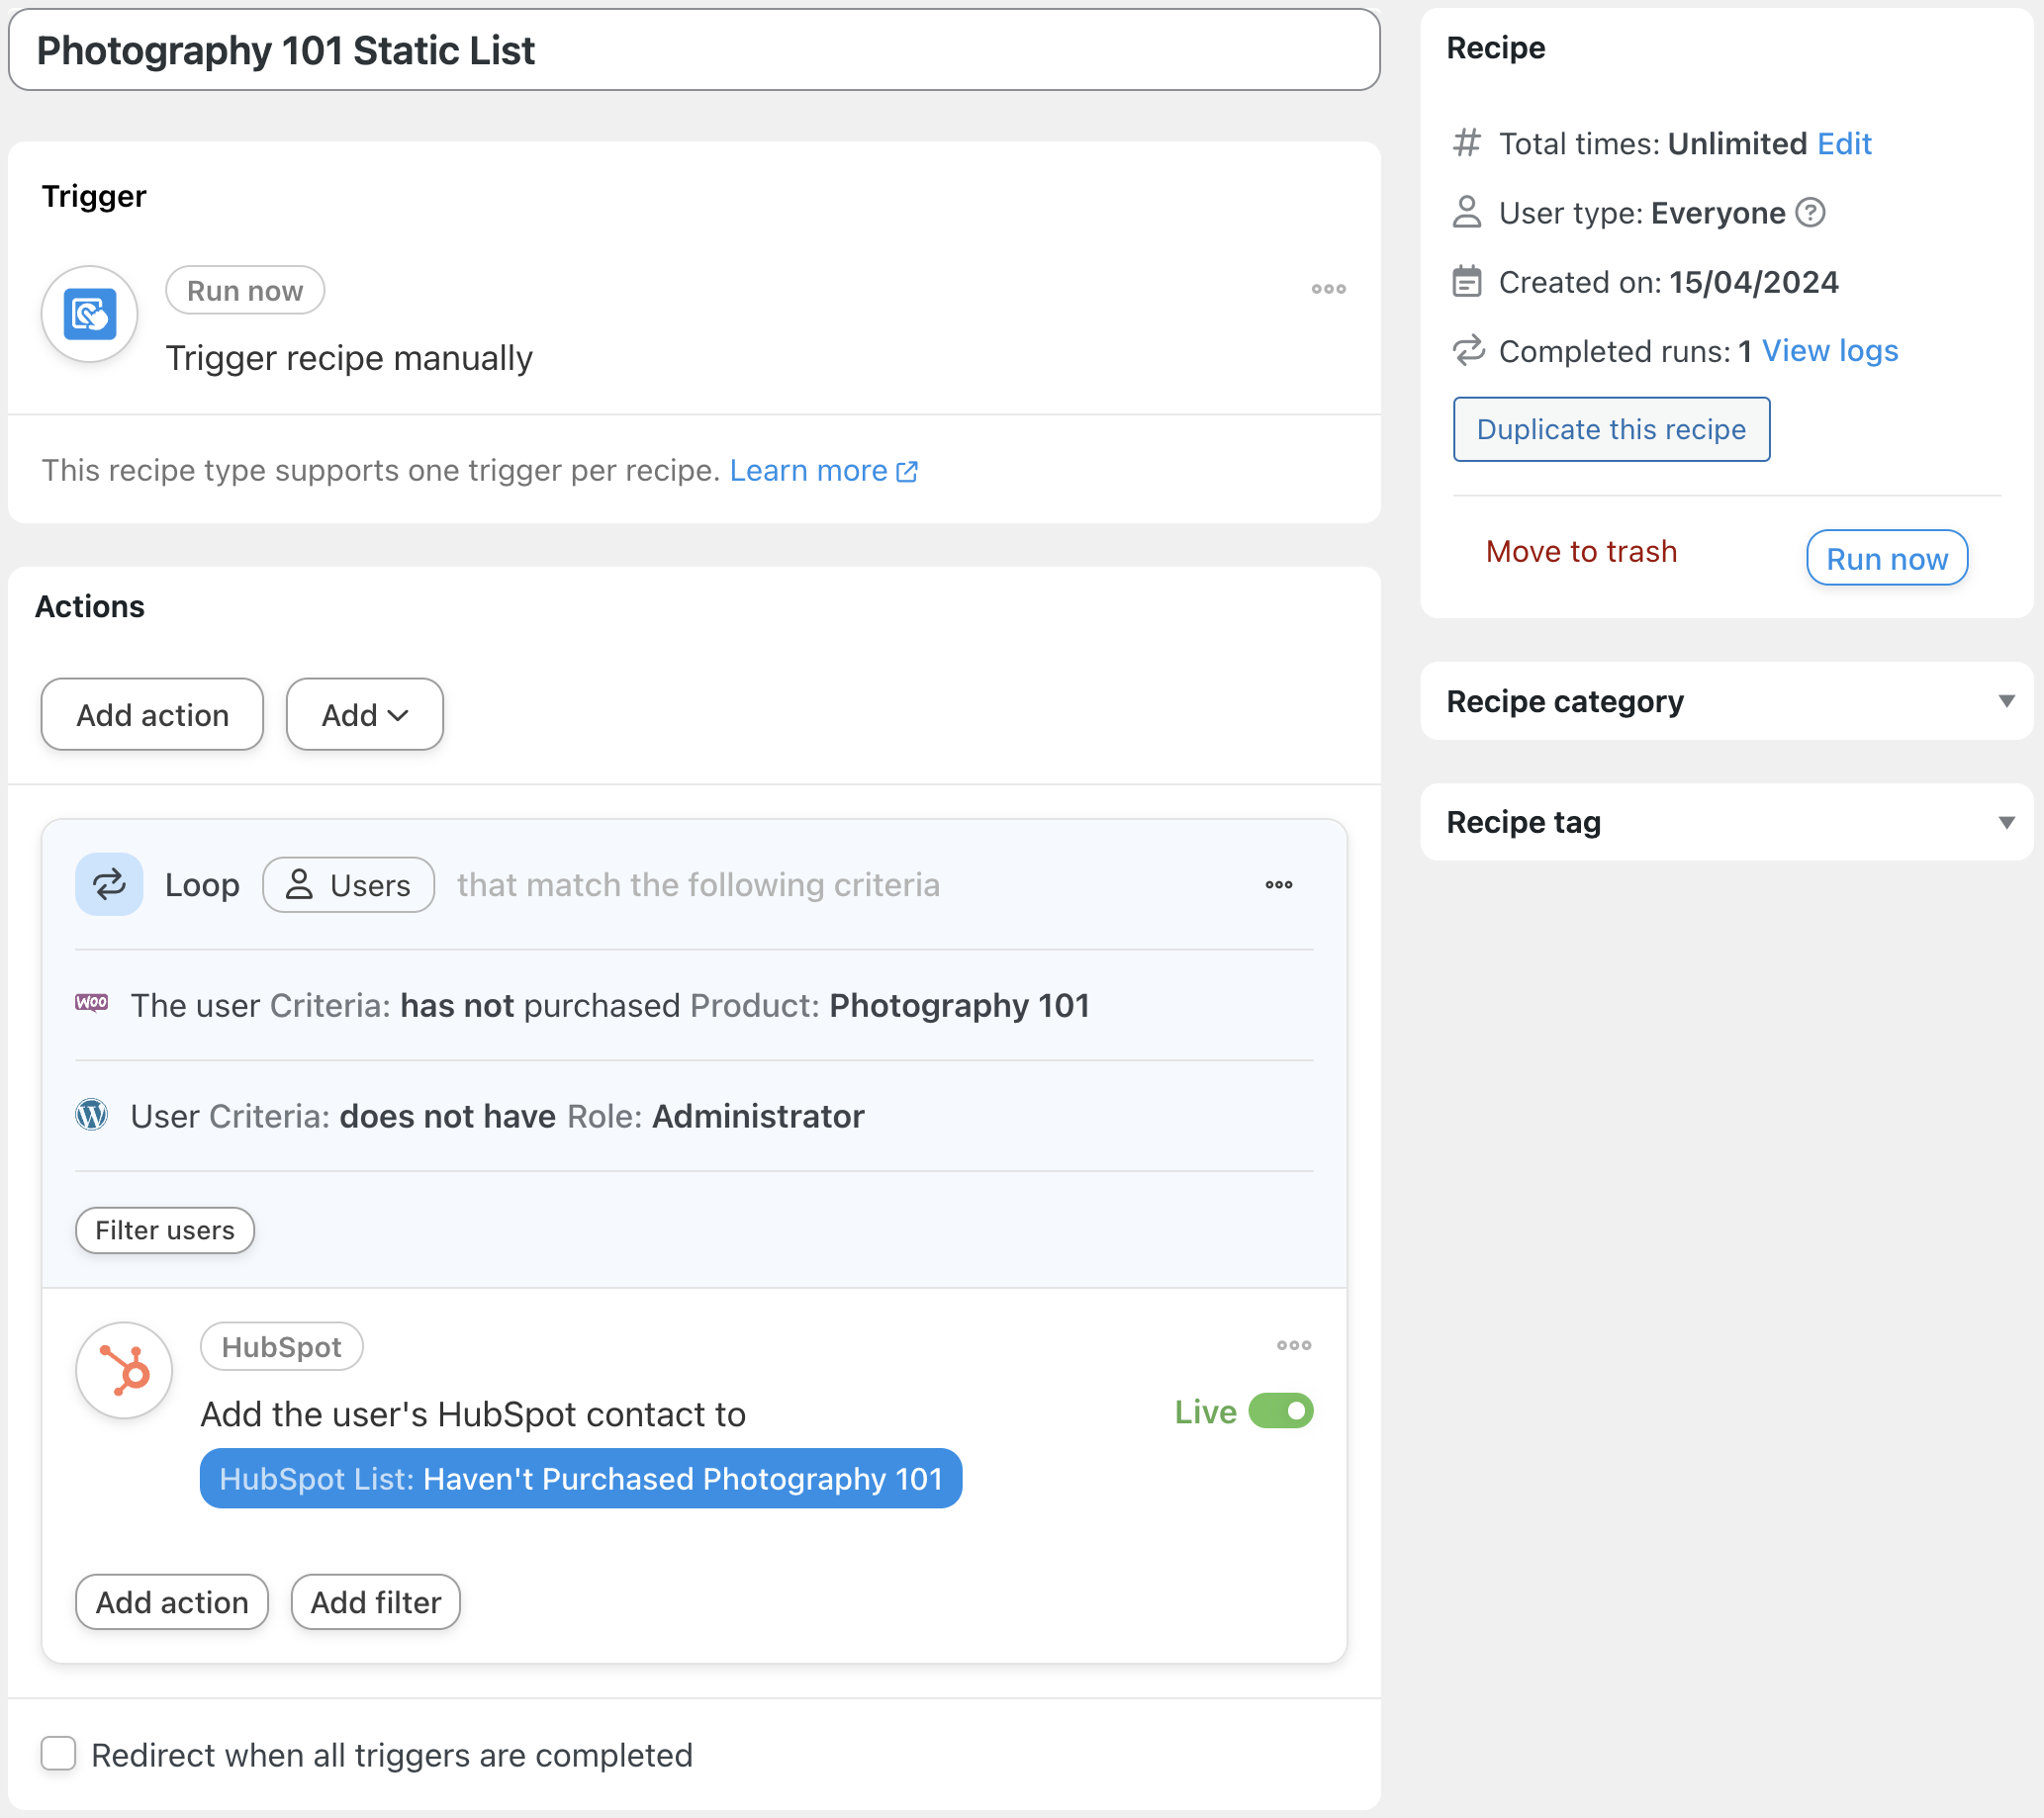
Let’s take a look at how we did it.
Step 1: Create a New Recipe
From your WordPress Admin Dashboard, navigate to Automator > Add new recipe. In the pop-up window that appears, select Everyone.
Step 2: Name Your Recipe
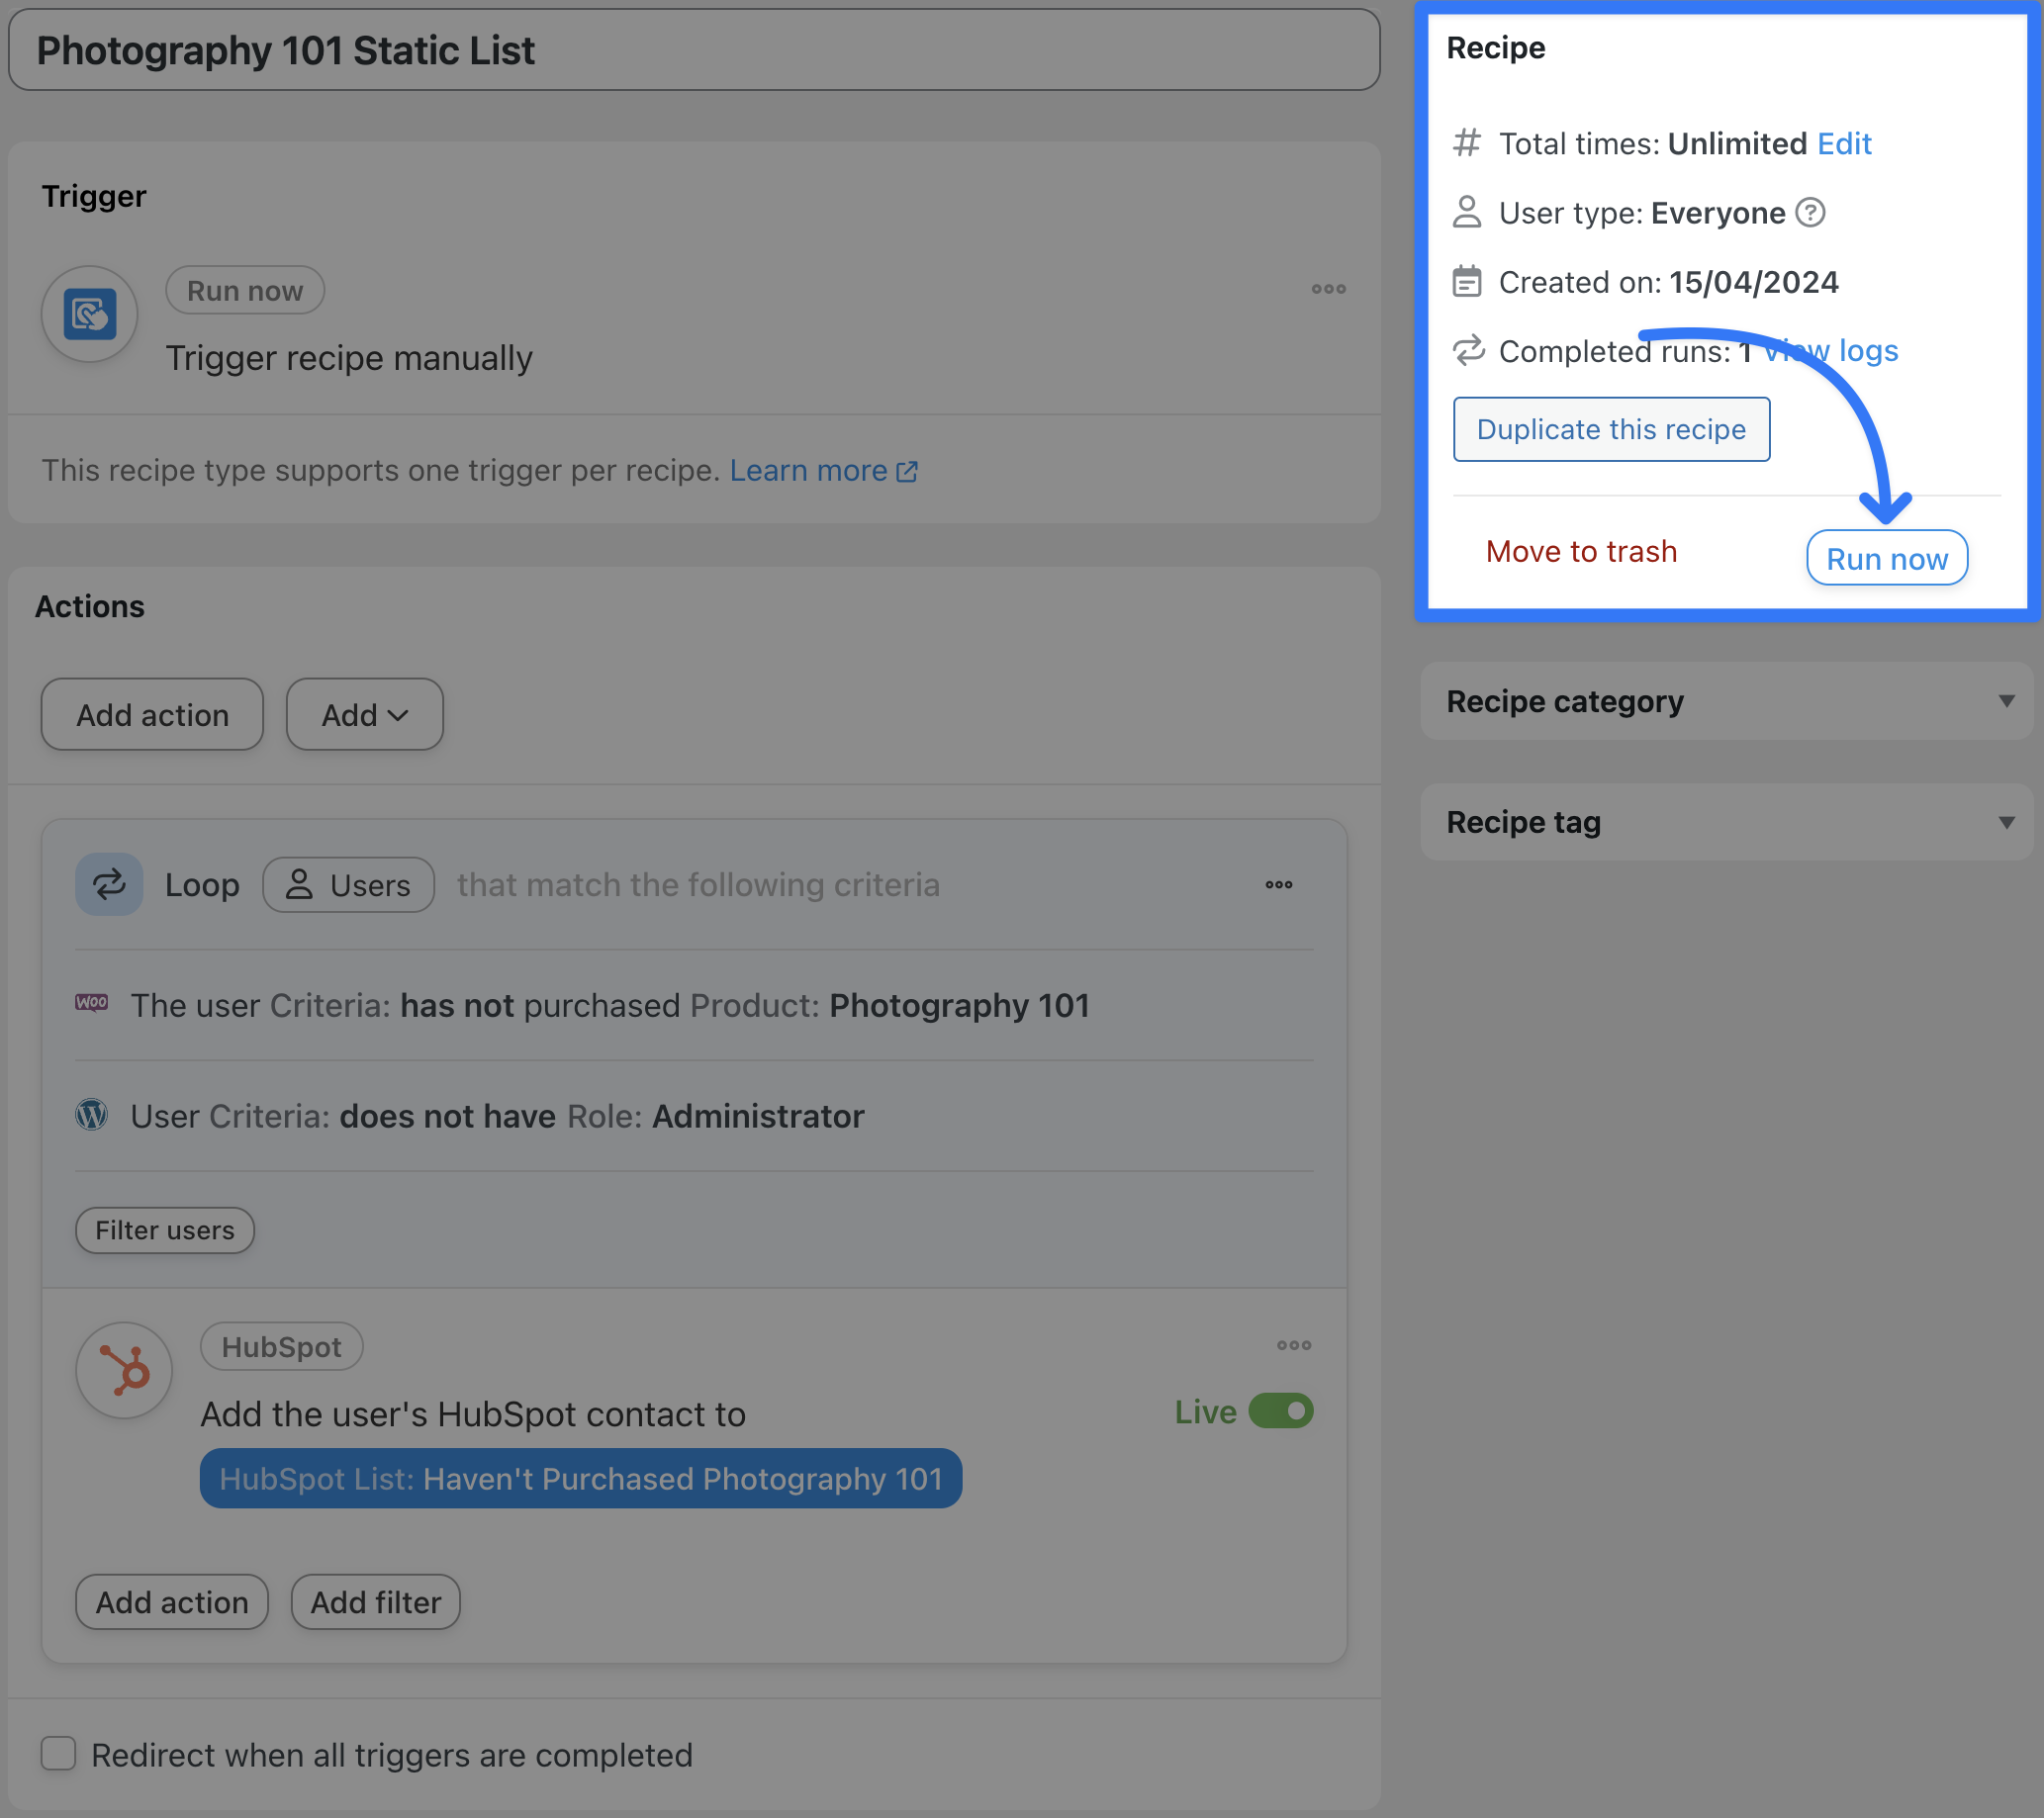
We’ve named this recipe “Photography 101 Static List” for easy reference.
Step 3: Configure Your Trigger(s)
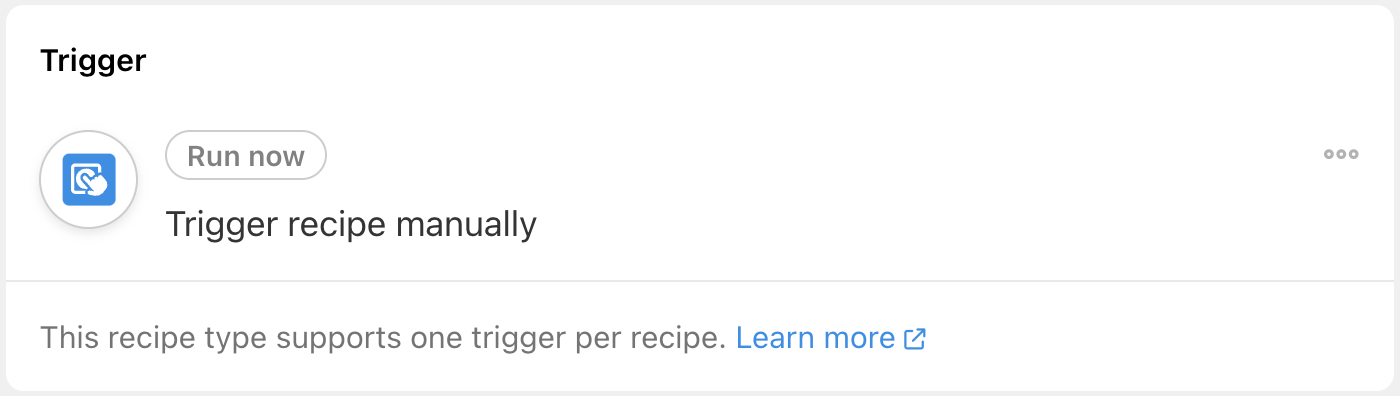
In the Trigger panel, from the menu of available integrations, select Run now. From the dropdown list that appears, Trigger recipe manually.
When you’re finished, your trigger should look like this:
Step 4: Configure Your Action(s)
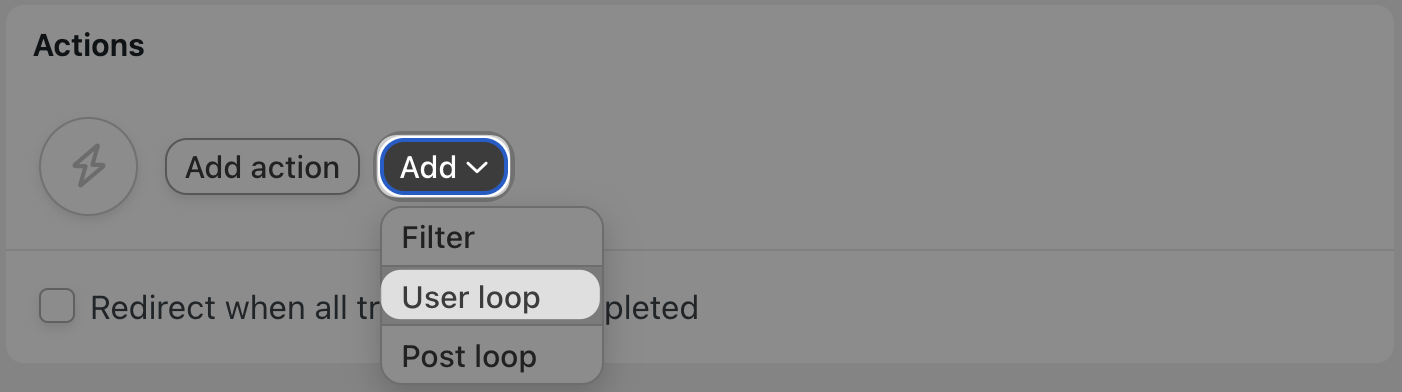
In the Actions panel, click Add and select User loop from the dropdown list.
Automator will create a Loop pane within the Actions panel. By default, Automator will have applied a user filter to exclude WordPress admins from the actions. You can choose to remove this filter or add another, depending on your own workflows.
We have decided to leave that filter in place and add another one. To add another filter, simply click Filter users. A pop-up window will appear where you can select the criteria that users must match in order to be included in the action(s), i.e., the static list.

Once you’re finished, click Confirm.
Now you can add the action. Simply click Add action within the Loop pane and select HubSpot from the menu of available integrations. From the dropdown list appears, select Add the user’s HubSpot contact to a static list.
Automator will prompt you to select one of your pre-existing static lists. Once you’re finished, click Save. Your Loop pane should look something like this:
Step 5: Make Your List!
Your recipe is all configured and ready to go! All you have to do is click Run now and sit back as Automator generates an entire HubSpot list for you!
You can now use this list to create one-off email campaigns with exclusive offers. And, even though this isn’t an active list, you can still dynamically remove contacts from the list if/when they purchase the product in question, helping you to track the success of your email campaigns.
Connect HubSpot to WooCommerce
We promised you one last amazing Woo and HubSpot integration—and now is when we deliver.
So far, we’ve looked at sending one-way information from WooCommerce to HubSpot. But what about the other way around?
What if you wanted to generate a unique Woo coupon code for contacts that you add to a static list? What if you wanted to create an order, complete with a payment gateway and a discount, when you update a contact’s details in HubSpot?
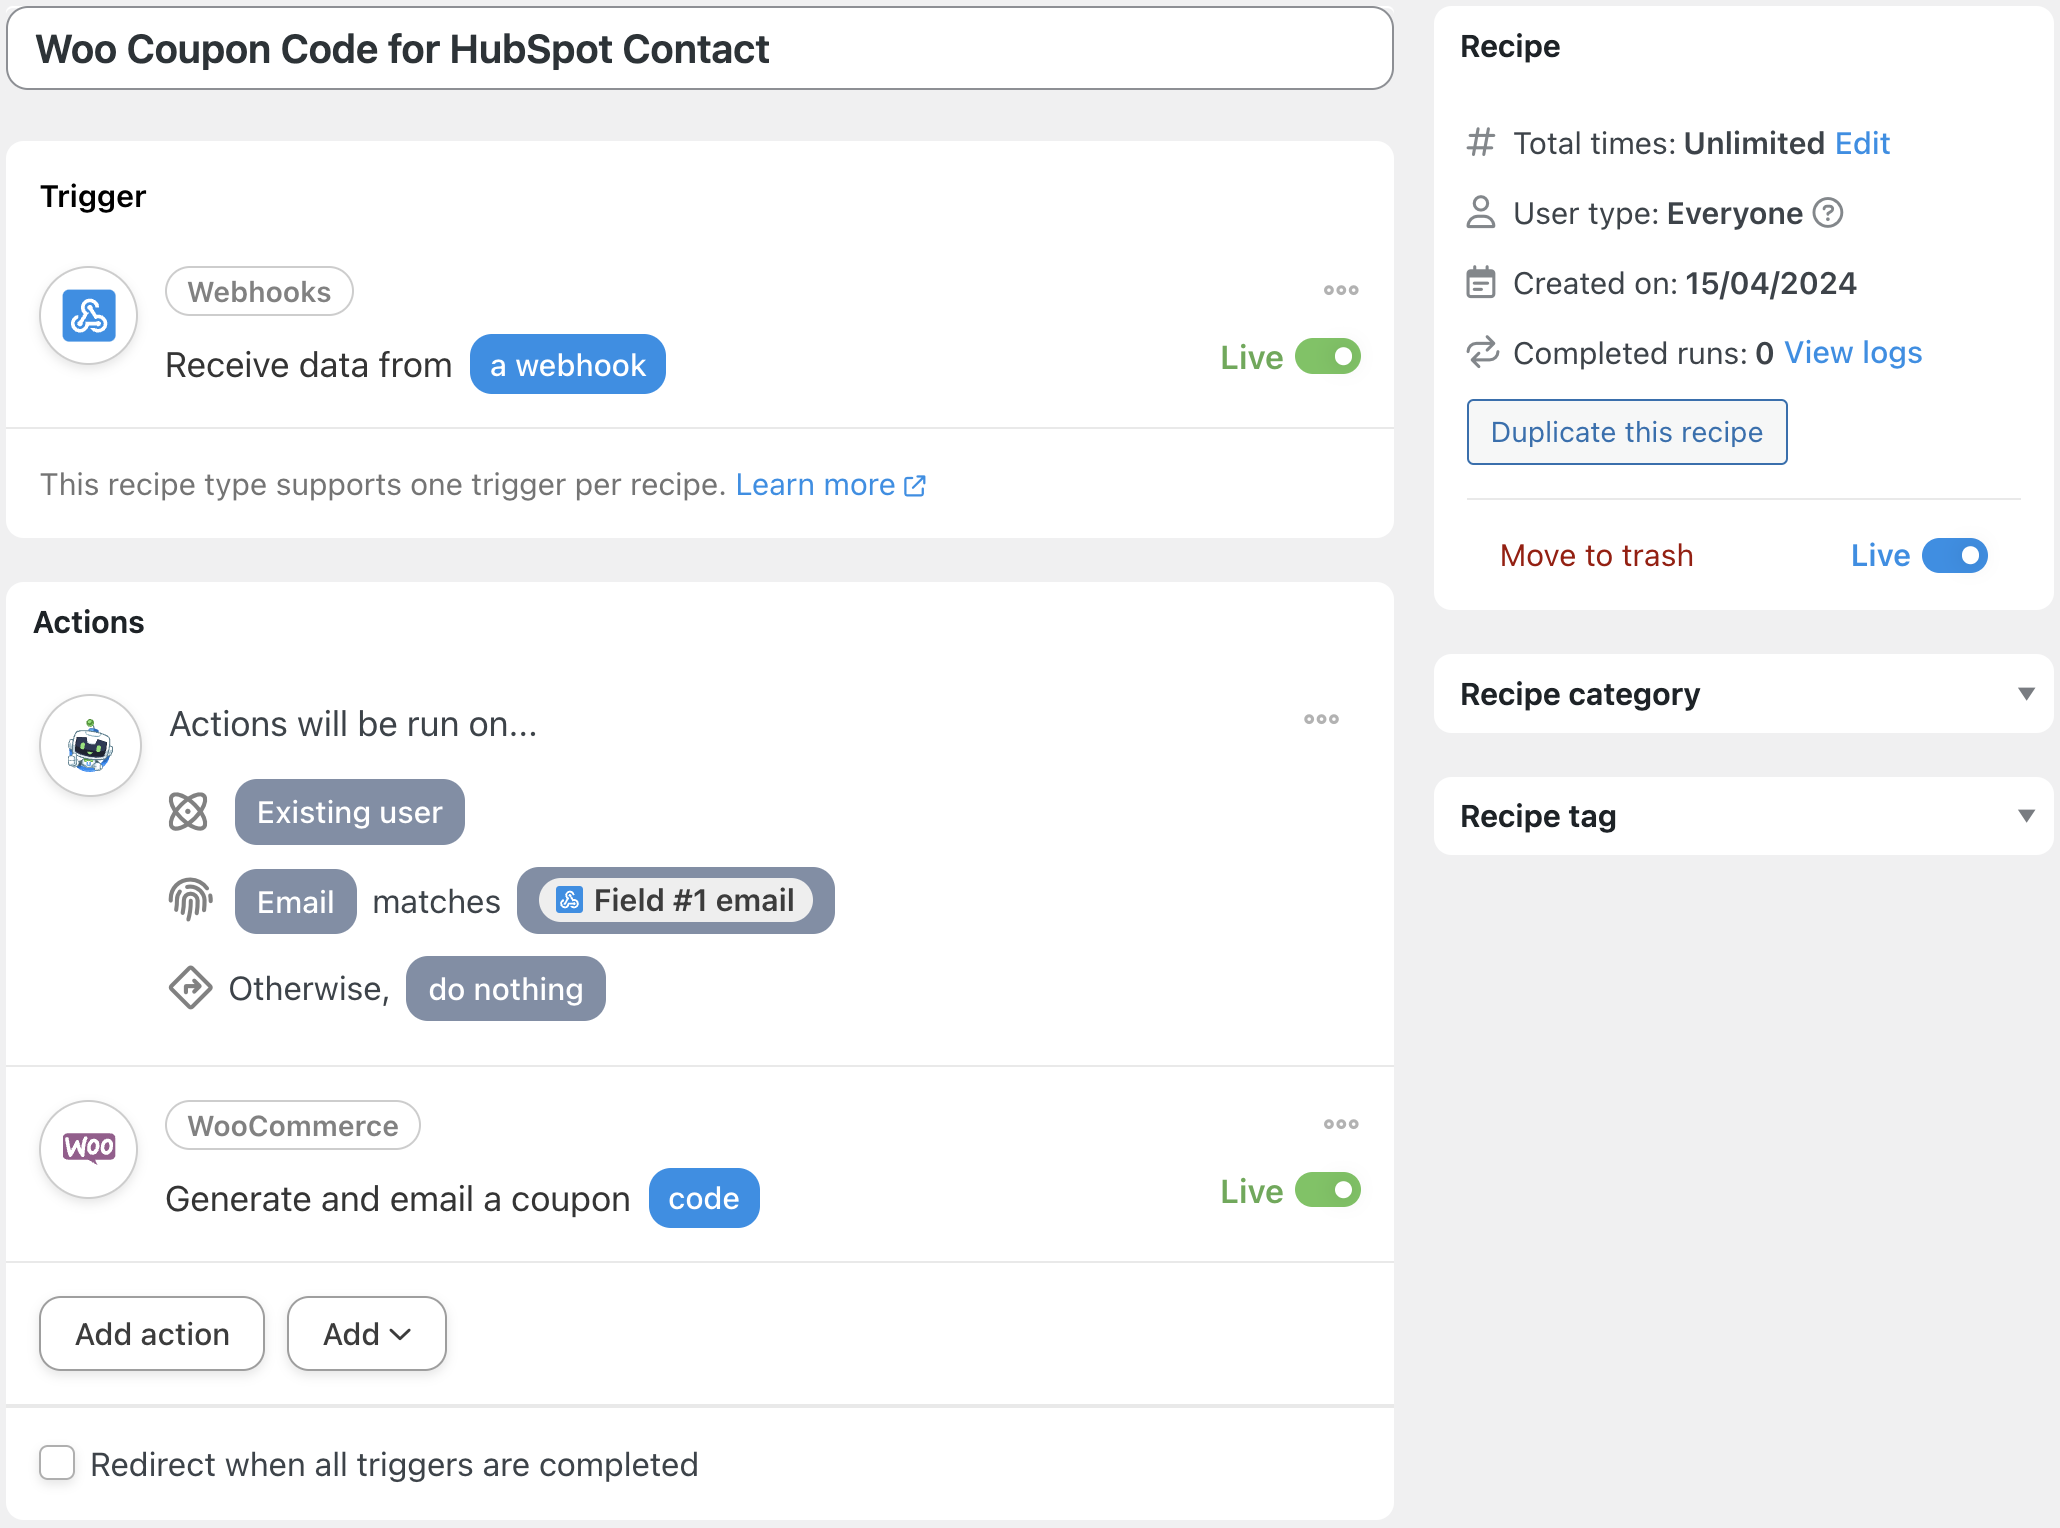
By combining HubSpot’s workflows feature (available with Sales, Service, Marketing and Operations Hub Professional plans) with Automator’s Webhooks integration, you can recreate the recipe pictured above.
Want to know more about creating webhooks with HubSpot? Check out HubSpot’s step-by-step walkthrough.
Frequently Asked Questions
Conclusion
That’s it! You’re now an expert in WooCommerce and HubSpot integrations.
In this guide, we covered the basics on how to connect WooCommerce to HubSpot. Then we showed you why Automator is the best tool for the job and, hopefully, left you eager to try out some integrations of your own.
Want to know more about connecting WooCommerce to HubSpot? Drop us a line in the comments section below and we’ll get back to you.
Until next time, happy automating!

Related Posts


This Post Has 0 Comments