Revive old WordPress posts with AI and Uncanny Automator. Learn how to reverse content decay…
Connect WordPress to Zapier with Automator in 5 Steps
Connect your WordPress website to Zapier with Uncanny Automator to unlock thousands of integrations and powerful WordPress automations.
Are you trying to find a way to connect your WordPress website to Zapier (and its thousands of integrations)? We’ll venture a guess and say that’s likely what brought you here. Hopefully not after too much scrolling—because this is the best solution out there!
In this article, we’ll show you how to harness the power of Zapier for your WordPress website using Uncanny Automator.
Zapier will give you access to thousands of integrations, from Gmail and Stripe to Notion, GitHub, YouTube and more. Automator, on the other hand, can perform the internal WordPress automations and integration-specific workflows that Zapier cannot.
But that’s enough of an introduction for now. Let’s get into the good stuff.
Why Connect WordPress to Zapier with Automator
We probably don’t have to tell you: managing a WordPress website takes time and effort. Unless, of course, you made the smart decision to get an automation tool like Automator or Zapier. Or, even better, both.

Now, we know what you’re probably thinking: “Why would I need two automation and integration tools?” The answer is simple. While both Zapier and Automator integrate with your favorite apps and plugins to automate repetitive tasks and workflows, Zapier is an automation generalist whereas Automator is a WordPress specialist.
Not convinced that two are better than one? Here are the top reasons why connecting Zapier to WordPress with Automator is the pro move you should make to upgrade your automations:
- More integrations: With 214 integrations (and counting), Automator already connects all of your favorite apps and plugins. However, with Zapier, you’ll gain access to thousands more. And, because Automator connects seamlessly with Zapier, you can bring all of those integrations right to your WordPress website.
- Better integrations: From editing individual user meta to bulk editing posts, Automator gives you the ability to carry out just about any WordPress function you can think of. Make use of features such as filters, delayed and scheduled actions, an advanced formatter and more to customize your automations.
- Simpler integrations: Automator connects Zapier and its thousands of integrations to WordPress using webhooks. Thanks to a user-friendly interface, if you can point and click, you can pull off this integration—no code required!
Convinced yet? Grab your Automator license so you can enhance your Zapier automations.>>>
Now that you have your Automator license, it’s time to connect WordPress to Zapier. We’ll provide you with a detailed walkthrough and some powerful automations that you’ll want to try out for yourself. From there, you can let your integration imagination run wild!
Connect Gmail to WordPress with Zapier + Automator
One of the more common integrations that WordPress businesses seek is the ability to connect their site to their Gmail account. Well, thanks to Zapier and Automator, you can!
Want to create a new user or update WordPress user meta, such as adding a secondary email address? How about forwarding priority emails from specific addresses directly to Slack?
We’ll show you how to do all of that (and more) in just five easy steps.
Step 1: Create and Name a New Recipe
Automator works using recipes (i.e., combinations of triggers and actions). To create a new recipe, navigate to Automator > Add new recipe from your WordPress Admin Dashboard.In the pop-up window that appears, select Everyone.

Give your recipe a name that makes it easy to recognize at a glance. For example, we’ve named this recipe “Connect Gmail to WordPress with Zapier Webhook”.
Step 2: Configure Your Trigger(s)
In the Trigger panel, from the menu of available integrations, select Zapier.
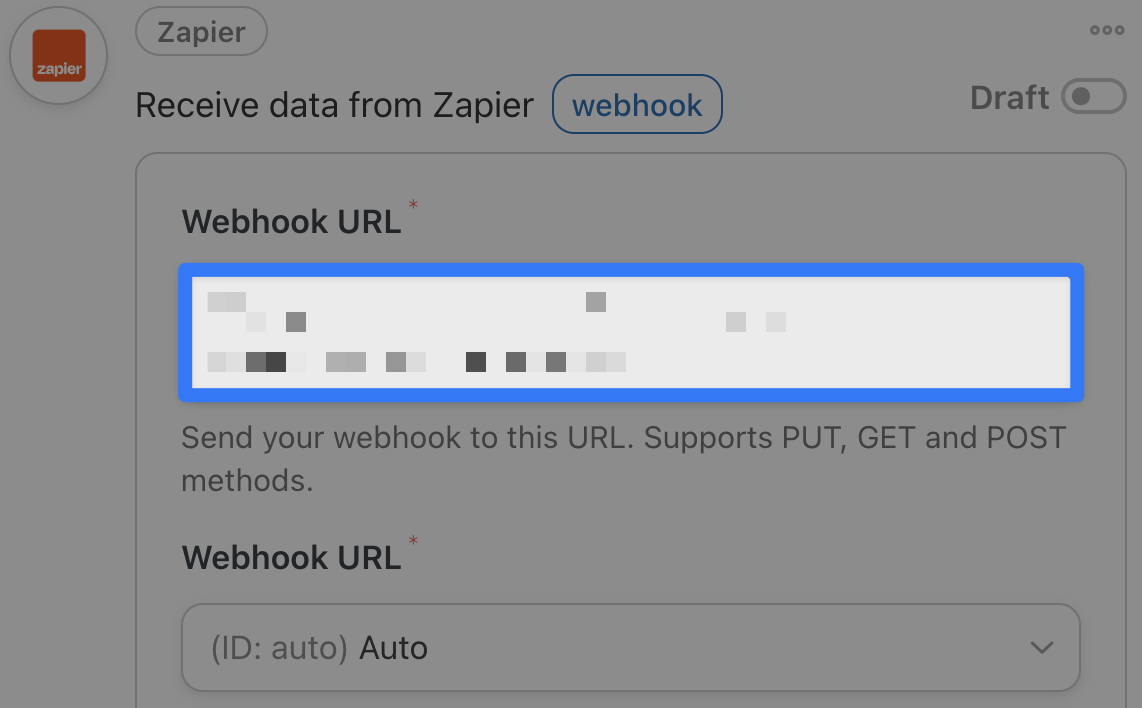
From the dropdown list, select Receive data from Zapier webhook.

Automator will present you with a webhook form. Copy the Webhook URL to your clipboard.
Step 3: Configure Your Zap
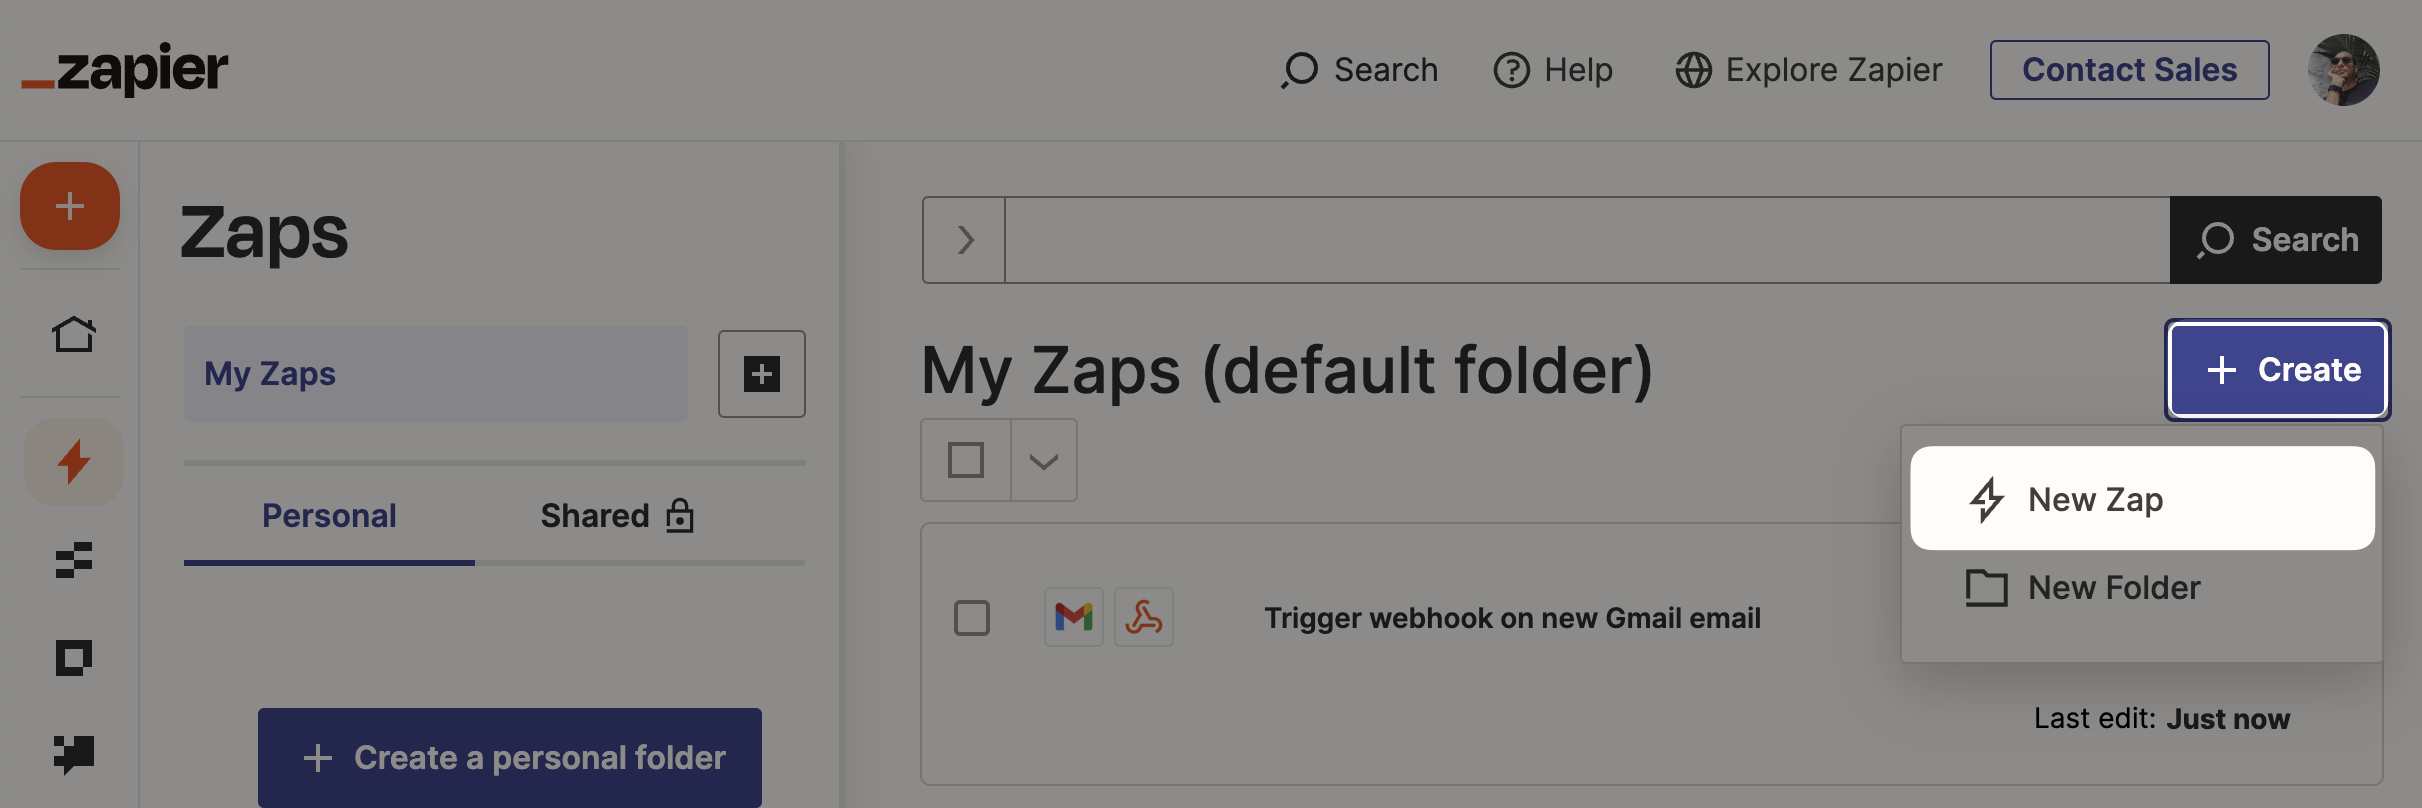
In a new tab, navigate to your Zapier account and click Create > New Zap.
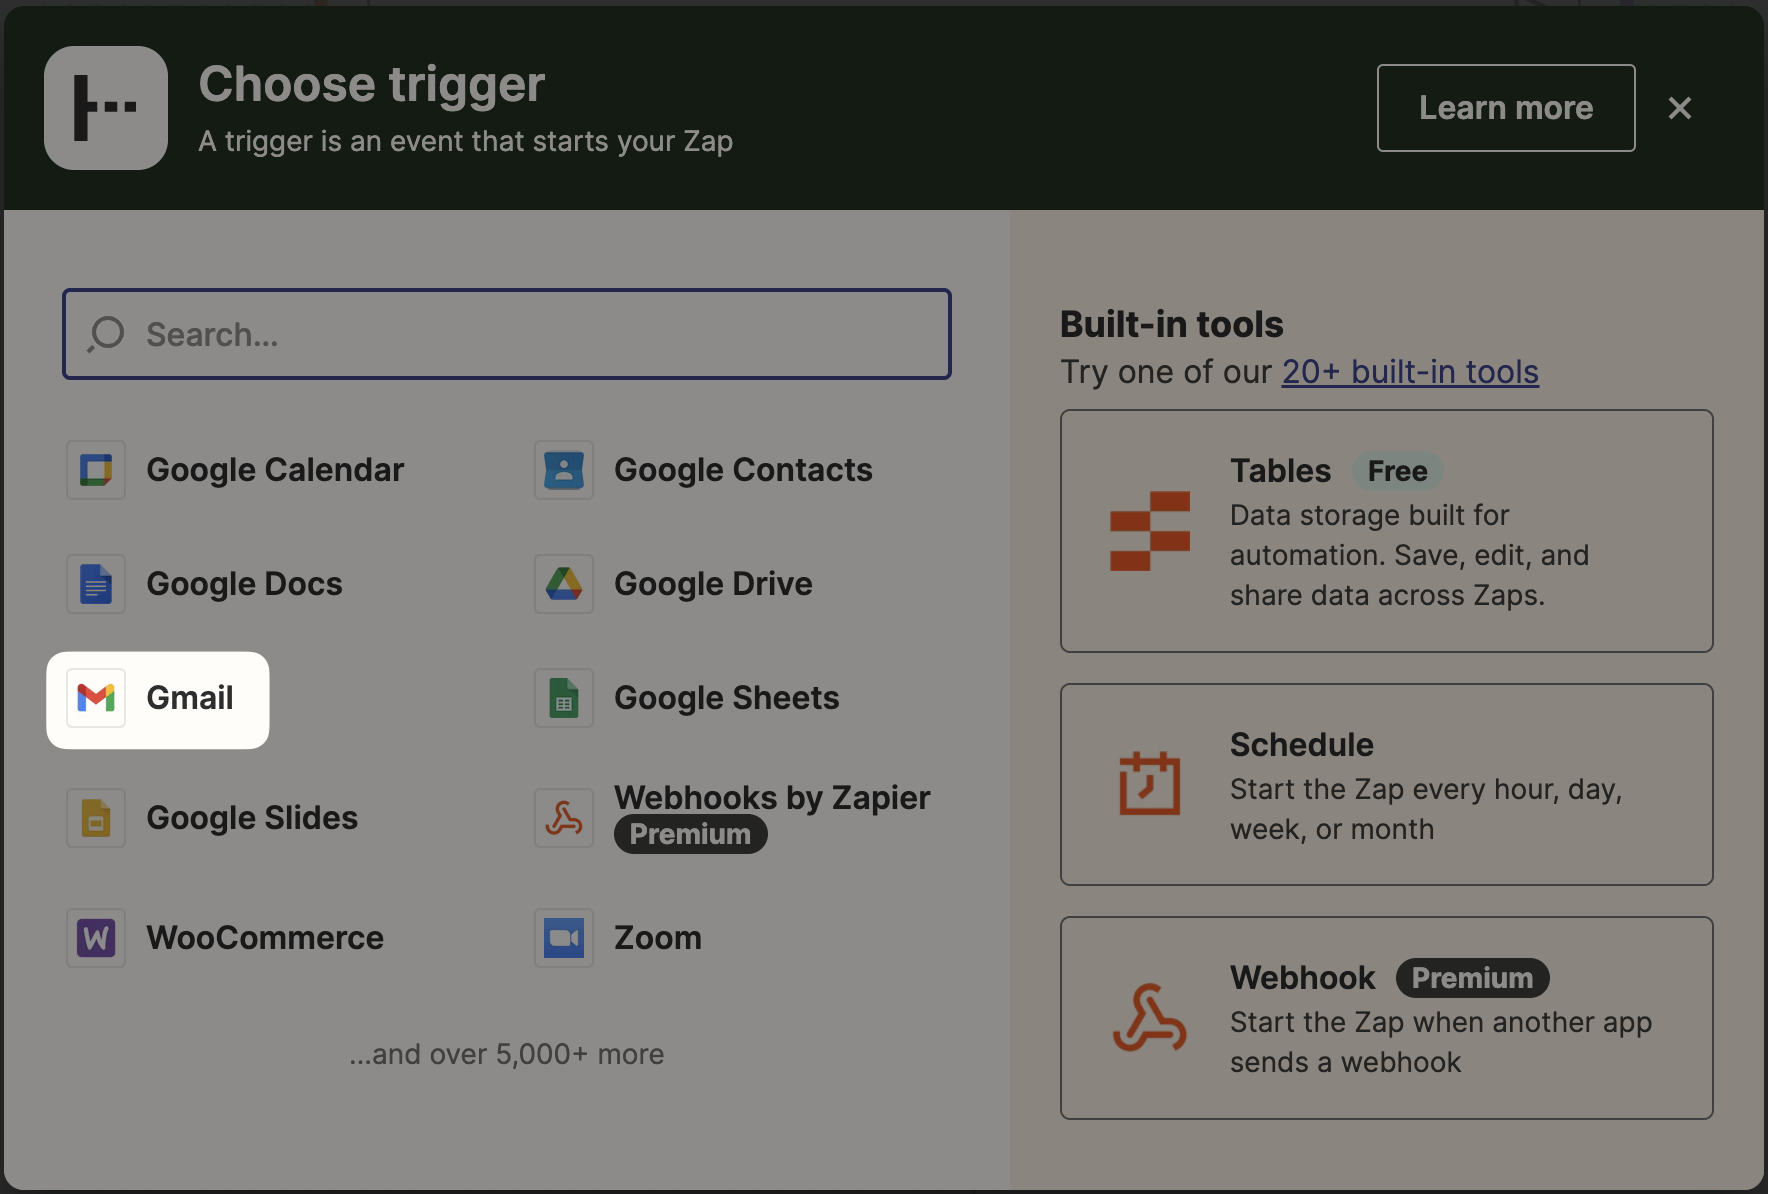
In the Zap editor, click Trigger and select Gmail in the window that appears.
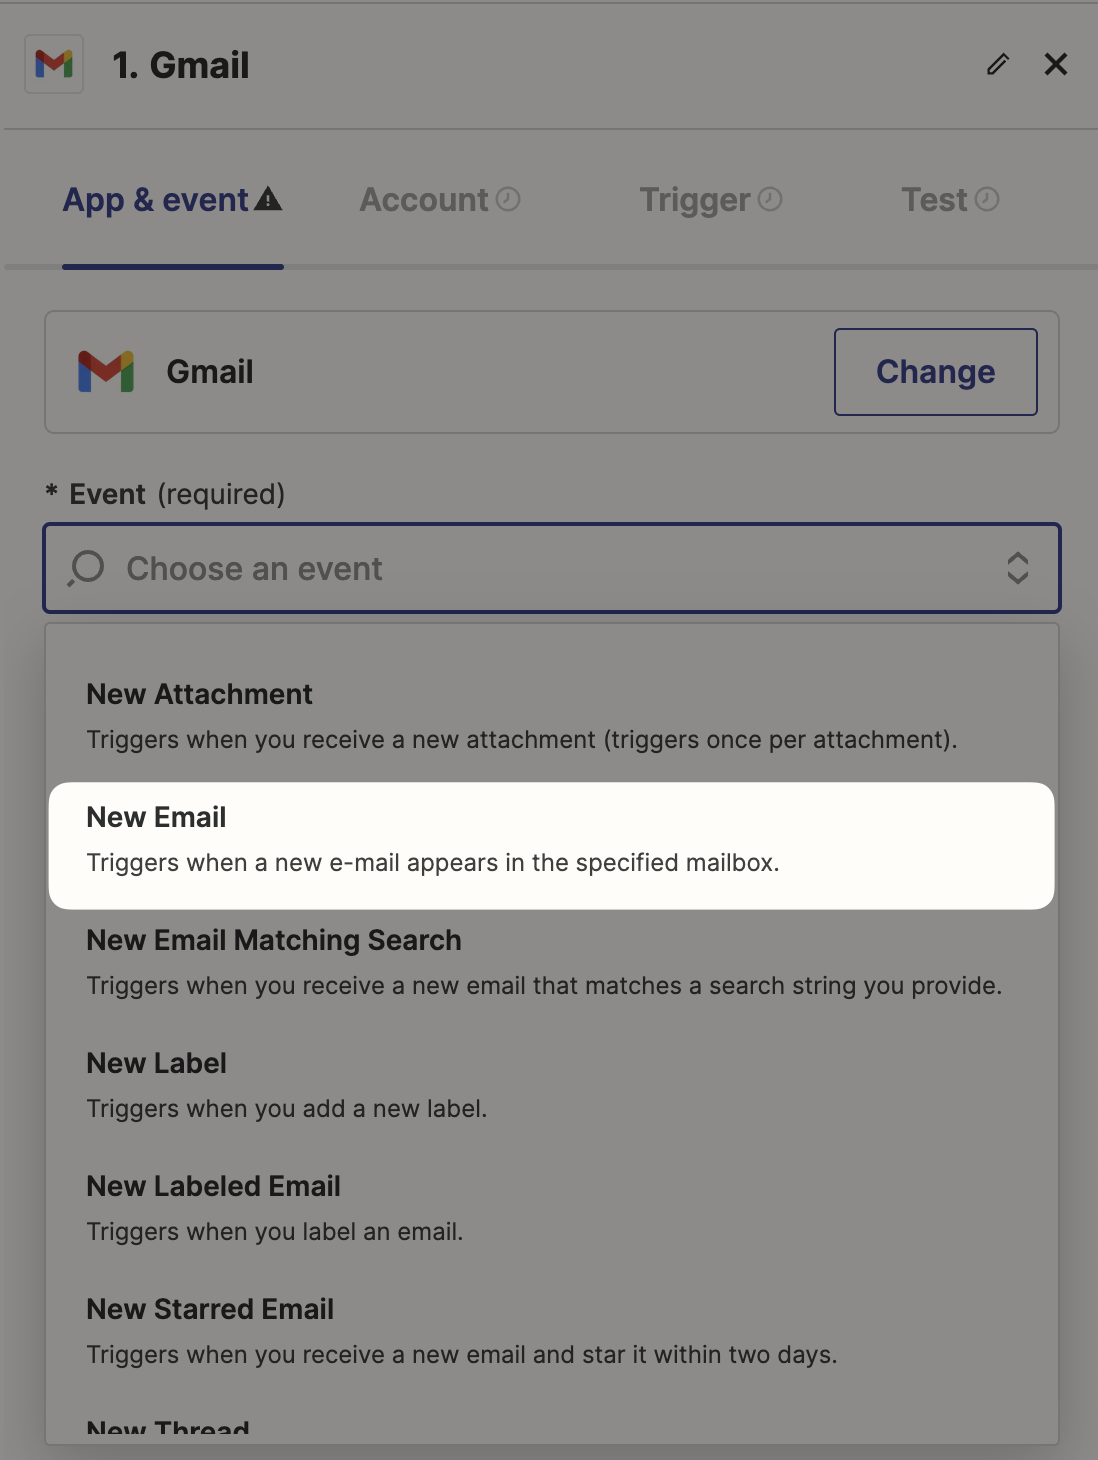
In the editor panel, select an event. For example, we have selected New Email.
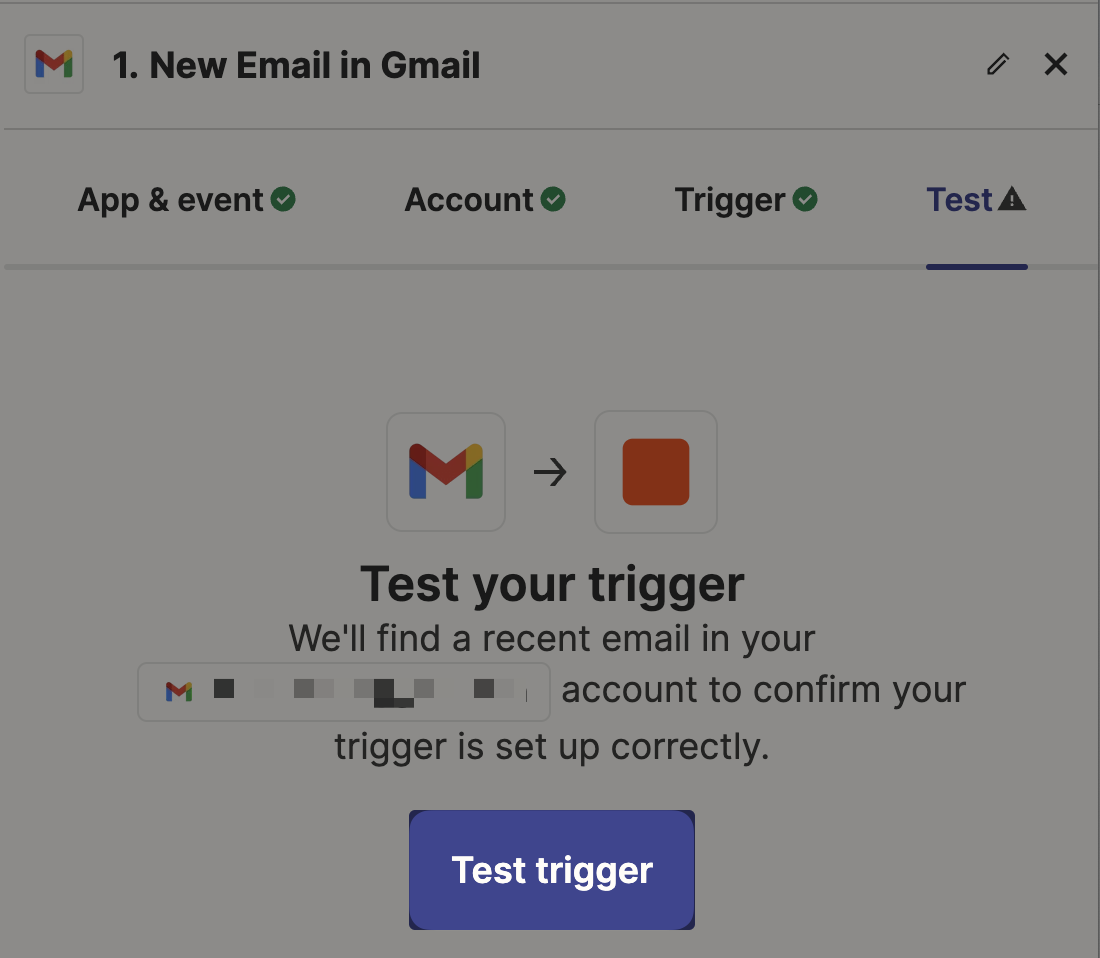
If you haven’t already, connect a Gmail inbox under the Account tab and, if you choose, a specific label/mailbox under the Trigger tab. Finally, click Test trigger under the Test tab.
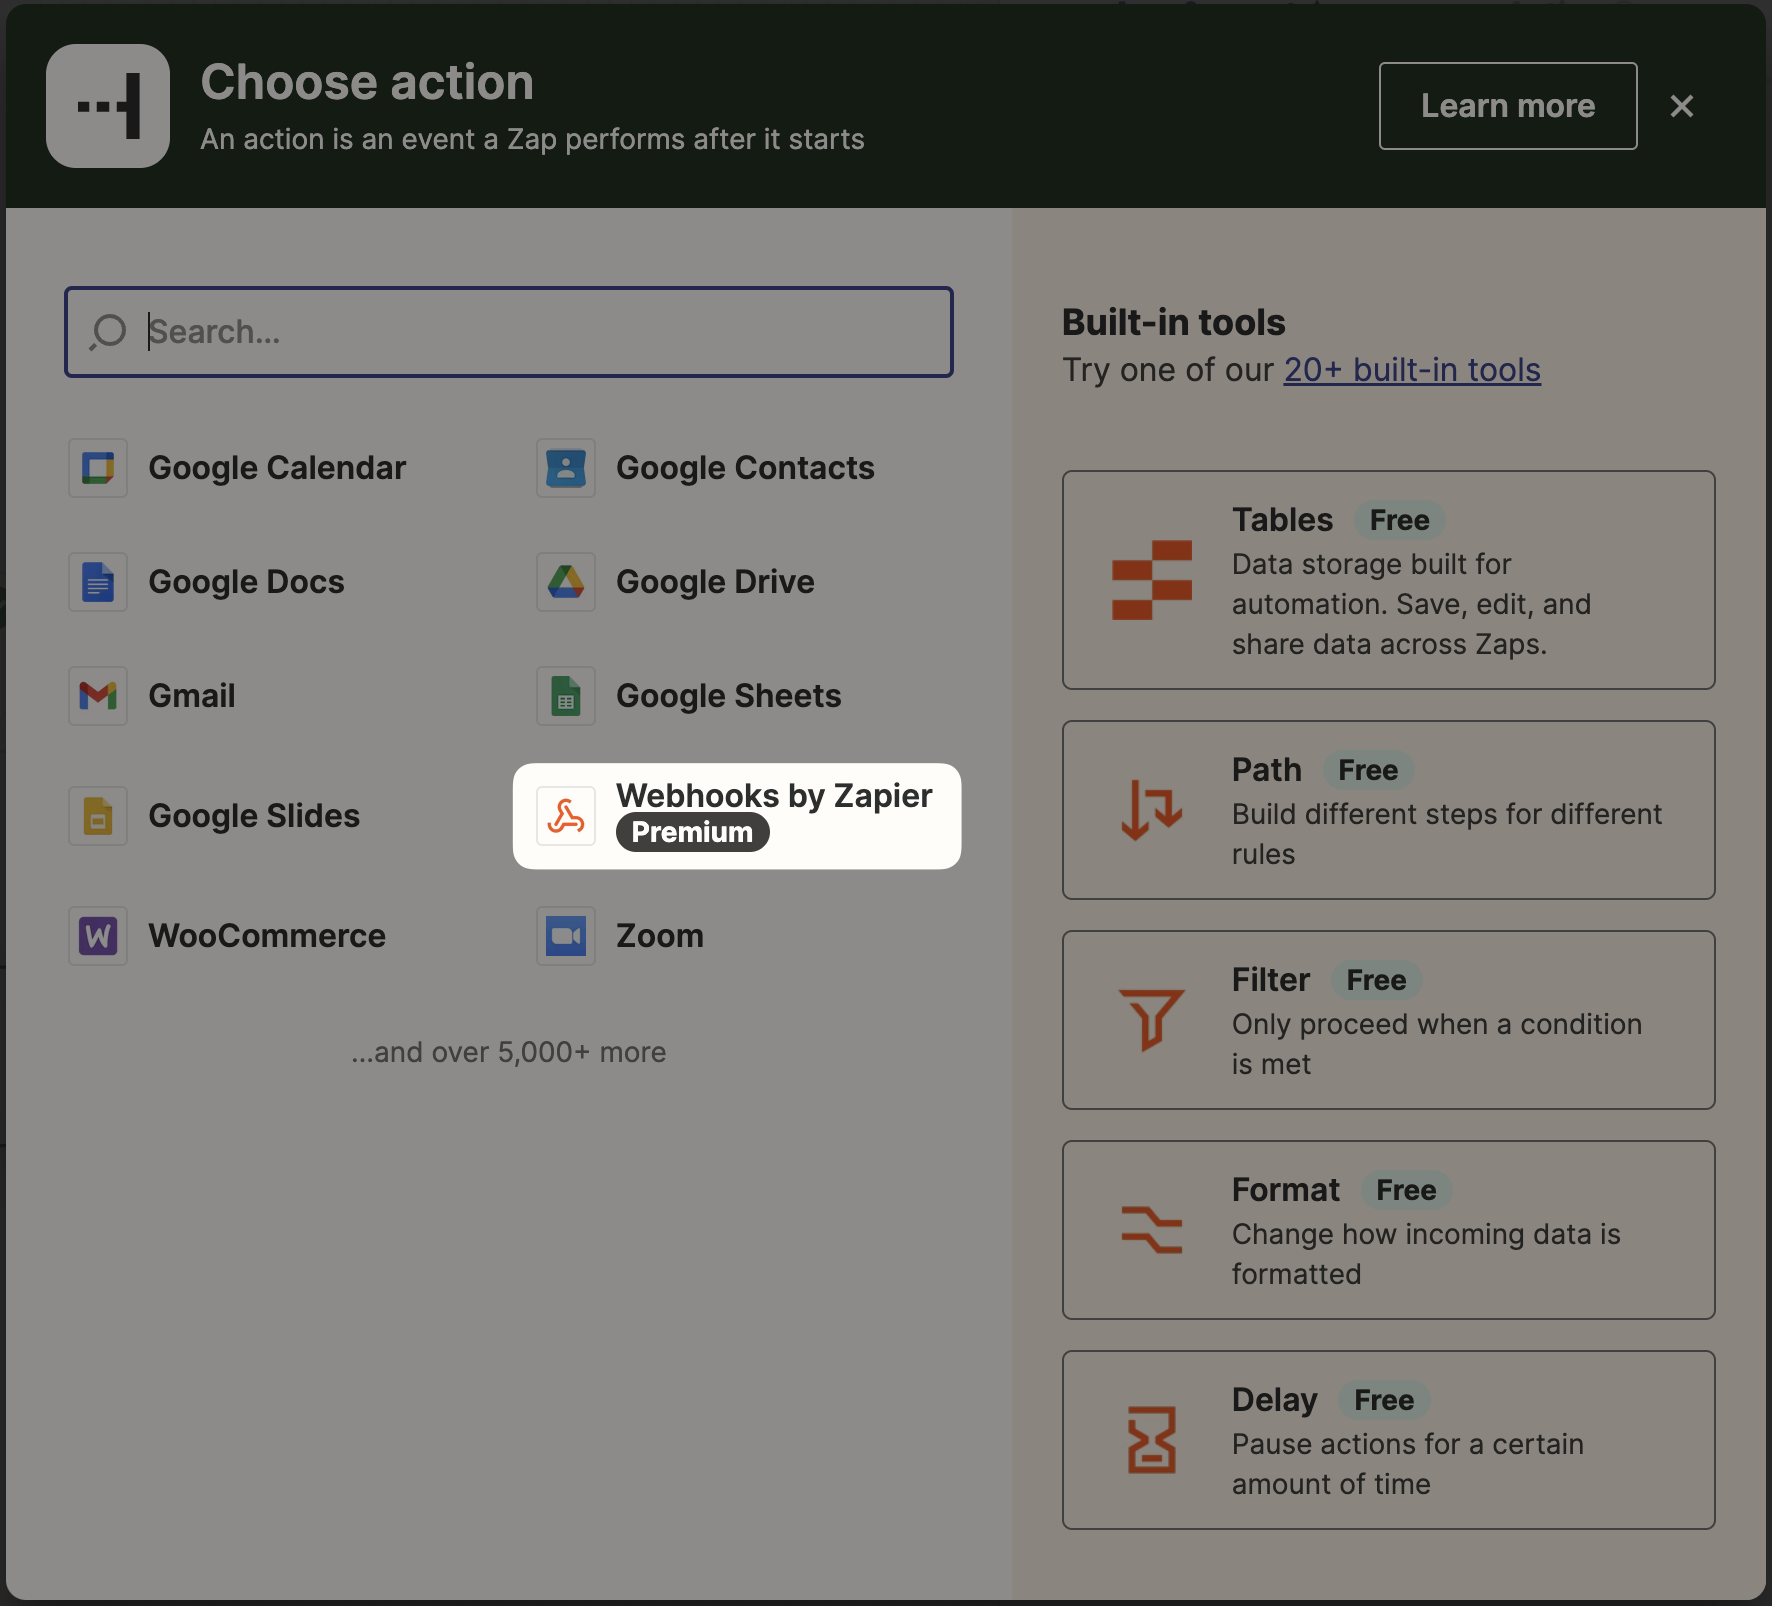
Click Continue with selected record or Action and select Webhooks by Zapier in the window that appears.
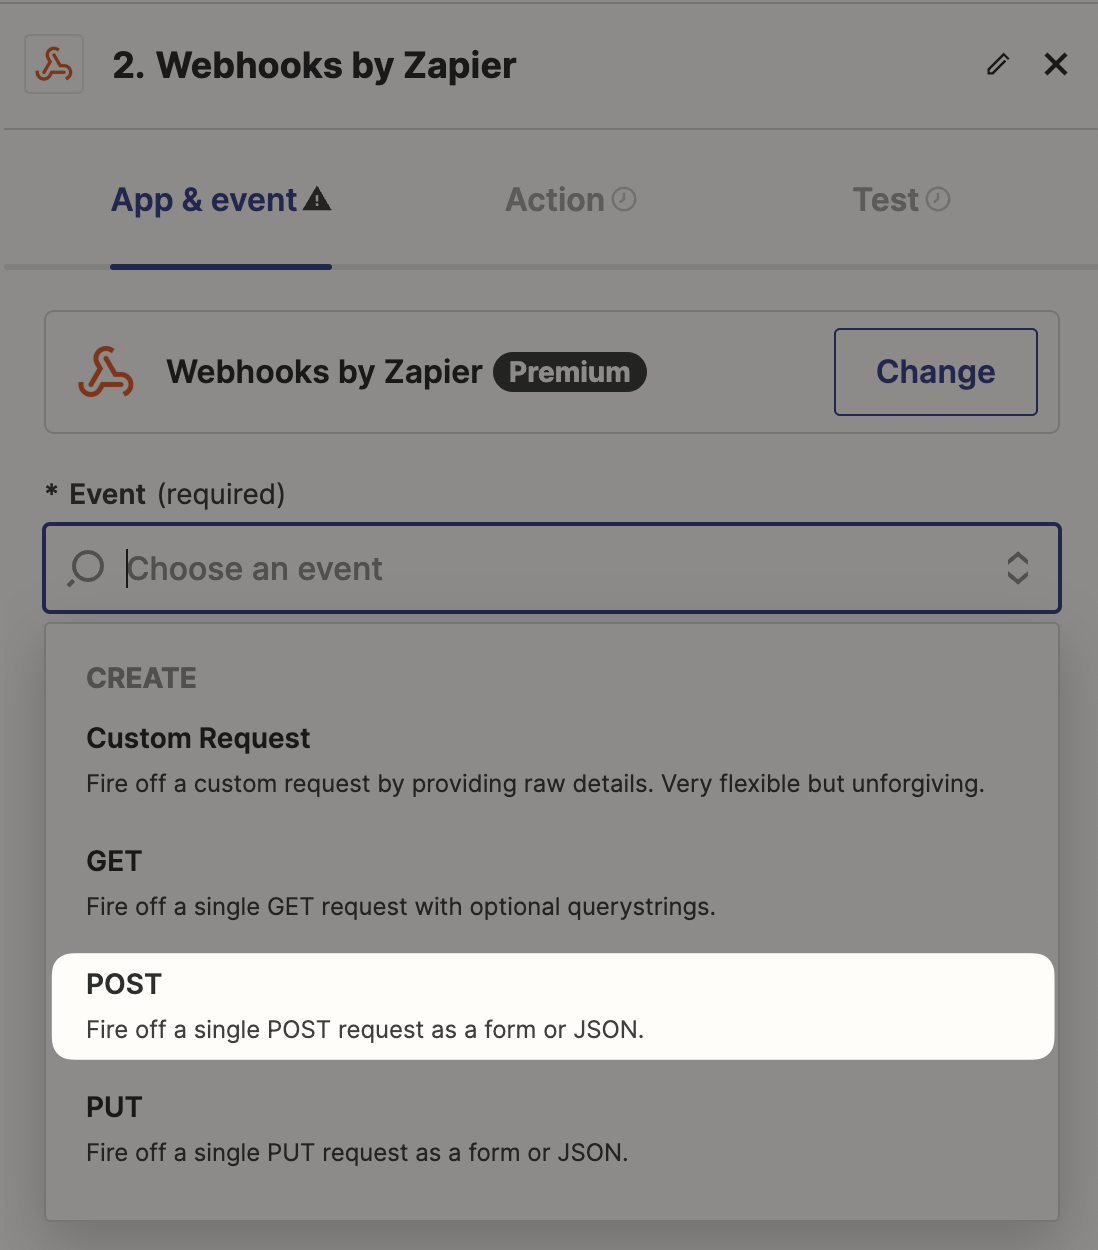
Under the App & Event tab, select Post in the Event field.
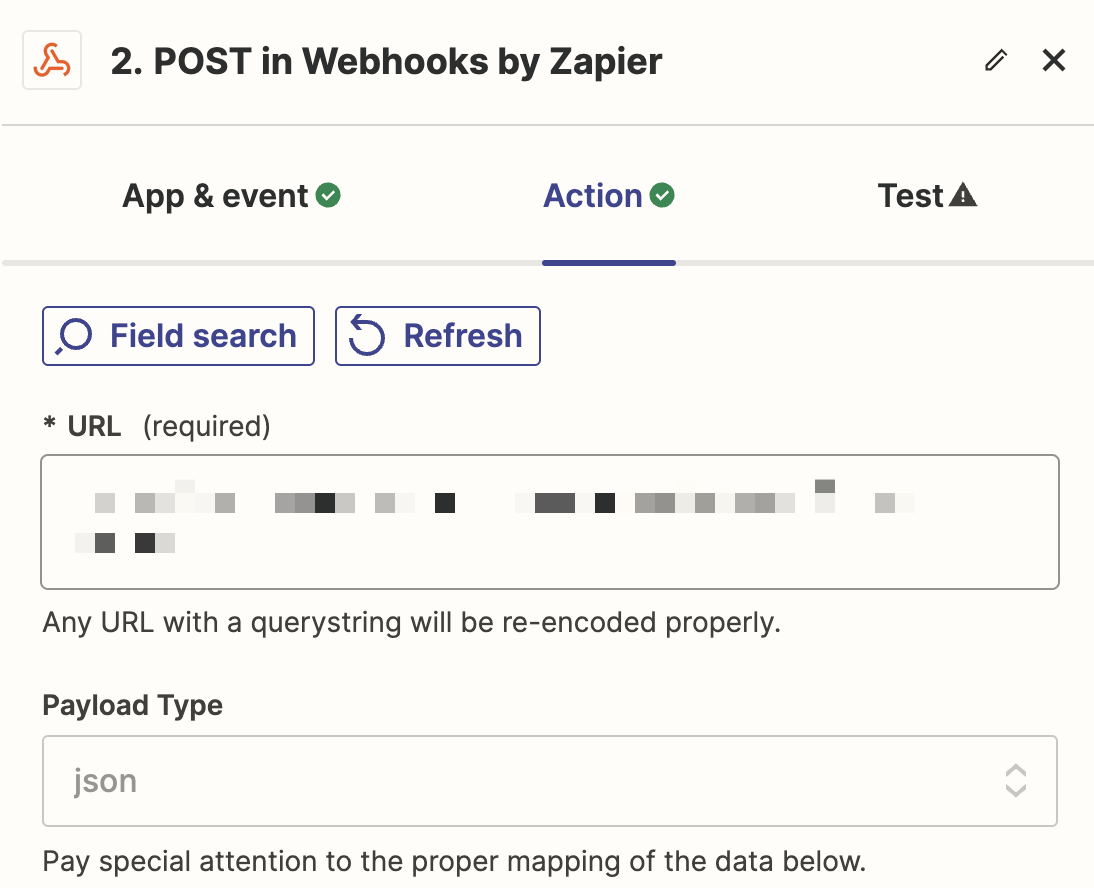
Under the Action tab, paste the webhook URL from Automator into the URL field. In the Payload type field, select “json”.
Next, under the Data section, input the information that you want to send to your WordPress website.
Each data point comprises two elements: a key (i.e., a name) and a value (i.e., the data). In Zapier webhooks, the top field is the key and the bottom field is the value.
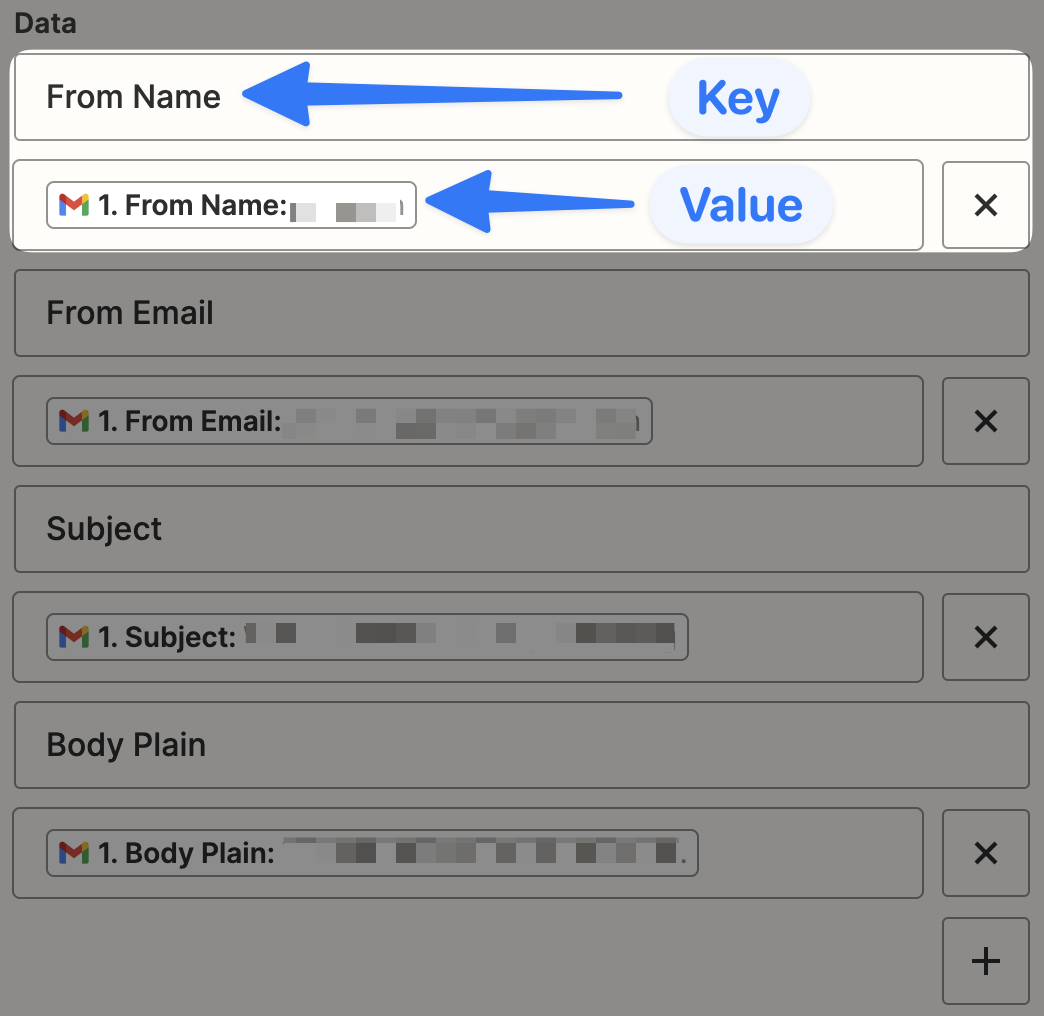
Zapier will already have parsed the data from your Gmail during the test you ran on the trigger. Simply select the data/value that corresponds to each key from the dropdown list.
Alternatively, you can enter static data in these fields.
(Optional: If you want to enhance the security of your webhooks, you can use Headers. Headers also use key/value pairs. If you choose to use headers, you will need to include the same key/value pairs in your Automator webhook form.)
Once you have input all of your data, return to the Automator tab and click Get samples.
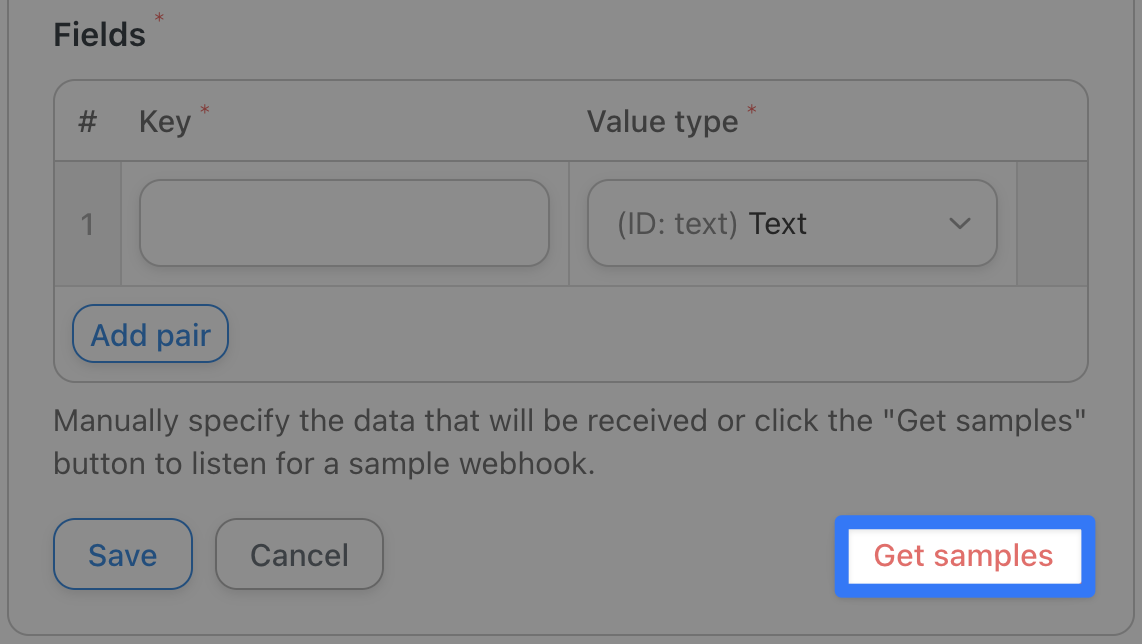
Within sixty (60) seconds, return to the Zapier tab and click Test under the Test tab. Once the test is successful, return to the Automator tab.
A pop-up window will have appeared, displaying the results of the test. Click Use these fields.

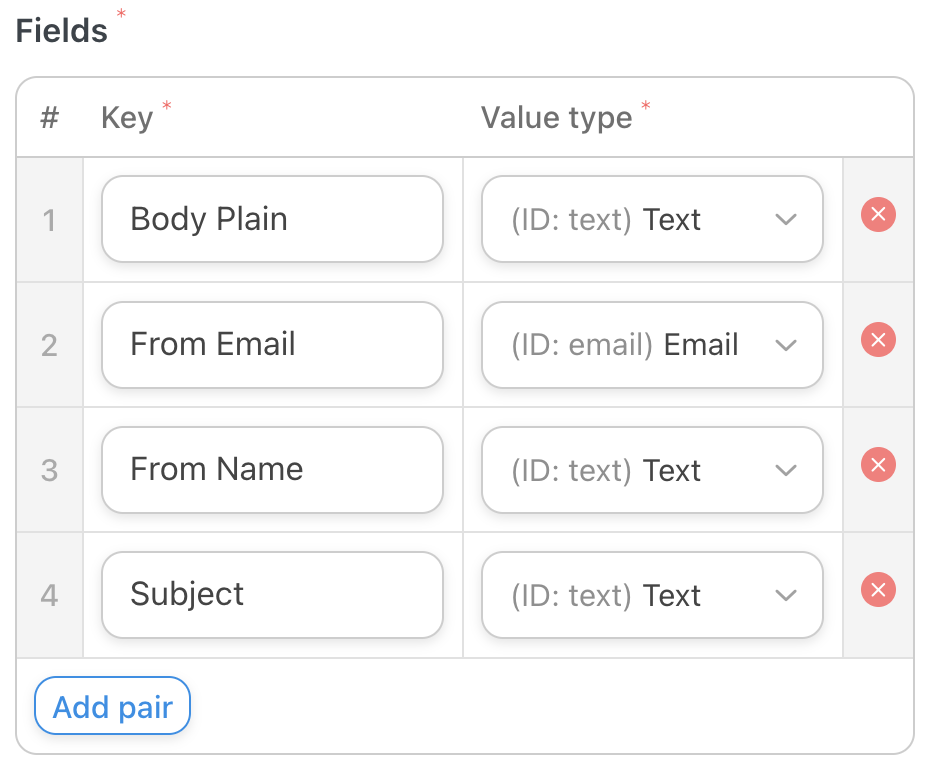
Automator will populate the Fields section on the webhook form with the contents of the test, i.e., the Data fields from the Zapier webhook.
Once you’re satisfied, click Save. Your completed Automator trigger should look like this:
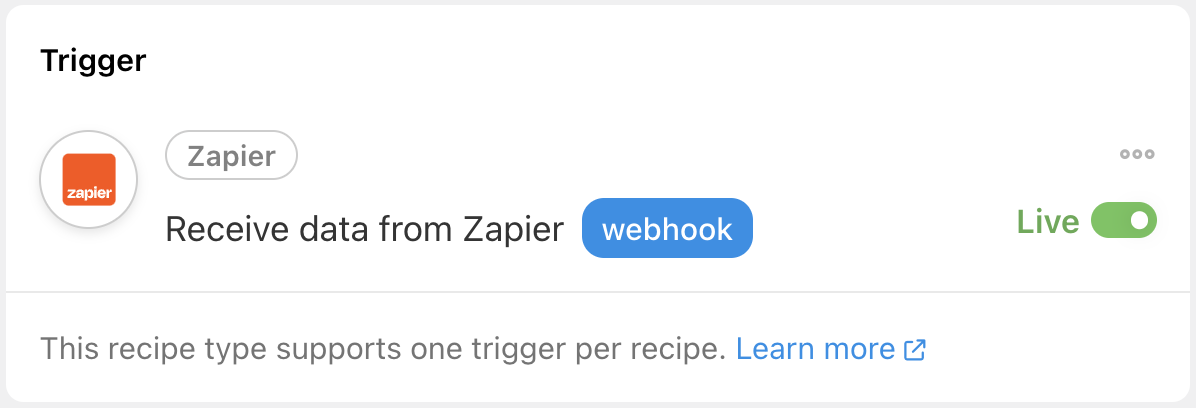
Return to your Zapier tab and click Publish.
Step 4: Configure Your Action(s)
Now that your zap is complete, you can decide what you want Automator to do with the Gmail data as it arrives at your WordPress website via webhook.
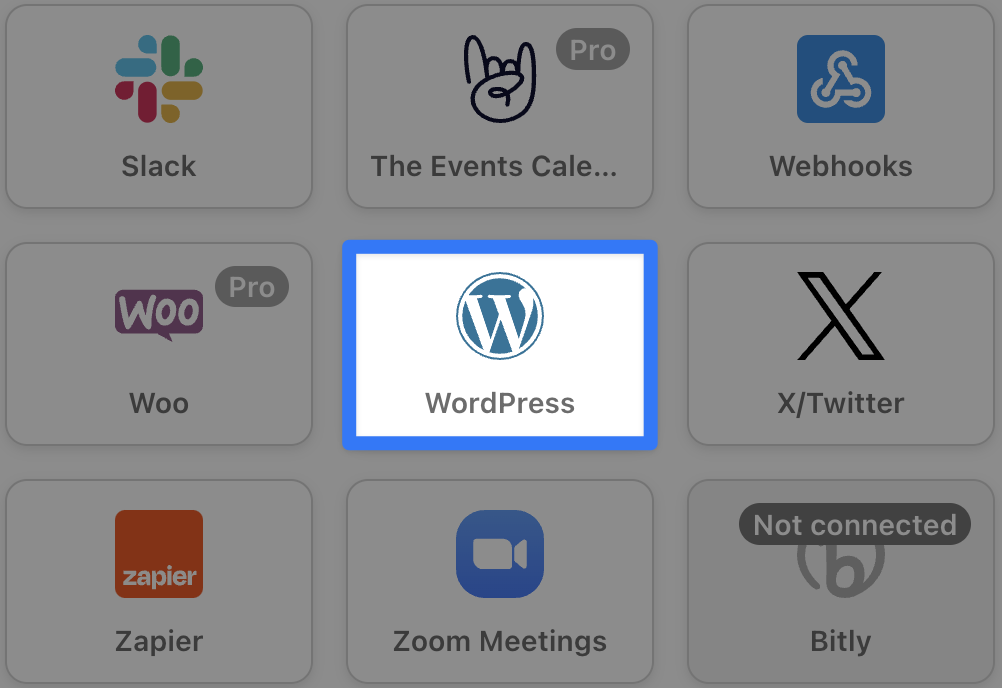
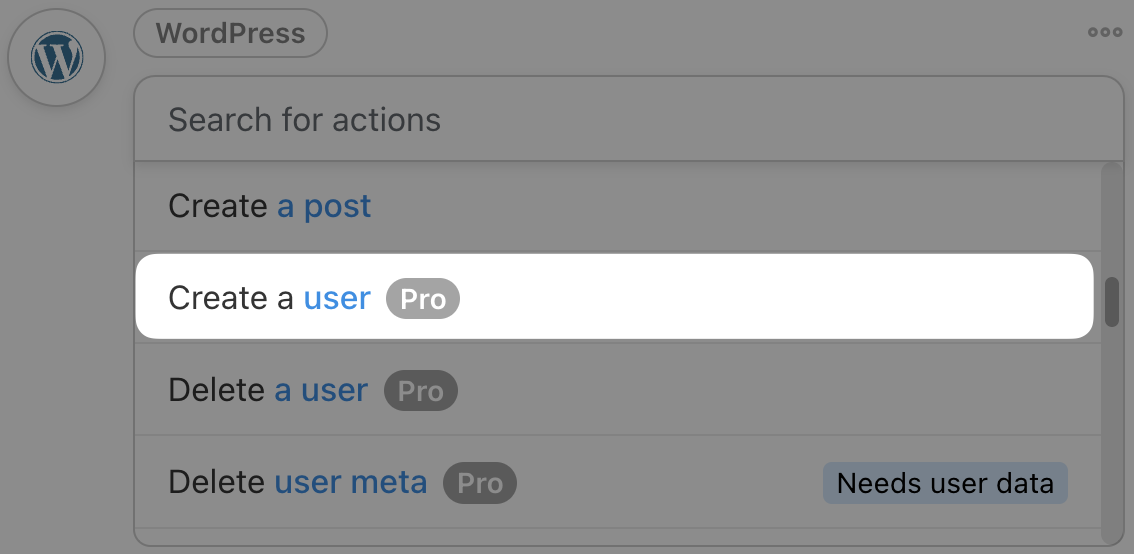
We’ll show you a few cool things that you can do.In the Actions panel, click Add action and select WordPress from the menu of available integrations.
From the dropdown list, select Create a user.
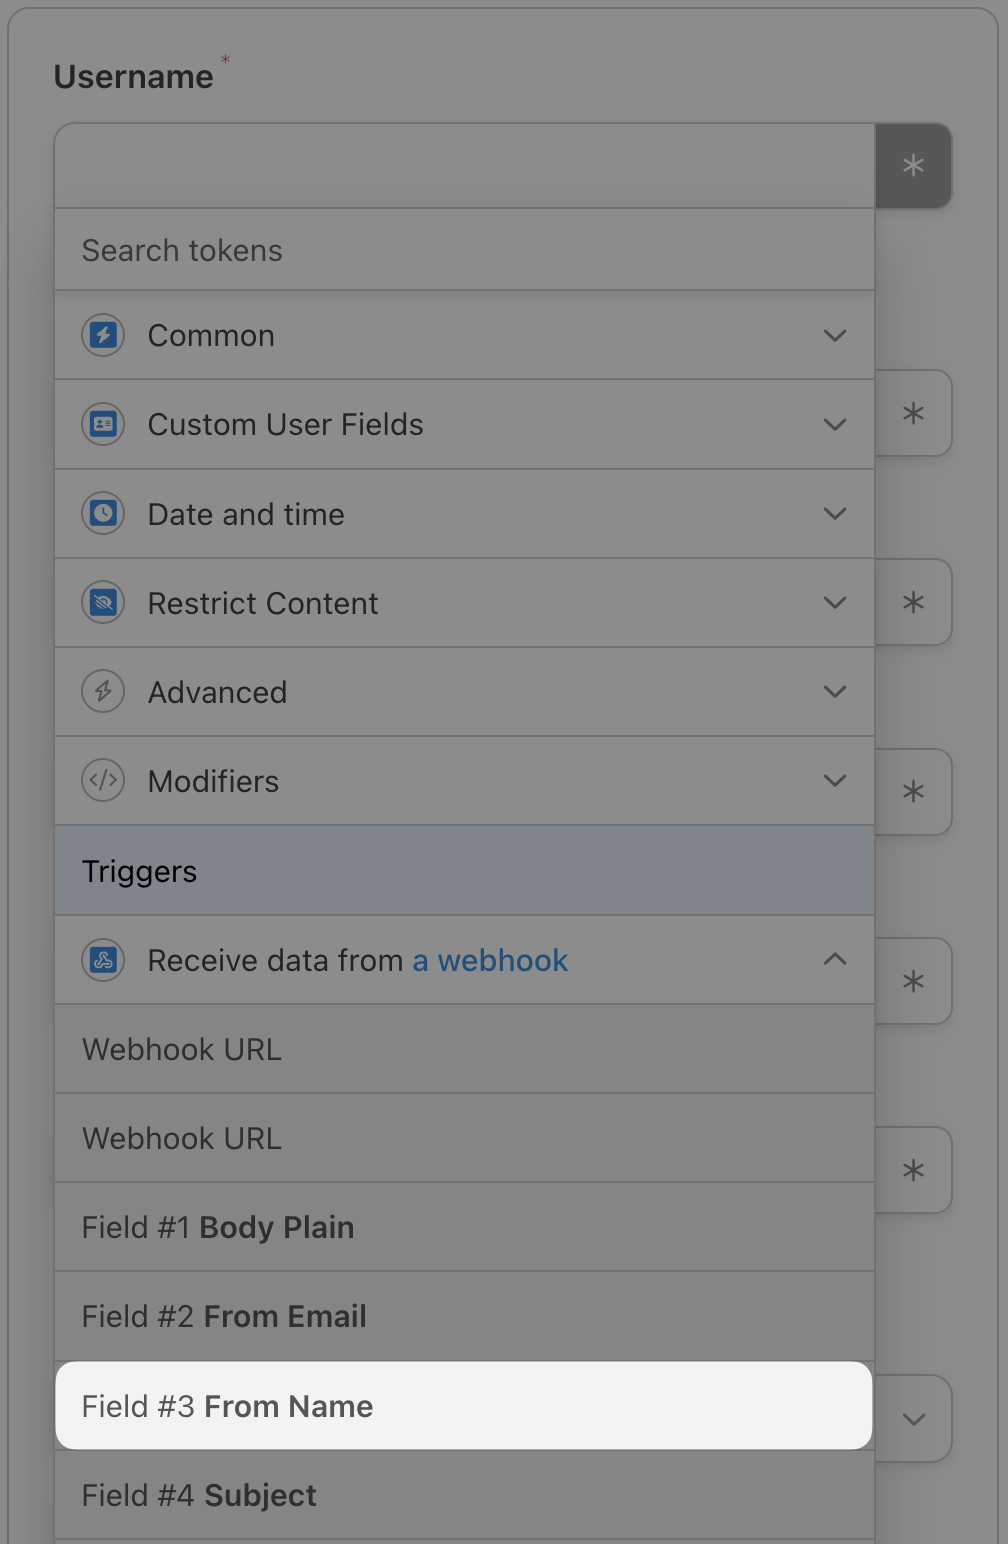
Automator will present you with a form to fill out the new user’s information. We’ll accomplish this using tokens (dynamic data pulled from your WordPress website and from within recipes). In this instance, we’ll be using tokens that represent the data sent from the Zapier webhook.
To select a token, click the Asterisk in a field and select the corresponding token. For example, in the Username field, we have selected the From Name token.
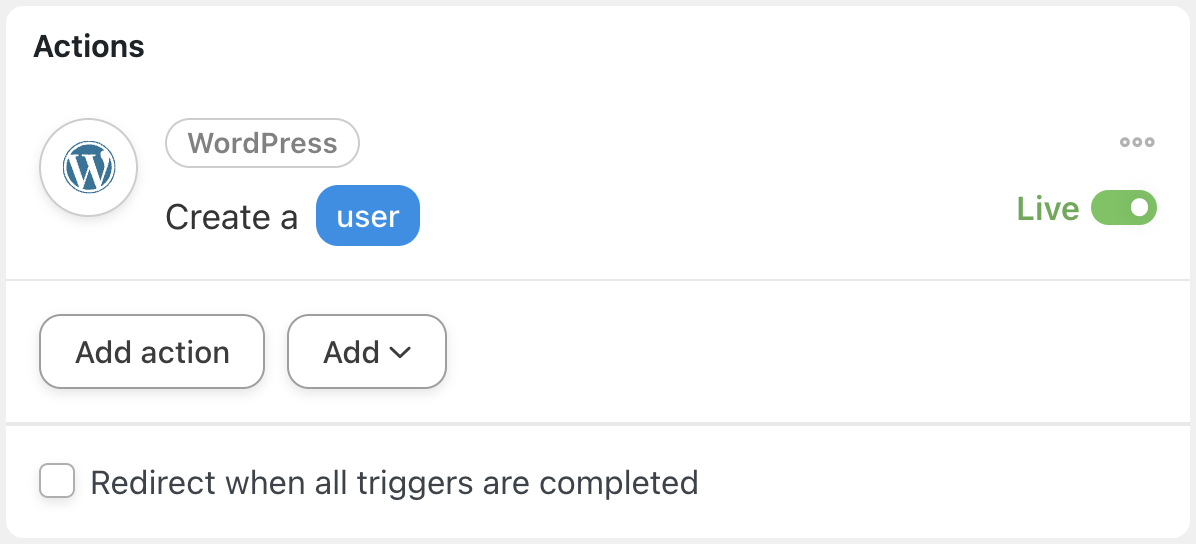
The only other required field is the Email field. Select the From Email token for this field. Fill out the remaining fields using tokens or static entries, as suits your needs.When you’re finished, click Save. Your completed action should look like this:
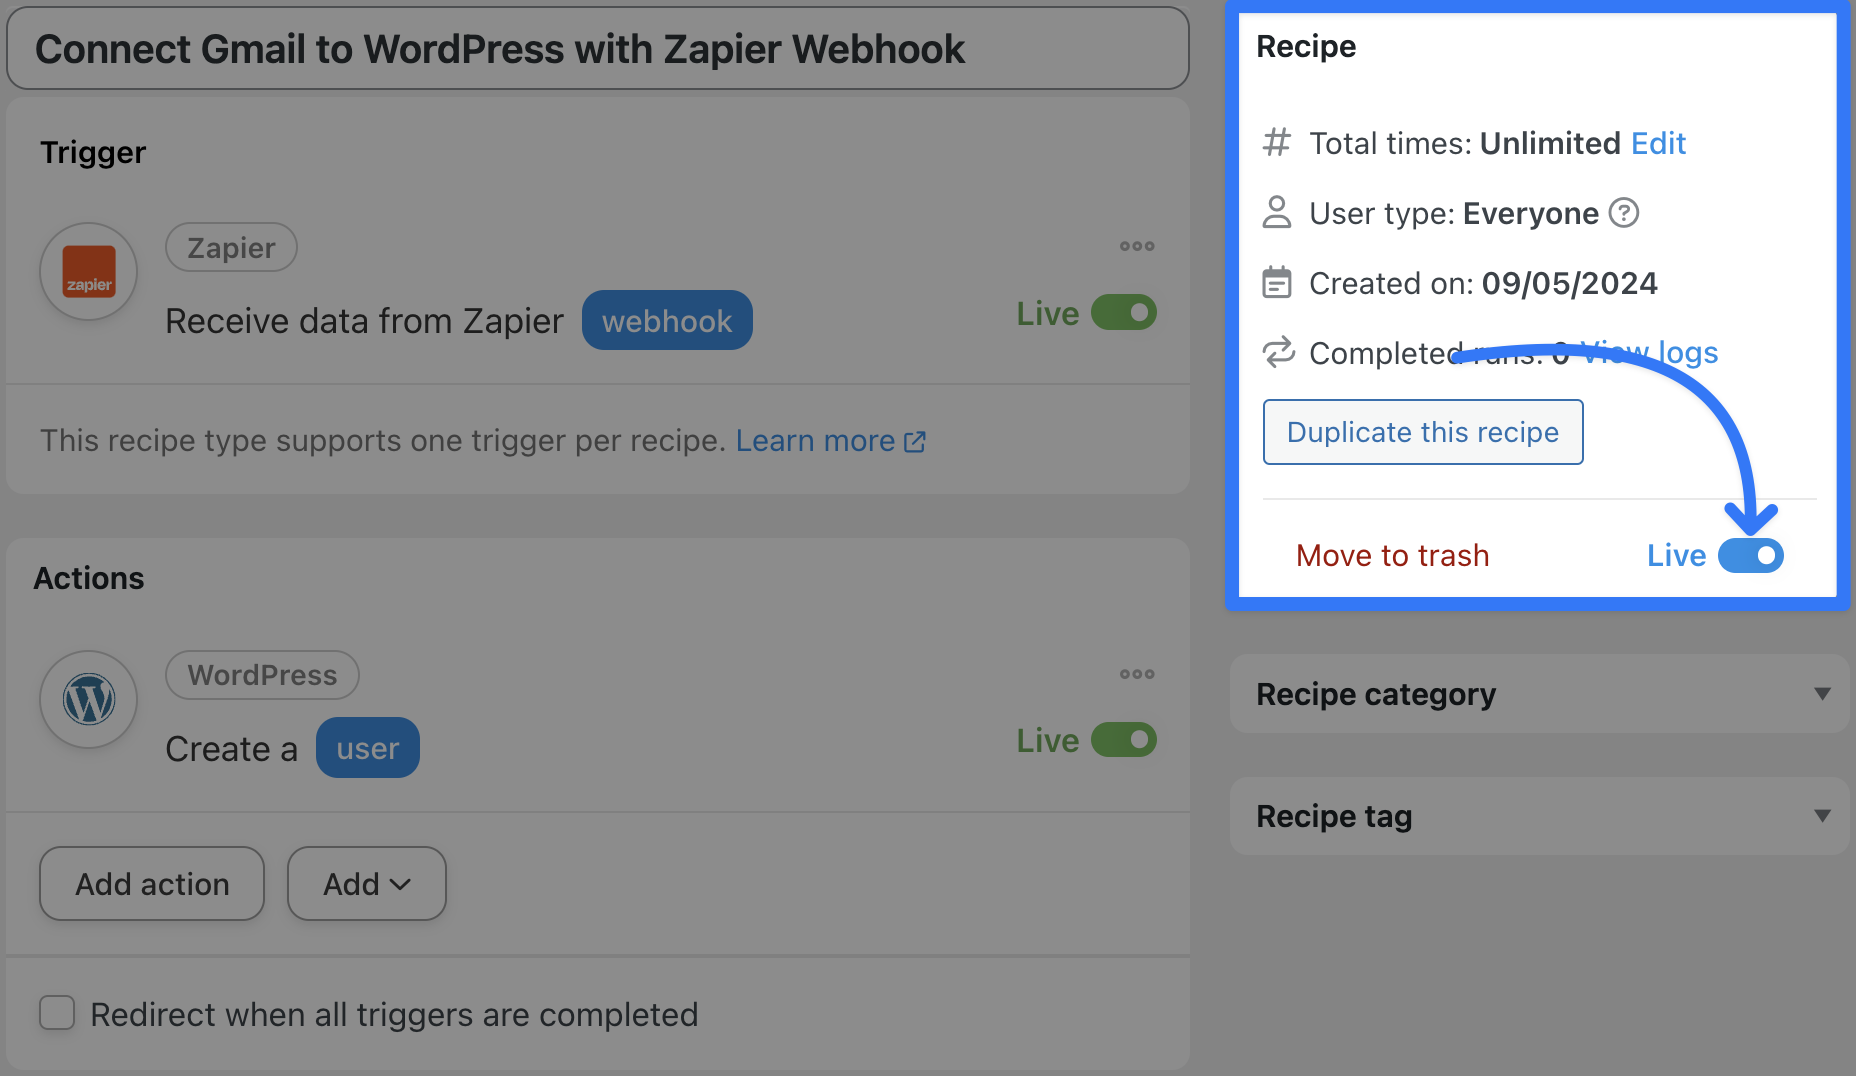
Step 5: Go Live!
You’re just about ready to connect your WordPress website to Zapier and beyond. All that’s left for you to do now is toggle the recipe from Draft to Live!
Why stop there? We modified the recipe slightly, using Automator’s Set user meta action to add a secondary email to a user’s profile.

With that action, we’re able to match the “From Name” token to a “Username”. If there’s a match, Automator will add the “From Email” to the user’s profile as a secondary email address. If no such match exists, Automator will simply create the user.
Better WordPress Automations with Automator + Zapier
We’re still not done yet. One of the coolest Automator features that makes managing your WordPress website that much easier is the ability to add filters.
What if you didn’t want to create/update a WordPress user for every Gmail email you get? Or, what if you wanted to forward priority emails to the appropriate Slack channels?
That would be one of those instances where Automator’s specialization in all things WordPress improves Zapier’s generalized automations. Let’s take a look.
Step 6 (Optional): Add a Filter
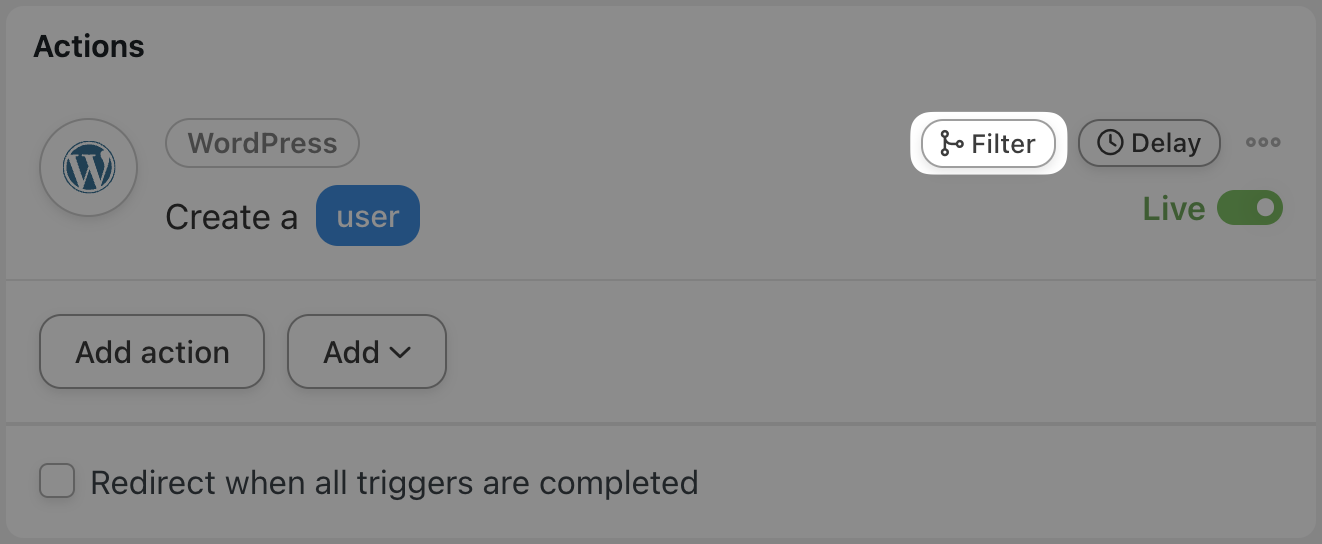
Returning to the recipe that we created together, hover over the action and click Filter.
In the pop-up window that appears, select A token meets a condition.

Automator will then prompt you to configure the rule, i.e., set the criteria that the token must satisfy for the action to run.
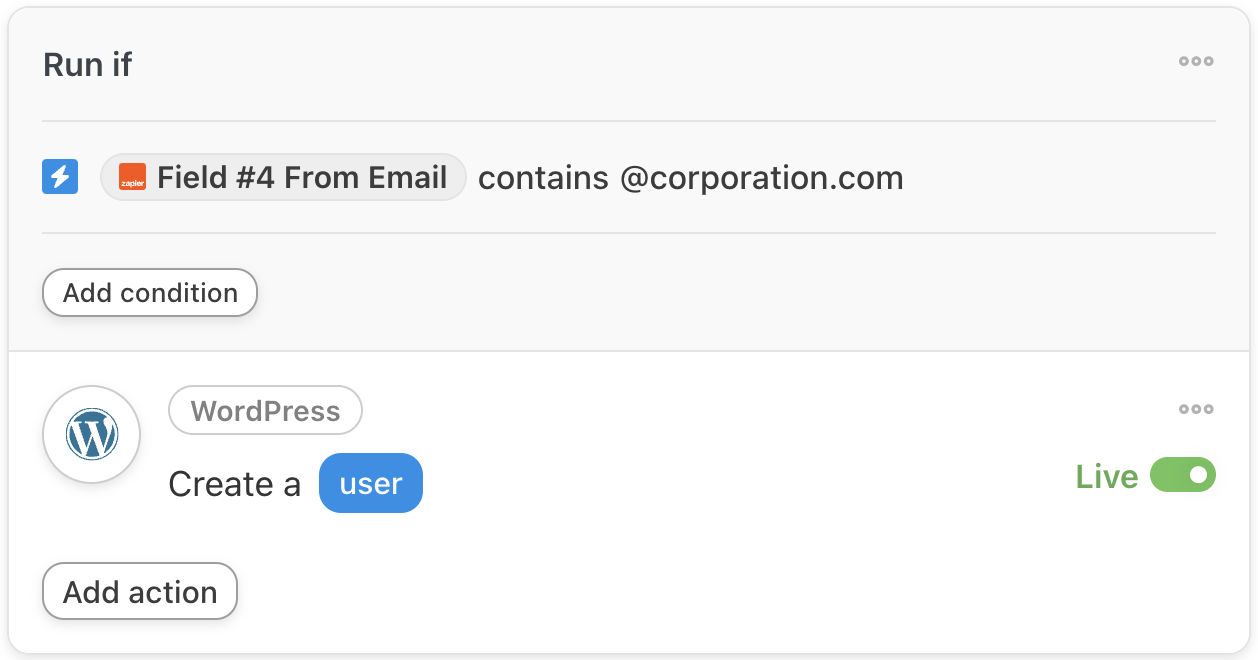
For example, we have configured the rule to require the “From Email” token to contain the value “@corporation.com”.
Once you’re finished, click Save filter. Your action with the new filter should look something like this:
Add as many filters as you like! The power to automate your workflows is at your fingertips.
Create an Unbeatable Two-Way Integration
So far, we’ve looked at a few ways that you can connect WordPress to Zapier. But we promised you the ability to harness the power of Zapier’s integrations for your WordPress website. So what about going the other way? How about connecting Zapier to WordPress?
You might be totally unsurprised to learn that Automator makes this incredibly easy as well! Imagine allowing your students to upload their content to your YouTube channel. Or how about giving content creators access to your platform to share their latest videos, images or stories?

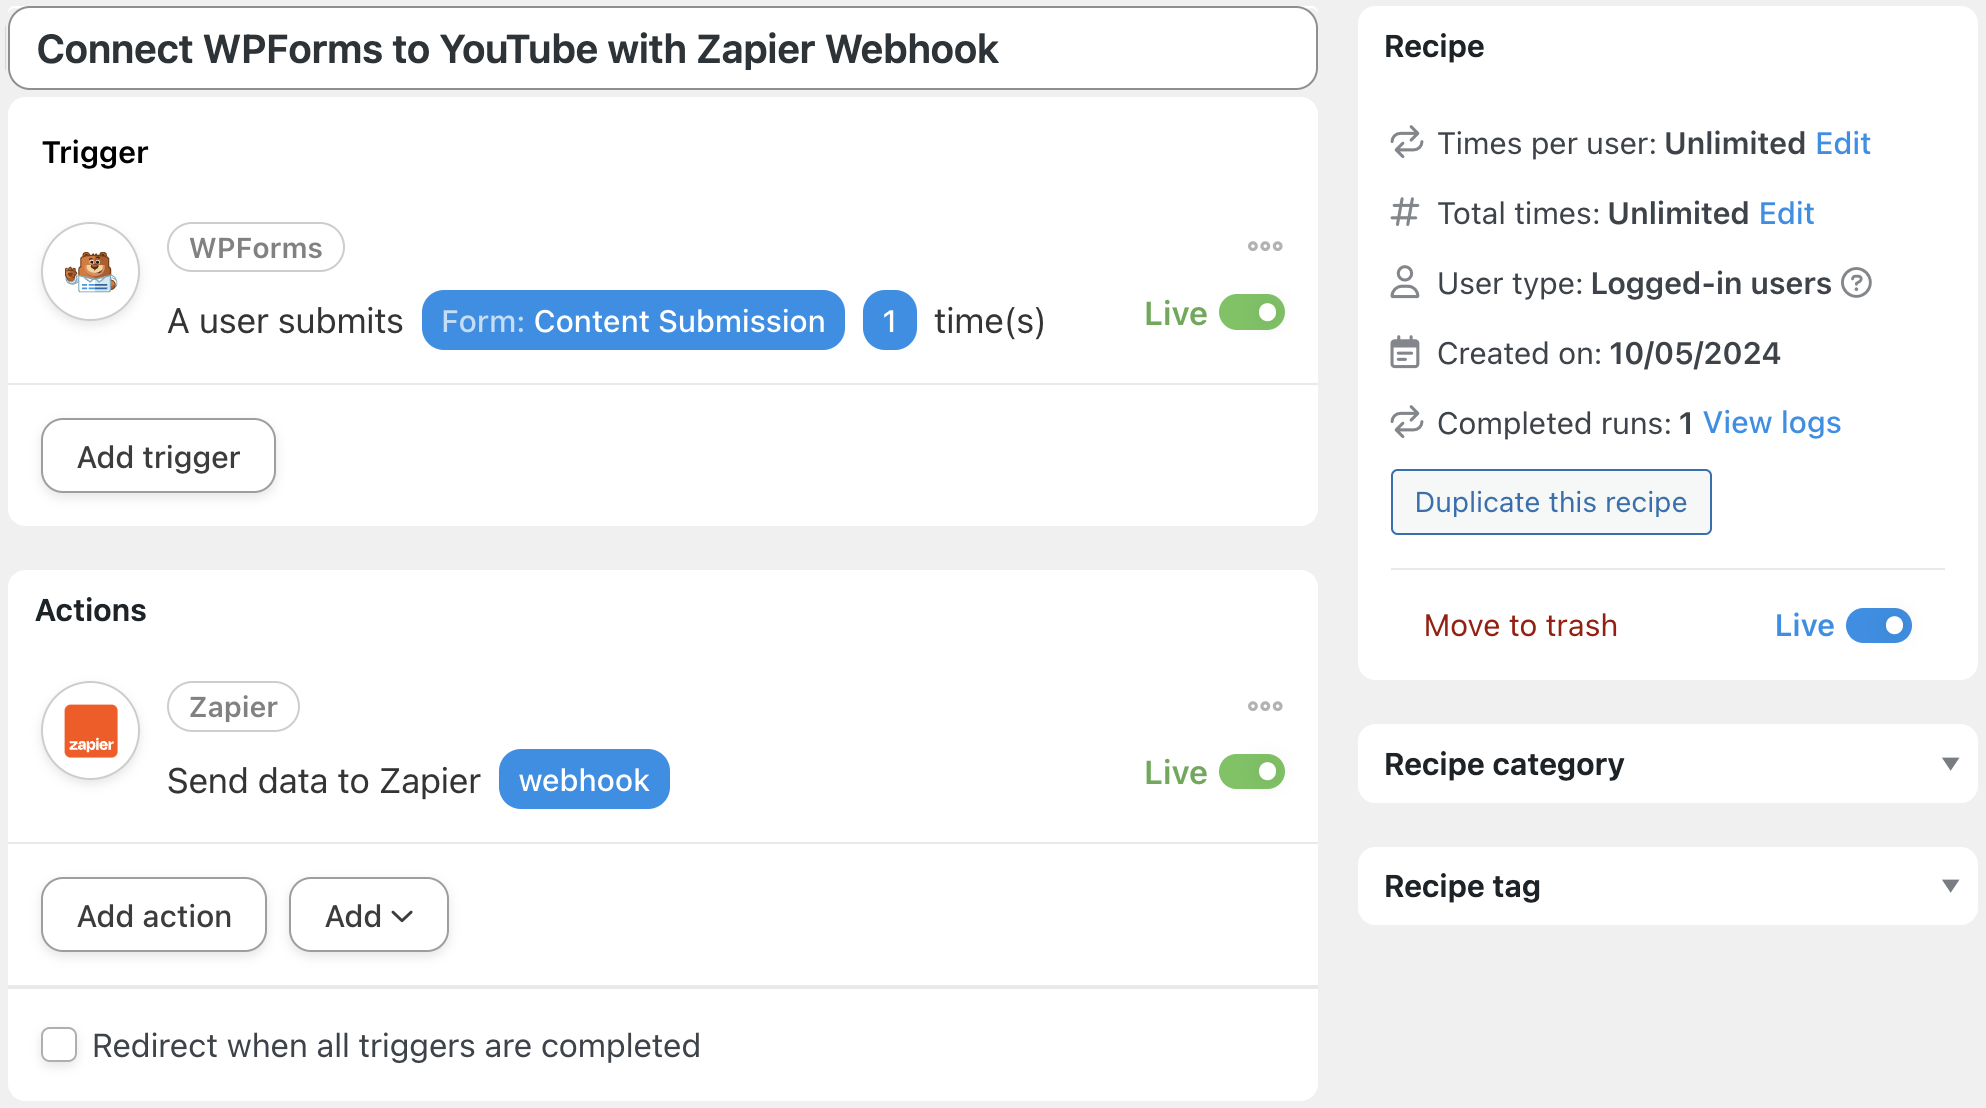
In the recipe pictured above, we’re able to allow our WordPress users to upload videos directly to YouTube (or Vimeo) from a form submission!
Want to know how we did it? You already know half the steps!
Step 1: Create and Name a New Recipe
From your WordPress Admin Dashboard, navigate to Automator > Add new recipe. In the pop-up window that appears, select either Logged-in users or Everyone. (Keep in mind that this recipe will automatically upload videos to your YouTube channel or other connected account. You may choose to have some security around who can upload content and/or where the content submission form is on your website.)
Give your recipe a name that makes it easy to recognize at a glance. We have named this recipe “Connect WPForms to YouTube with Zapier Webhook”.
Step 2: Configure Your Trigger(s)
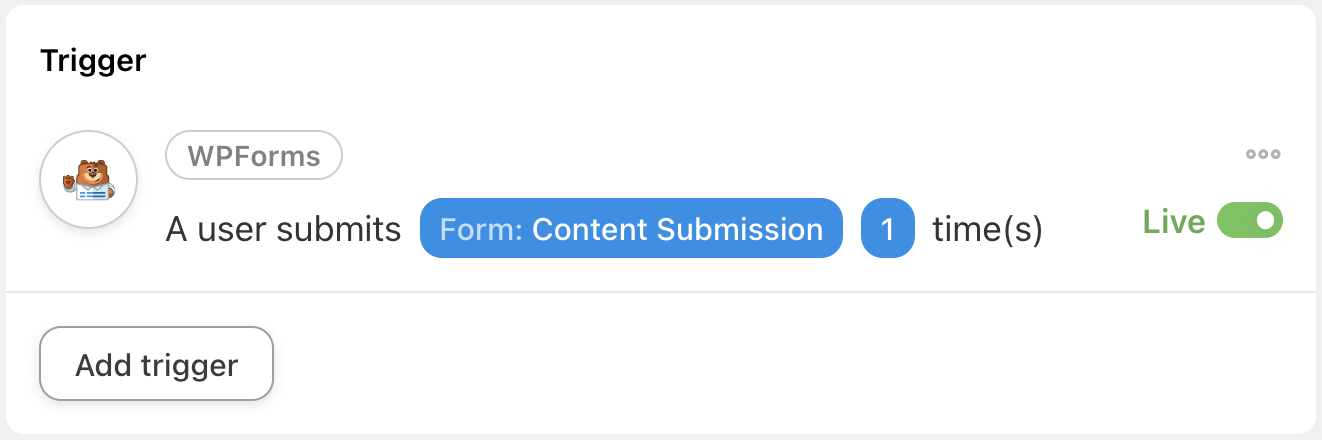
In the Trigger panel, from the menu of available integrations, select WPForms. From the dropdown list that appears, select A user submits a form.
Automator will prompt you to select your content submission form. (Your content submission form should contain at least the following fields if uploading to YouTube: Title, Description, Tags and Categories.) Once you’re finished, click Save.
Your completed trigger should look something like this:
Step 3: Configure Your Action(s) and Zap
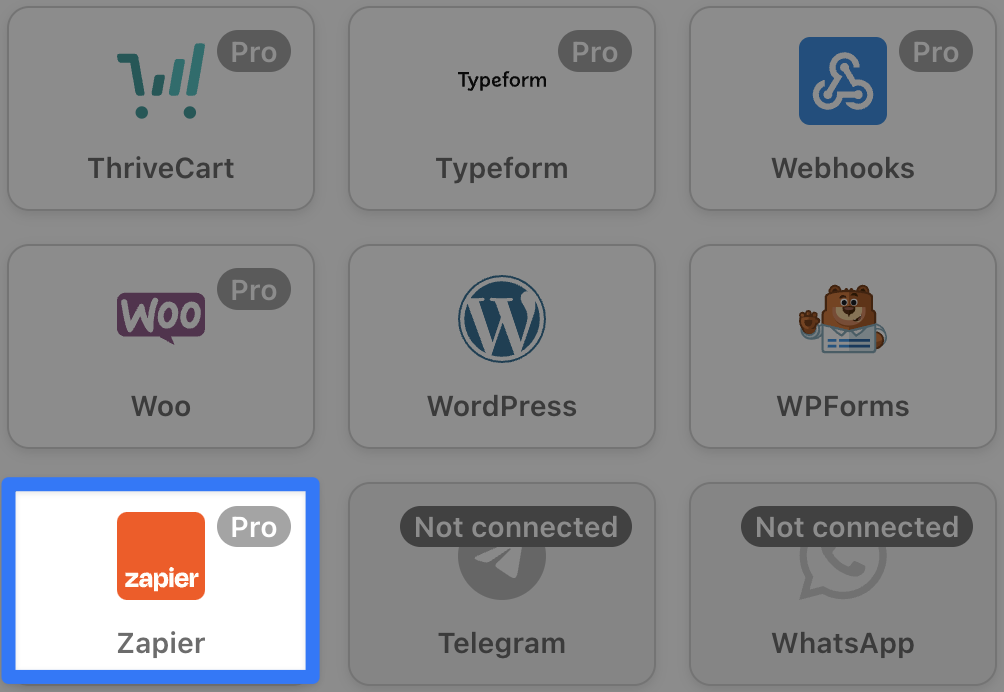
In the Actions panel, click Add action and select Zapier from the menu of available integrations. From the dropdown list that appears, select Send data to Zapier webhook.
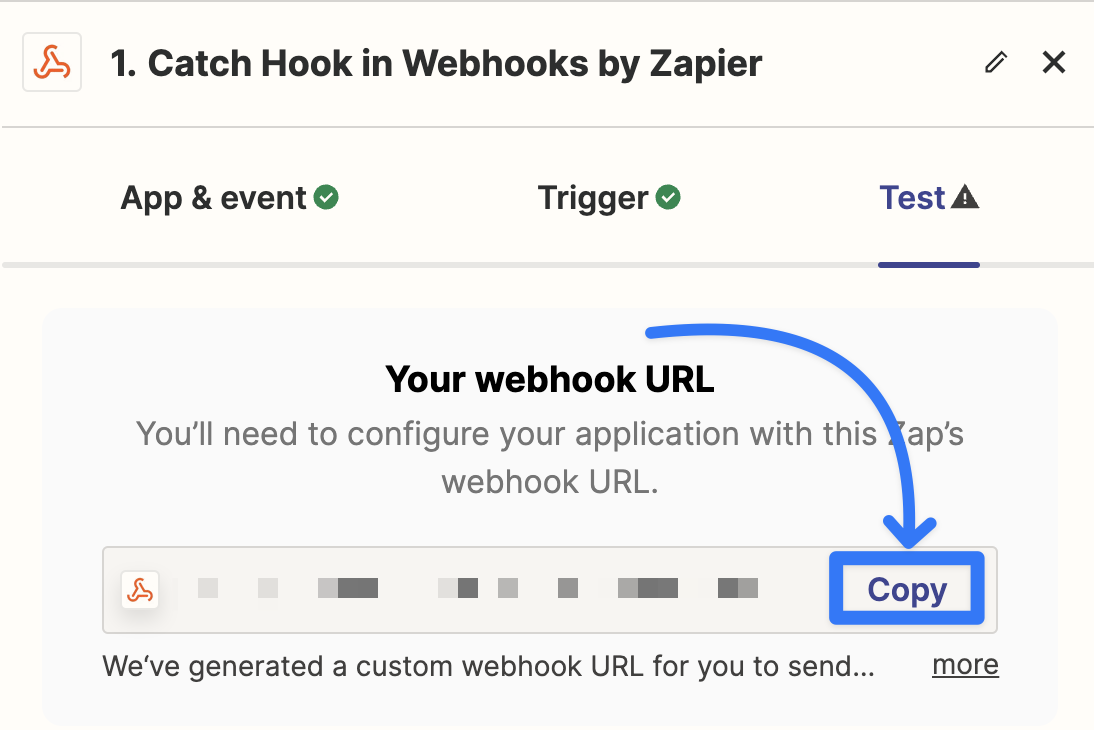
In a new tab, navigate to your Zapier account and create a new Zap.In the Zap editor, click Trigger and select Webhooks by Zapier. Under the App & event tab, select Catch Hook in the Event field.

Next, go to the Test tab and copy the URL to your clipboard.
Return to your Automator tab and paste the webhook URL into the URL field. You can leave the default settings of the other fields unchanged.
Now, in the Body field of the Automator webhook form, you can decide which information you want Automator to send via webhook to Zapier and, ultimately, to YouTube.
Just as before, use key/value pairs, selecting the token from your WPForms trigger that corresponds to each key.

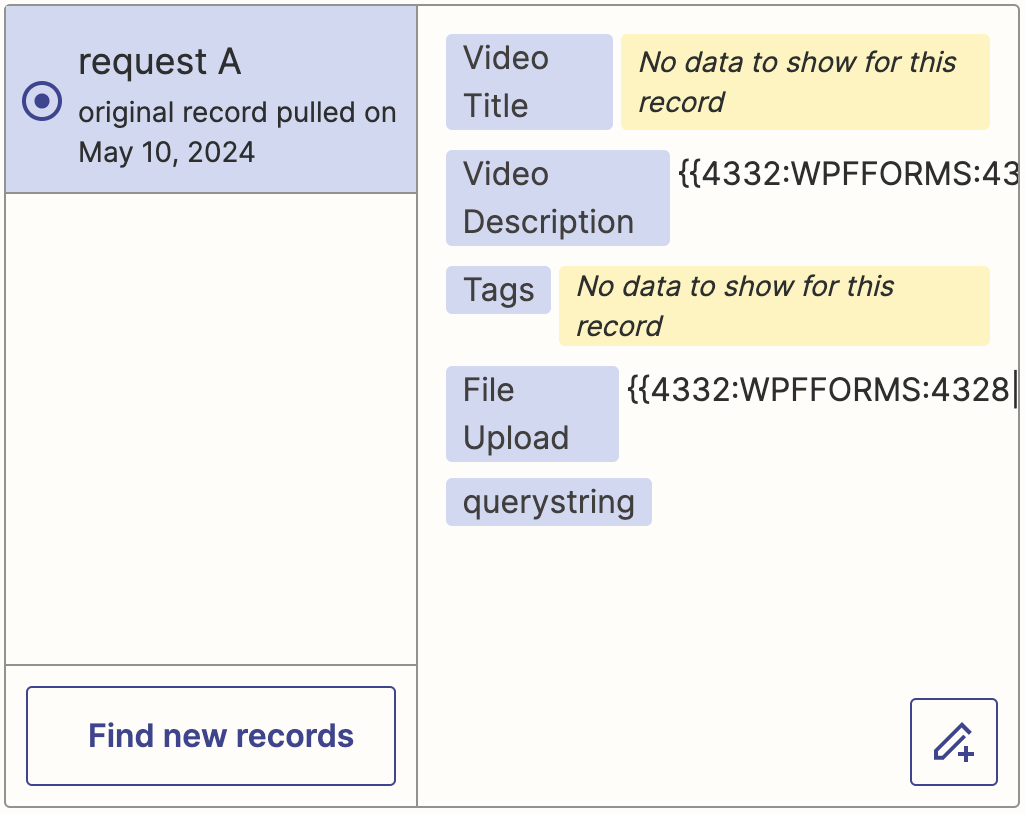
Once you have configured all of your key/value pairs, click Send test. Within sixty (60) seconds, return to your Zapier tab and click Test trigger.
Zapier will return the data from you entered in the Body field after a successful test.
Click Continue with selected record. Zapier will then prompt you to select an integration for the action (YouTube, Vimeo, etc.).
Under the App & event tab, select Upload Video. If you have already connected your YouTube or Vimeo account, navigate to the Action tab.
Use the information retrieved from the webhook test to populate the corresponding fields.

Fill out the remaining fields as your needs require. Once you’re finished, click Continue.
Zapier will automatically take you to the Test tab. If you run a test and it is unsuccessful, you don’t need to worry. There was no video to upload from the webhook URL test. You can safely skip the test and turn your Zap “On”.
Step 4: Complete Your Automator Recipe
Return to your Automator tab and Save the Zapier action. Once you’re finished, your Actions panel should look like this:

Step 5: Go Live!
All that’s left for you to do now is toggle your recipe from Draft to Live. That’s it! Head to your YouTube channel and watch the video submissions roll in!
Many More Ways to Connect WordPress to Zapier
In this article, we showed how to connect WordPress to Zapier using Automator. We showed you the basics of setting up webhooks to send data from Zapier to Automator and vice versa. Then we ran through a few modifications to Automator recipes to improve your workflows.
Now the data is your court! Whether you want to create WordPress users from PayPal payments, enroll students in LearnDash courses or reset their course progress, Automator has you covered.
From Stripe and GetResponse to Spotify and YouTube; if Zapier can integrate with it, Automator can integrate it with WordPress.
Want to know more about how webhooks work? Check out this resource from Zapier about outgoing webhooks and this nifty guide from Automator about incoming webhooks. Or, drop us a line in the comments section below.
Until next time, happy automating!

Related Posts


This Post Has 0 Comments