Revive old WordPress posts with AI and Uncanny Automator. Learn how to reverse content decay…
Connect Your WordPress Website to Airtable with Automator
Want to connect your WordPress website to Airtable? Follow this step-by-step guide to send data from your website to Airtable for FREE.
There are times when running a WordPress website can get a little messy. Between your spreadsheets, your image galleries, your client or member lists, your content calendar, your contributor and affiliate lists, your… you get the idea.
Fortunately, you can consolidate all of your WordPress website data into a single, easy-to-use database.
Connect your WordPress website to Airtable with Uncanny Automator and make data-entry a thing of the past. The best part is that, with Automator and Airtable, you can start building bigger and better databases without spending any money!
Yup, you read that right. I’m going to show you how to create a seamless Airtable integration for WordPress for FREE. And without writing any code!
Ready to get started?
What is Airtable?
For the tech-enthusiasts in the crowd who enjoy using industry jargon, Airtable is a cloud-based collaborative relational database management system (RDBMS) service. Try saying that five times fast.
For everyone else in the crowd (myself included) who might find all those techy-words a little tongue-twisting, there is an easier definition. Simply put, Airtable is a database that allows you and your team to store information, create relationships between that information and organize and view it however you’d like.
In spite of its sophistication, Airtable offers an intuitive, familiar and user-friendly interface that puts the power of relational databases right at your fingertips—no SQL fluency required.
With Airtable, you can consolidate your Excel spreadsheets, synchronize your Google Calendars and centralize your image galleries. There really is no limit to what data you can manage with Airtable.
All of this doesn’t come cheaply however—it comes totally freely! You can get started with the free version of Airtable and still enjoy the best this relational database has to offer. As your database—and business—grows, upgrading to Airtable Plus, Pro or Enterprise won’t break the bank either.
Click here for Airtable’s full pricing schedule.
How Does Airtable Work?
Airtable has a simple, hierarchical structure that makes storing, sharing and analyzing data easy and actually quite enjoyable. The basic components of Airtable are:
- Workspaces
- Apps (a.k.a., Bases or “databases”)
- Tables
- Fields
- Records
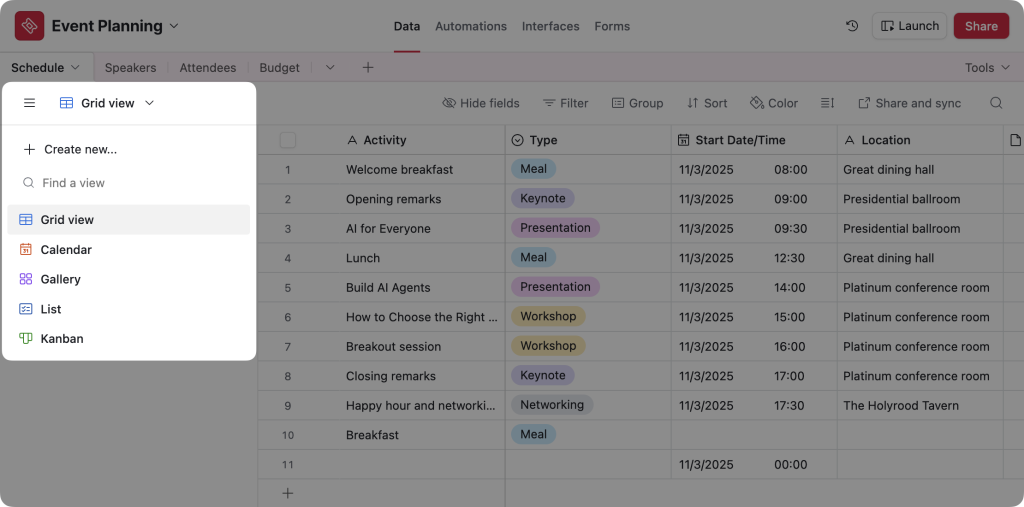
- Views
Workspaces
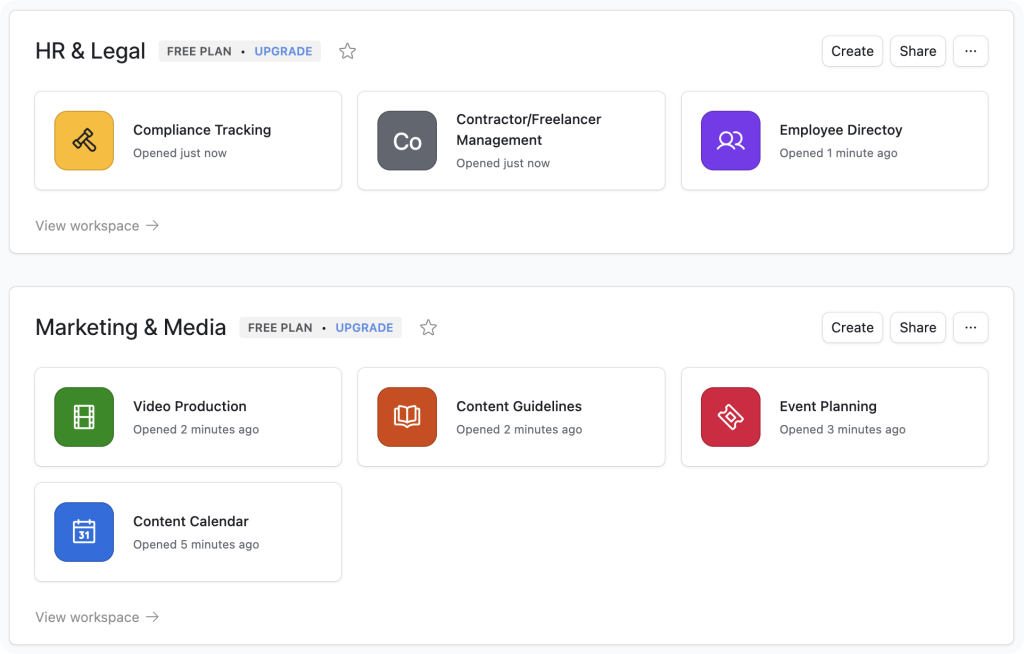
Workspaces house collections of bases and can each have their own unique set of workspace collaborators. It’s easiest to think of workspaces as different departments within a company.
For example, in the picture below, I have two workspaces; Marketing & Media and HR & Legal.
Apps
In Airtable, the term “app” and “base” are often used interchangeably. Within databases, you’ll see tabs for, “Data”, “Automations”, “Interfaces”, and “Forms”. Altogether, this makes “bases” into “apps”.
It’s easiest to think of “bases” as the individual databases where you’ll store all of your data. Databases generally start out in a familiar spreadsheet format called a “Grid” but they are infinitely customizable once you start to populate them with data.
Tables
Each base can contain an infinite number of tables. Tables are similar to worksheets in a spreadsheet.
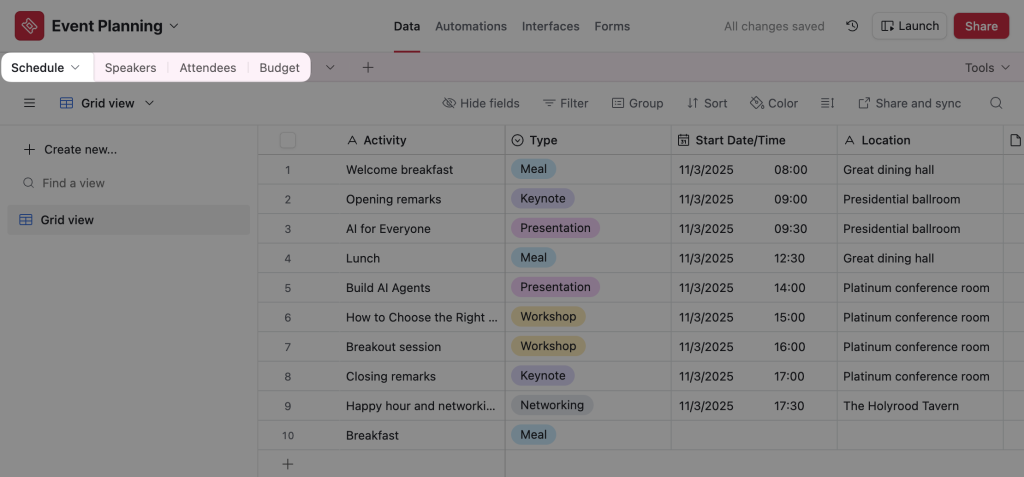
You can use them to store various types of related data. For example, in my Event Planning base, I can have various tables to store data such as event schedules, speakers, attendees, and budgets.
Fields
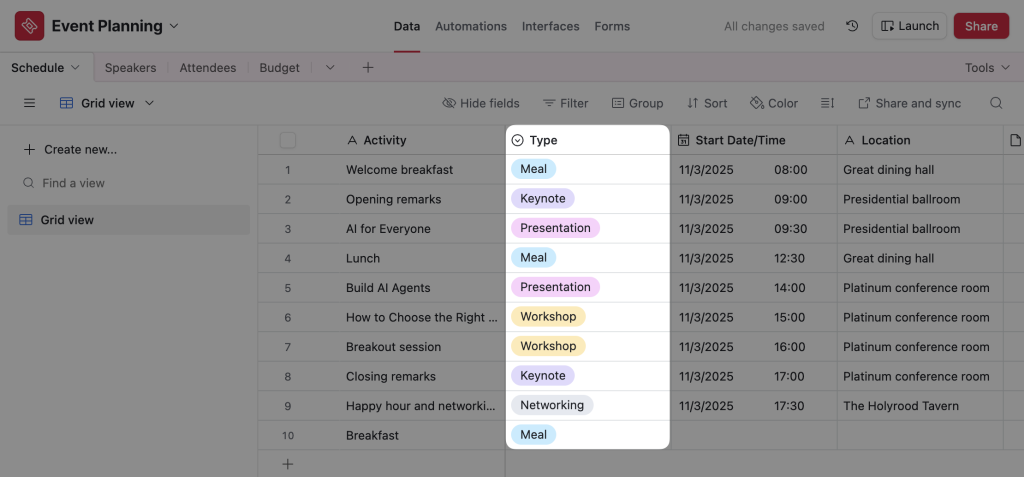
In Airtable, fields are the individual columns within tables. Fields store a specific type of data, from simple text to images and formulas. Fields are designed and intended to keep your data consistent and organized across the database.
Records
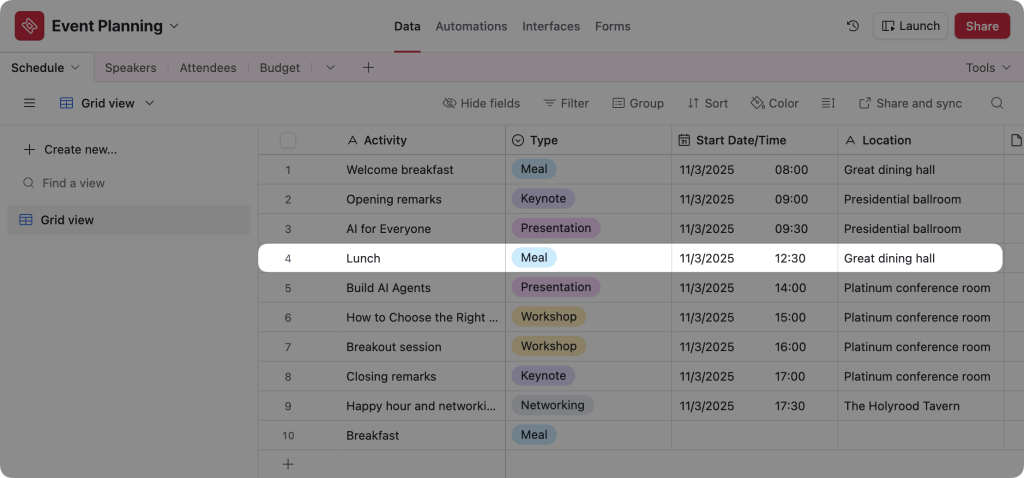
Records are the fundamental building block of your Airtable database. They are similar to rows in a spreadsheet.
Each “cell” that intersects with a field (or column) represents a data point for that record. In my Event Planning base, each activity is a record with data stored in various fields.
Views
Views is just one of the many ways that Airtable sets itself apart from other organizational and collaborative tools.
Once you’ve populated your base with data, you can change the way you view that information with just a click. Select the calendar view for events, the timeline view for sequential information, the gallery view for products or switch between them all—whatever catches your fancy!
What is Uncanny Automator?
Uncanny Automator is the #1 automation and integration plugin for WordPress websites. With Automator, you can create combinations of triggers and actions to connect your favorite apps and plugins, automate your workflows and, most importantly, save yourself loads of time and money.
With Automator, connecting your WordPress website to your Airtable databases doesn’t require a single line of code. Or even a single penny.
Pair the most powerful automation plugin with the most powerful database tool to create seamless workflows.
To install and activate Uncanny Automator Lite (the free version of Automator):
- Log in to your WordPress site as an Admin.
- Navigate to Plugins > Add new.
- Enter “uncanny automator” in the search bar.
- Click Install and Activate.
- Register your account for complimentary app credits at automatorplugin.com/my-account.
Ready to get started?
Connect Your WordPress Website to Airtable
Now that you’ve signed up for Airtable and installed the Automator plugin on your WordPress website, you’re just a few clicks away from creating a fully automated database.
Automator will connect your WordPress website to Airtable using a webhook. I promise, it’s not nearly as techy-techy as it sounds. If you can copy and paste, you can use webhooks.
Step 1: Open Your Airtable Base
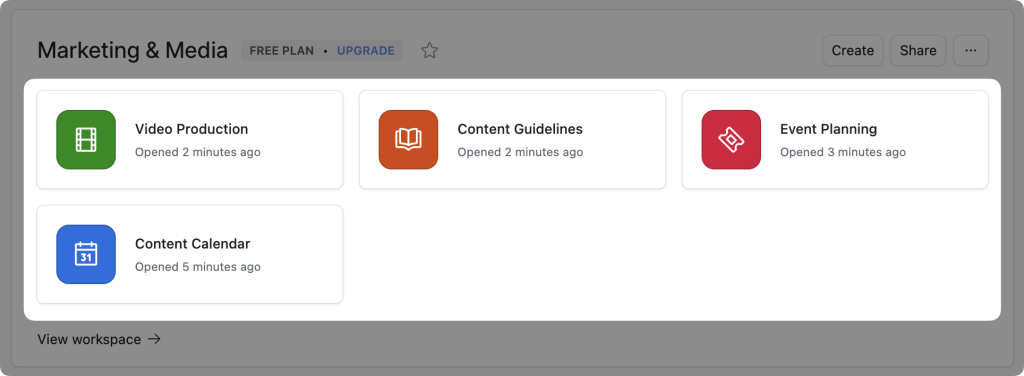
From your Airtable account page, select the base you’d like to have connected to your WordPress website. We’ve selected the base Event Planning from our Marketing & Media workspace as pictured above.
In this example, we’ll show you how to automatically add attendees to your Airtable Event Planning base using WPForms and Automator.
Step 2: Add Your Airtable Automation Trigger
From the base, click the Automations tab.
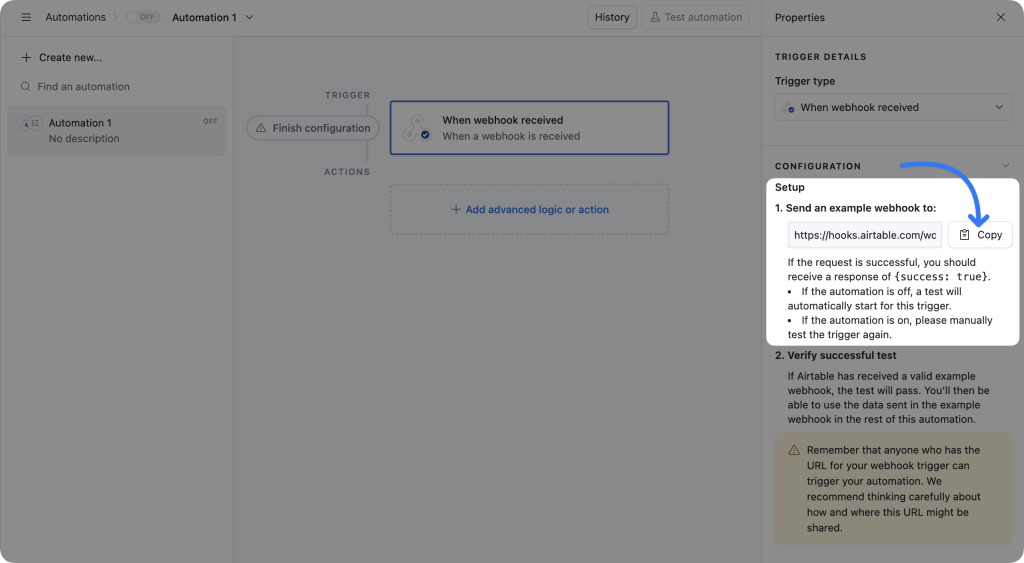
From the Automations screen, click Add trigger then select When webhook received from the drop-down list that appears.
Step 3: Copy Your Webhook URL
Under the Properties panel, click Copy next to your webhook URL.
In one of the following steps, we’re going to paste this URL into an Automator recipe. This is how Automator knows where, in the whole world wide web, to send your valuable WordPress data.
Step 4: Create a New Recipe
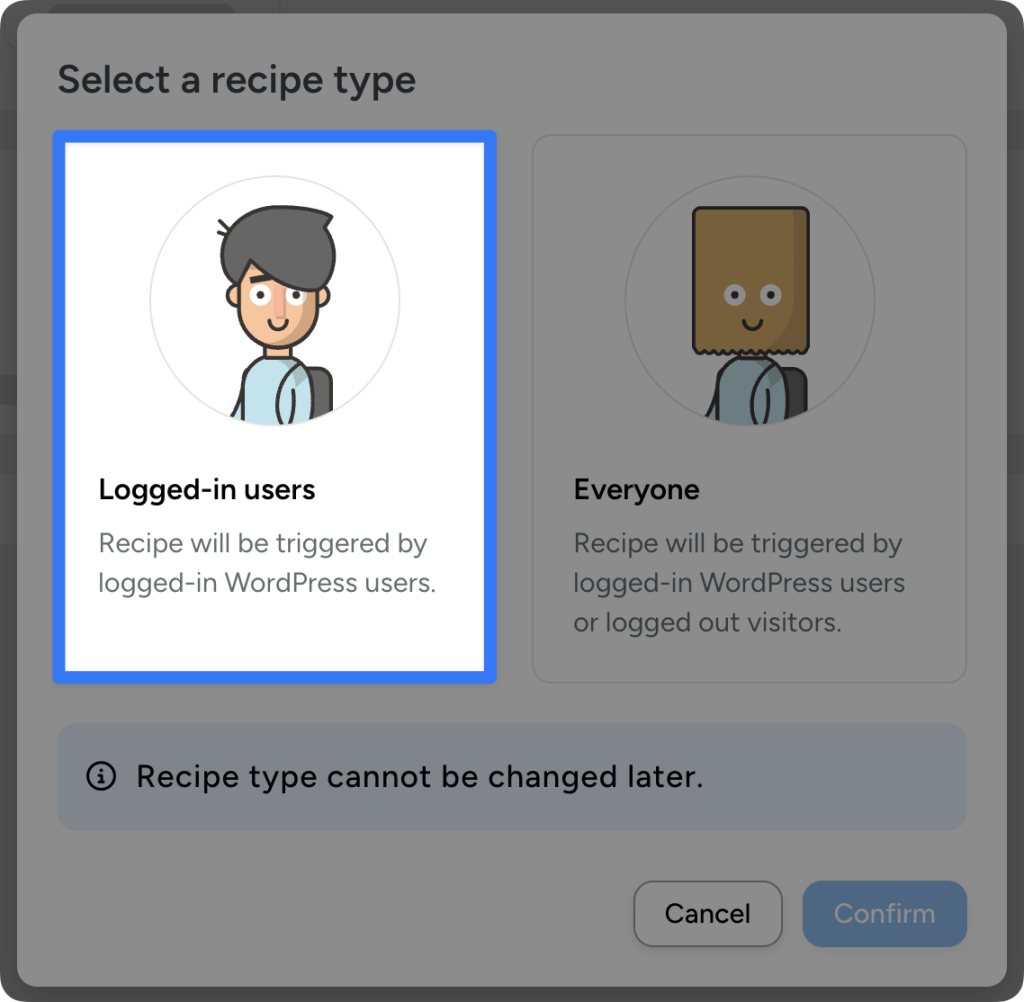
Now, from your WordPress Admin Sidebar, navigate to Automator > Add new recipe. In the pop-up window that appears, select Logged-in users.
Step 5: Name Your Recipe
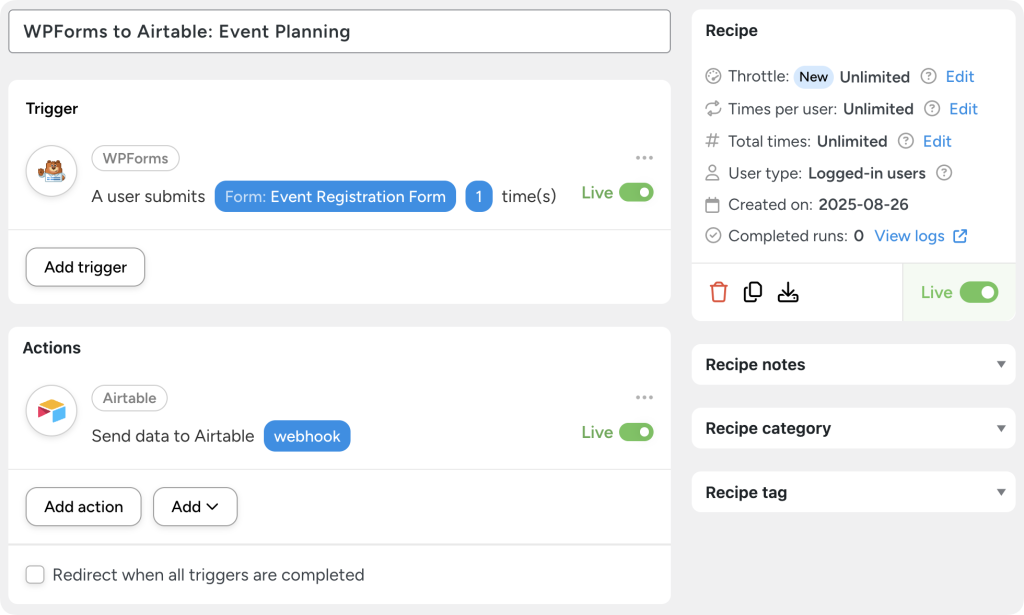
We’ll be navigating between your WordPress Admin screen and your Airtable account screen so it’s a good idea to name your recipe before you forget. I’ve named this recipe WPForms to Airtable: Event Planning so I know what this recipe does at a glance.
Step 6: Configure Your Trigger
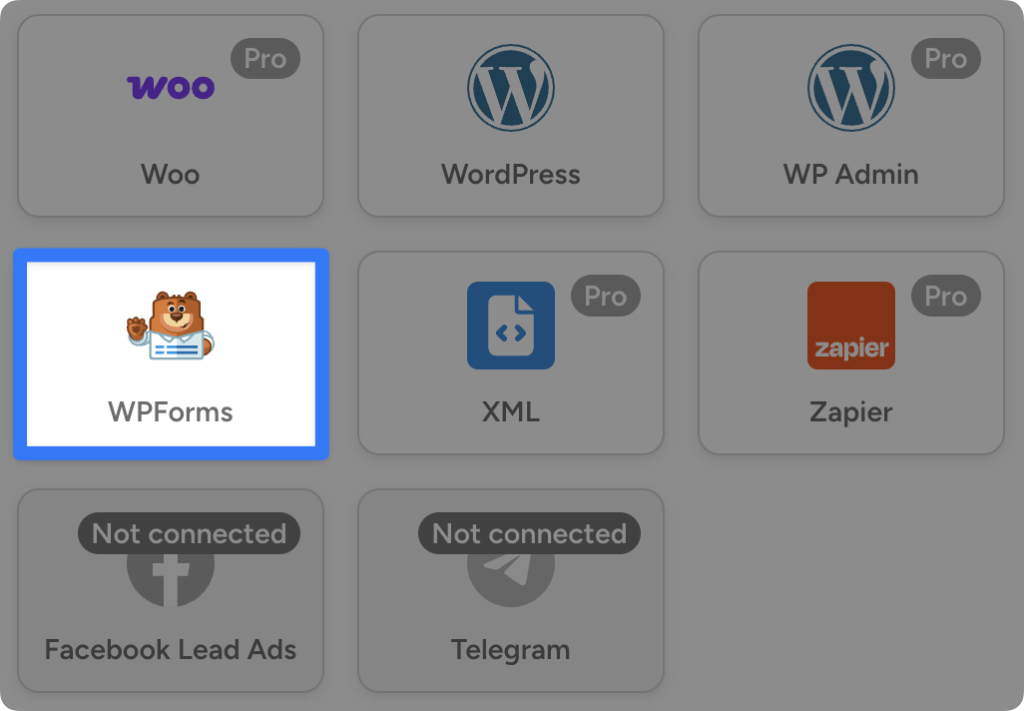
In the Triggers panel, select WPForms.
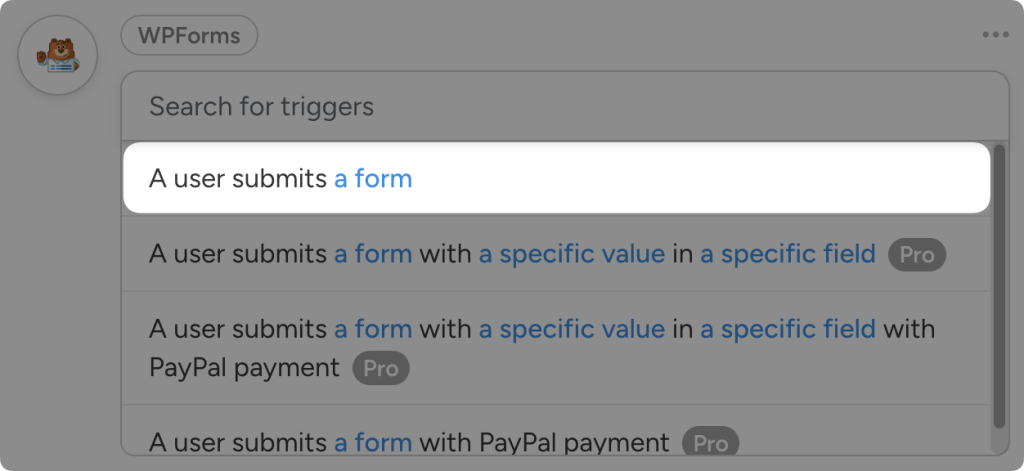
From the drop-down list that appears, select A user submits a form.
Automator will then prompt you to select one of your forms. For example, I have selected my Event Registration form.
Once you’ve selected the correct one, click Save.
Step 7: Paste Your Webhook URL Into Automator
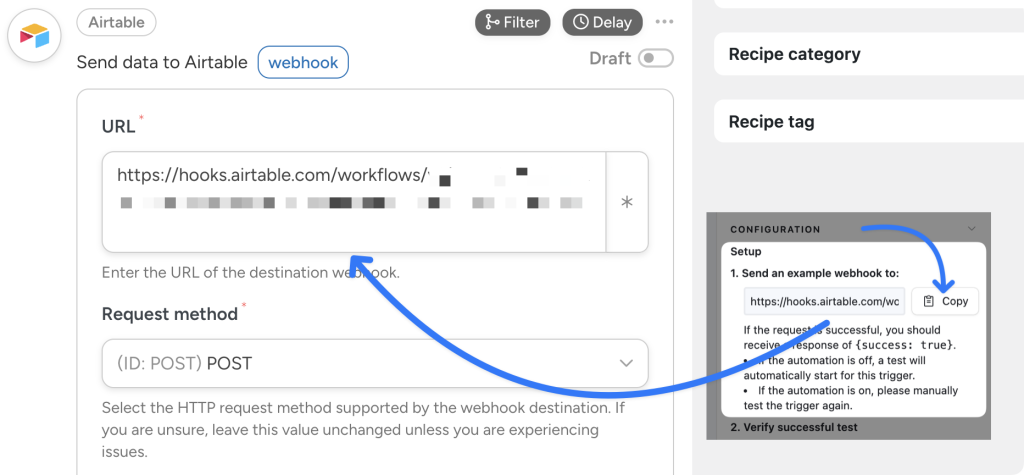
In the Actions panel, click Add action and select Airtable.
From the dropdown list that appears, select Send data to Airtable webhook.
The next thing you’ll want to do is to paste the URL from your Airtable Automations screen into the field labeled URL. If you need to copy it again, return to the Airtable Automations screen and click Copy.
(Note: Anyone with your Airtable webhook URL can trigger your Airtable automations. Only share the webhook URL with people who should have access to your Airtable base.)
Step 8: Finish Configuring Your Action
Automator will already have auto-filled the techy-techy fields that Airtable will use to interpret the incoming data so you don’t have to fill it in yourself. See, no code!
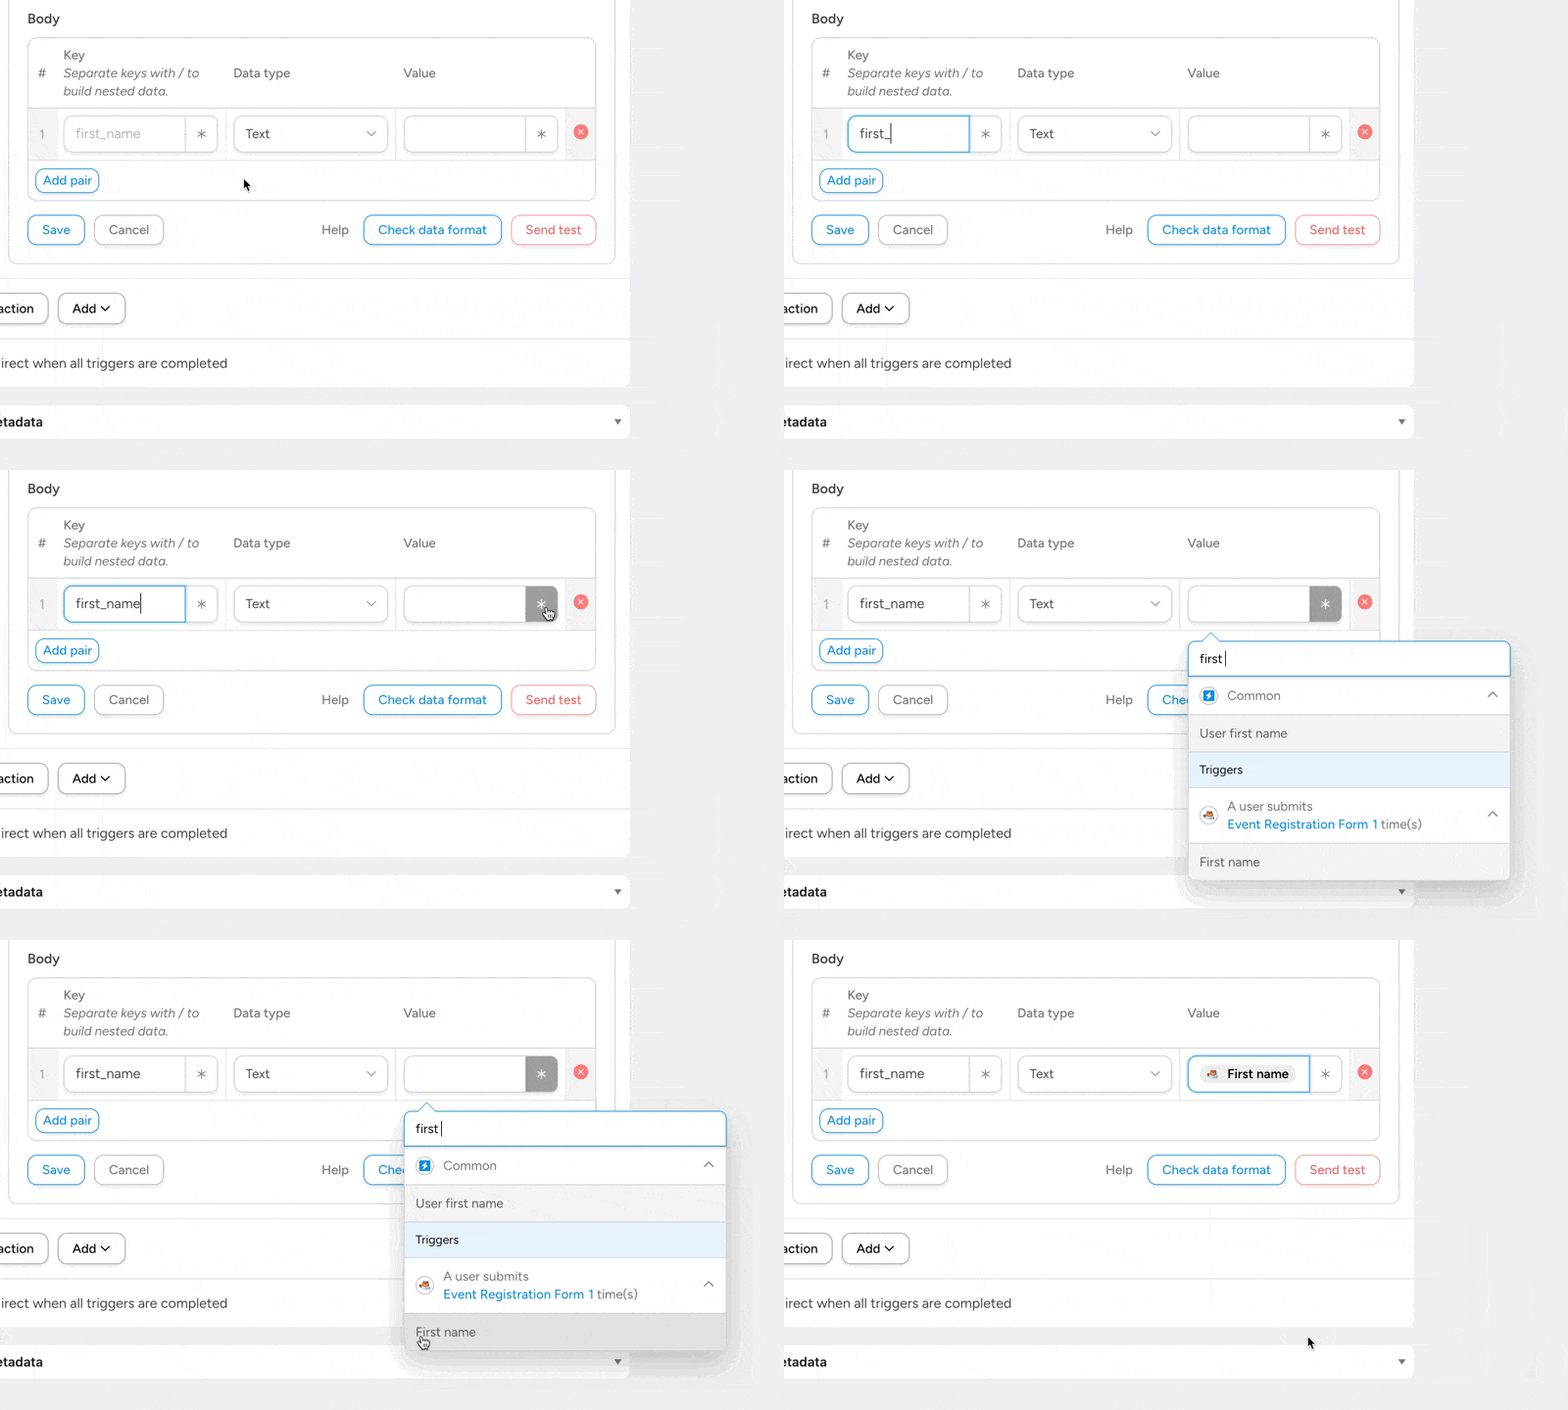
Scroll down to the bottom of the Actions panel to the Body section. This is where you get to specify the data that you want to send to Airtable. You can fill in this data using tokens (i.e., dynamic data from your WordPress site and from within recipes).
This section consists of two fields: one labeled Key and the other labeled Value. In simple terms, data in webhooks is stored and organized in key/value pairs. Keys describe values—that’s it.
You can name your keys whatever you’d like—but static names are always best—and set the values to anything. However, it’s best to keep it simple because the keys will tell you later on what the value represents.
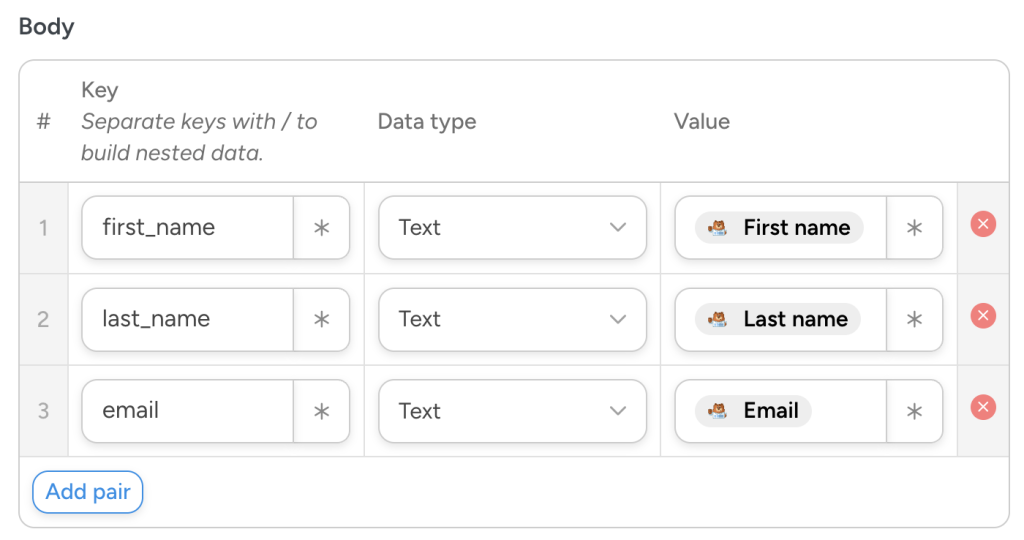
For our example, I have created key/value pairs that correspond to the input fields in my event registration form as well as the records in my Airtable base so that I never get confused.
In the first empty Key field, for example, I have typed “first_name”. In the corresponding Value field, I’ve selected the “First Name” token from the dropdown list of tokens.
To send more data to Airtable, click Add pair. You can add as many pairs of keys and values as you’d like but, once again, I’ve only selected the pairs that correspond to the fields within my event registration form as well as the records in my Airtable base. It should look something like this:
Once you’ve added all of your pairs, click Send test.
This will ensure that all of the data is formatted correctly and inform Airtable on the data sets that the webhook will receive when the automation is activated. If all has gone well, you should see a green confirmation message:
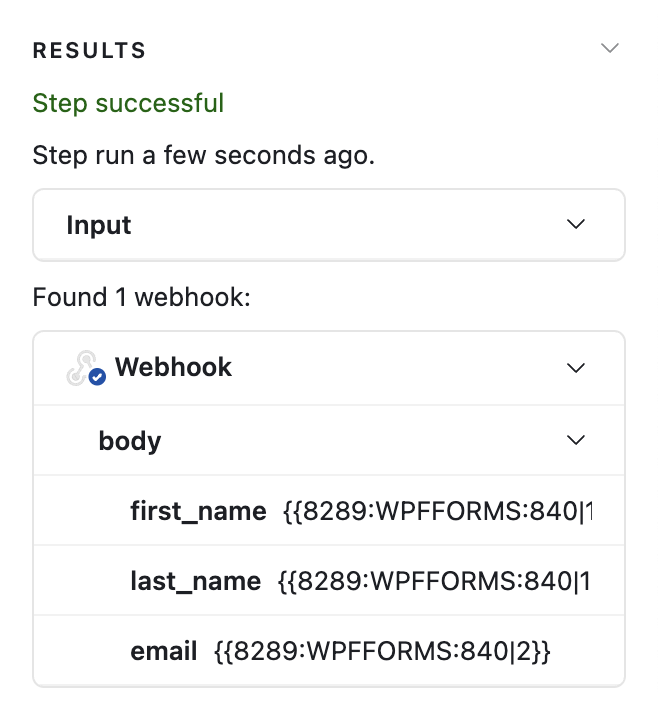
Double-check that the test was successful by navigating to your Airtable Automations screen. At the bottom of the Properties panel, you should see a Results section that looks similar to this:
After you’ve double-checked that Automator and Airtable and talking “techy” to each other, return to your Automator window with the recipe builder and click Save.
Step 9: Go Live!
Toggle your recipe from Draft to Live. It should look something like this:
Step 10: Configure Your Airtable Automation
Now that you’ve sliced, diced, flambéed and plated your Automator recipe, it will automatically send the paired data you selected to your Airtable base. But Airtable still has to know what to do with this delicious data once it arrives.
Fortunately, much like with Automator recipes, configuring your Airtable automations doesn’t require any coding skill—just a love for saving time.
In your Airtable Automations screen, click Add advanced logic or action and select Create record.
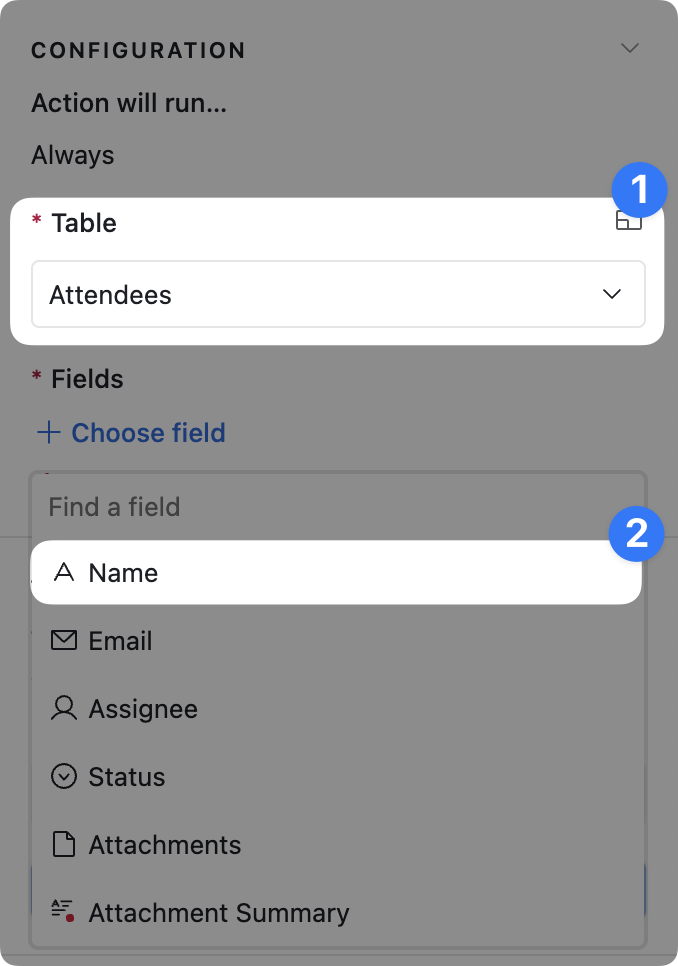
In the Configuration panel on the right-hand side, select the table where the new data from the webhook should go. In our example, that would be the Attendees table.
Under Fields click Choose field then select the field from the Attendees table that you would like to sync with your Automator recipe. For example, I’ve selected Name.
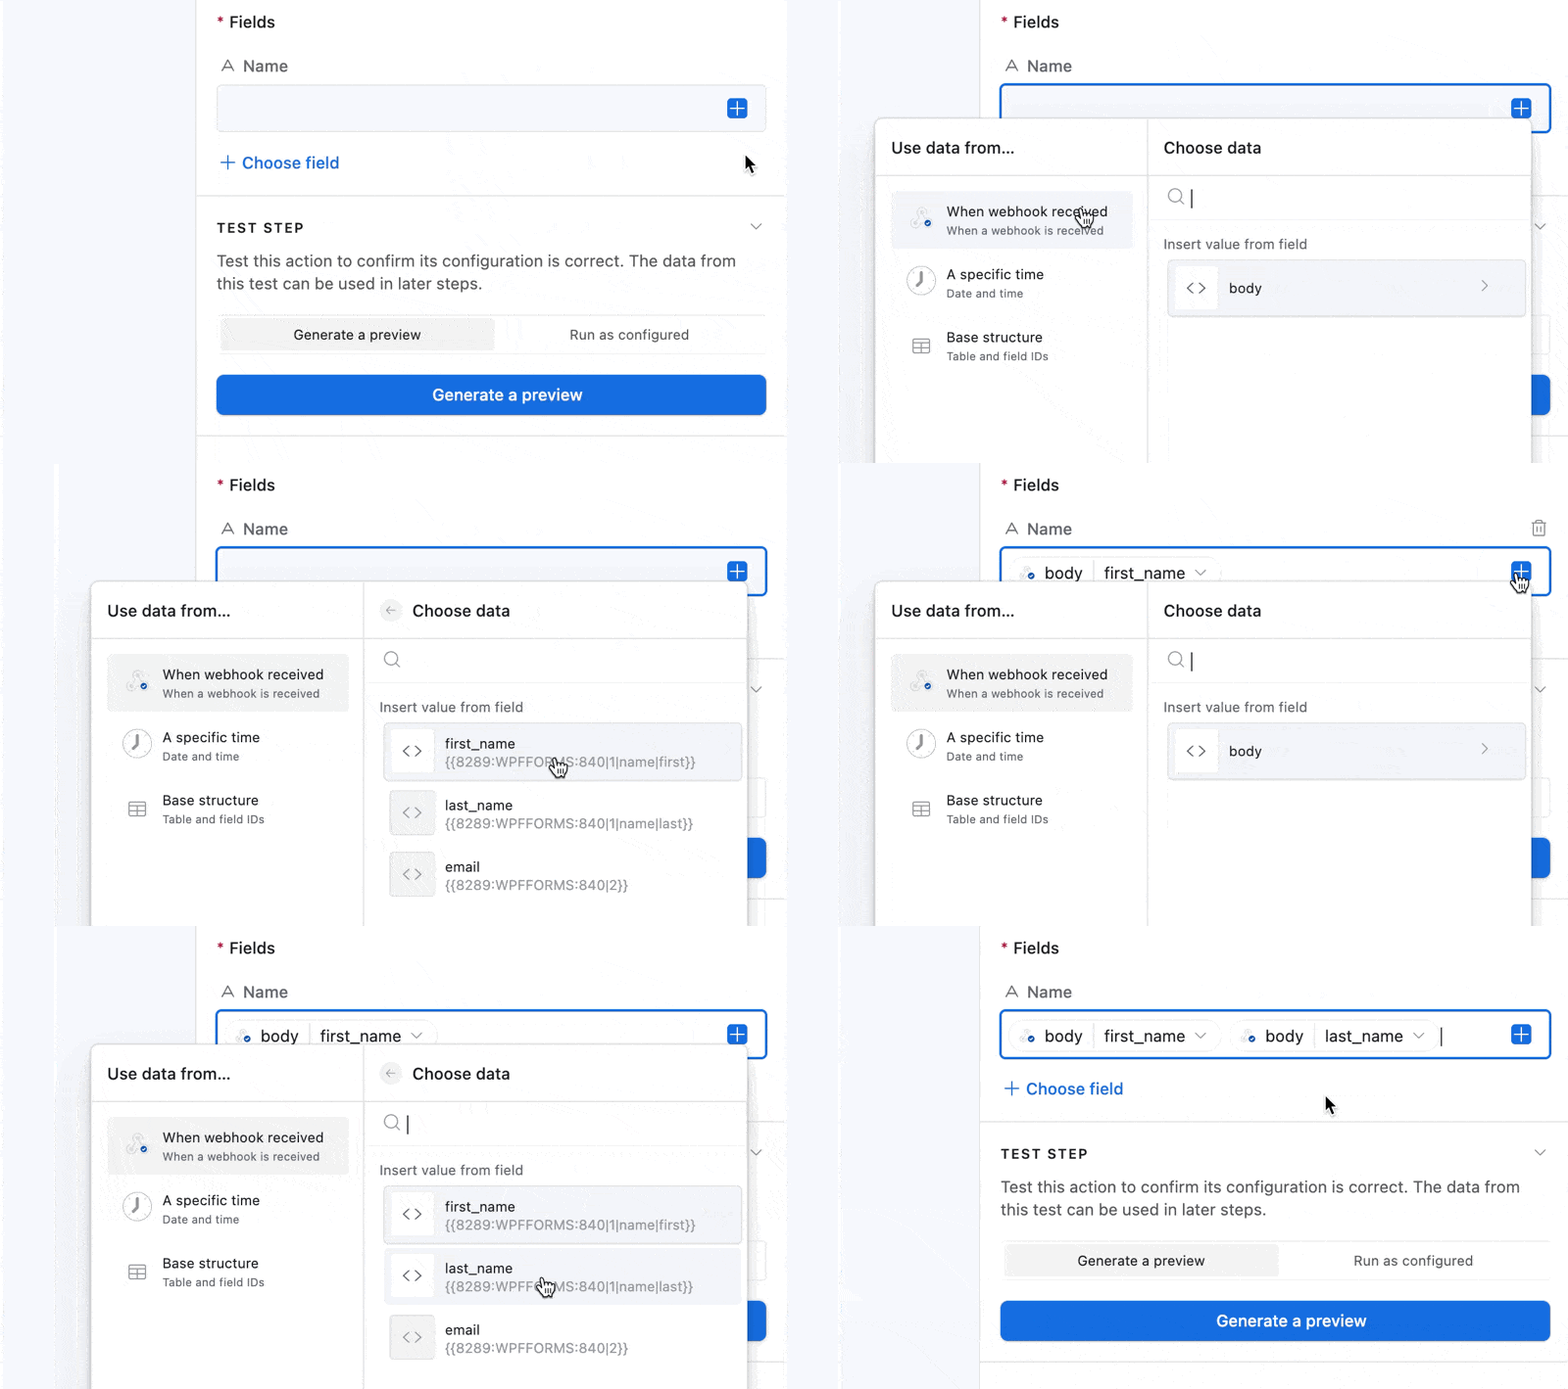
In the Name field, click on the plus sign. In the modal that appears, ensure that the trigger, “When webhook received” option has been selected.
Next, click body under Insert value from field and select the fields you want to use to populate the record.
You may recognize the dropdown list that appears. These are the key/value pairs that we put into Automator! Select the corresponding data for the field.
In this example, that would be the “first_name” and “last_name”. These are the keys that represent the data that Automator will populate with the information someone enters out event registration form.
When you’re done setting up your fields, you can test your automation without even having to fill out your registration form. In the Test Step section, simply click Run as configured then Run test.
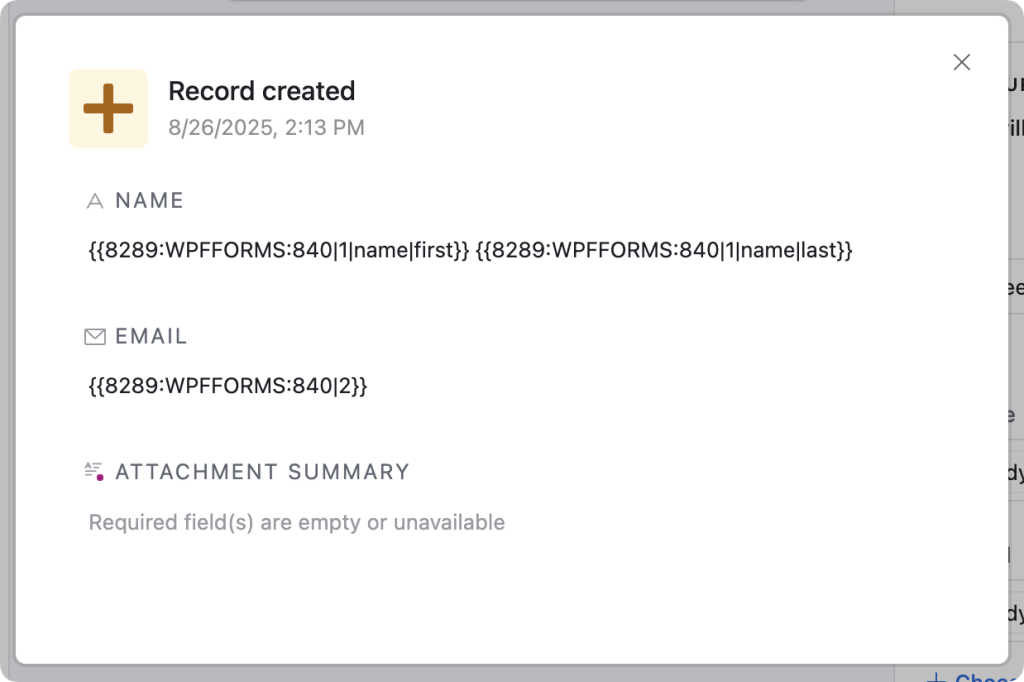
If the test was successful, Airtable will show you a report indicating that a record has been created.
Don’t forget to toggle your Airtable automation to On so you can sit back and watch as your database populates itself!
Frequently Asked Questions
Bigger, Better Bases with Automator
Now that you know how to connect your WordPress website to Airtable, you’re going to be dancing digital circles around those tech enthusiasts!
Use Airtable to manage your events, keep track of your WooCommerce inventory or plan your LearnDash courses—or do all three!
How do you use your WordPress website data? What are some of the ways that you use Automator and Airtable to improve your workflows? Let us know in the comments section below.
Until next time, happy automating!





This Post Has 0 Comments