Revive old WordPress posts with AI and Uncanny Automator. Learn how to reverse content decay…
How to Connect Keap to WordPress
Connect Keap to WordPress with Uncanny Automator. Sync your contacts, add and remove tags and even create customized AI-generated notes.
Are you looking for a way to create Keap contacts from your WordPress website? Maybe you want to tag your Keap contacts based on their Woo or EDD purchases? Perhaps you want to create contact notes based on LearnDash LMS progress?
Whatever the reason, if you’re trying to integrate Keap and WordPress, you’ve landed on the right page.
In this post, we’ll introduce you to Uncanny Automator: the #1 WordPress automation and integration tool. Then we’ll show you how to integrate Keap with your WordPress-powered business.
Let’s get started.
Why Connect Keap to WordPress with Automator
When it comes to integration tools, WordPress users have tons of options. However, there is one no-code solution that stands out from the rest: Uncanny Automator.
By creating simple combinations of triggers and actions called recipes, Automator allows you to connect all of your favorite apps and plugins, including Keap and countless more.
Automator comes packed with tons of powerful features that put customizable, time-saving automations at your fingertips. There are too many features for us to list here but these are just some of the advantages of Automator that make it the best tool for any WordPress job:
- Affordability: Unlike other automation and integration tools, Automator doesn’t charge per automation fees. That means you can sync dozens, hundreds or even thousands of contacts between Keap and WordPress without incurring any additional costs. Simply put, the more you automate and integrate, the more you save!
- Ease-of-Use: Automator’s user-friendly click-and-play interface means that you can automate complex workflows in just a few clicks—and even fewer minutes. Simply select the integrations you want in your automated workflow, choose a few triggers and actions and let Automator do the work.
- Seamlessness: Automator integrates fully with your WordPress website and your chosen apps and plugins. This means that you incorporate as much data into your Keap and WordPress workflows as you choose. Using tokens, you can sync any data from WordPress to your Keap CRM including order information, course progress, login dates, and much more.
- Integrations and Addons: Automator has 214 integrations with more on the way all of the time. In case that wasn’t enough, Automator’s Custom User Fields, Restrict Content and User Lists addons makes managing your WordPress content and connecting it with Keap that much easier.
- Scalability: Want to replace one tag with another across thousands of contacts? As your WordPress business grows and your user and contact lists get longer, you’ll appreciate Automator’s Post Loops and User Loops features. Loops give you the ability to create and manage as countless contacts with the click of a button.
These are just some of the standout features that make Automator the best tool for connecting Keap to WordPress.
Ready to manage your contacts with ease? Get your Automator Pro license now so you can follow along>>>.
Not sure that Automator is for you? No worries. Download the FREE FOREVER version of Automator then register your account. You’ll get a limited number of app credits so you can connect Keap to WordPress—and so much more!
Add WordPress Users to Keap Companies
Now that you have your Automator Pro license or some app credits to spend, let’s take a look at creating our first Automator recipe.
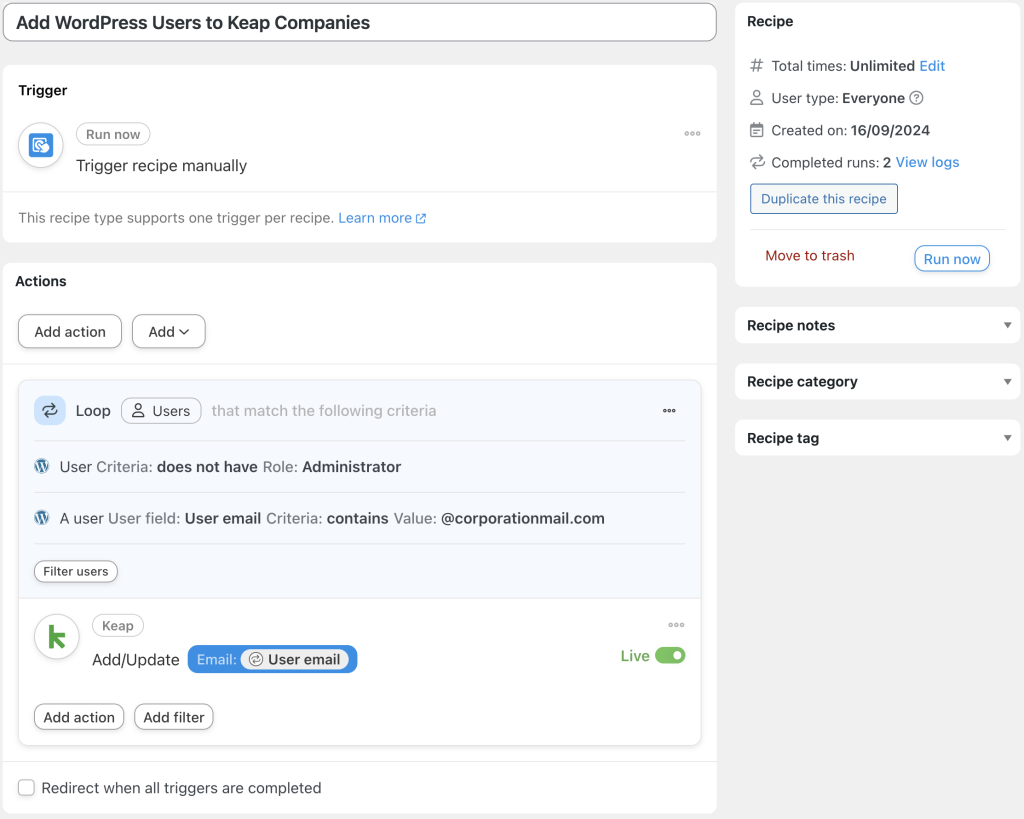
Keap’s Companies features is a key organizing tool for your contacts. Using Automator’s Loops feature, we can both add WordPress users to Keap and then sort them into companies, as pictured in the recipe above.
Here’s how we did it.
Step 1: Create and Name a New Recipe
From your WordPress Admin Dashboard, navigate to Automator > Add new recipe. In the popup window that appears, select Everyone.
Give your recipe a name that makes it easy to recognize at a glance. For example, we have named this recipe “Add WordPress Users to Keap Companies”.
Step 2: Configure Your Trigger(s)
In the Trigger panel, from the menu of available integrations, select Run now.
From the dropdown list that appears, select Trigger recipe manually. Once you’re finished, your trigger should look like this:
Step 3: Configure Your Loop Action(s)
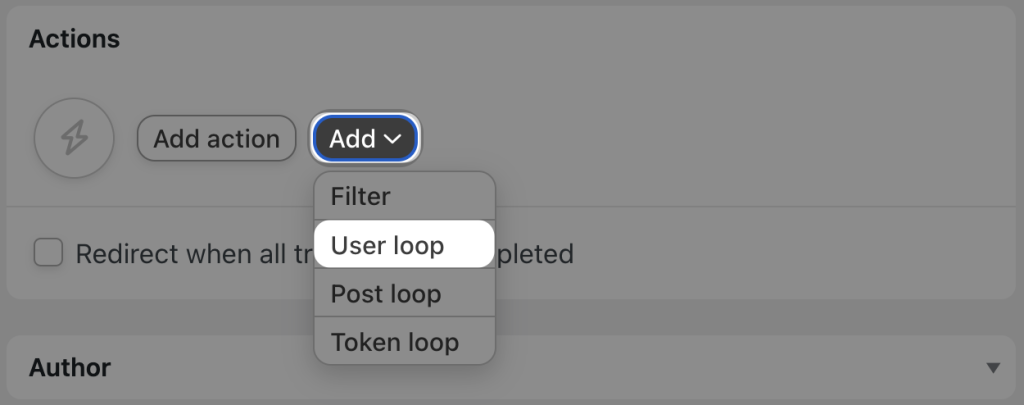
In the Actions panel, click Add and select User loop.
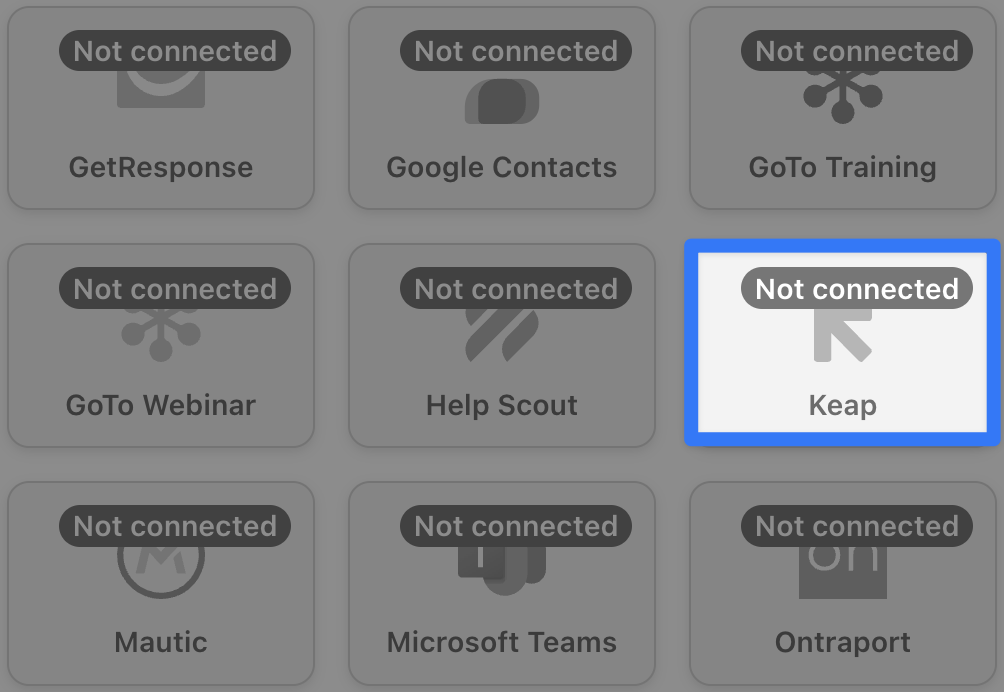
Within the Loop pane, click Add action and select Keap.
If you haven’t already connected your Keap account, simply click Connect account in the modal that appears and follow the prompts. Once you’ve connected your account, return to the recipe editor.
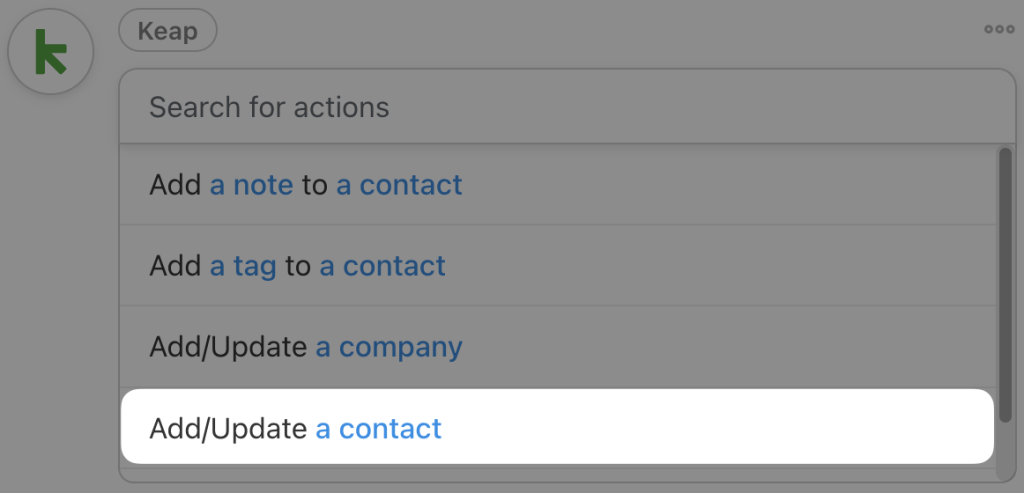
From the dropdown list that appears, select Add/Update a contact.
Automator will present you with a form to fill out the new contact’s information. We’re going to use tokens (i.e., dynamic data pulled from your WordPress website and from within recipes) to fill out the form fields.
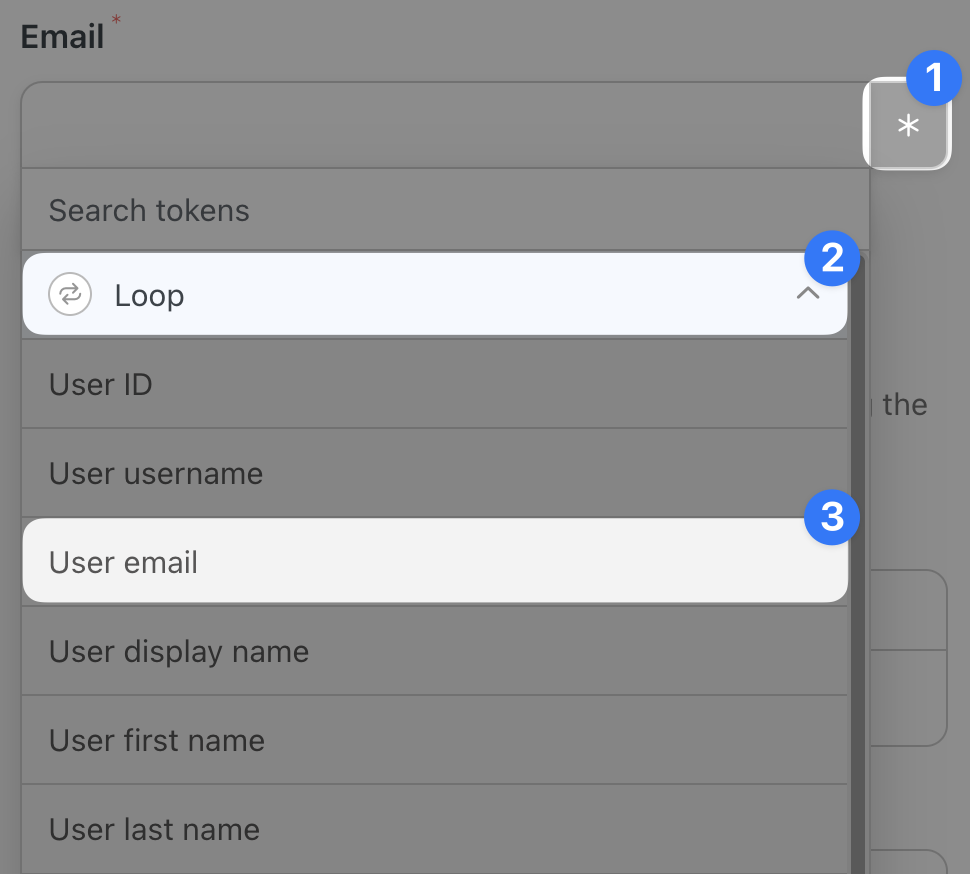
To use a token, click on the Asterisk in a field and select the corresponding token from the dropdown list. For example, in the Email field, we selected the loop token “User email”.
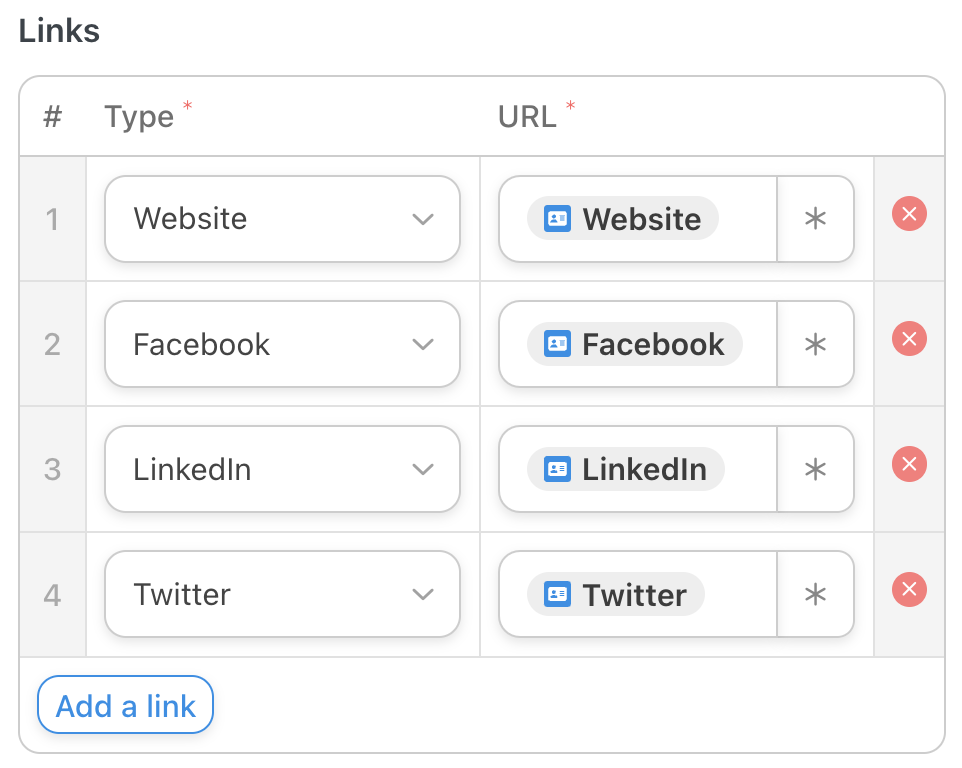
Fill out your contact’s details by clicking Add field under Contact info, Phone numbers and Links using tokens and/or static data. For example, under Links, we used Automator’s Custom User Fields Addon to sync our contact’s social media profiles to Keap:
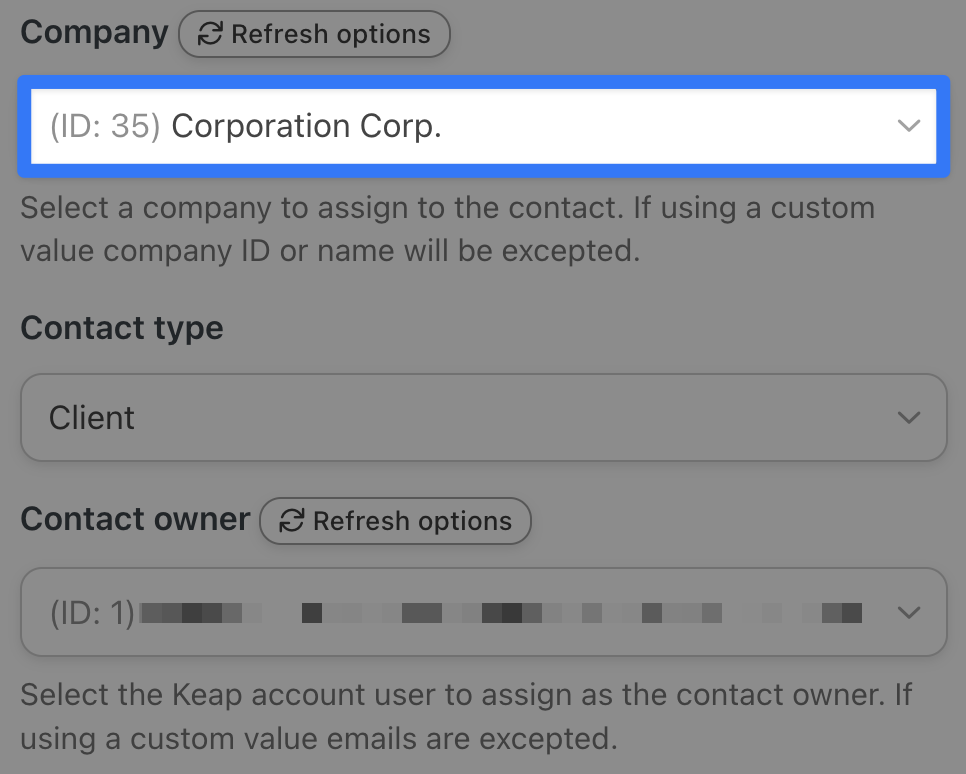
Next, under Company, select the Keap company to which you would like to add contacts. (Note: You do not need to add WordPress users to a Keap company. You can simply add them to your contacts and sort them later if you choose.)
For example, we have selected “Corporation Corp.”. Once you’re finished, click Save.
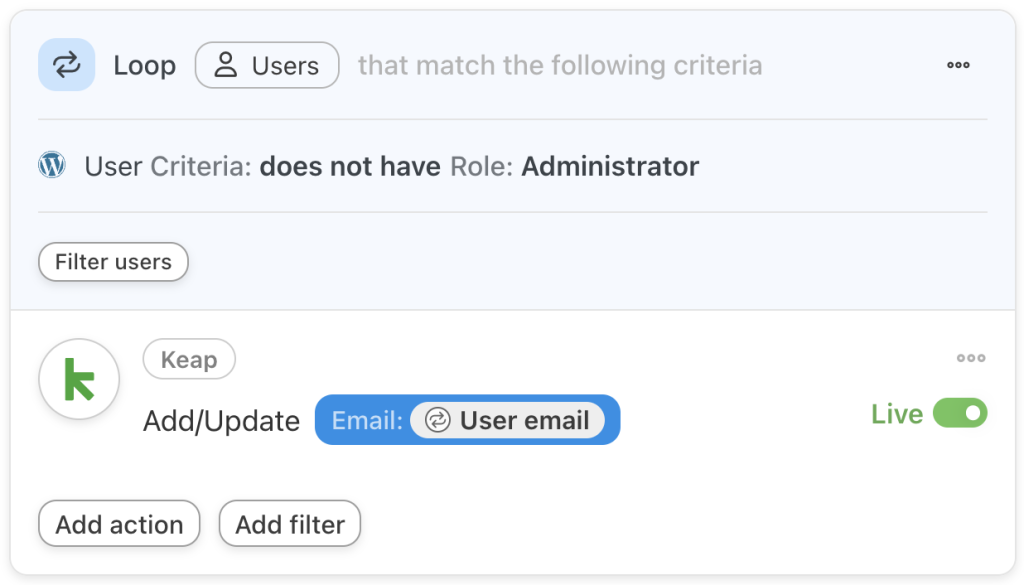
Your Loop pane should now look something like this:
Step 4: Configure Your Loop Filter(s)
As our recipe stands, Automator will add every WordPress user who isn’t an Administrator to our Keap contacts. Of course, we want to be somewhat more targeted than that. And this is where loop filters come in.
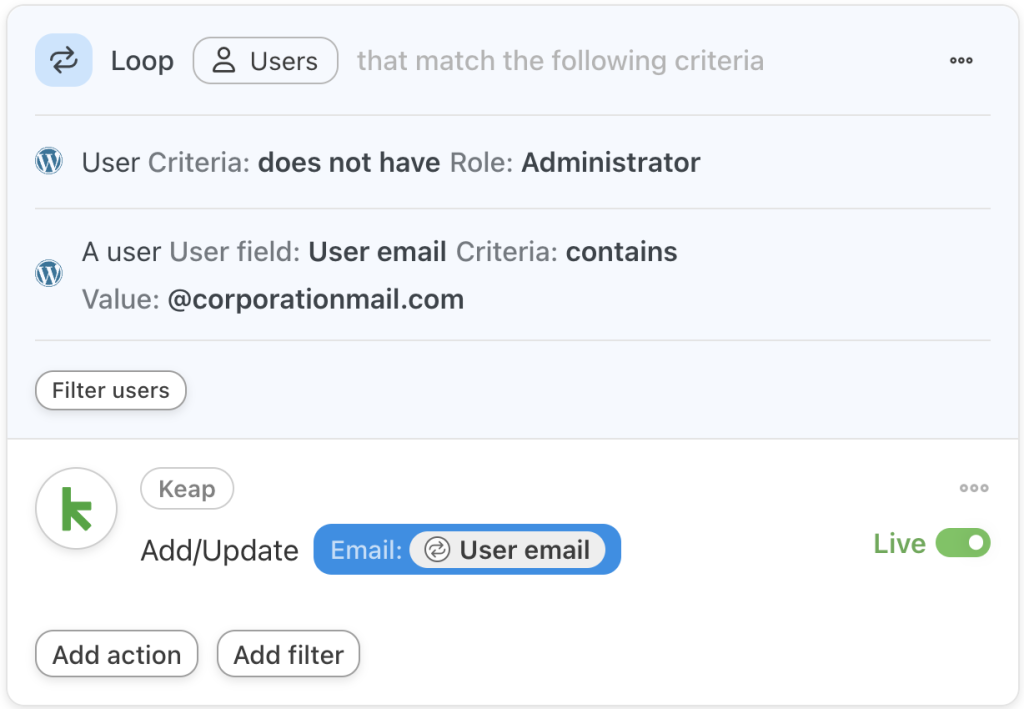
By default, Automator will always add the loop filter “User Criteria: does not have Role: Administrator” to every new User loop. You can Edit or Delete this filter by clicking the corresponding icons.
We’re going to leave this filter in place and add a second one that will help us sort the right users into our Keap company.
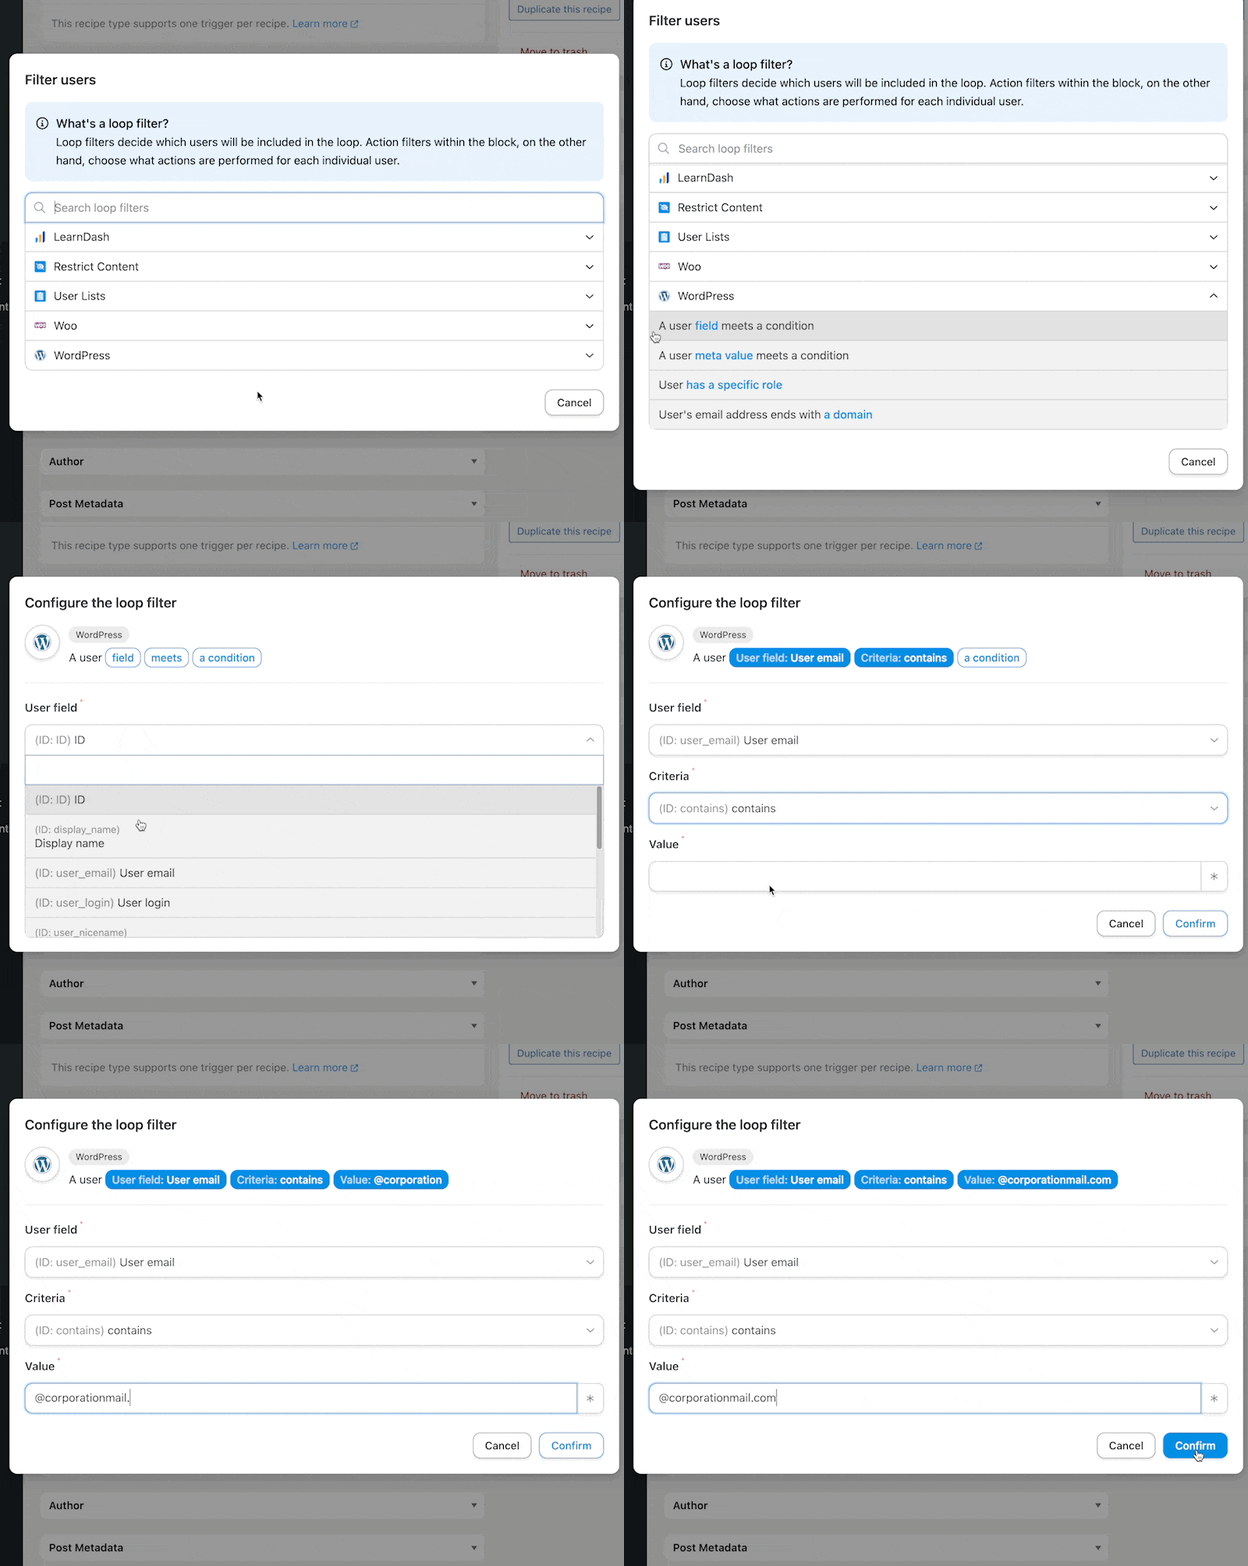
To add a loop filter, click Fitler users. In the modal that appears, select WordPress > A user field meets a condition.
Set the User field and Criteria to match a Value that only the WordPress users who you want to have added to your Keap company will satisfy. For example, we have configured our filter so that only WordPress users whose email address contains “@corporationmail.com” will be added to the Keap company “Corporation Corp.”.
Once you’re finished, click Confirm. Your Loop pane should now look something like this:
Step 5: Run now!
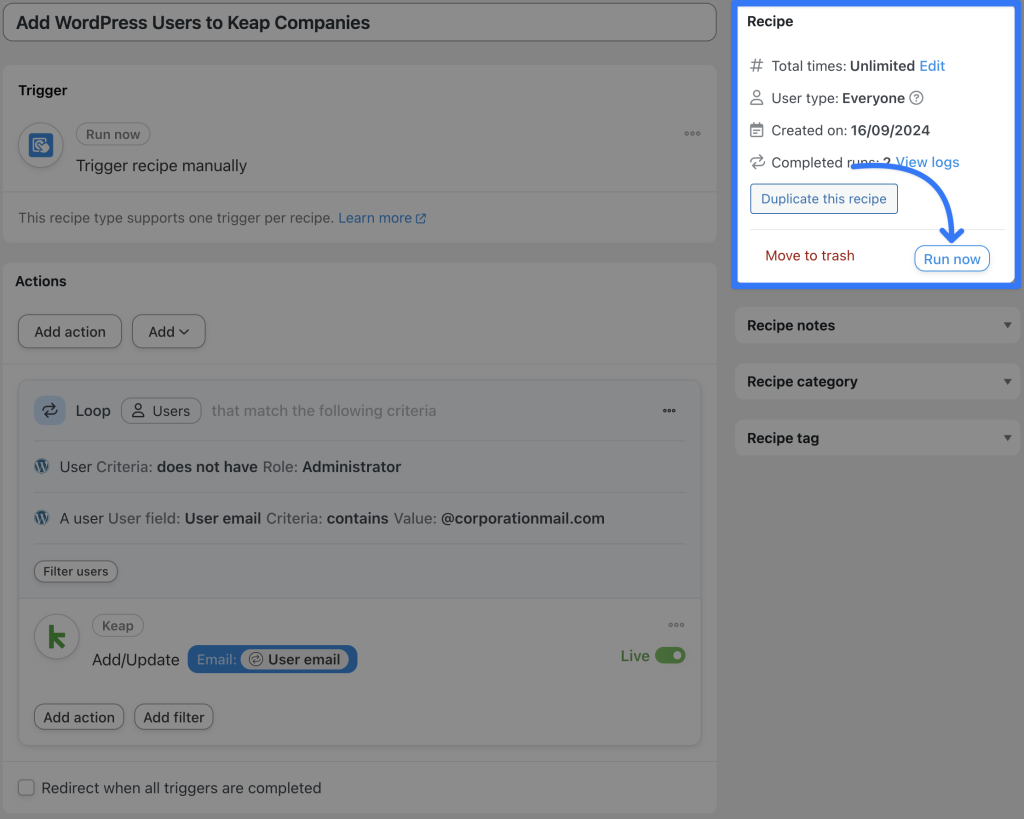
You’re just about ready to add your WordPress users to your Keap company. All that’s left for you to do is click Run now.
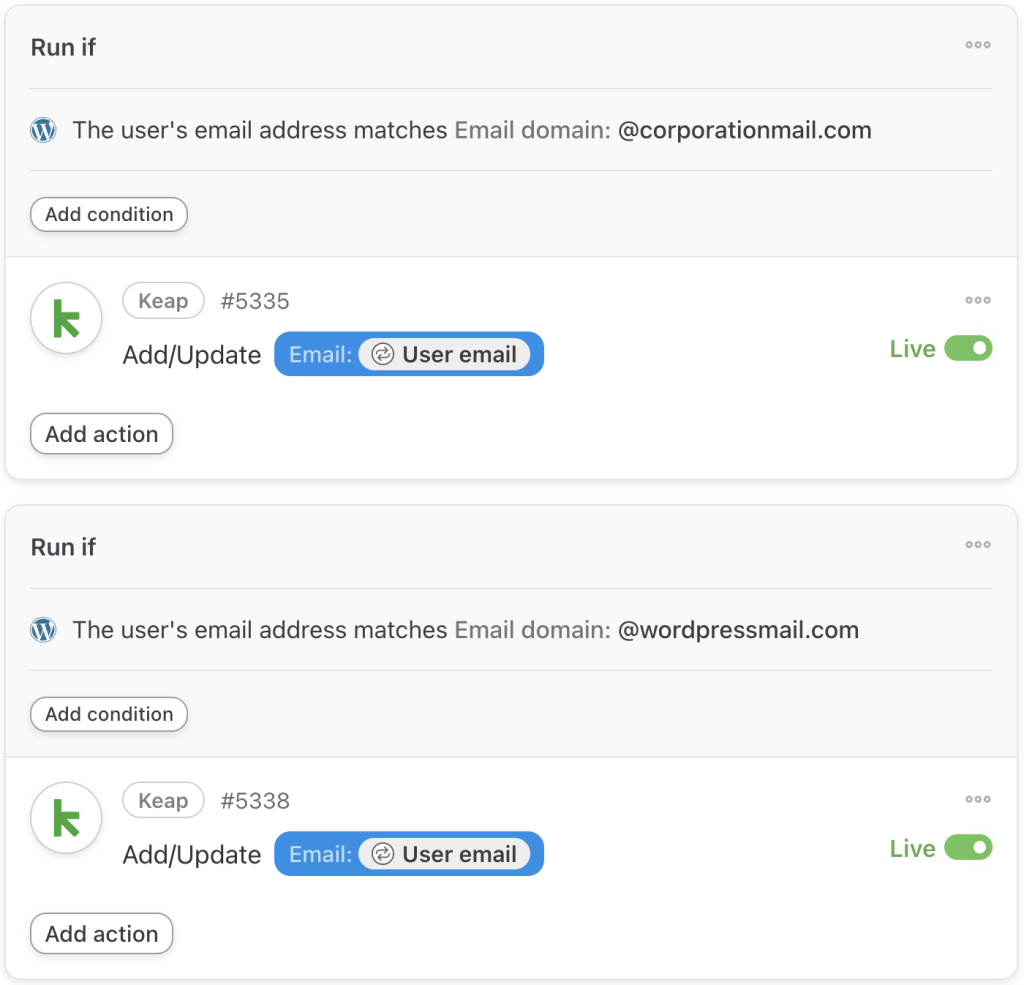
That’s it! You’ve just seamlessly turned your WordPress users into Keap contacts. But why stop there? You can take this recipe even further by adding individual action filters to your User loop to sort WordPress users into different Keap companies.
Tag Woo Customers in Keap
Now that your WordPress users have been added to Keap and sorted into their companies, let’s take a look at more ways to segment your contacts.
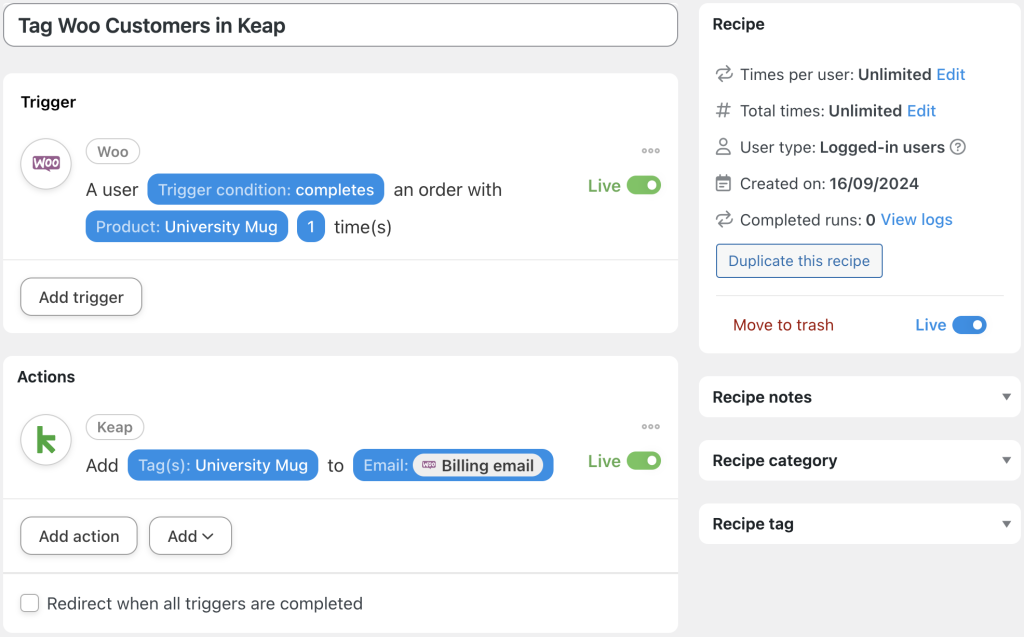
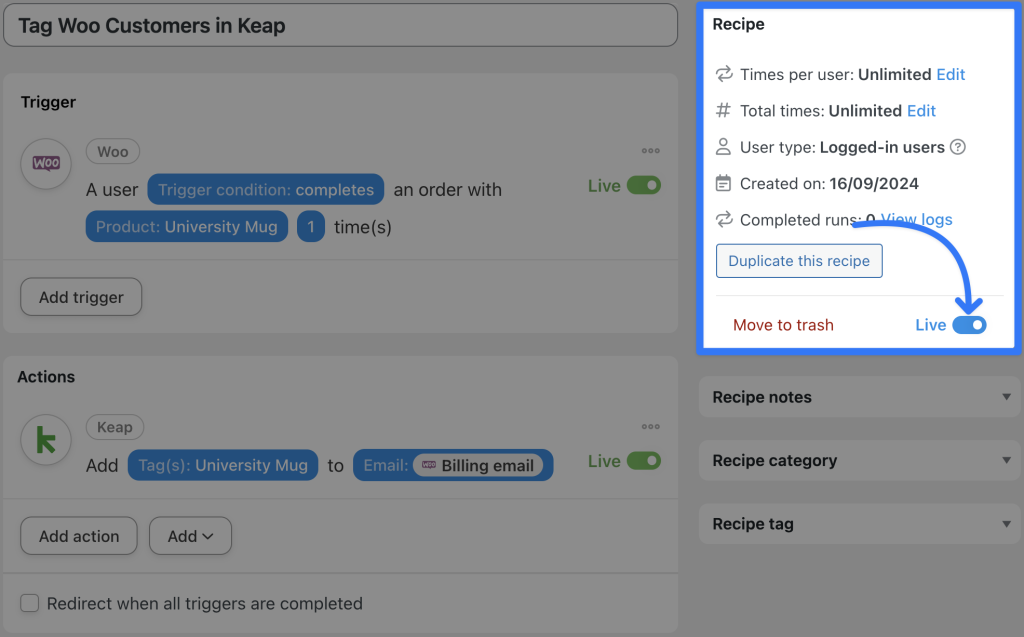
In the recipe pictured above, for example, we’re able to tag our Woo customers in Keap based on their purchases. Here’s how we did it.
Step 1: Create a New Recipe
From your WordPress Admin Dashboard, navigate to Automator > Add new recipe. In the popup window that appears, select Logged-in users.
Step 2: Name Your Recipe
Give your recipe a name that makes it easy to recognize at a glance. For example, we have named this recipe “Tag Woo Customers in Keap”.
Step 3: Configure Your Trigger(s)
In the Trigger panel, from the menu of available integrations, select Woo.
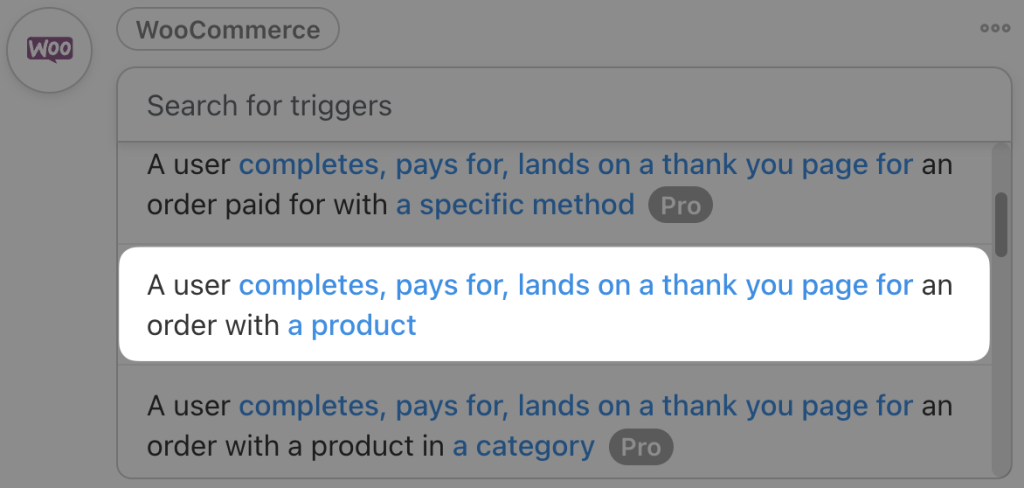
From the dropdown list that appears, select A user completes, pays for, lands on a thank you page for an order with a product.
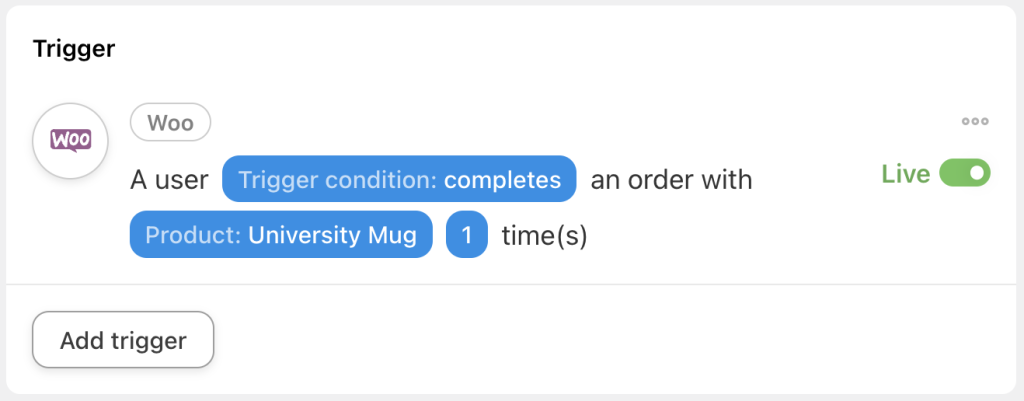
Automator will prompt you to select the Trigger condition and Product. For example, we have selected “completes” and “University Mug”. Once you’re finished, click Save. Your completed trigger should look something like this:
Step 4: Configure Your Action(s)
In the Actions panel, click Add action and select Keap.
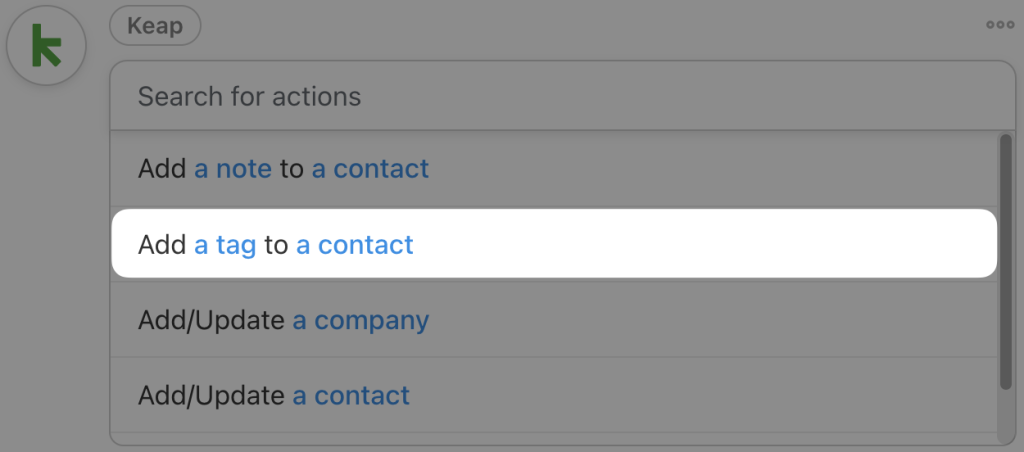
From the dropdown list that appears, select Add a tag to a contact.
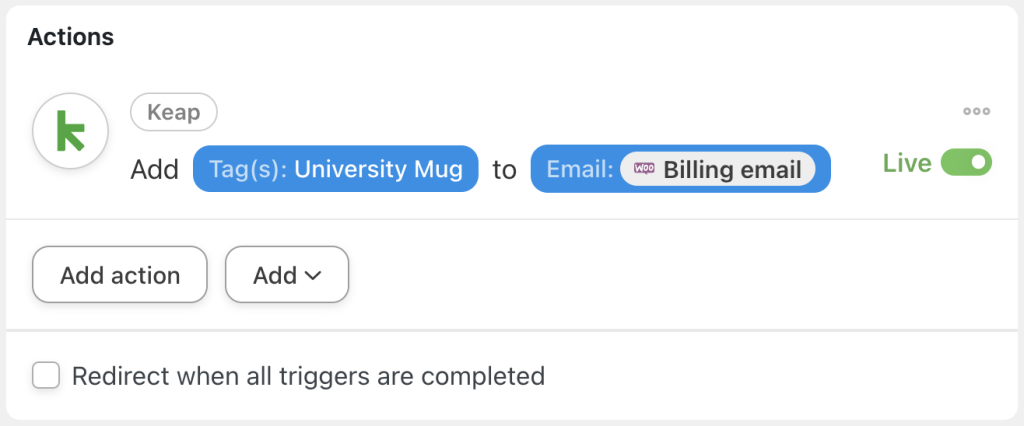
Automator will present you with two fields. In the Tag(s), select the tag that corresponds to the product from your trigger. For example, we have selected the tag “University Mug”.
In the Email field, select a token that corresponds to the contact’s email in Keap. This can be the “User email” token or the “Billing email” token from the Woo trigger.
Once you’re finished, click Save. Your completed action should look something like this:
Step 5: Go Live!
Ready to start tagging your Keap contacts from their Woo purchases? Just toggle the recipe from Draft to Live and let Automator segment your contacts in real-time.
More Exciting Ways to Connect Keap to WordPress
As we mentioned before, Automator has 214 integrations, meaning that connecting Keap to WordPress is just the beginning.
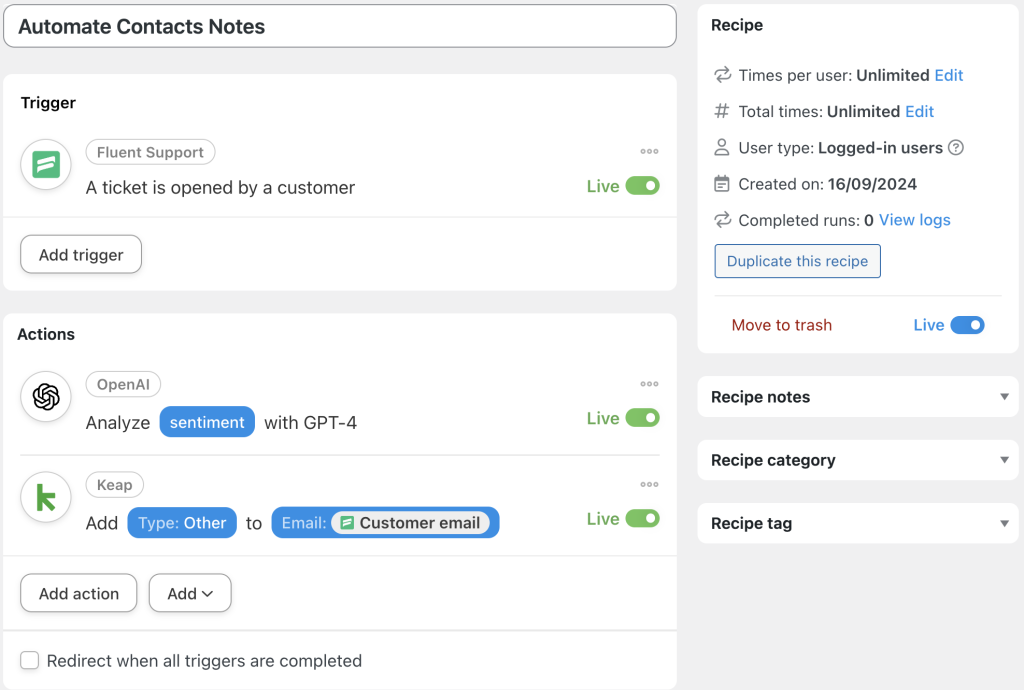
One of Automator’s most powerful and popular integrations is with OpenAI. Whether you want to generate images or excerpts for social media platforms, you can automate the process with this integration.
Better yet, as in the recipe pictured above, you can connect Keap to FluentSupport with Automator and add OpenAI into the mix to perform sentiment analysis before adding a note to the contact.
How will you connect Keap to WordPress? Get your Automator Pro license and try out different integrations to save more time, generate more revenue and augment your workflows>>>.
Frequently Asked Questions
Conclusion
Connecting Keap to WordPress with Uncanny Automator is a powerful way to streamline your workflows and automate routine tasks.
By following the steps outlined in this guide, you can easily sync data, apply tags, and “Keap” your contact lists up to date—all without writing a single line of code. Whether you’re managing ecommerce data, course progress, or simply keeping track of customer interactions, Automator ensures your systems are working together seamlessly.
Ready to take your WordPress and Keap integration to the next level? Try Uncanny Automator today and discover how easy automation can be!
Until next time, happy automating!









This Post Has 0 Comments