Revive old WordPress posts with AI and Uncanny Automator. Learn how to reverse content decay…
How to Connect LifterLMS to HubSpot—for FREE!
Connect LifterLMS to HubSpot with Uncanny Automator and upgrade your multichannel eLearning marketing game—for FREE!
If you’re looking to upgrade your LifterLMS marketing automation, then you’ve landed on the right page.
In this post, we’ll show you how to create a seamless LifterLMS and HubSpot integration using Uncanny Automator. By the end of this detailed walkthrough, you’ll be able to:
- add LifterLMS students to HubSpot,
- track overall grade in real-time,
- track overall progress in real-time,
- create automated multichannel campaigns, and
- much more!
But that’s enough of an introduction for now. Let’s get started upgrading our elearning marketing automation.
Why Connect LifterLMS to HubSpot with Automator
For those who don’t know, Uncanny Automator is the #1 no-code automation and integration tool for WordPress websites.
Using simple combinations of triggers and actions called recipes, Automator allows you to connect all of your favorite apps and plugins. If you’ve ever asked yourself, “How do I connect my CRM to my LMS?” or, “How can I connect my LMS to my ecommerce platform and my internal Slack channel?” then Automator is your answer.
While it is possible to manually upload your LifterLMS students and their data to HubSpot, with Automator there are some key advantages:
- Real-time Updates: Automator gives you the ability to update your HubSpot CRM records in real-time, ensuring that your elearning and CRM platforms are synced. This means that you can deliver timely and actionable emails and notifications to your learners and instructors.
- Deep Integration: Automator taps securely and directly into your WordPress website and HubSpot CRM. This ensures that you can sync as much or as little of your LifterLMS data with HubSpot as you choose.
- Time and Cost Savings: Automating your workflows allows you to save time, so you can do more of what you love and less of what you don’t. Additionally, Automator has no per automation fees, meaning the more you automate and integrate, the more you save.
- More Integrations, More Possibilities: Automator has 214 integrations, giving you more ways to automate your workflows. From elearning and ecommerce, to blogging, memberships, and even AI-powered content creation, Automator has you covered.
Ready to connect LifterLMS to HubSpot?
Get Automator Pro now and unlock your WordPress website’s full potential >>>
Not sure if you’re ready for all of that power? No worries. You can still connect LifterLMS to HubSpot for free using the free forever Automator plugin. Don’t forget to register your account to receive app credits so you can try out some of the recipes in this walkthrough and connect your WordPress website to other apps such as OpenAI, Facebook, Slack, and Zoom.
Add LifterLMS Students to HubSpot
Now that you have Automator, let’s get started creating our first recipe. Probably the first thing you’ll want to do is sync your LifterLMS student rolls with your HubSpot CRM contact list.
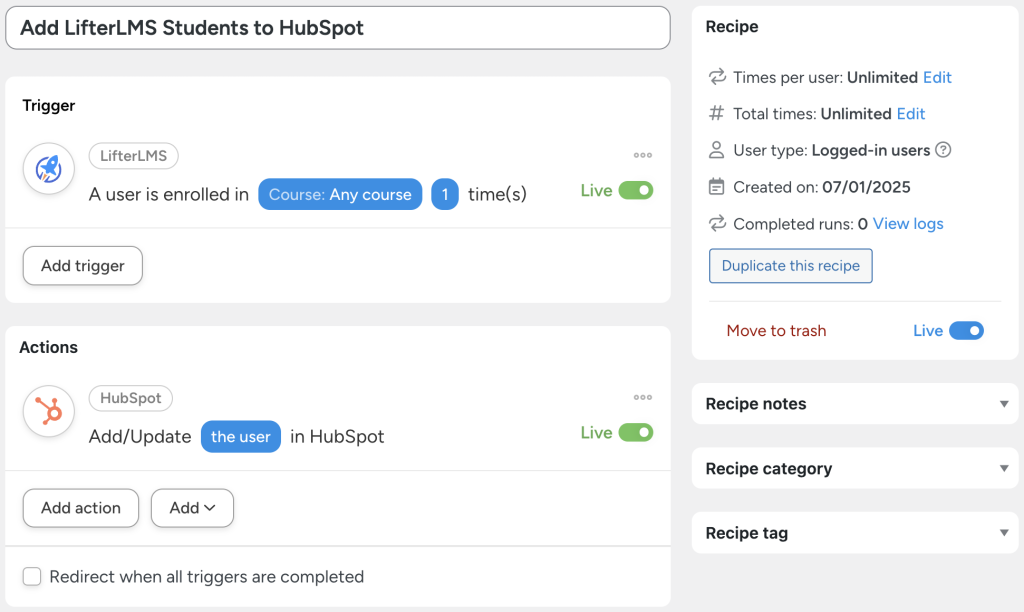
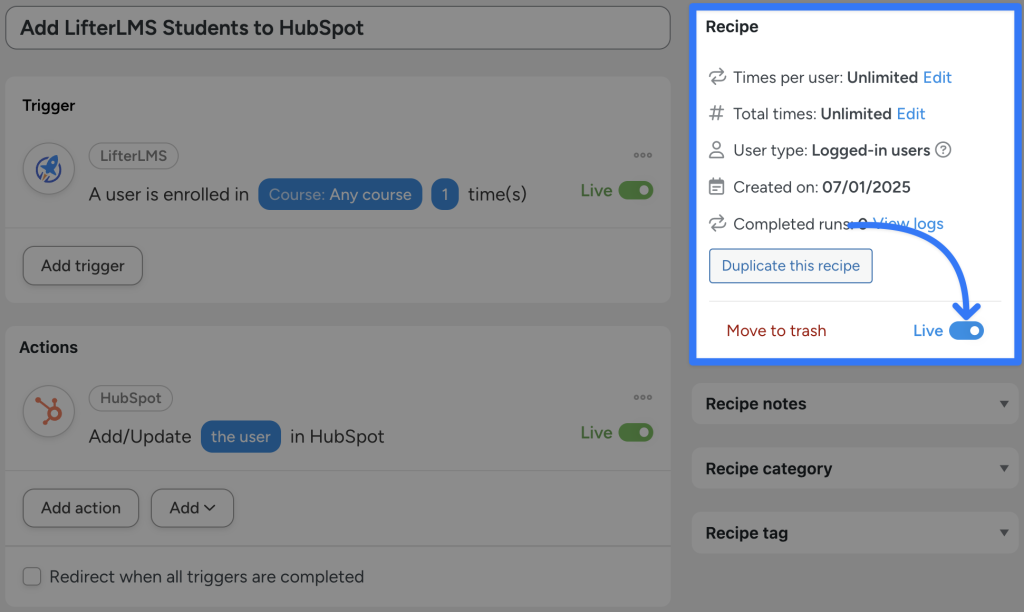
In the recipe pictured above, we’re able to add/update our LifterLMS students’ records whenever they enroll in a new course.
In eLearning terms, this recipe is just the primer course. But it’s a good place to start for connecting LifterLMS to HubSpot. Here’s how we did it:
Step 0 (Optional): Export Existing Students
Before we get into setting up the Automator recipe to connect LifterLMS to HubSpot in real-time, let’s take a look at exporting your existing students to your CRM contact list.
There are two ways accomplish this:
- Download and import a CSV file to HubSpot, or
- Run an Automator User Loops recipe.
User Loops are an Automator Pro feature, so if you have the free Automator plugin, use the first method of downloading and importing a CSV file to HubSpot. If you have Automator Pro, you can jump down to the instructions for the User Loops recipe.
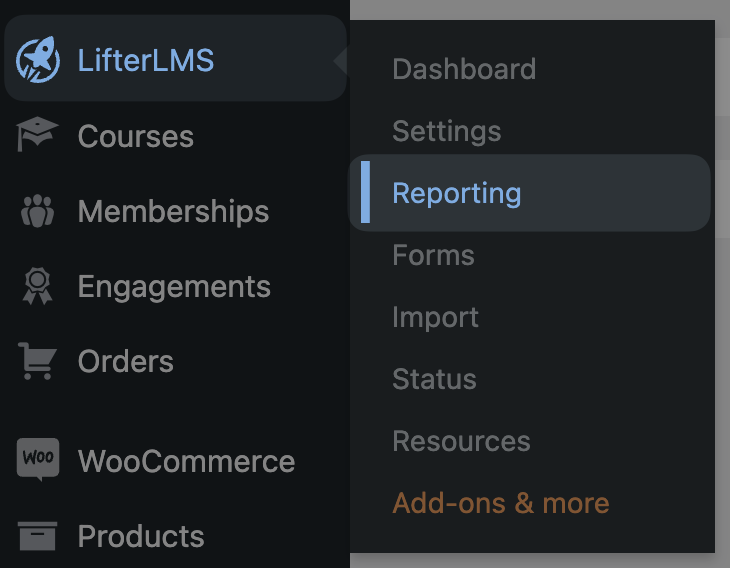
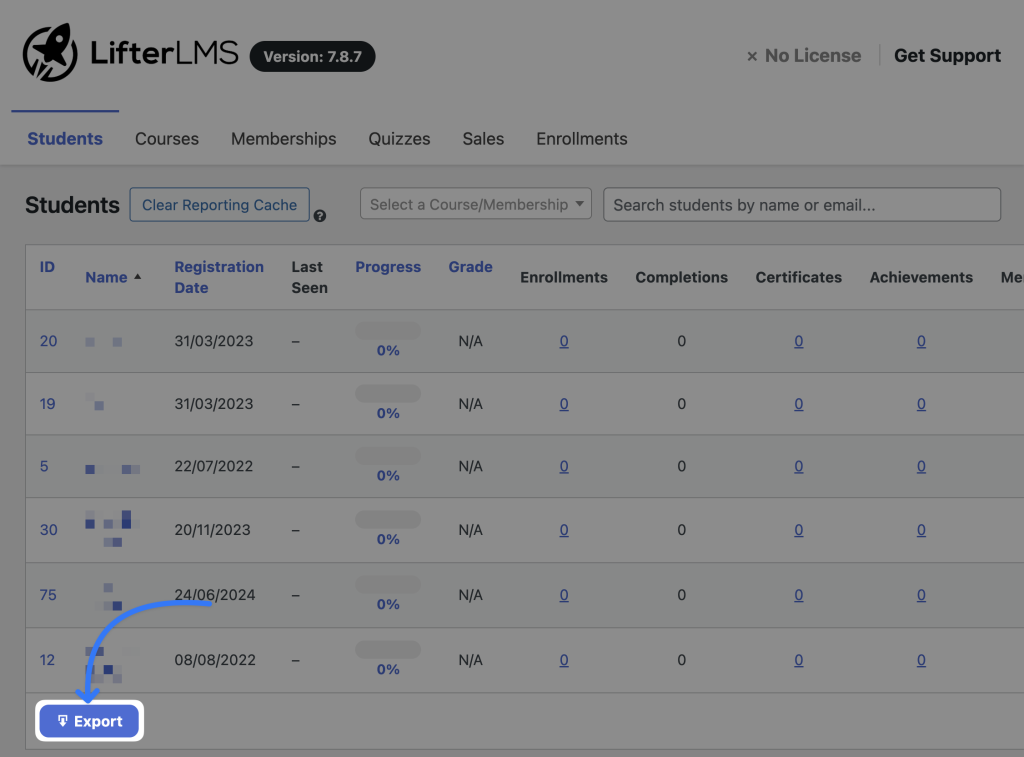
LifterLMS allows you to download CSV files of reports. To do this, navigate to LifterLMS > Reporting from your WordPress Admin Dashboard.
Click Export under the “Students” tab.
Finally, navigate to your HubSpot account and click Import in the upper-right hand corner. Follow the instructions to complete the process.
If you need a detailed walkthrough on importing CSV files into HubSpot, you can find a tutorial here.
Step 1: Create a New Recipe
From your WordPress Admin Dashboard, navigate to Automator > Add new recipe. In the popup window that appears, select Logged-in users.
Step 2: Name Your Recipe
Give your recipe a name that makes it easy to recognize at a glance. For example, we have named this recipe “Add LifterLMS Students to HubSpot”.
Step 3: Configure Your Trigger(s)
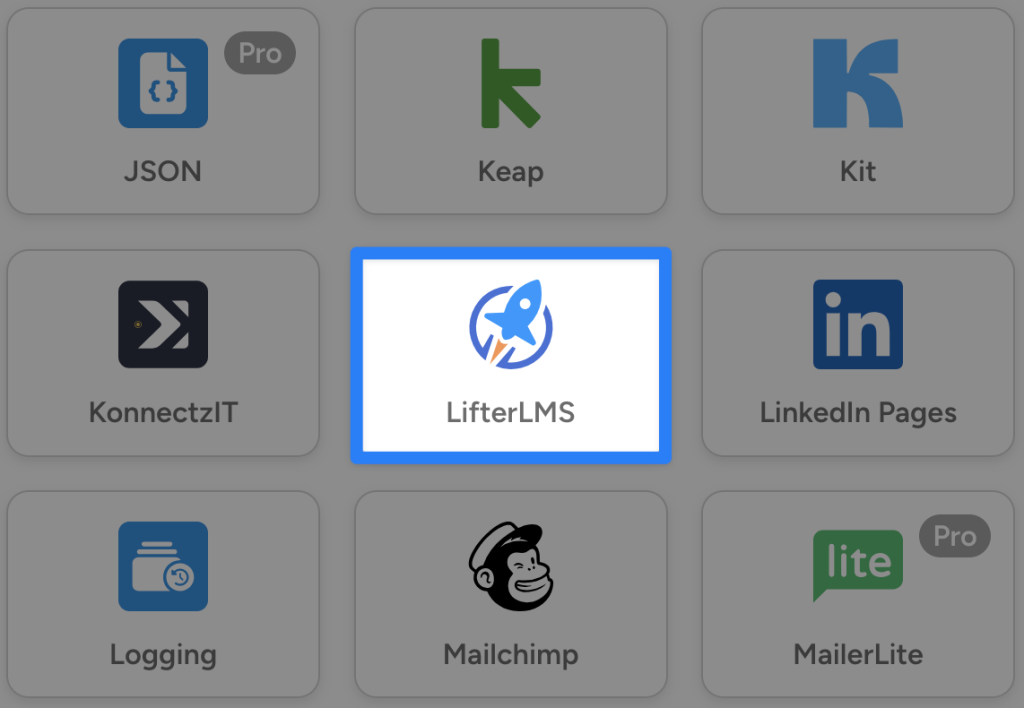
In the Triggers panel, from the menu of available integrations, select LifterLMS.
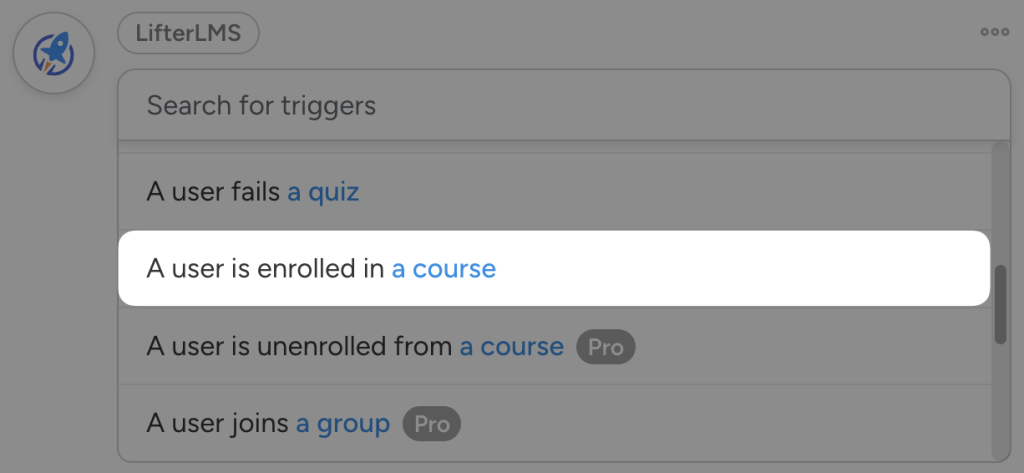
From the dropdown list that appears, select “A user is enrolled in a course”.
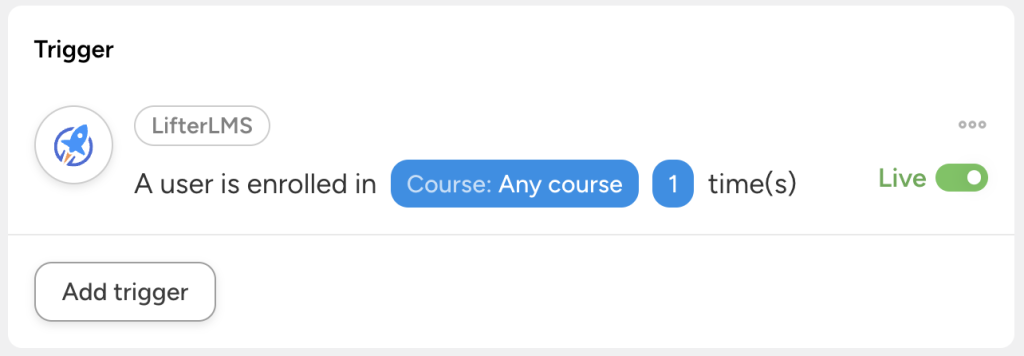
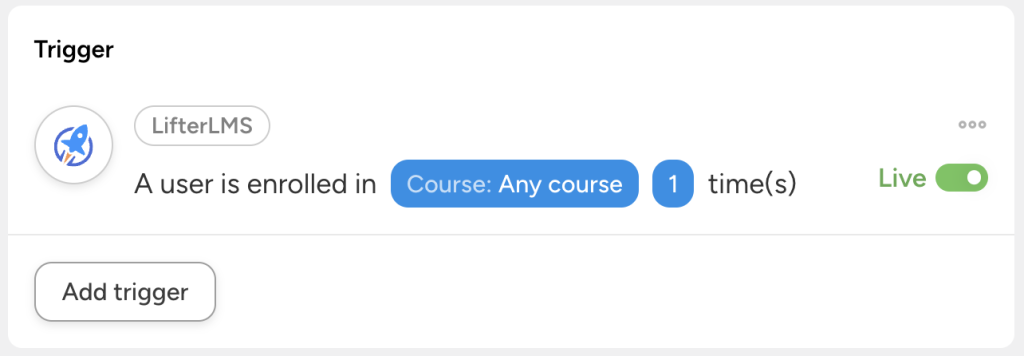
Automator will prompt you to select a course. Because we want to keep our HubSpot contact list as updated as possible, we have left the default selection “Any course”.
Once you’re finished, click Save. Your completed trigger should look like this:
Step 4: Configure Your Action(s)
In the Actions panel, click Add action and select HubSpot.
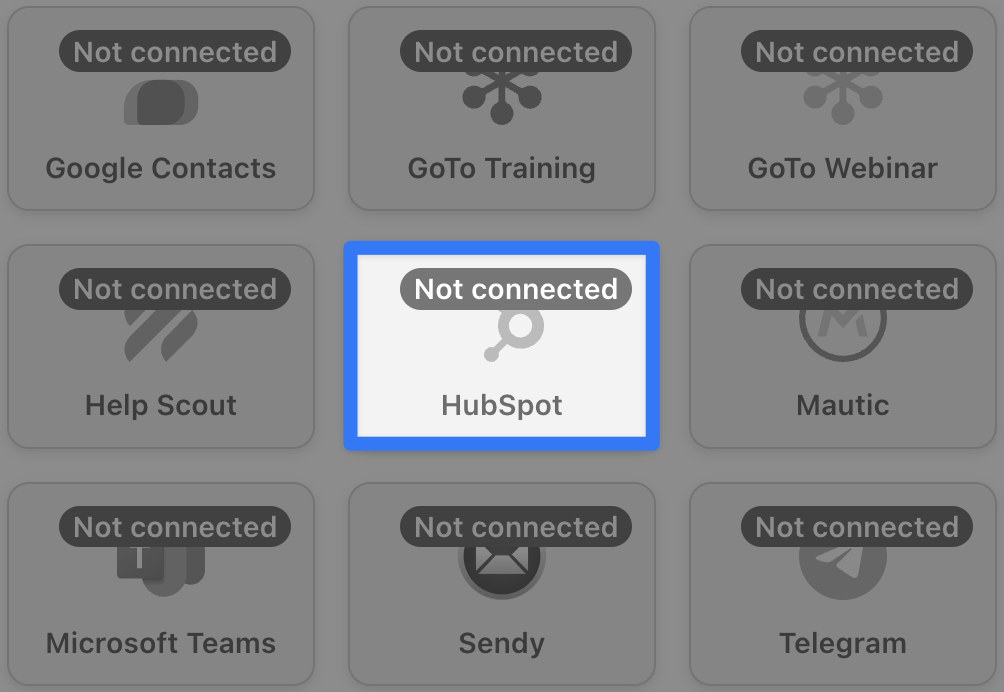
(Note: If you have not yet connected your HubSpot account, simply click Connect account in the modal that appears and follow the instructions.)
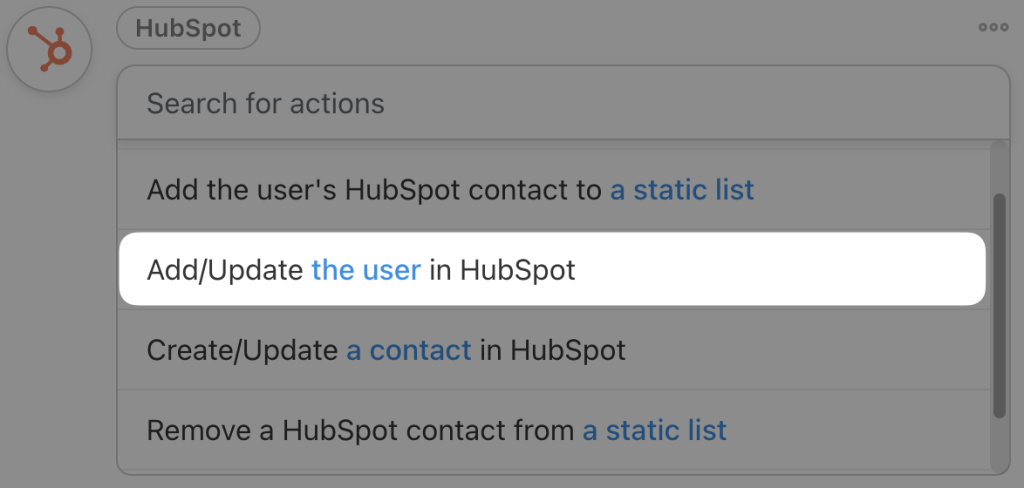
From the dropdown list that appears, select “Add/Update the user in HubSpot”.
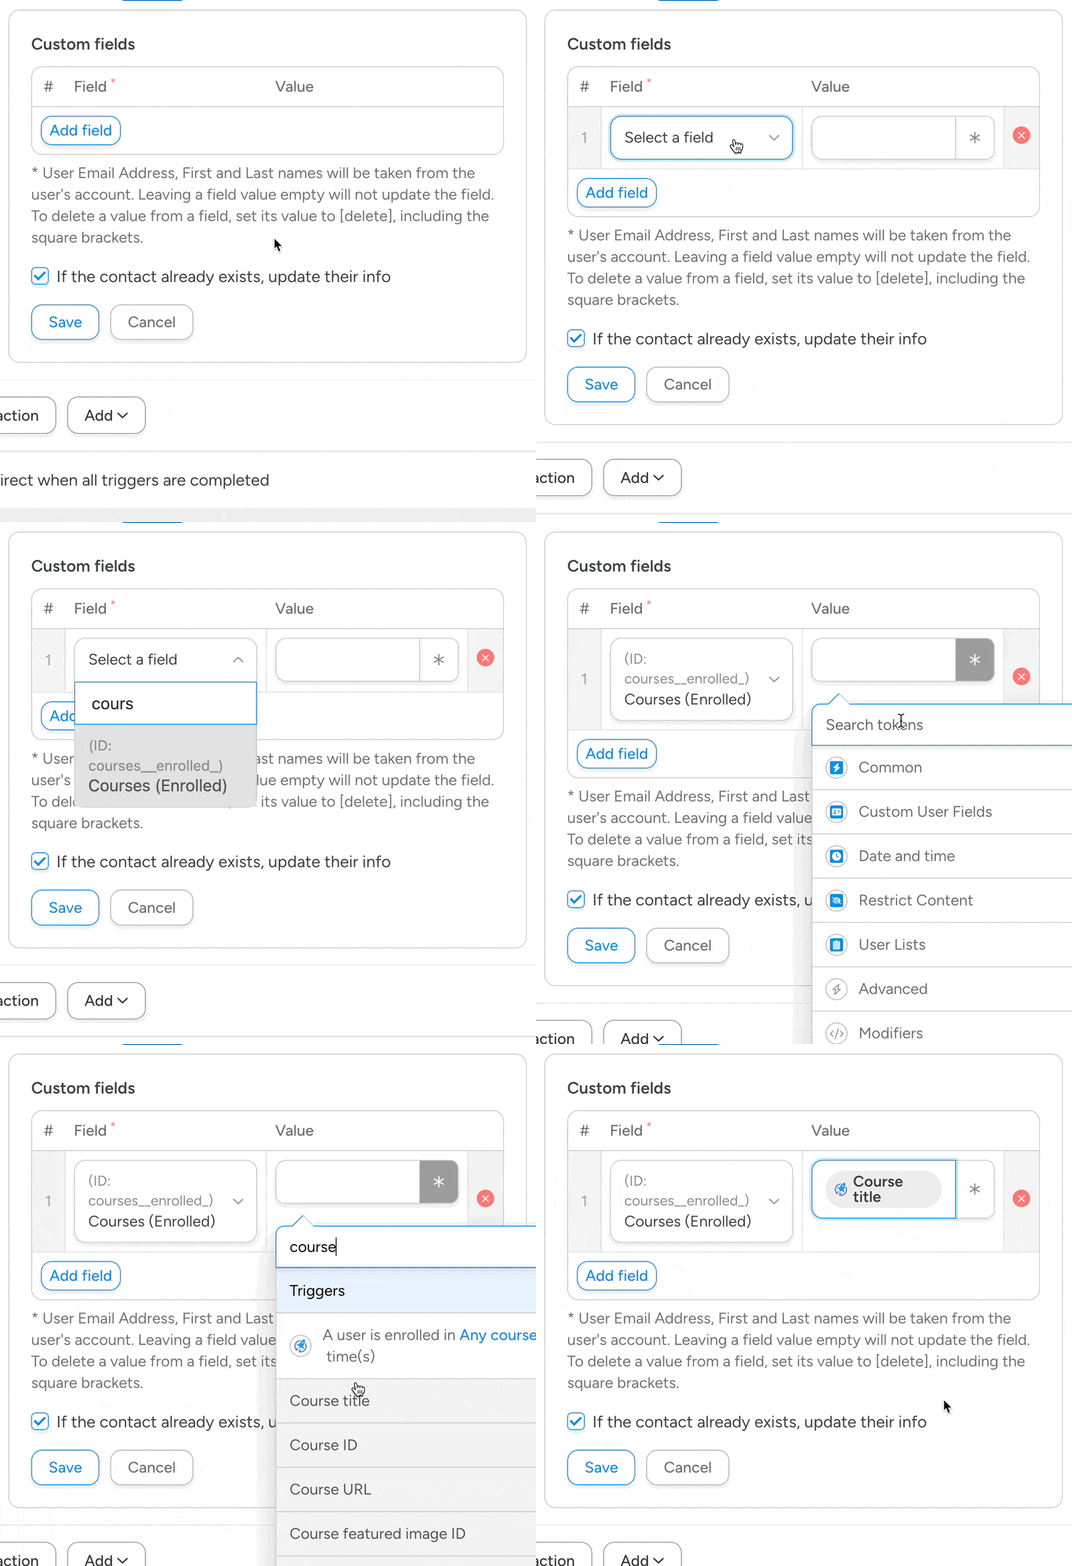
By default, Automator will add/update the user’s email address, first name, and last name. However, you can choose to add/update additional fields to reflect the student’s new activity.
To add/update fields, simply click Add field. Next, in the Field column, select the HubSpot field you want to update.In the Value column, enter a static value or select a token (i.e., dynamic data) by clicking on the Asterisk in the field.
Add as many fields as you want to update. Once you’re finished, click Save. Your completed action should look like this:
(Note: Your custom fields format in WordPress will have to match the format in HubSpot. For example, our “Courses (Enrolled)” field in HubSpot is a “Multiple checkboxes” field type in HubSpot with a list of all of our LifterLMS courses. Ensure that your field types and formats are synchronized so that data can transfer seamlessly.)
Step 5: Go Live
You’re just about ready to connect LifterLMS to HubSpot and perfectly sync your student records with your CRM. All that’s left for you to do is to toggle the recipe from Draft to Live.
That’s it! You’ve successfully created a seamless LifterLMS HubSpot integration. With what you’ve learned in following these steps, you can create just about any Automator recipe you can dream up.
If you haven’t already, don’t forget to upgrade to Automator Pro to unlock UNLIMITED app credits and more powerful triggers, actions, and features.
Export LifterLMS Students to HubSpot: User Loops Recipe
If you have Automator Pro, you can easily export your LifterLMS students to your HubSpot contact list without having to download any files. Here are the advantages of exporting your LifterLMS students to HubSpot with Automator:
- greater control over data shared,
- more dynamic fields to track (lifetime spend, membership expiration dates, etc.)
- synchronize non-LifterLMS data at the same time, and
- automatically sort students into static lists upon export.
Step 1: Create and Name a New Recipe
From your WordPress Admin Dashboard, navigate to Automator > Add new recipe. In the popup window that appears, select Everyone.
Give your recipe a name that makes it easy to recognize at a glance. For example, we have named this recipe “Export LifterLMS Students to HubSpot”.
Step 2: Configure Your Trigger(s)
In the Triggers panel, from the menu of available integrations, select Run now.
From the dropdown list that appears, select “Trigger recipe manually”.
Step 3: Configure Your Action(s)
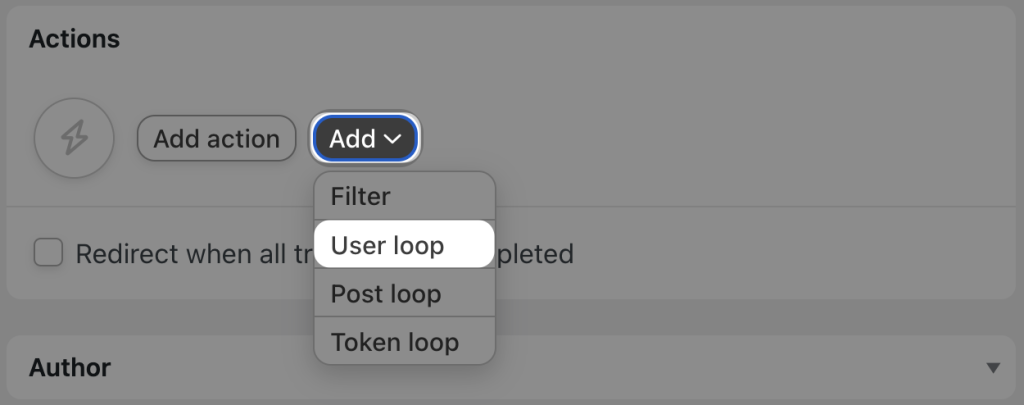
In the Actions panel, click Add and select User Loop.
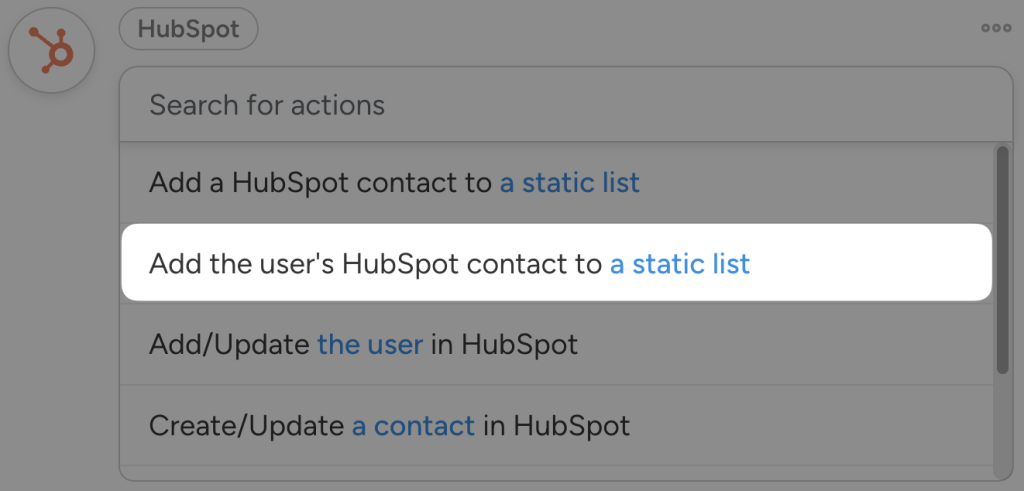
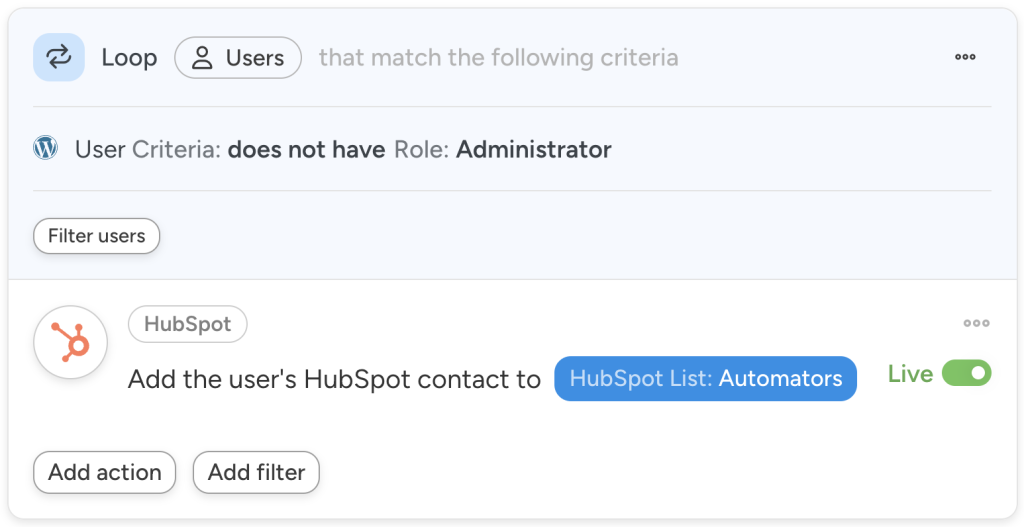
Within the Loop pane, click Add action and select HubSpot. From the dropdown list, select “Add the user’s HubSpot contact to a static list”.
(Note: If you haven’t already added your LifterLMS students to HubSpot, you can select the action “Add/Update the user in HubSpot”. You can then add another action, “Add the user’s HubSpot contact to a static list,” to the recipe.)
Automator will prompt you to select a list. For example, we have selected our static list “Automators”.
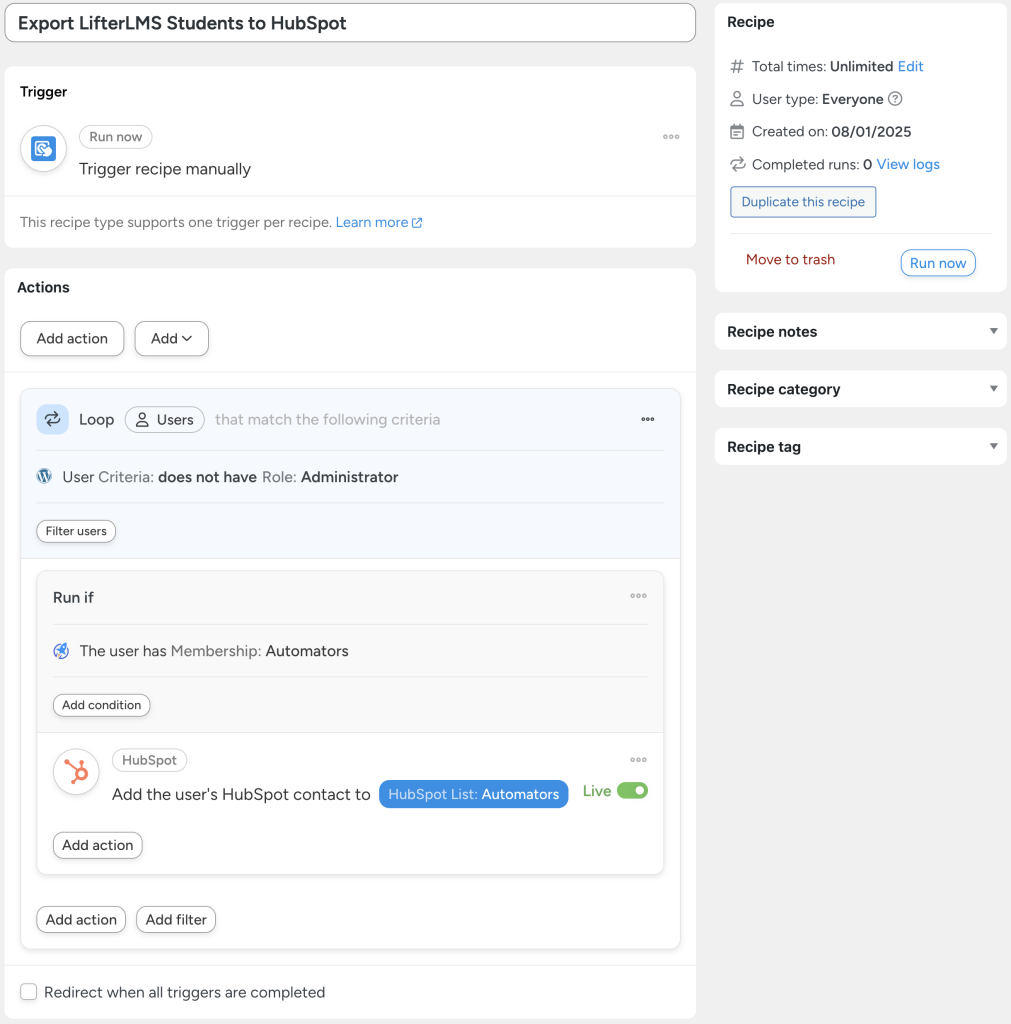
Once you’re finished, click Save. Your Loop pane should now look something like this:
Step 4: Configure Your Action and Loop Filter(s)
As the recipe is now configured, Automator will add every WordPress user who isn’t an Administrator to your HubSpot static list. Needless to say, we’d like to be a little more specific than that.
To accomplish this, we will use Loop and/or action filters. To add an action filter, hover over the action to which you would like the filter to apply and click Filter.
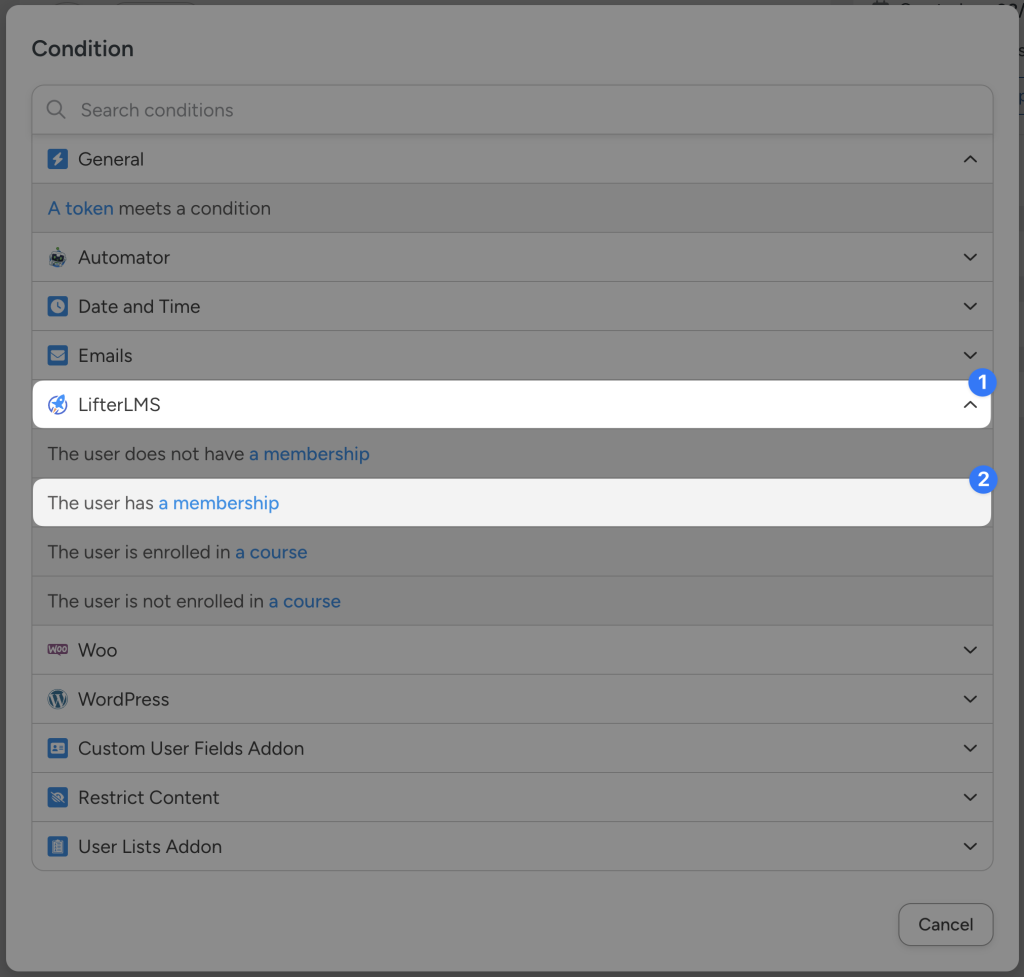
In the modal that appears, click LifterLMS and select the filter condition that you want to have applied to the action. For example, we have selected the filter condition “The user has a membership”.
Next, Automator will prompt you to select the membership. For example, have selected the membership that correlates with our HubSpot static list.
Once you’re finished, click Save filter.
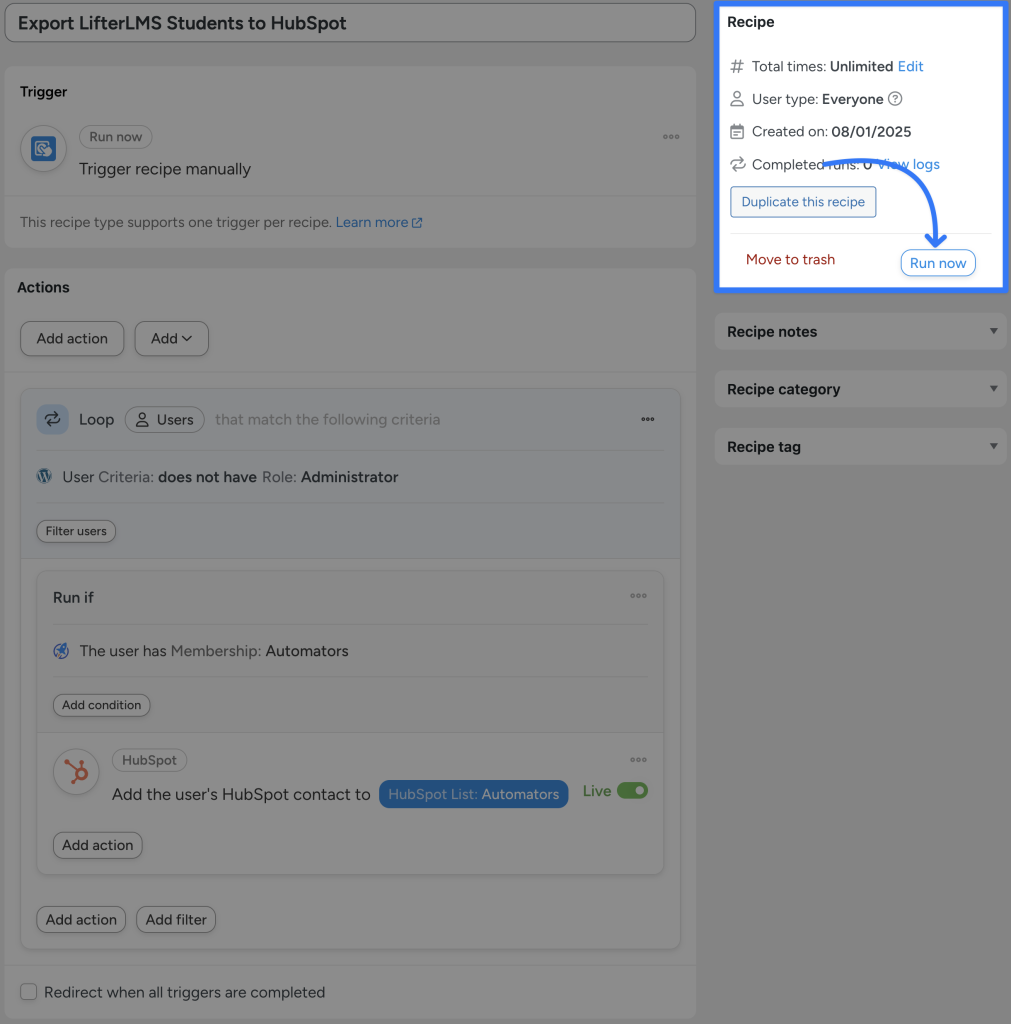
Step 5: Run now!
You’re just about ready to add your LifterLMS students to the right HubSpot static list. All that’s left you to do is click Run now and let Automator handle the rest.
Why stop there? Add more HubSpot actions with filters to export LifterLMS students in different memberships into different static lists.
More Ways to Connect LifterLMS to HubSpot
Automator has dozens of triggers, actions, and filters for LifterLMS and HubSpot alone. This gives you the ability to customize your LifterLMS and HubSpot integration any way you choose.
With a few Automator recipes under your belt, we’re pretty confident that you can easily cook up some powerful automations of your own. Nevertheless, here are just a few recipe ideas to get you started.
Sync Your HubSpot Active Lists with LifterLMS
HubSpot’s “Active Lists” are a great way for elearning institutions to provide relevant communications to students and educators as they register for and, eventually, complete courses.
However, without an integration tool like Automator, HubSpot would never know if/when your LifterLMS students enrolled in or completed different courses, lessons, or quizzes.
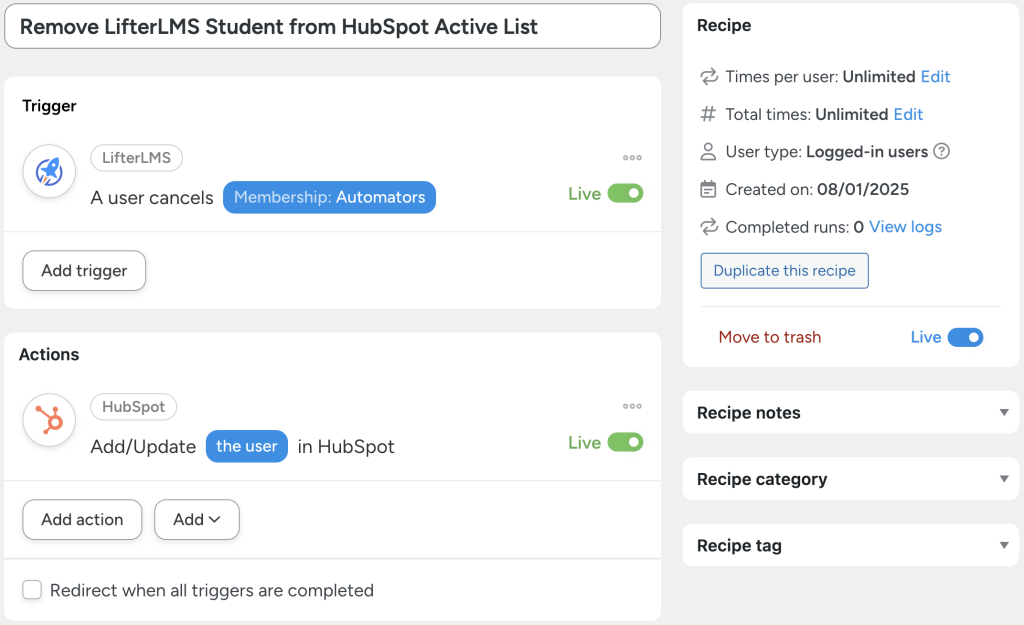
In the recipe above, for example, we can update a LifterLMS student’s properties in HubSpot to reflect the fact that they have cancelled a membership. Automator will delete the corresponding property in their HubSpot contact and, subsequently, HubSpot will remove them from the corresponding Active List.
Sync LifterLMS Student Progress with HubSpot
A large part of why you might want to connect LifterLMS to HubSpot has to do with providing your learners with the support they need.
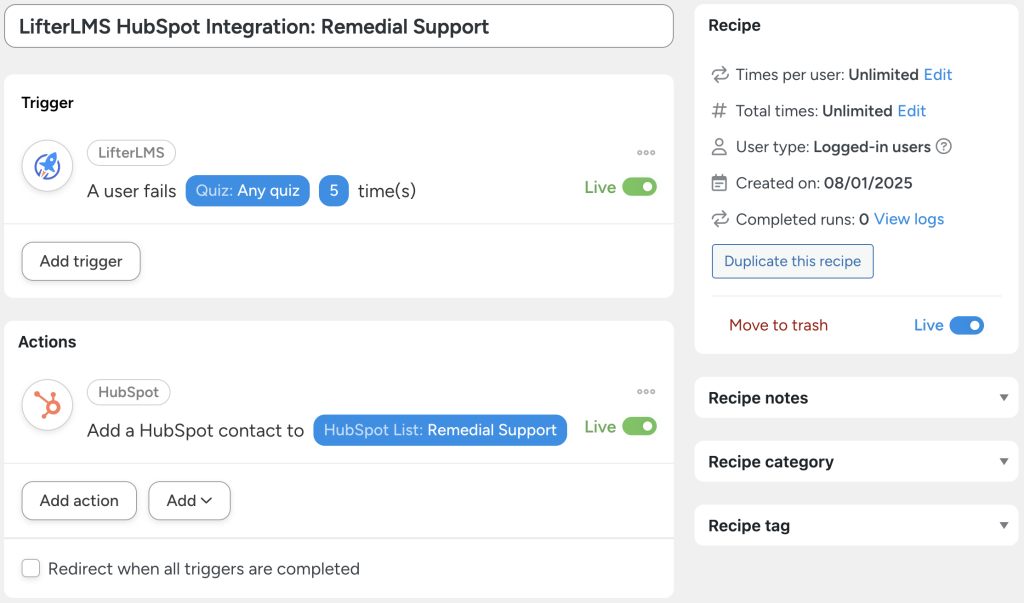
In the recipe pictured above, for example, we can add our LifterLMS students to a static list after they have failed quizzes a given number of times.
This ensures that our learners who need the most support will receive the content and remedial attention to help them thrive.
Frequently Asked Questions
Conclusion
By now, you know everything you need to know about how to connect LifterLMS to HubSpot—for FREE!
In this guide, we walked you through exporting your LifterLMS students to HubSpot as contacts using two methods: manually with CSV file upload, and automationally with an Automator Loops recipe.
We showed you how to add custom fields, how to leverage Automator’s more powerful features to automatically sort your HubSpot contacts, and even how to use Automator to enhance your Active Lists in HubSpot.
Ready to unlock the power of an automated elearning experience?
Until next time, happy automating!







This Post Has 0 Comments