Revive old WordPress posts with AI and Uncanny Automator. Learn how to reverse content decay…
How to Easily Change WordPress Post Types in Bulk
Automatically change WordPress post types in bulk with Uncanny Automator. Simplify your content management, user experience and SEO with this tutorial.

Are you trying to change WordPress post types in bulk? Did you know that you can use the Uncanny Automator plugin to drastically simplify the process and streamline your content management workflows?
Whether you want to update specific post meta, rewrite slugs or even add taxonomies, Automator can help you. Of course, in this tutorial we’ll focus on one key content management strategy: changing WordPress post types in bulk and individually.
Save time, costs and, most importantly, your sanity with this simple trick for streamlining your content management. You’ll see that, with Automator, you can change as few or as many post types as you want with just the click of a single button.
Let’s get into it.
What Are WordPress Post Types?
Post types are some of the fundamental building blocks of any WordPress website. They define the various kinds of content you can create and manage on your website, each with its own unique set of features and purposes.
You can think of a post type as a kind of container that differentiates one type of content from another. By default, WordPress comes with a few built-in post types:
- Posts: These are the standard blog entries and are typically displayed in reverse chronological order. They contain meta fields such as author, date of publication, taxonomies, tags and comments amongst others. They are ideal for managing timely content such as news articles, blog posts, or product/company updates.
- Pages: These are similar to posts, however they are better suited for static content that doesn’t change often, such as your About Us or Contact Us pages.
- Attachments: This WordPress post type is for media files that you upload to your site, such as images, videos, or documents. They are given an ID and/or URL that differentiates them from other attachments.
- Revisions: These are saved versions of your posts or pages. As a leading CRM, WordPress allows you to revert to earlier versions of your content with this post type.
- Menus: This post type defines navigable posts and pages on your website. This post type makes it easy for you to improve the user experience by helping them find relevant content.
Beyond these default post types, WordPress also allows you to create custom post types tailored to your needs. Additionally, plugins and themes that you download and activate on your WordPress website will usually create post types of their own to help you manage your content.
Some common custom post types are:
- Products: Usually used for running an e-commerce store with a plugin like WooCommerce.
- Testimonials: Showcase customer feedback and build word-of-mouth advertising the WordPress way. Plugins such as WPForms include addons and templates to get your started in minutes.
- Portfolios: If you want to let your work speak for itself, you’ll want a portfolio post type. Whether for photography, drawings and 3D renderings, or other creative works, a portfolio post type is the best way to showcase your CV.
- Events: Plugins such as Modern Events Calendar and The Events Calendar create post types called “events” with all of the fields and meta data you need to organize gatherings, either in-person or online.
Want to know more about WordPress post types? Check out this detailed article>>>.
Understanding and utilizing different post types can greatly enhance the organization and functionality of your WordPress website. They enable you to tailor your content structure to fit the unique requirements of your site and business, improving both the user experience and your SEO.
In the following sections, we’ll explore how you can leverage Uncanny Automator to change all of these post types and more, whether individually or in bulk. Let’s start streamlining your content management process and making your WordPress site more dynamic and flexible.
Uncanny Automator: The Best Content Manager for WordPress
Managing your WordPress content can be a nightmare or, with the right tools, a dream come true.
Enter the right tool: Uncanny Automator.
Automator is already the #1 automation and integration tool for WordPress websites. And, in this tutorial, we’ll show you part of what makes Automator the best content manager for WordPress as well. Whether you’re looking to streamline your workflows, automate repetitive tasks, or perform bulk edits, Automator has got you covered.

One of the standout features that makes Automator the best content manager is the Post Loops feature. This powerful tool allows you to perform bulk actions on your WordPress posts with unparalleled ease—actually, with just the click of a button.
Imagine being able to update hundreds of posts at once, adding new tags, categories, or even custom fields. With Post Loops, you can do just that and much more. This feature not only saves you time but also ensures consistency and quality across your content.

Automator’s content management features, of course, don’t end there.
One of Automator’s most powerful features is the ability to edit post meta. Post meta refers to the additional data attached to your posts, such as custom fields, and other unique identifiers that enhance the functionality of your content.
With Automator, you can automate the process of updating post meta, ensuring that all of your posts have the most current and relevant information. This is particularly useful for managing custom post types, where specific meta fields are essential for displaying the correct information.
Change WordPress Post Types Individually
Now that you have your Automator Pro license, let’s take a look at how you can change WordPress post types individually. In the next section, we’ll show you how to change WordPress post types in bulk.
Automator works using recipes, i.e., combinations of triggers and actions that automate workflows and connect different integrations.
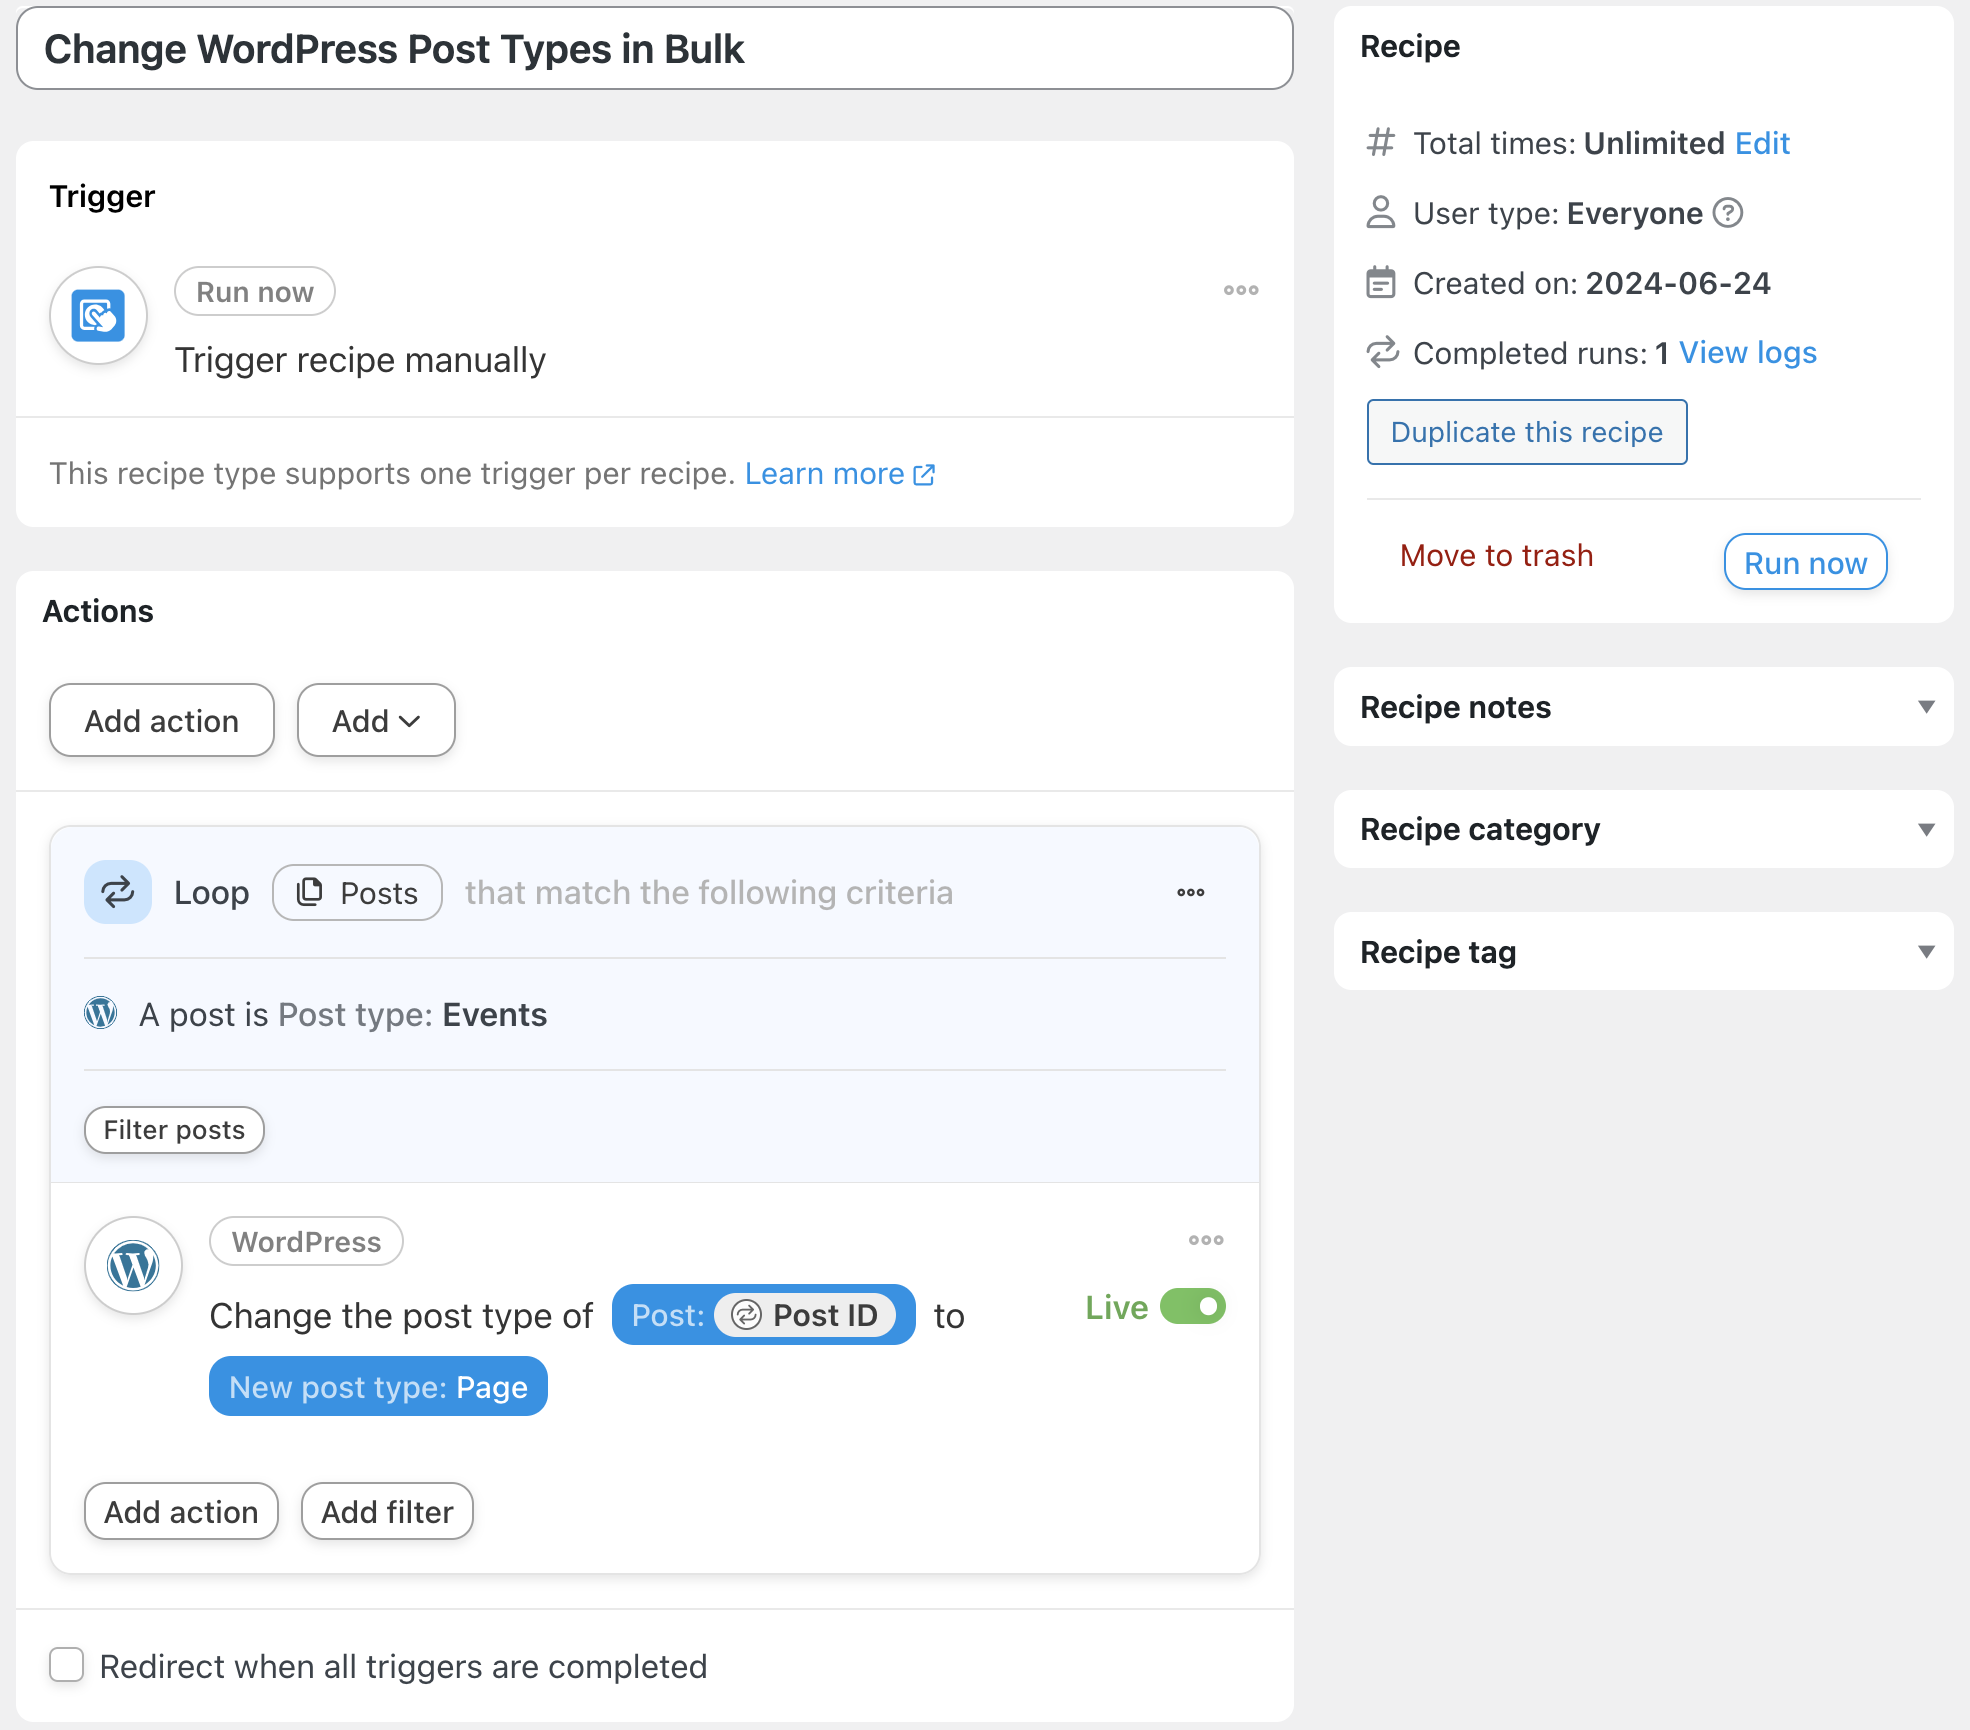
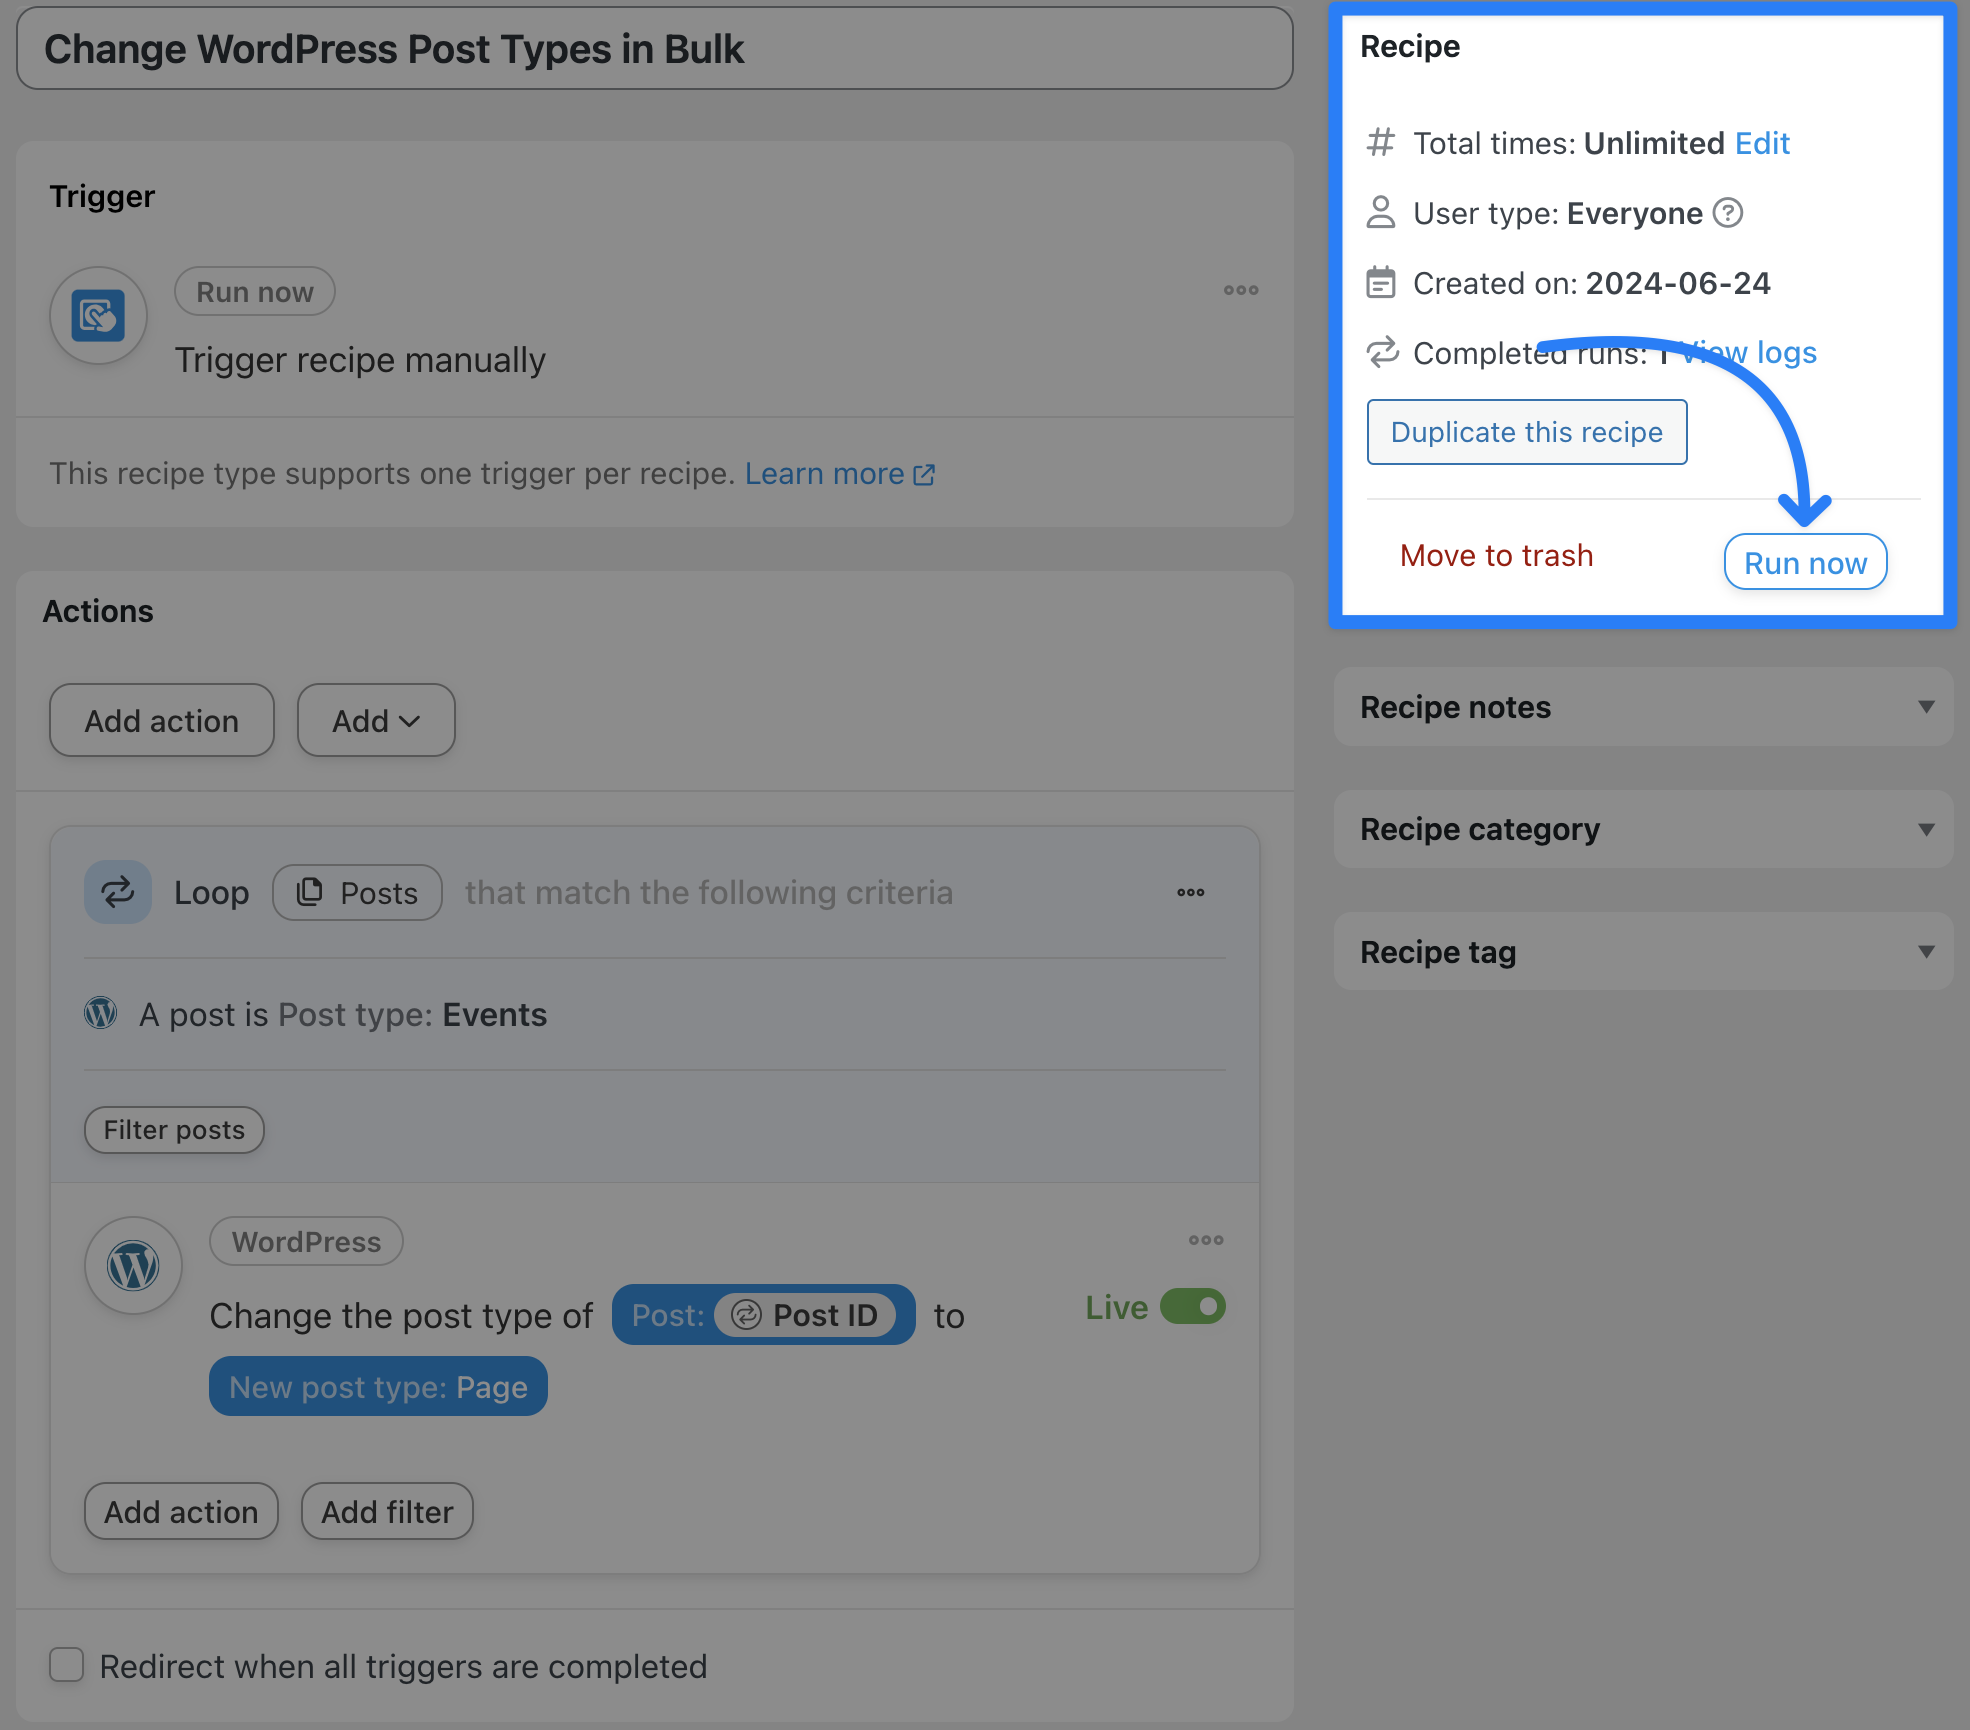
In the next steps, we’ll recreate the recipe pictured above.
Step 1: Create a New Recipe
From your WordPress Admin Dashboard, navigate to Automator > Add new recipe. In the pop-up window that appears, select Everyone.

Step 2: Name Your Recipe
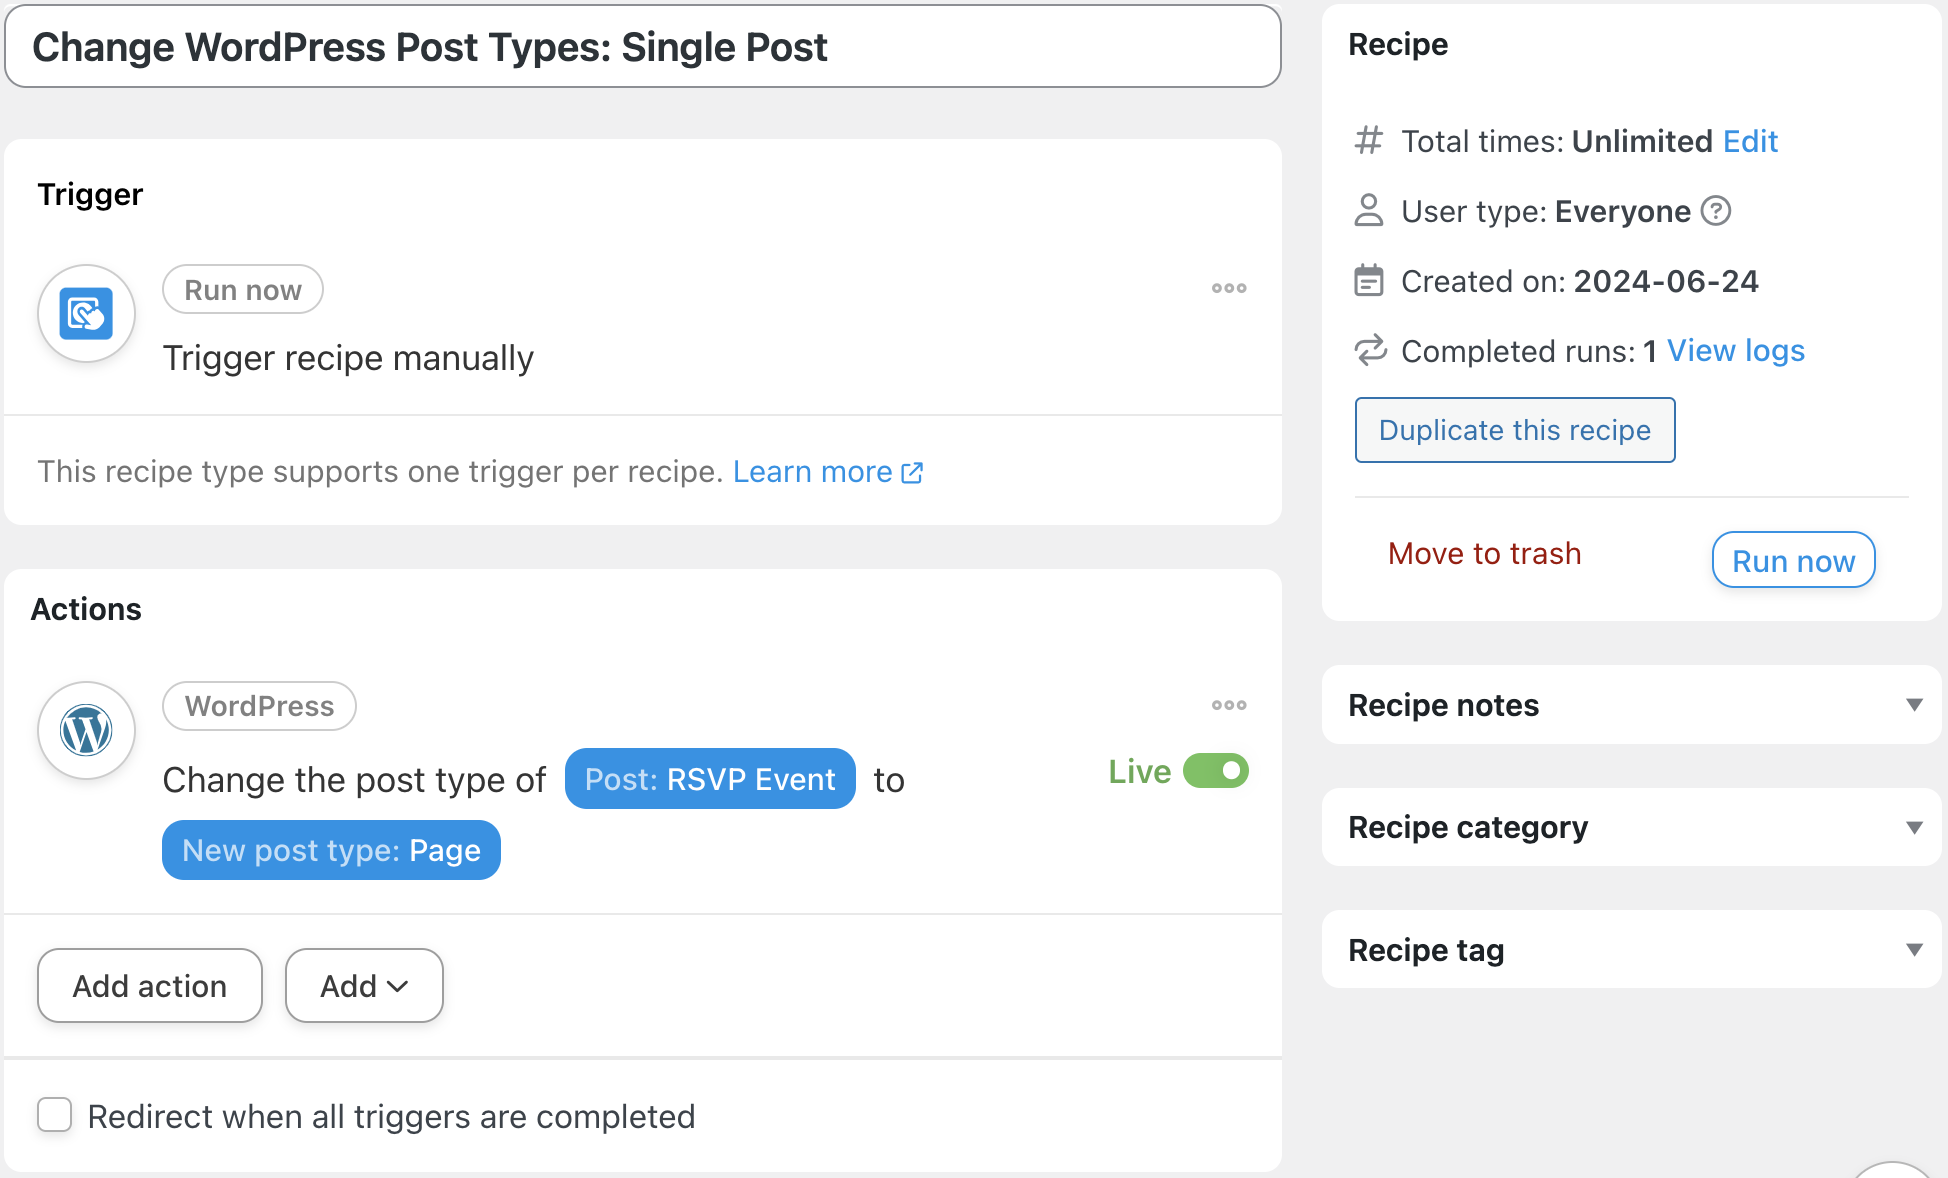
Give your recipe a name that makes it easy to recognize at a glance. For example, we’ve named this recipe “Change WordPress Post Types: Single Post”.
Step 3: Configure Your Trigger(s)
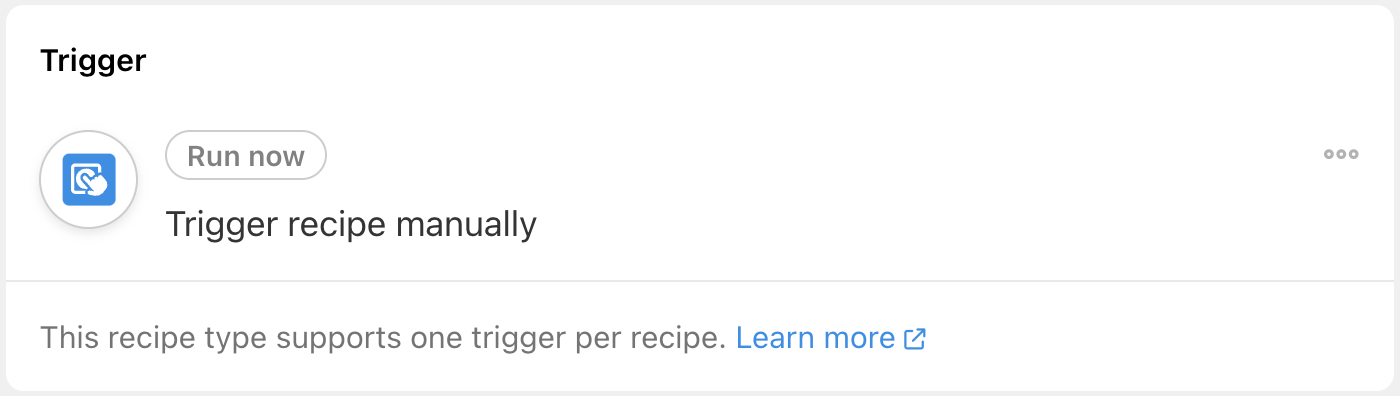
In the Trigger panel, from the menu of available integrations, select Run now.

From the dropdown list that appears, select Trigger recipe manually. Your completed trigger should look like this:
(Note: If you want to change WordPress post types automatically, you can select from any number of other triggers. For example, we could trigger this recipe when a user logs in or views a page. We could also use one of Automator’s many integrations such as WPForms to change WordPress post types upon a form submission.)
Step 4: Configure Your Action(s)
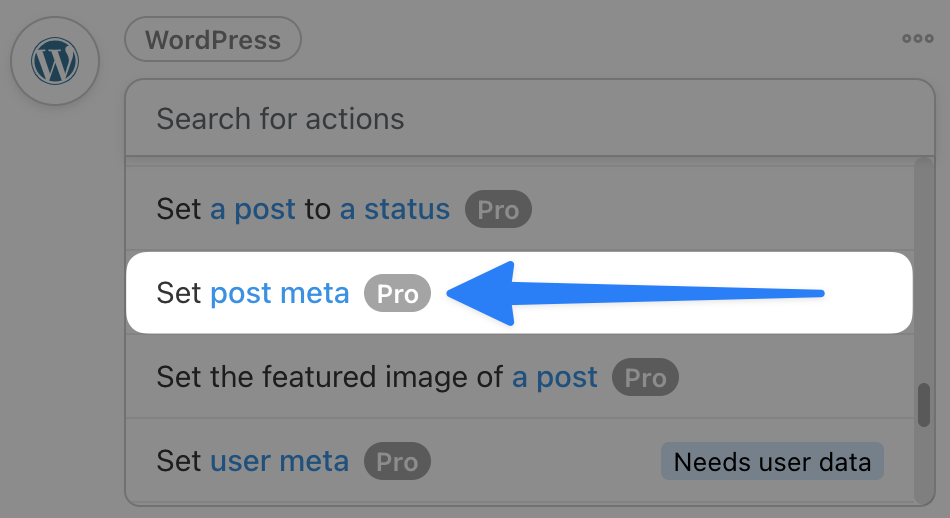
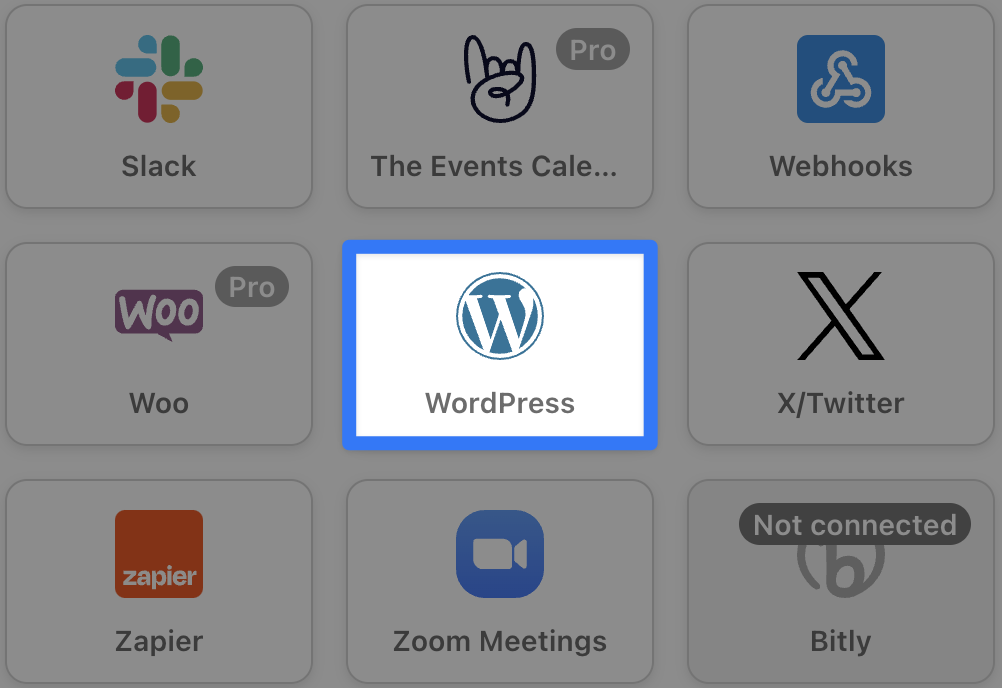
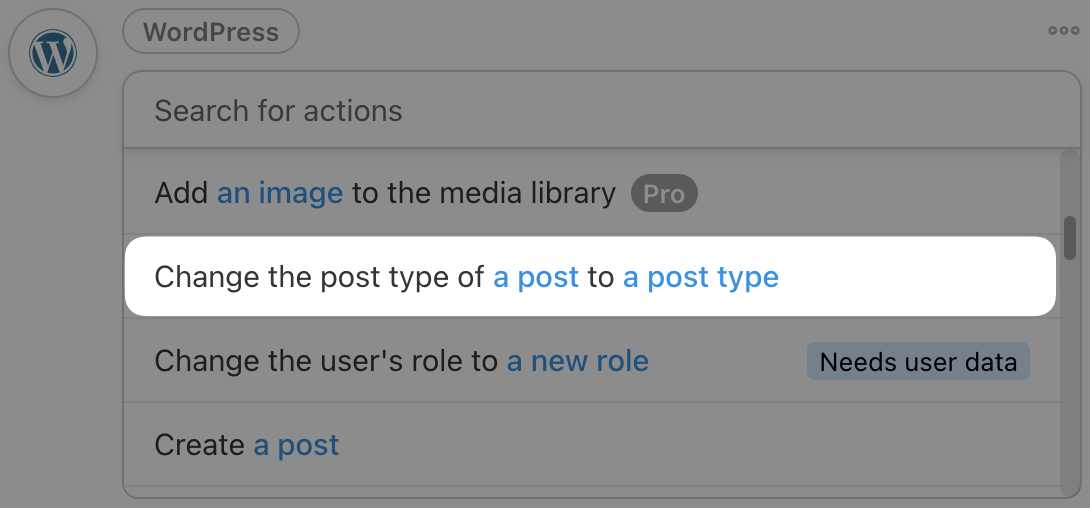
In the Actions panel, click Add action and select WordPress.
From the dropdown list that appears, select Change the post type of a post to a post type.
Automator will present you with a form. Here, you can select the Current post type of the post that you want to change, the specific post you want to change, and the New post type you want to change to.
For example, we have chosen to change one of our Event posts into a Page post type.
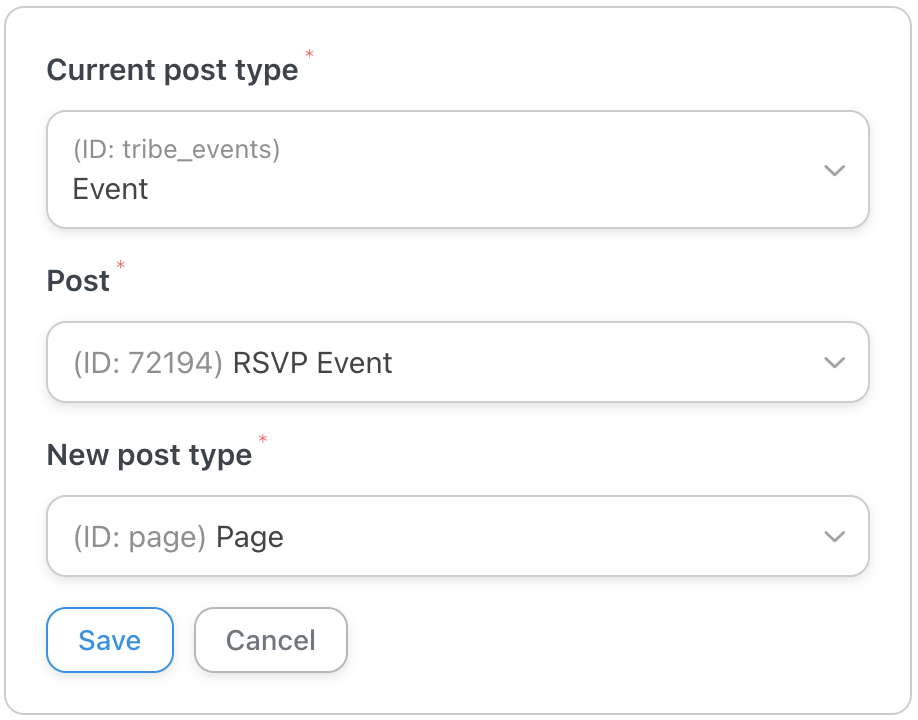
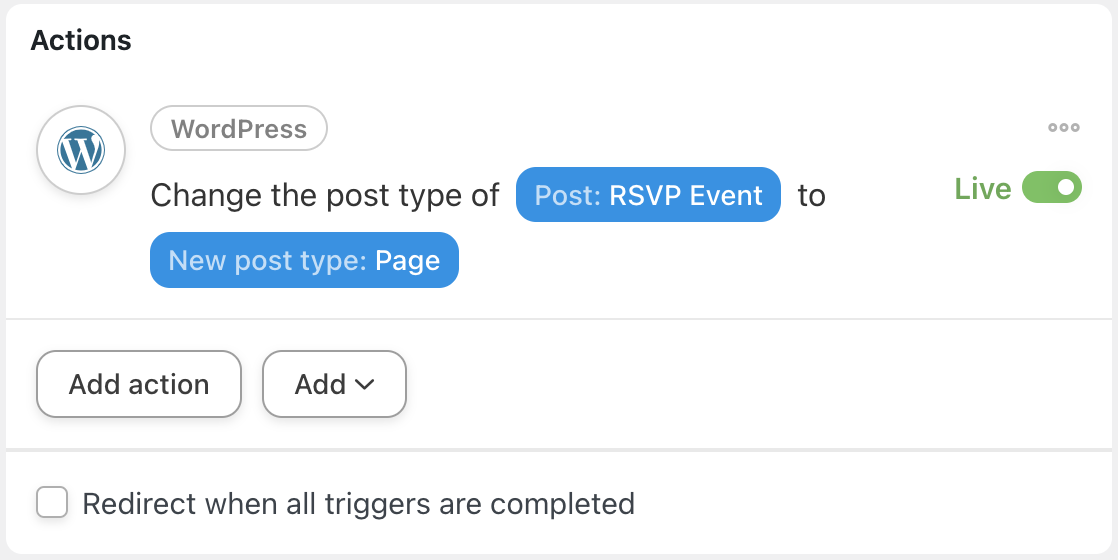
Once you’re finished, click Save. Your completed action should look something like this:
Step 5: Change It Up!
You’re just about ready to change your WordPress post types. All that’s left for you to do is to click Run now and let Automator handle the rest.
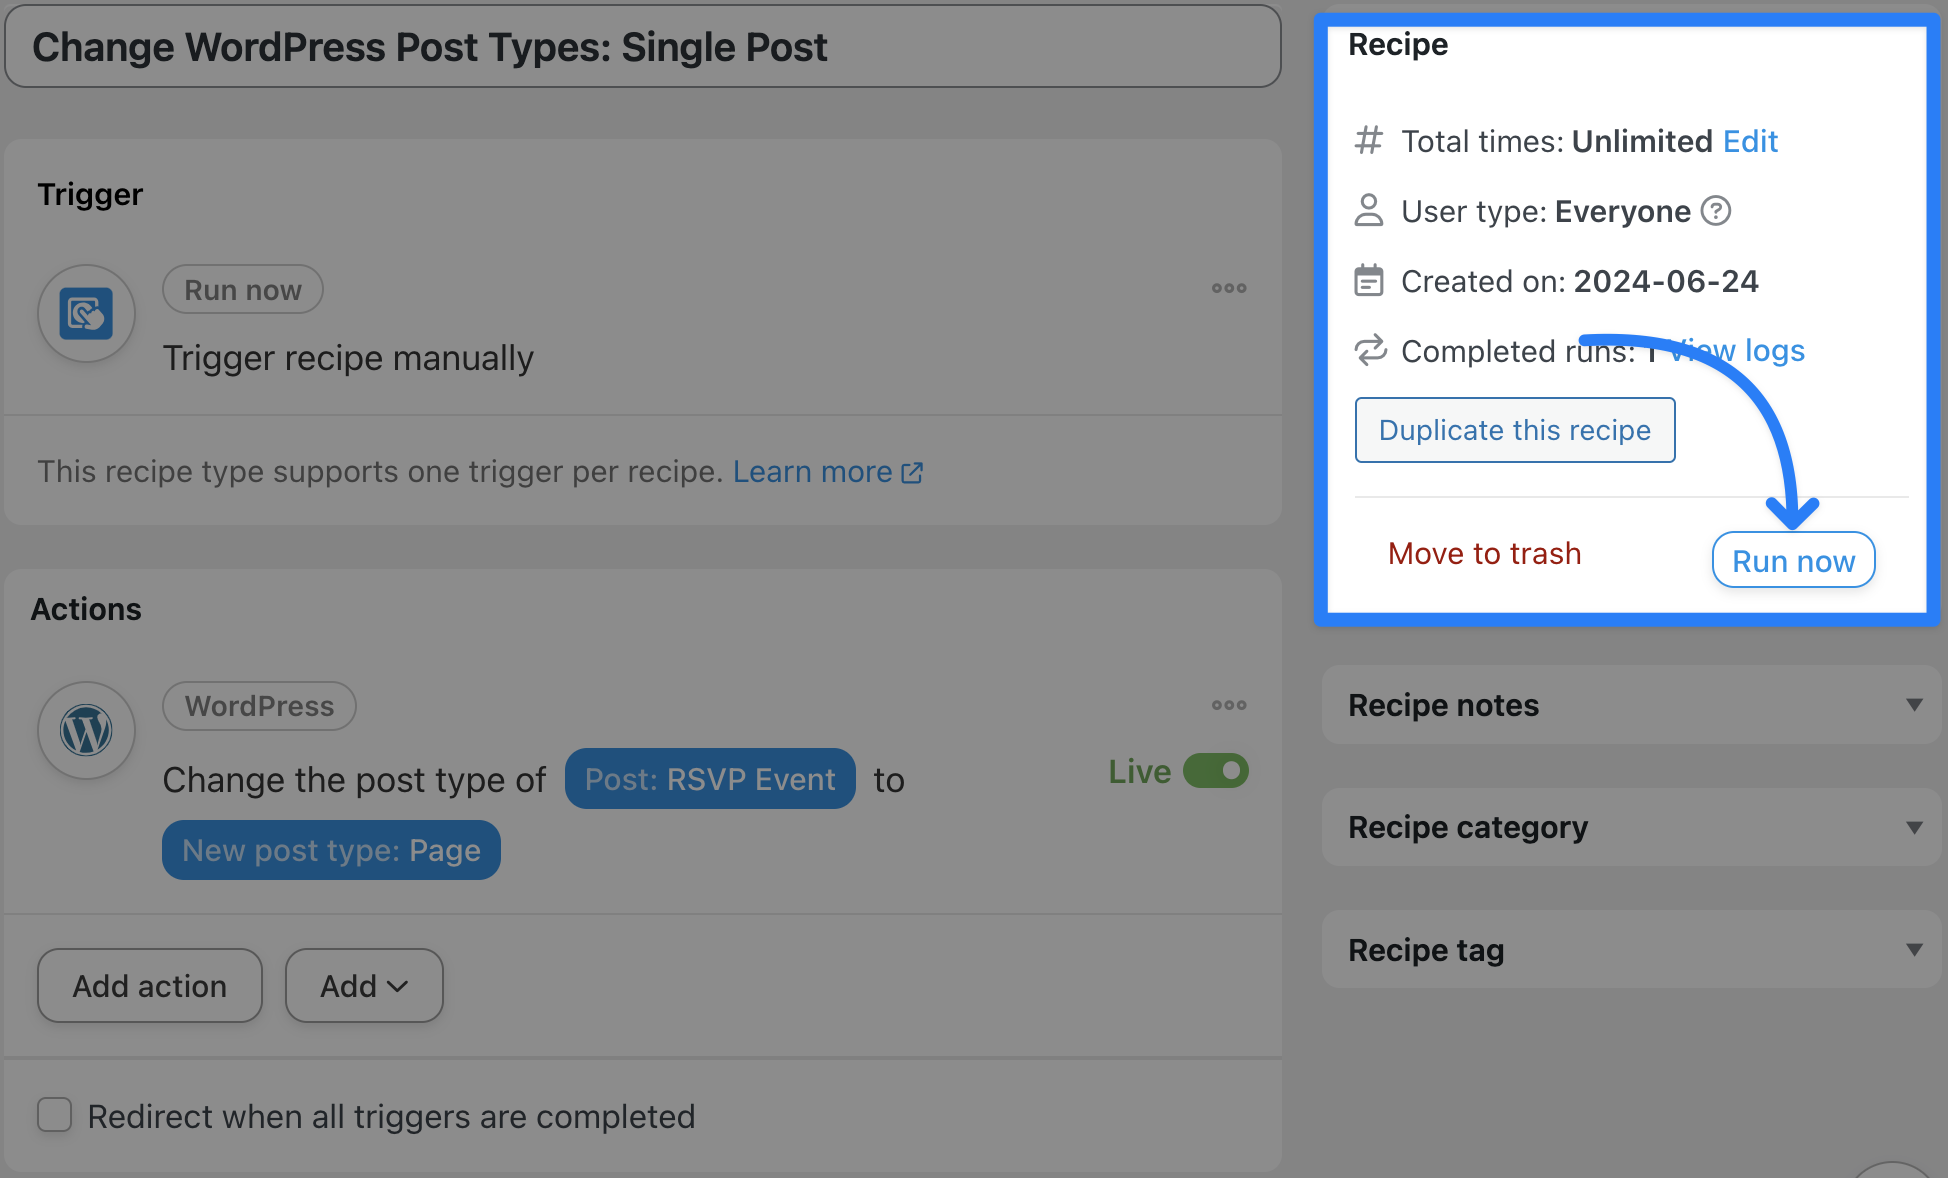
That’s it! You’ve successfully changed your first WordPress post type! But, you may not want to change all of your posts one-by-one. In the next section, we’ll take a look at changing multiple post types at once.
Change WordPress Post Types in Bulk
Now that you’ve gotten the hang of making Automator recipes, let’s take a look at the Automator Loops feature. This will allow you to change the post type for as many posts as you want.
Follow the steps below to change WordPress post types in bulk.
Step 1: Create a New Recipe
From your WordPress Admin Dashboard, navigate to Automator > Add new recipe. In the pop-up window that appears, select Everyone.
Step 2: Name Your Recipe
We’ve named this recipe “Change WordPress Post Types in Bulk”.
Step 3: Configure Your Trigger(s)
In the Trigger panel, from the menu of available integrations, select Run now. From the dropdown list that appears, select Trigger recipe manually.
Step 4: Configure Your Action(s)
In the Actions panel, click Add and select Post loop.
Automator will present you with a Loop panel that includes filters. You can use these filters to select the post type(s) that you want to change. By default, Automator will have a filter for the post type Posts. You can either Edit or Delete this filter by clicking on the corresponding icon.
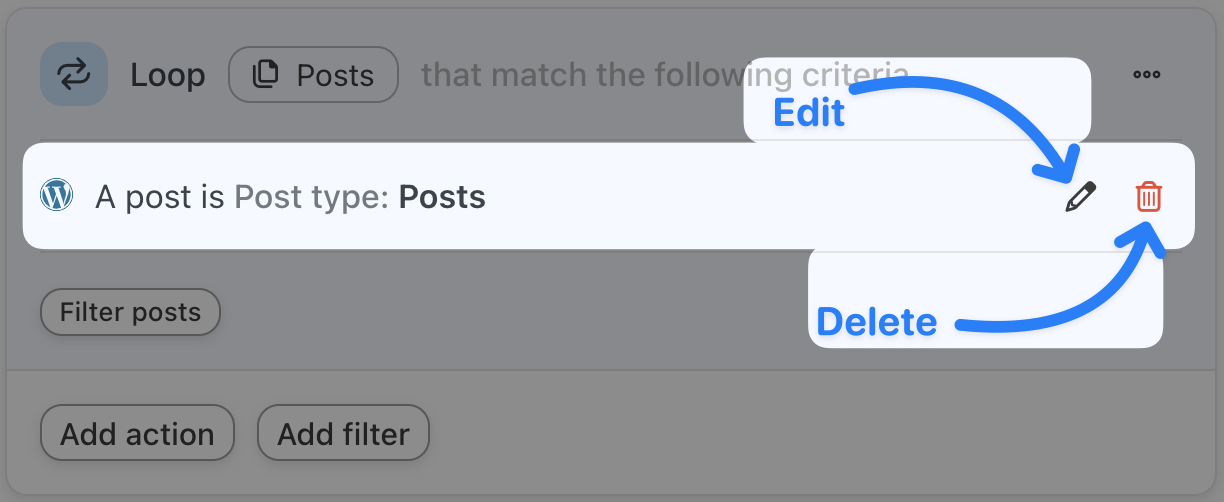
We’ve chosen to edit the filter and selected the post type Events. Once you’ve selected the post type of the posts you want to change, click Confirm.
Now, within the Loop panel, click Add action and select WordPress. From the dropdown list, select Change the post type of a post to a post type.
Just as before, Automator will prompt you to select the Current Post Type, Post and New post type. In the Current Post Type field, select the same post type from the loop filter.
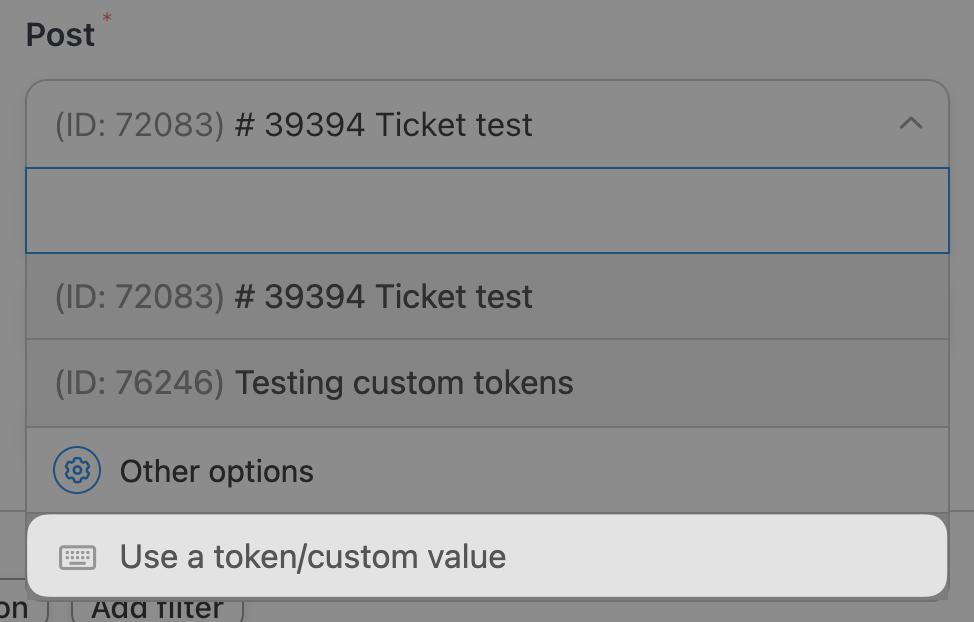
In the Post field, select Use a token/custom value.
In the subfield, click the Asterisk and select Post ID.
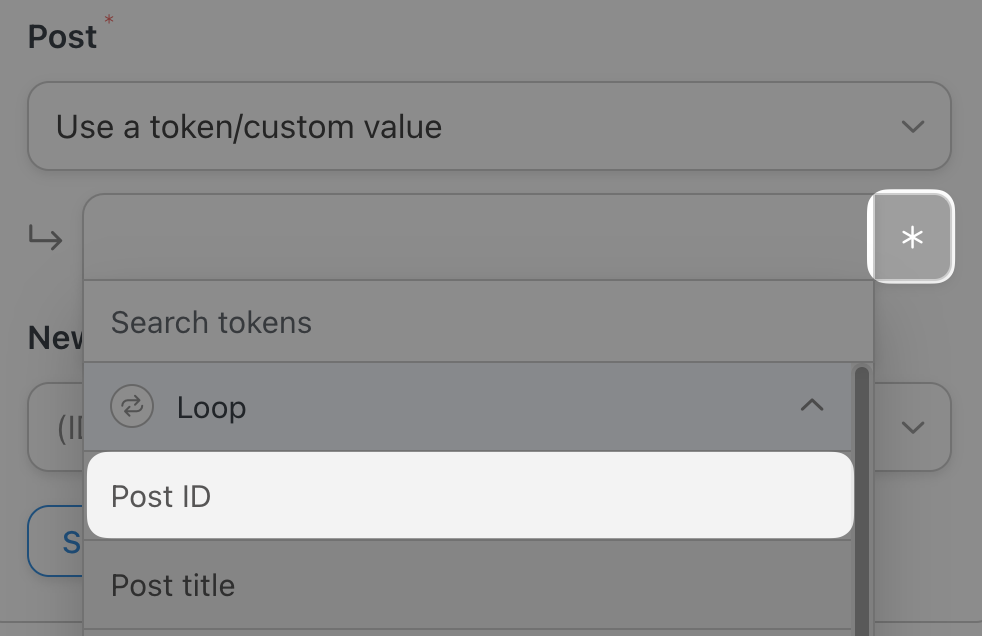
This will tell Automator to “cycle” through all of the posts that meet the criteria.
Next, select the New post type and click Save. Your Actions panel should look something like this:

Step 5: Edit in Bulk
Ready to change your WordPress post types in bulk? All that’s left for you to do is to click Run now and let Automator handle the rest.
That’s it! You’ve successfully mastered the art of managing your WordPress content with ease.
Frequently Asked Questions
Conclusion
In this blog post, we showed you how to change your WordPress post types in bulk with Uncanny Automator. Our tutorial covered changing post types individually and in bulk.
Ready to automate your content management with Automator?
Get your Automator Pro license now>>>.

Related Posts


This Post Has 0 Comments