Revive old WordPress posts with AI and Uncanny Automator. Learn how to reverse content decay…
How to Find and Re-Engage Inactive LearnDash Students
Are your students falling behind? Not anymore! Find and re-engage your inactive LearnDash students with Uncanny Automator.

Have some of your LearnDash students started falling behind? Maybe they missed a deadline for a quiz or simply haven’t logged into their account in weeks. Either way, there’s a simple solution to easily find and re-engage your inactive students.
In this step-by-step guide for elearning WordPress websites, we’ll show you how to get your lapsed LearnDash learners back using Uncanny Automator. Without further ado, let’s wake up those students in the back row of the classroom!
Introduction
As an elearning educator or administrator, we probably don’t have to tell you; the learning never stops. But, sometimes, your learners do, and that’s why we’ve made this walkthrough.
By the end of this quick tutorial, you’ll be able to:
- define how long a student must be “dormant” before they are considered inactive,
- automatically identify and target inactive LearnDash students,
- integrate LearnDash with your CRM and favorite plugins to launch compelling re-engagement campaigns, and
- accomplish so much more!
Before we delve into the details, let’s answer some of your burning questions.
What is an inactive student?
Every organization will have their own criteria for defining inactive students. However, generally speaking, an inactive student is someone who has failed to take certain steps within a given timeframe. This could be:
- failure to register for courses/programs in a timely manner,
- failure to engage with course/program content in a timely manner, or
- failure to apply for certification after completing courses/programs.
Uncanny Automator allows you to define an inactive student however you choose and helps you reach out to and re-engage with these lapsed learners.
How can Automator help me find inactive LearnDash students?
What if we told you that you could automate your entire elearning platform with just one plugin? From operational workflows like registering new students to marketing automation and more, Uncanny Automator can help you:
- find and target inactive students,
- send automated personalized messages,
- and even generate personalized learning pathways to maximize engagement.
And you can do it all without ever having to write (or read) a single line of code.

If Automator sounds like the stuff of a WordPress developer’s dreams, that’s because it is. Automator is the #1 automation and integration plugin for WordPress websites. Using simple combinations of triggers and actions, you can connect all of your favorite apps and plugins to create seamless workflows.
When it comes to finding and re-engaging inactive LearnDash students, Automator has tons of features to help you locate individual learners or find users in bulk.
The FREE forever version of Automator has features that we know you’ll love. However, throughout this article, we’ll be relying on Automator Pro features.
Get your Automator Pro license here so you can follow along.>>>
Send Automated Emails to Inactive LearnDash Students
Now that you have your Automator license, it’s time to re-engage with your inactive LearnDash students.
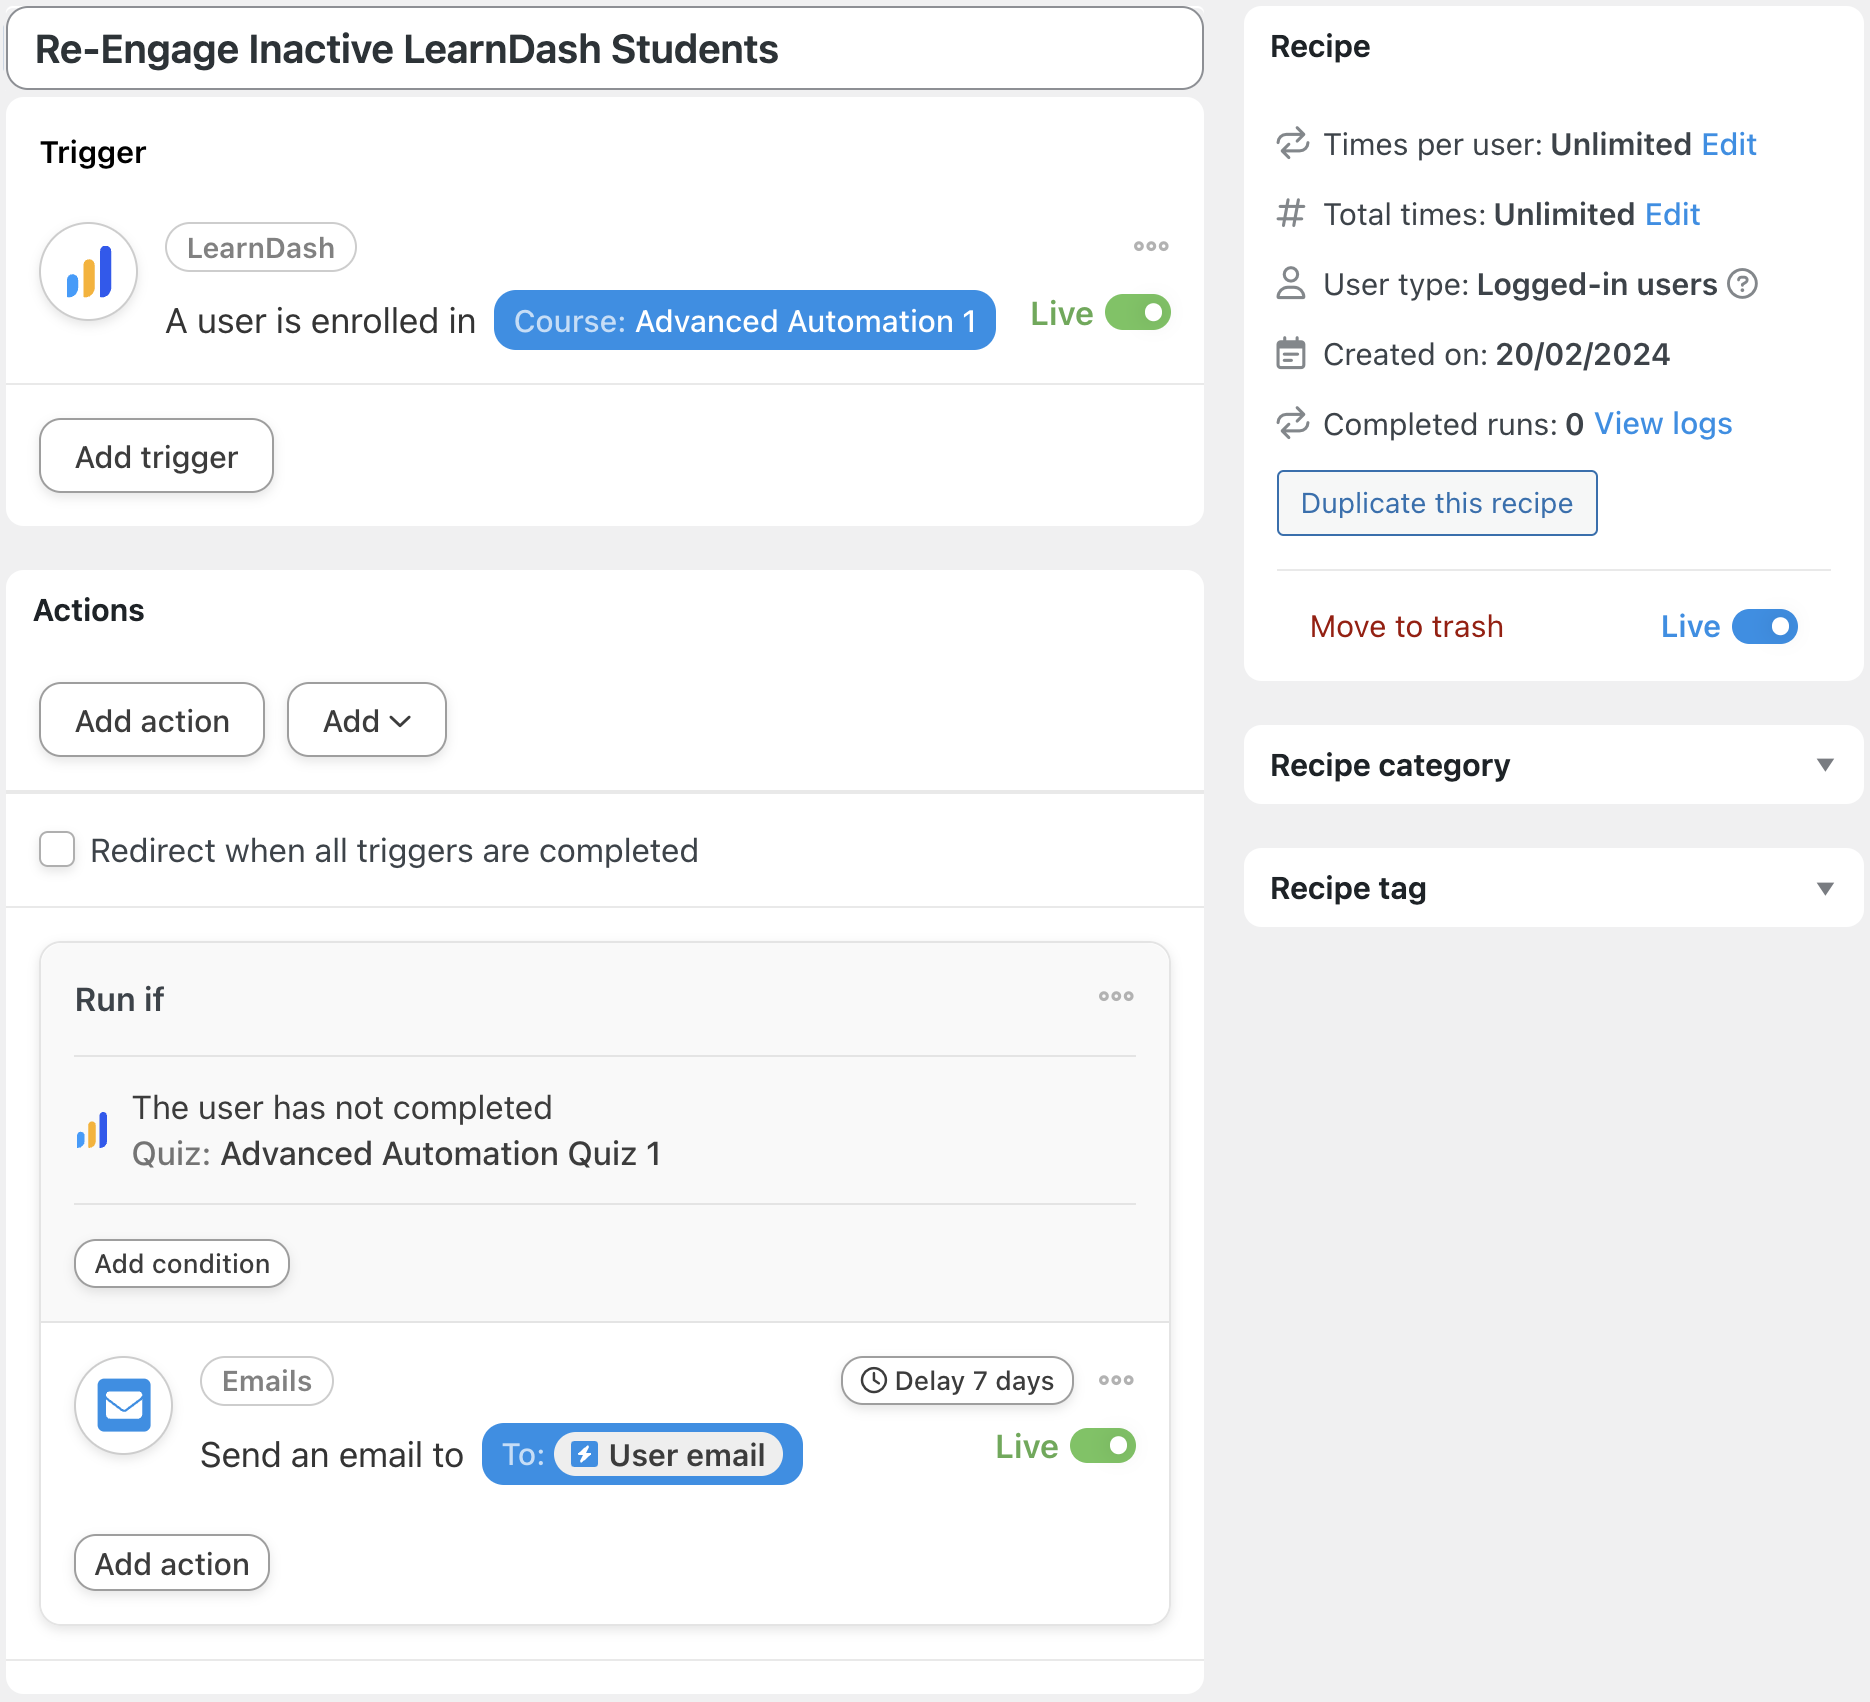
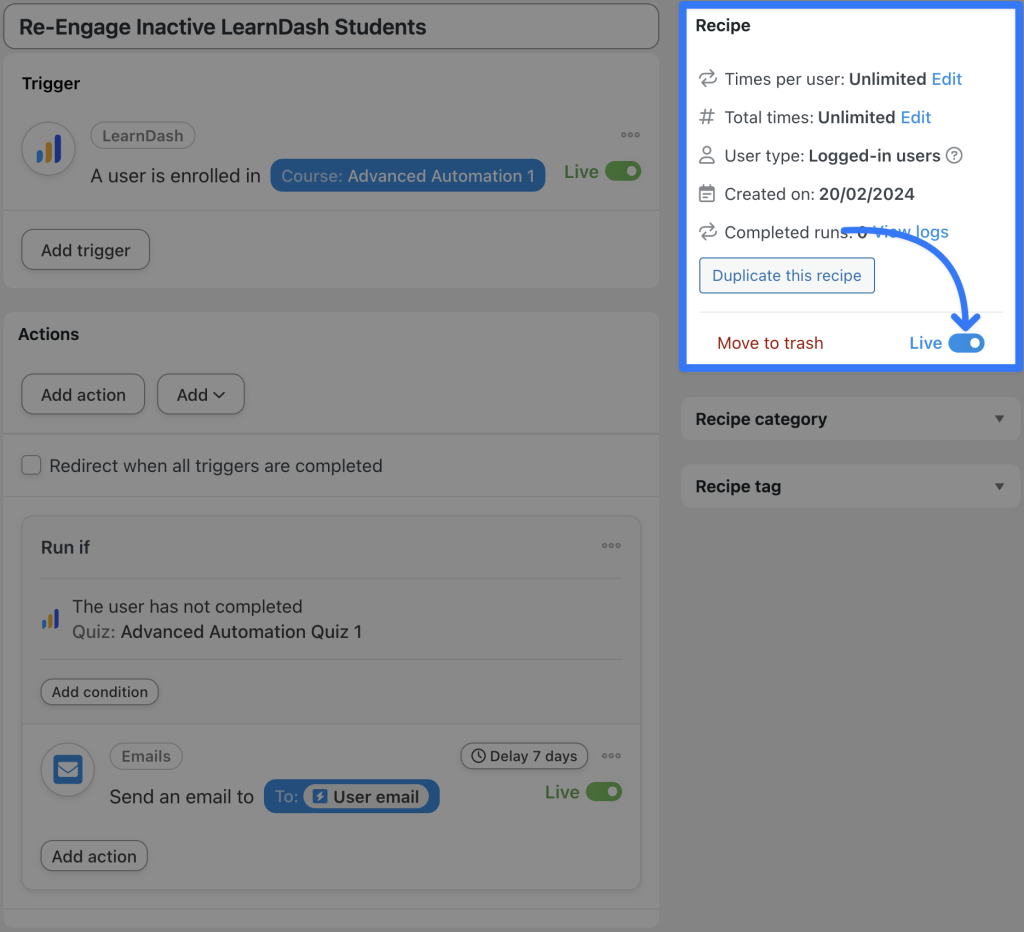
In the recipe pictured above, we’re able to automatically send an email to students enrolled in one of our courses if they haven’t completed a quiz within seven (7) days of enrollment. In the next steps, we’ll show you how to recreate this recipe and, more importantly, how to customize it to suit your needs.
Step 1: Create and Name a New Recipe
From your WordPress Admin Dashboard, navigate to Automator > Add new recipe. In the pop-up window that appears, select Logged-in users.

Give your recipe a name that makes it easy to recognize at a glance. For example, we’ve named this recipe “Re-Engage Inactive LearnDash Students”.
Step 2: Configure Your Trigger(s)
In the Trigger panel, from the menu of available integrations, select LearnDash.

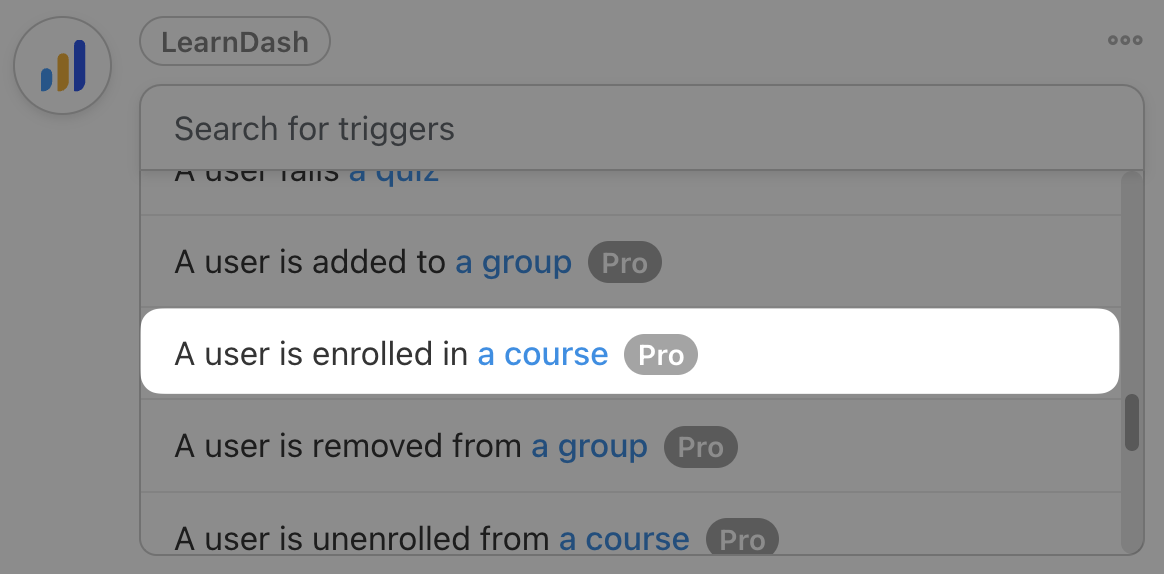
From the drop-down list that appears, select A user is enrolled in a course.
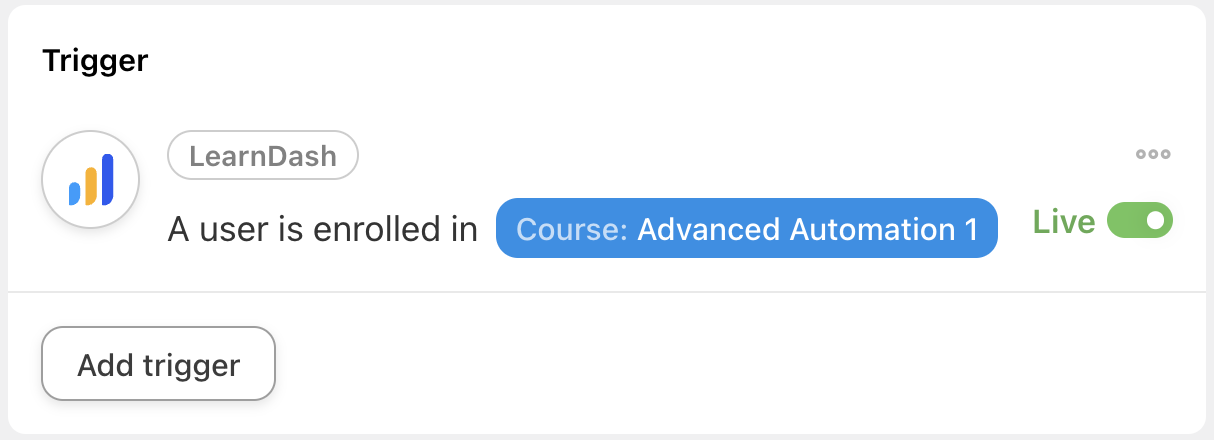
Automator will prompt you to select a course. When you’re finished, click Save. Your completed trigger should look something like this:
Step 3: Configure Your Action(s)
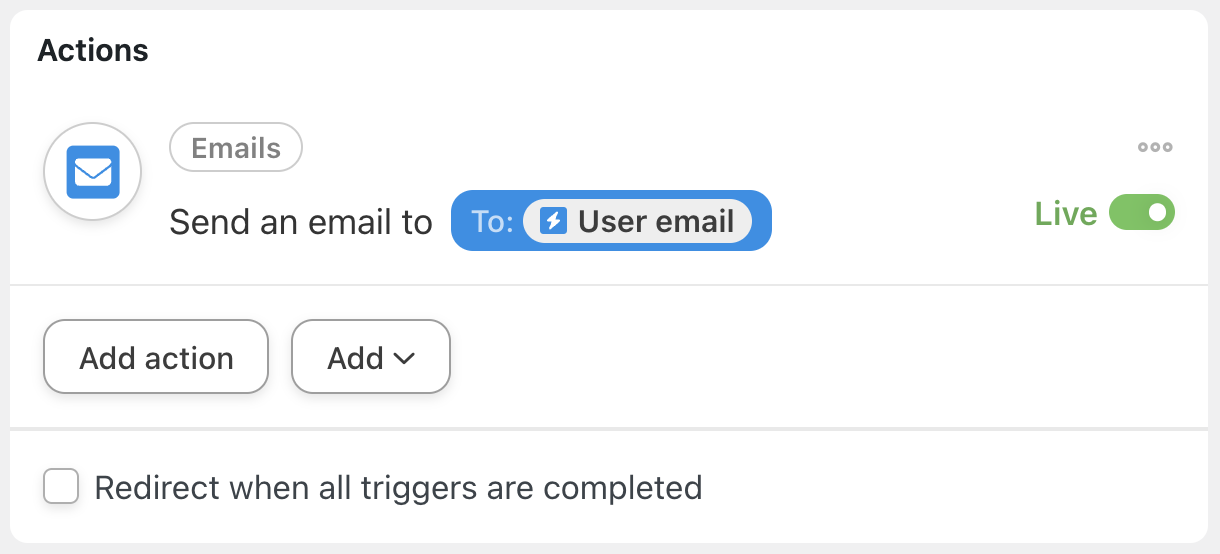
In the Actions panel, click Add action. From the menu of available integrations, select Emails.

From the drop-down list that appears, select Select an email. Automator will then present you with an email form. We’re going to fill in some of the fields using tokens (i.e., dynamic data pulled from your WordPress website and even from within recipes).
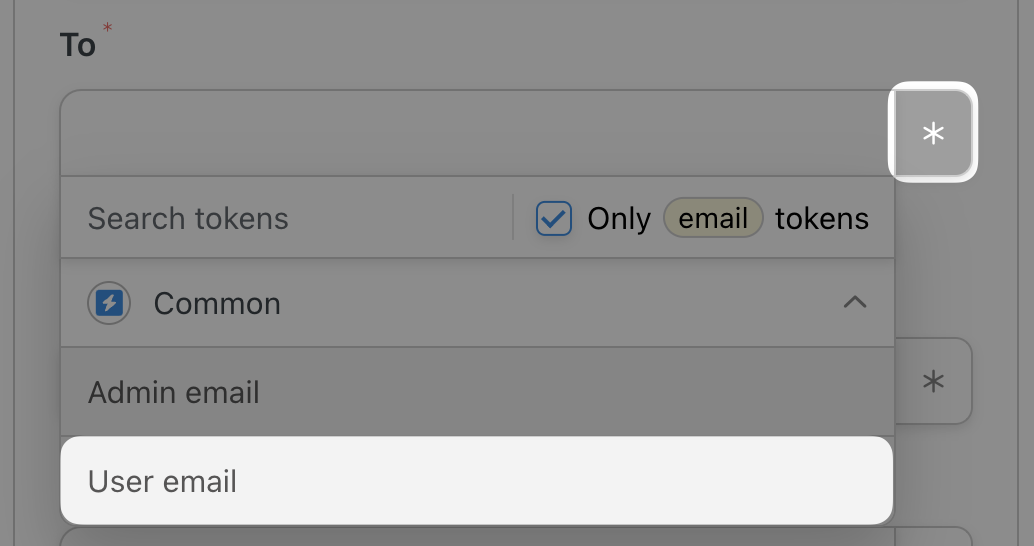
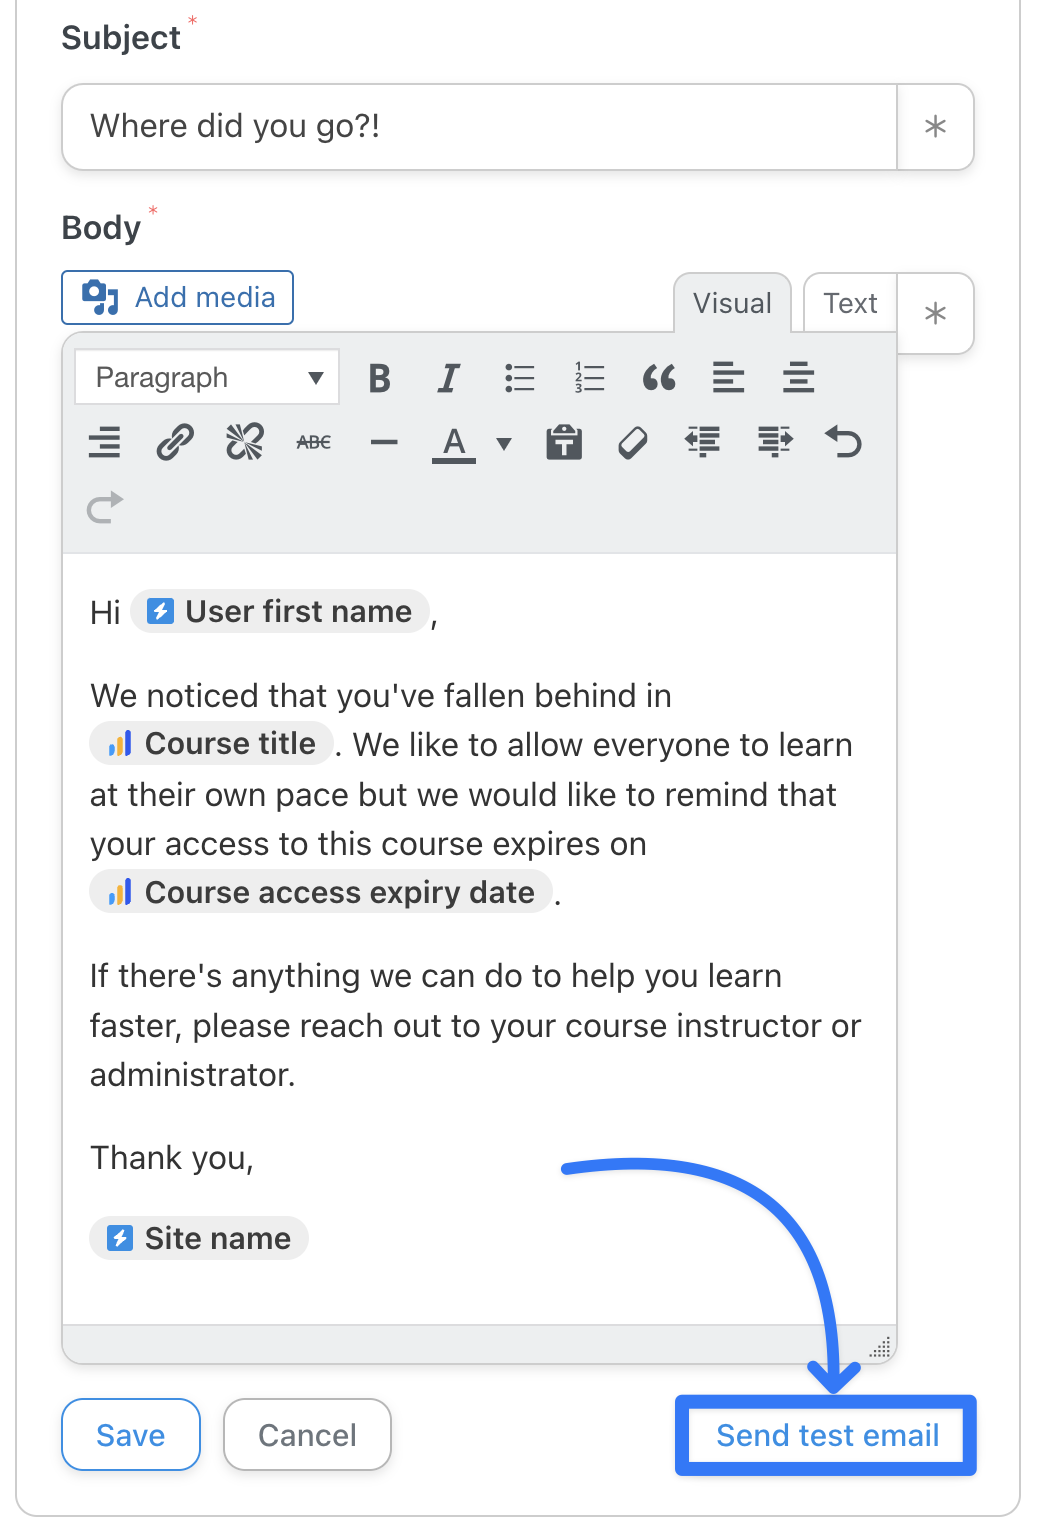
In the To field, click the Asterisk and select Common > User email.
You can then draft your email Subject and Content. Don’t forget to click Send test email to get a preview in your admin email inbox.
When you’re finished, click Save. Your completed action should look like this:
Step 4: Add a Filter and Delay
We’re going to use two of Automator’s Pro features to target our inactive students: action filters and delays.
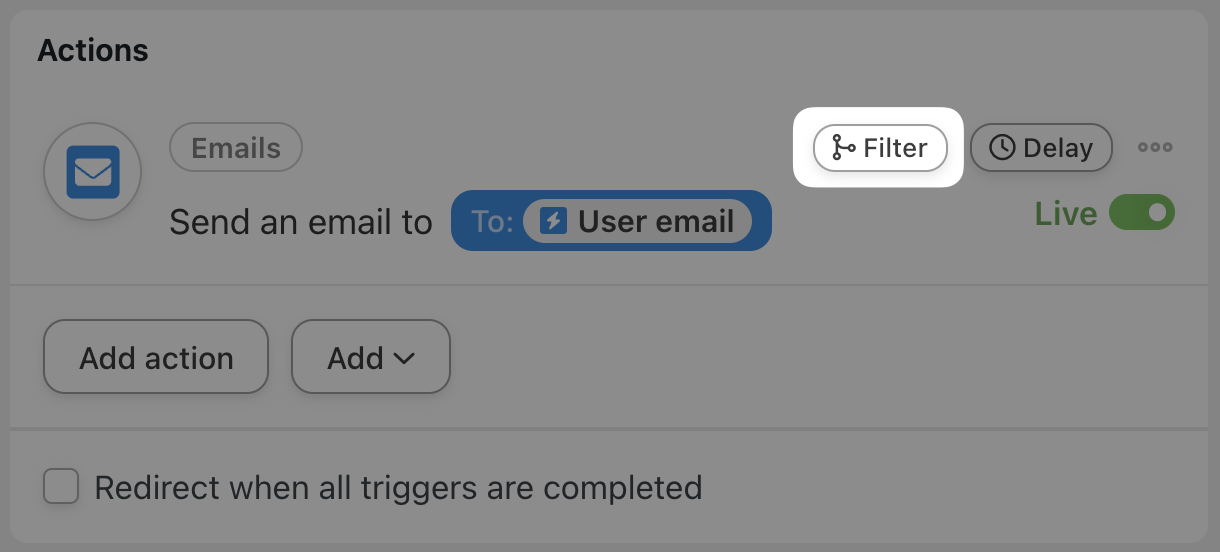
First, to add an action filter, hover over the Emails action that we configured in the previous step and click Filter.
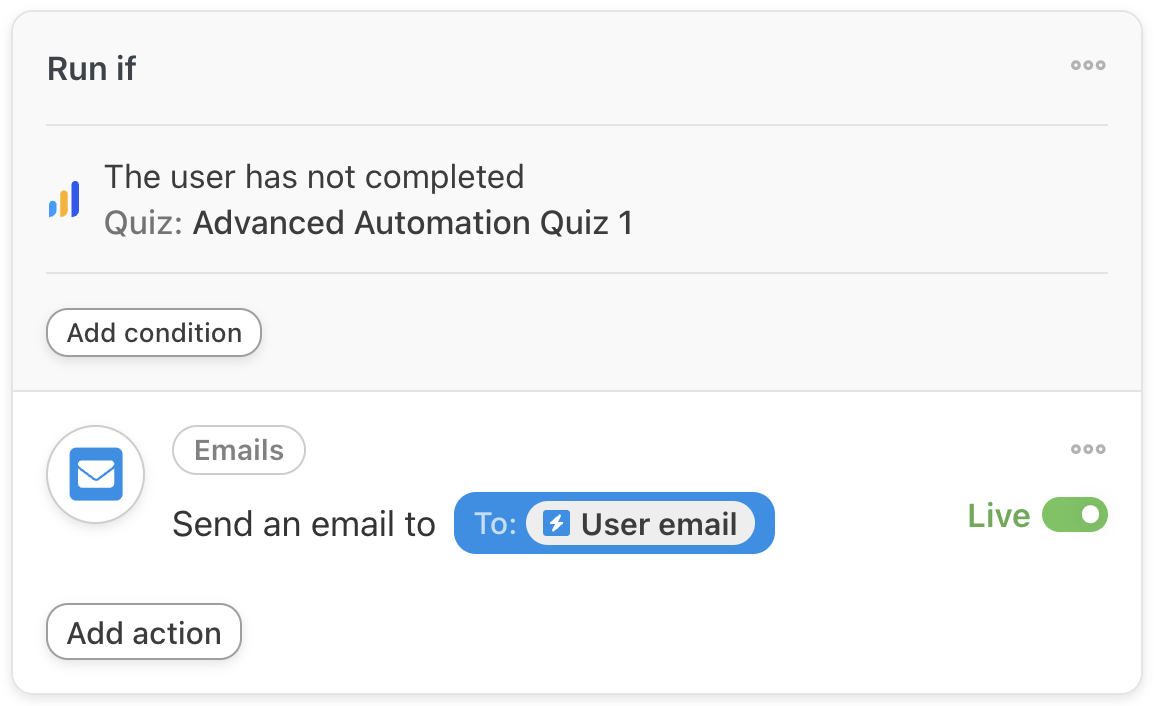
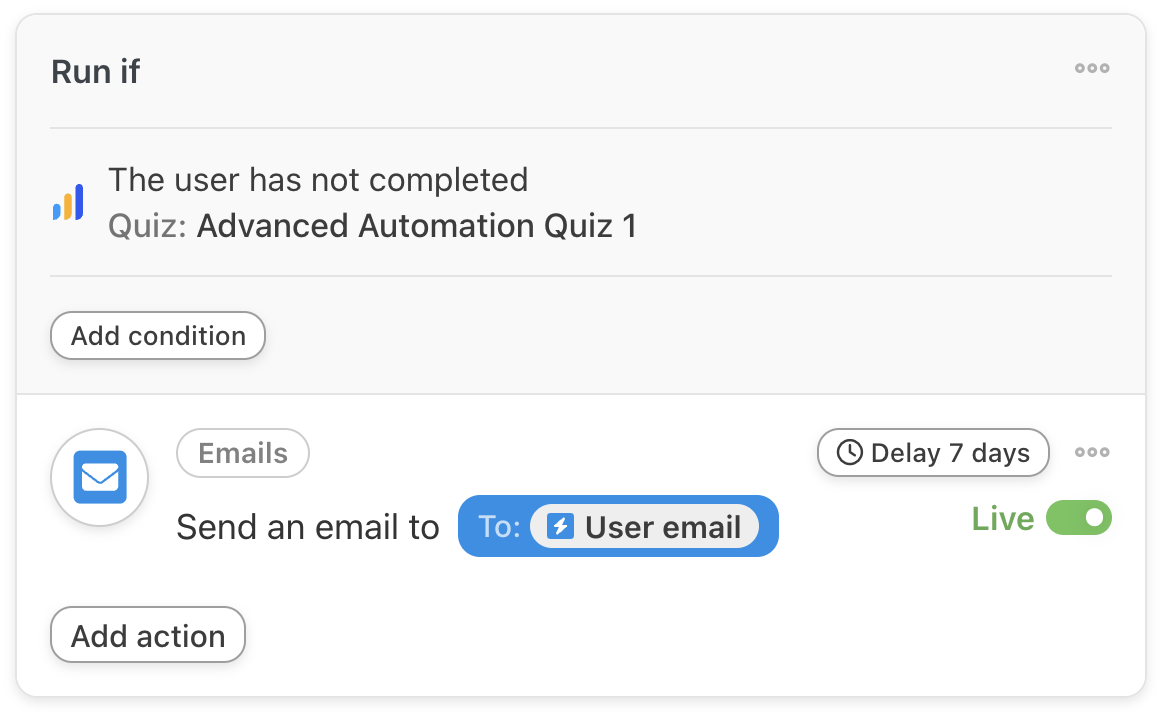
In the Condition window that appears, click LearnDash and select the condition that best suits your definition of an inactive student. For example, we have selected the condition The user has not completed a quiz.
Depending on the specific condition that you have chosen, Automator will then prompt you to complete the filter condition by selecting a course, lesson, quiz or topic. Once you’re finished, click Save filter. Your action should now look something like this:
Of course, we don’t want our students to receive this email right after enrolling in the course. We want to delay the action to ensure that our re-engagement automations are aligned with our course deadlines.
Once again, hover over the action and, this time, click Delay.
A pop-up window will appear where you can either set a time delay or schedule a specific date and time to run the action. In our example, we have a seven (7) day delay.
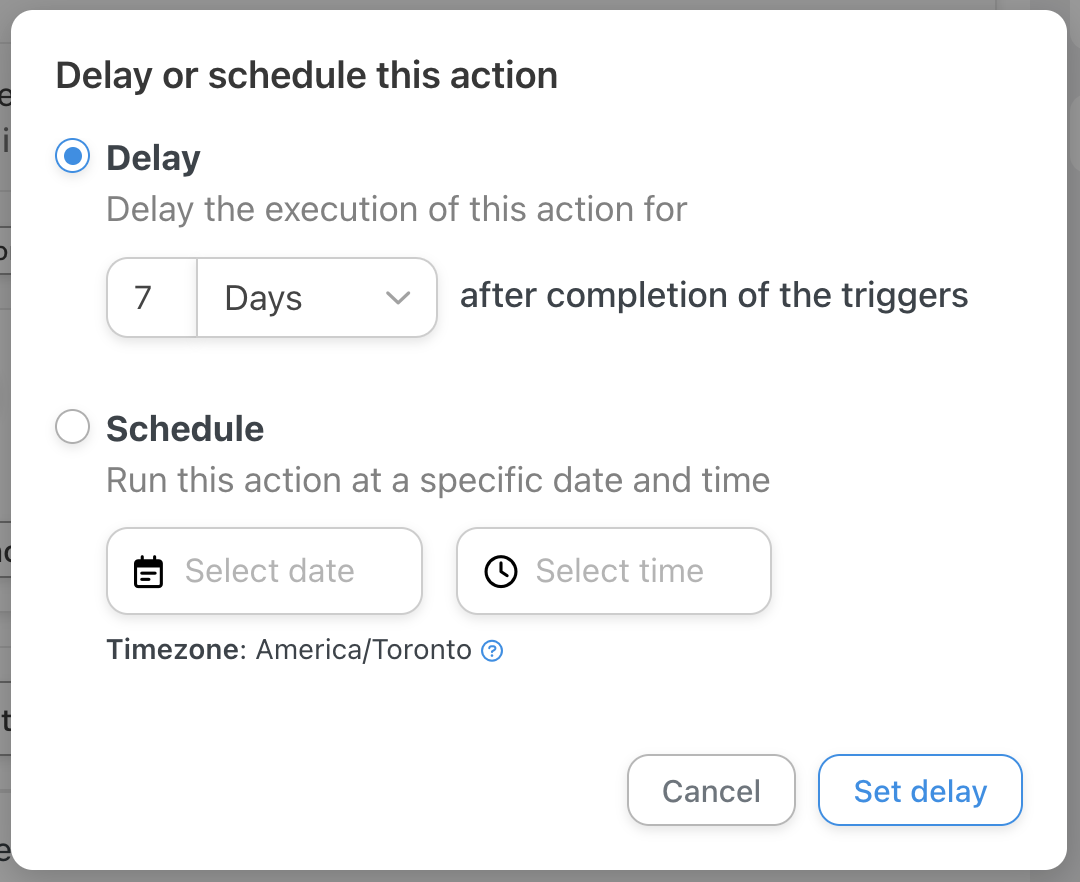
Once you’re finished, click Set delay. Your completed action should now look something like this:
Step 5: Go Live and Re-Engage!
You’re just about ready to help those lagging learners. All that’s left for you to do is to toggle the recipe from Draft to Live!
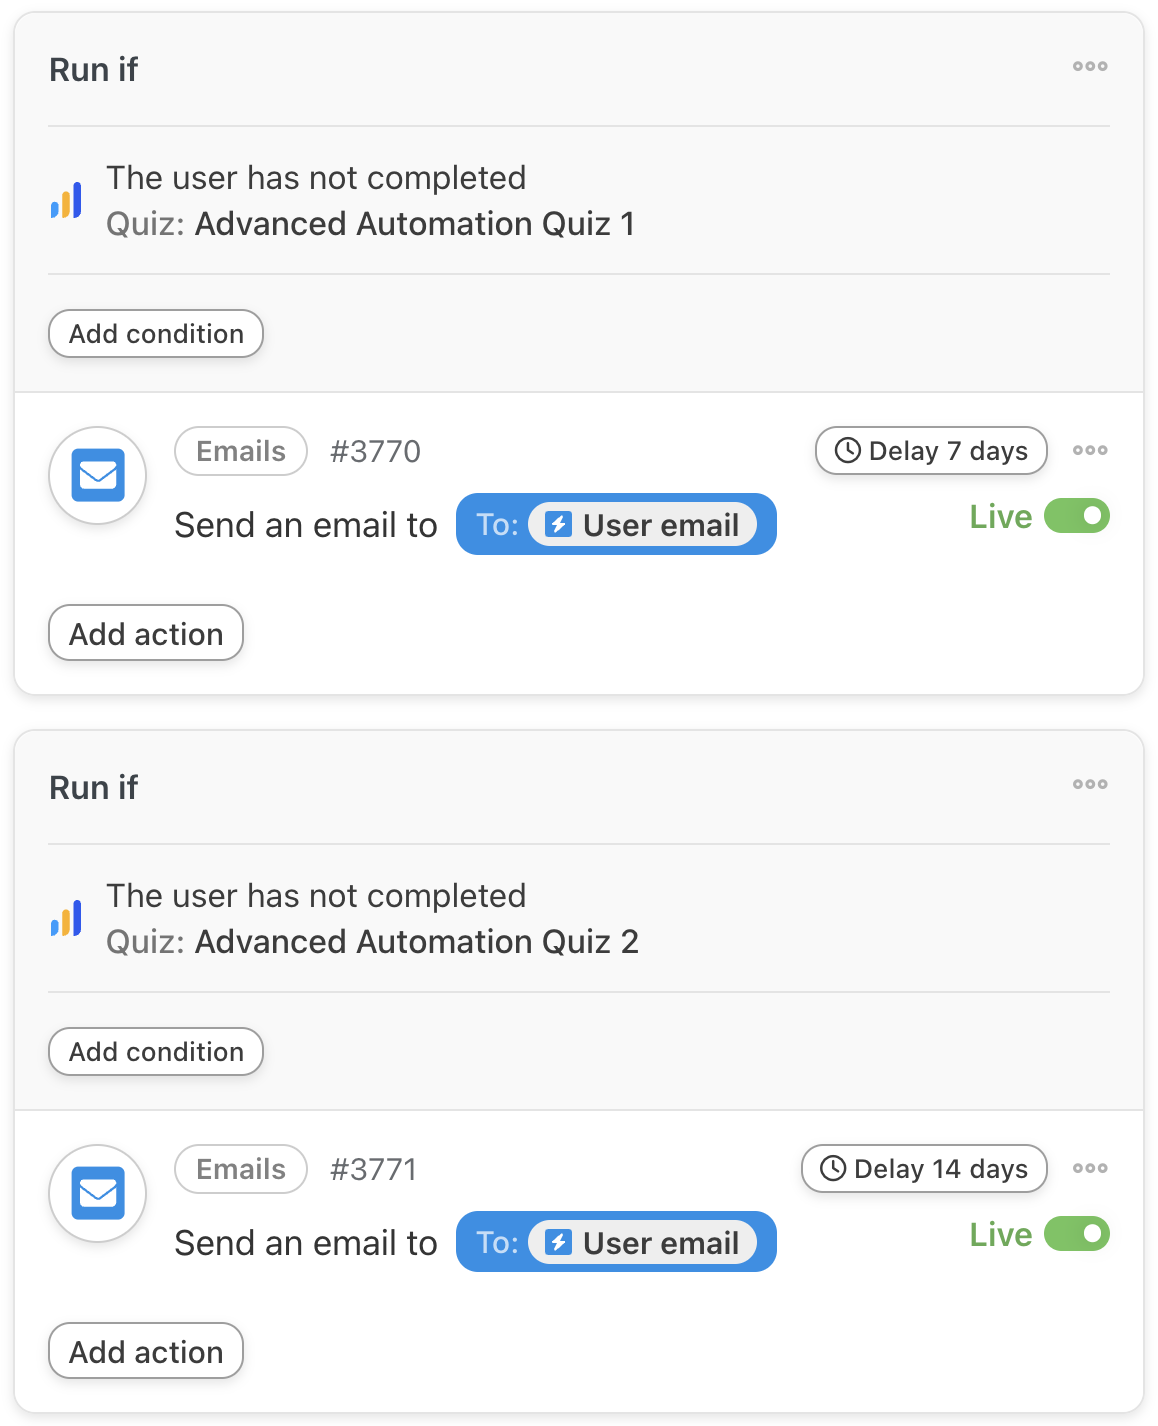
With this recipe, students registered in a course will receive an email reminder if they haven’t completed the specified quiz within seven (7) days of enrollment. But, as we established earlier, learning ends.
Add more actions to this recipe to ensure that students remain engaged until they have completed the course—and passed with flying colors!
CRMs such as ActiveCampaign, HubSpot, Drip and MailPoet can help you keep track of users who haven’t been reading your emails. However, without Automator, these CRMs have no idea what’s happening on your LearnDash-powered elearning platform.

If you prefer to manage your emails through your CRM, check out our list of 214 integrations.
More Ways to Re-Engage Inactive LearnDash Students
The recipe that we just created will help your LearnDash students to stay on top of their course/program material in an individualized way—especially given how customizable the recipe is. However, what about the students who have already fallen behind?
With Automator’s Loops feature, you can target your WordPress users in bulk. For example, with the recipe pictured below, we’re able to identify all of the users enrolled in a particular course who haven’t yet completed a specific lesson. We can then message these students in BuddyBoss and get them motivated to re-engage with their course content.

So far, all of the ways that we’ve chosen to re-engage with our inactive students assumes one thing: our students are still attending class. But what about the students with a poor attendance record, i.e., the students who haven’t been logging into their account.
Of course, Automator can help with that too.
Click the image below for a similar step-by-step walkthrough for finding and re-engaging with totally inactive WordPress users.

Re-Engage Inactive WordPress Users>>>
You’ll want to upgrade your Automator license to either Plus or Elite in order to get your hands on the FREE Custom User Fields Addon. It’s not necessarily a must for getting those students back into their seats, but it will certainly make ringing the recess bell a whole lot easier.
Conclusion
We certainly hope that we helped you get the attention of the students in the back row—and the ones skipping out on class altogether.
In this article, we covered:
- how to define inactive LearnDash students,
- recipes for re-engaging with inactive students individually and in bulk,
- integrating LearnDash with your CRM and other favorite plugins and apps, and
- more ways to get your students back into the classroom!
Your students aren’t the only ones who love to learn. We’d also like to hear from you on the ways in which you prefer to engage with your LearnDash students. Drop us a line in the comments section below and we’ll be sure to get back to you—we’re definitely active!
Until next time, happy automating.

Related Posts


This Post Has 0 Comments