Revive old WordPress posts with AI and Uncanny Automator. Learn how to reverse content decay…
How to Integrate Discord and WordPress: 3+ Community Engagement Hacks
Integrate Discord and WordPress with Uncanny Automator and engage with your community like never before. Dive into these no-code, low cost engagement hacks!
Did you know that Discord has over 150 million active monthly users each month?
Once just a hangout for gamers, Discord has evolved into a powerful community platform used by organizations and businesses of all kinds, from educators to ecommerce entrepreneurs.
If you’re running a WordPress site, integrating it with Discord can help you engage your audience, manage memberships, and automate important notifications. The best part? You can do it all without any manual work or even a single line of code.
Whatever type of online community you’re managing a Discord WordPress integration can:
- Streamline member/customer onboarding by assigning roles based on purchases or registrations.
- Keep your community engaged with real-time updates on blog posts, product launches, and announcements.
- Moderate access by automatically granting or removing Discord roles based on membership status.
In this guide, we’ll show you how to connect Discord to WordPress in just a few steps using Uncanny Automator, the best Discord WordPress plugin for no-code automation.
Let’s get started.
Why Connect Discord to WordPress with Automator
With online community engagement reaching historic highs, the need for businesses to provide their customers with a digital “clubhouse” has never been greater. Ever since its release in 2015, Discord has been a popular platform for online communities with a particularly engaged user base.
Here’s why automating a Discord WordPress integration using Uncanny Automator is essential for growing businesses:
1. Build an Engaged Community
A strong online community not only increases engagement—it boosts your bottom line. In fact:
- 85% of marketers say that online communities improve the customer journey.
- 27.3% of buyers consult with a product-related community before making a purchase.
By connecting WordPress to Discord, you can automatically bring your website users into an interactive space where they can ask questions, participate in discussions, and stay engaged with your brand.
By adding automation into the mix, you can build a highly engaged online community without adding hours worth of tasks to your daily operations.
With automation, you can:
- Auto-invite users to your Discord server when they sign up on your site.
- Assign community roles based on their purchases, subscriptions, or course enrollments.
- Send updates to a dedicated Discord channel whenever you publish new content.
2. Simplify Membership Management
If you run a membership site or another type of gated or paywalled community, manually managing Discord roles and access is time-consuming. Automator makes it effortless:
- Sync Discord roles with membership tiers—when a user upgrades or cancels, their Discord role updates automatically.
- Remove inactive users from premium channels when their subscription expires.
- Create private discussion spaces for specific customer groups, students, or VIP members.
3. Automate Notifications & Announcements
Tired of manually posting updates to your Discord server? Automator lets you:
- Send a message to a Discord channel whenever a new blog post is published or any type of new content goes live on your website.
- Notify members when a product is back in stock or when a sale goes live.
- Send private Discord messages to users based on their actions (for example, purchase confirmations).
What Makes Automator the Best Discord WordPress Plugin?
Not all Discord WordPress integrations are created equal. Some require custom coding, while others have limited automation features. Uncanny Automator stands out because it’s:
100% No-Code & Easy to Use
Forget about webhooks, bots, and complex API setups. Automator lets you create Discord automations with just a few clicks in fewer minutes.
Works with Your Favorite Apps & WordPress Plugins
Automator seamlessly connects Discord with WooCommerce, LearnDash, MemberPress, Gravity Forms, Drip and 214 more integrations. More so than any other integration tools, Automator empowers you to build workflows tailored to your community’s needs.
Packed with Powerful Discord Actions
With 9 Discord automation actions, Automator gives you full control over your online community. You can:
- Add users to a channel when they complete a purchase or course.
- Assign roles automatically based on membership level.
- Send private messages to users based on their behavior.
- Create new Discord channels dynamically for course cohorts or discussion groups.
- Remove roles or members when their access expires.
Scales with Your Community
Whether you’re managing an exclusive niche community or a large organization with thousands of members, Automator ensures smooth, reliable automation—helping you save time and focus on growing your audience.
Get Automator Pro and turn customers into community >>>
Not ready to commit to an Automator Pro license? No worries. You can still connect Discord to WordPress using the FREE version of Automator. Simply install and activate Automator from your WordPress Admin Dashboard, then register your account to receive complimentary app credits.
How to Integrate Discord and WordPress
To start creating Discord and WordPress integrations with Automator, follow these steps:
- Install and activate Uncanny Automator.
- From your WordPress Admin Dashboard, navigate to Automator > Settings.
- Under the App integrations tab, select Discord and click Connect Discord account.
- Automator will prompt you to sign in to a Discord account, or ask you to authorize permissions if you are already signed in.
- From the Automator Settings page, click Connect to sync any/all of the Discord servers you want to have connected to your WordPress website.
That’s it! You’ve successfully integrated your Discord server(s) with your WordPress website.
3 Powerful Discord WordPress Automations
Now that you have a powerful, community-building integration all set up, let’s take a look at creating your first Automator recipes.
1. Add Woo Members to Discord Servers & Channels
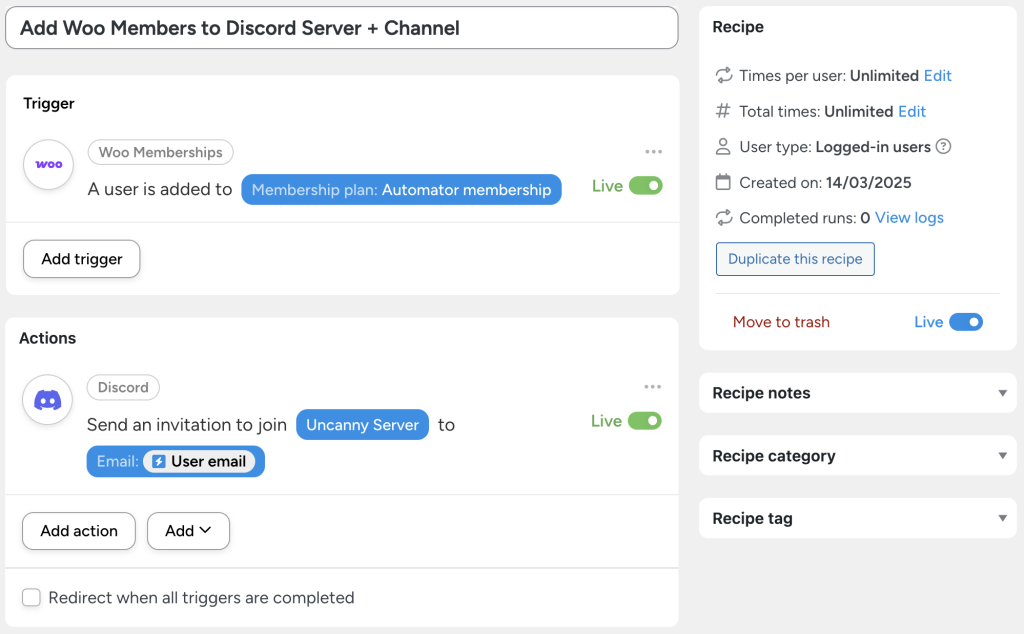
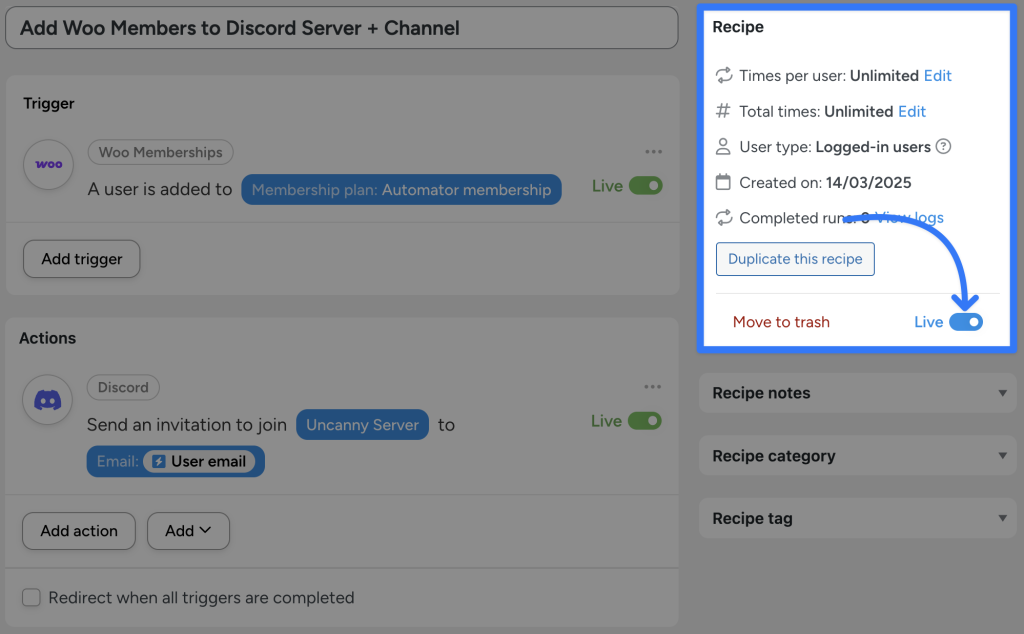
If you’re running a WooCommerce Memberships website, you can easily make exclusive Discord servers part of your membership offerings with the recipe pictured below.
Here’s how we did it.
Step 1: Create a New Recipe
From your WordPress Admin Dashboard, navigate to Automator > Add new recipe. In the popup modal that appears, select Logged-in users.
(Note: We were able to select “Logged-in users” because our Woo settings require login/registration at checkout.)
Step 2: Name Your Recipe
Give your recipe a name that makes it easy to recognize at a glance. For example, we have named this recipe “Add Woo Members to Discord Server + Channel”.
Step 3: Configure Your Trigger(s)
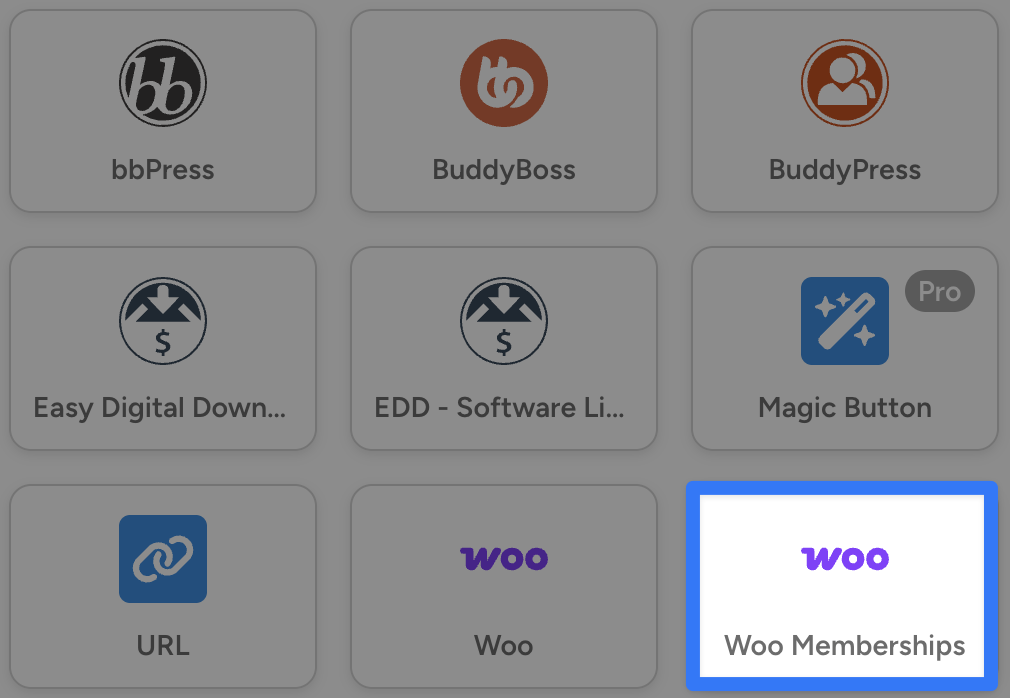
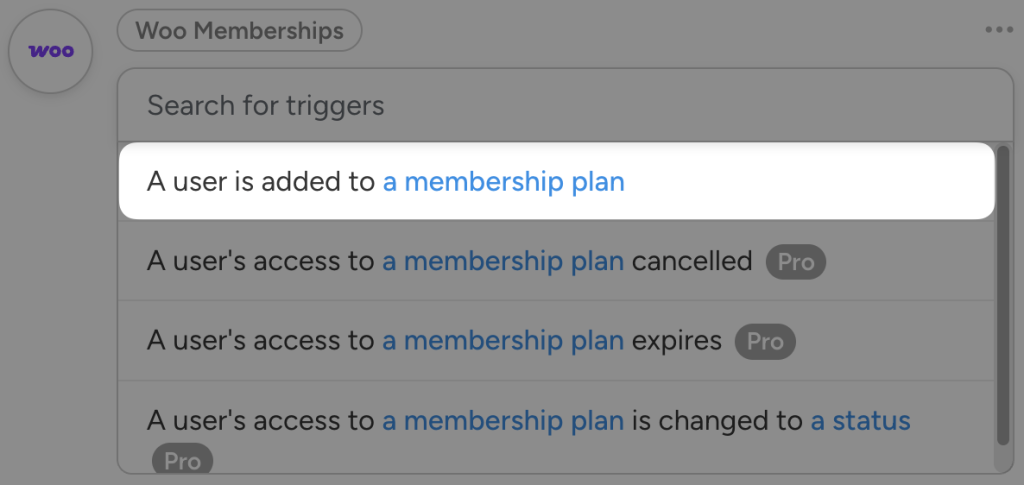
In the Triggers panel, from the menu of available integrations, select Woo Memberships.
From the dropdown list that appears, select A user is added to a membership plan.
Automator will prompt you to select a membership plan. Once you’re finished, click Save.
Step 4: Configure Your Action(s)
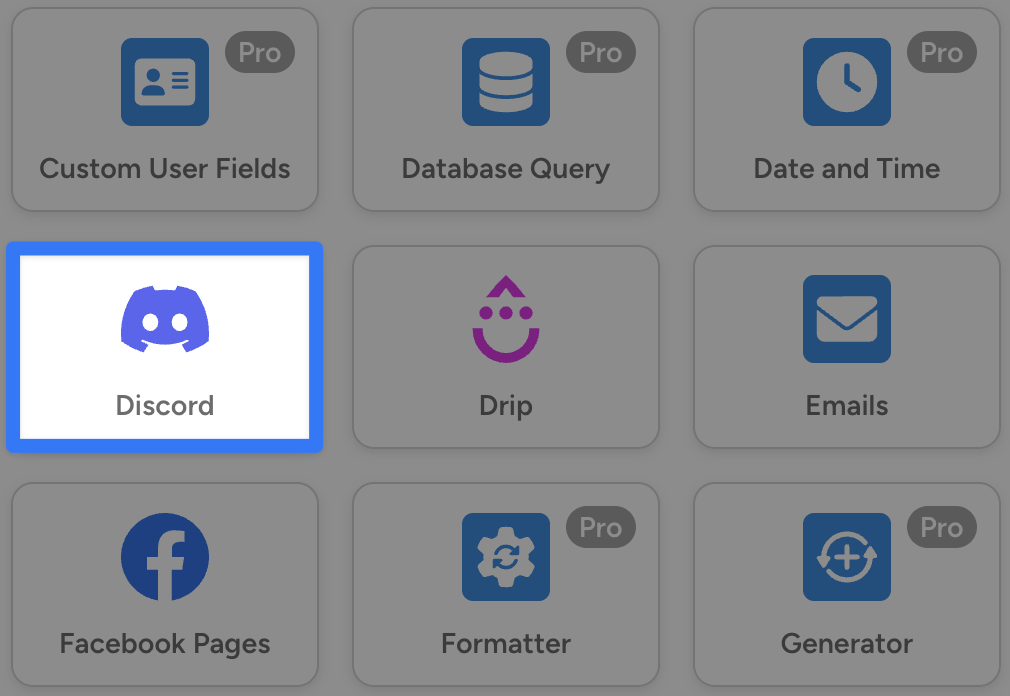
In the Actions panel, click Add action and select Discord.
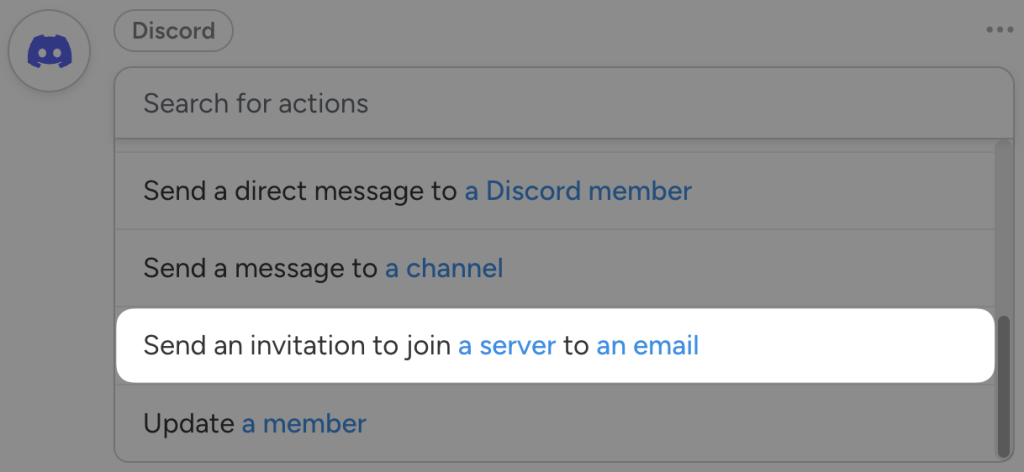
From the dropdown list that appears, select Send an invitation to join a server to an email.
Automator will present you with a form where you can specify the server and channel to which you would like to add these new members. You can also draft the email invitation.
We will fill out this form and draft our message using tokens (i.e., dynamic data from your WordPress website and from within recipes).
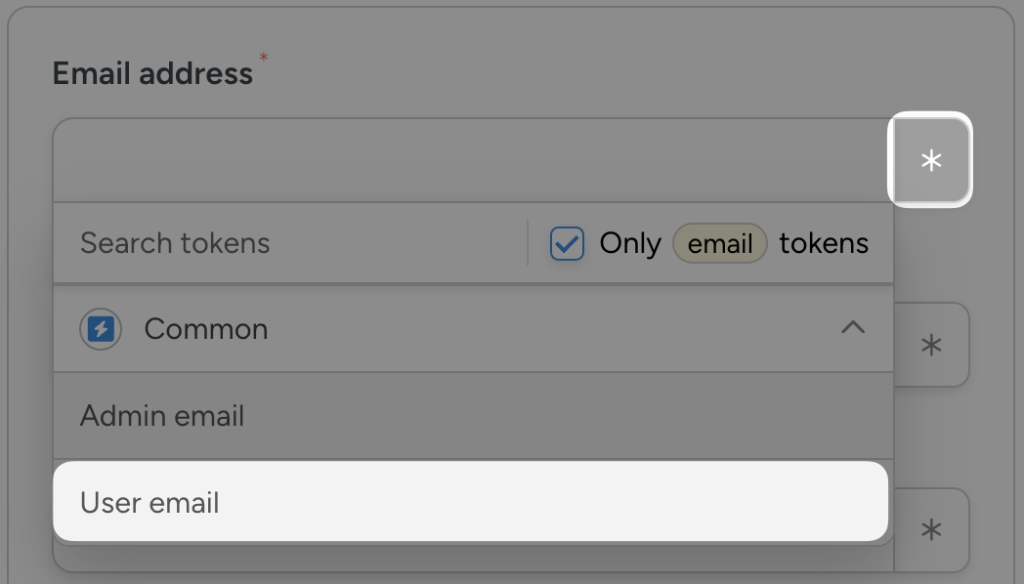
To use a token, click the Asterisk in a given field and select the corresponding token. For example, in the Email field, we have selected the “User email” token.
Fill out the remaining fields and draft your email. Once you’re finished, click Save.
(Tip: Want to learn how to send visually stunning branded emails directly from your WordPress website? Read our guide here.)
Step 5: Go Live!
You’re just about ready to create your first Discord WordPress integration with Automator. All you have to do is toggle the recipe from Draft to Live.
That’s it! You’ve just connected Discord to WordPress, instantly upping the value you can offer your Woo members and encouraging engagement.
Ready to see what more you can do with Automator and Discord?
Upgrade to Automator Pro to unlock even more triggers and actions >>>
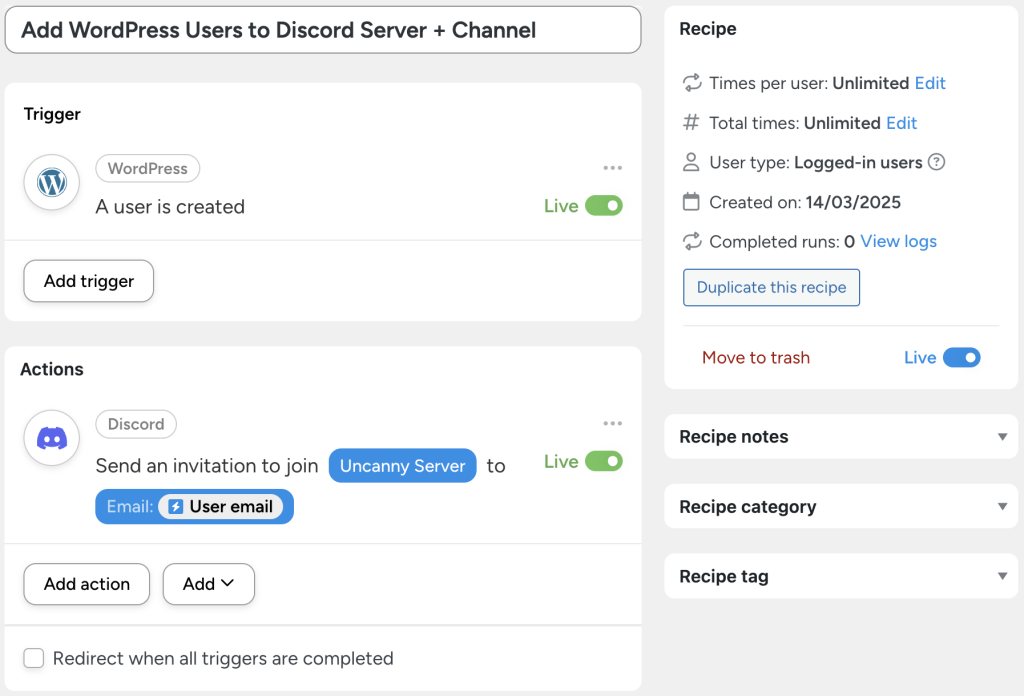
Not running a Woo Memberships website? You can still add new WordPress users to your Discord server(s) and channel(s) by simply swapping out the trigger in this recipe.
Don’t forget that Automator has actions to remove members from Discord and updates their roles, ensuring that your Discord community remains in sync with your WordPress website.
2. Launch Discord Sign-up Campaigns with Automator
The Automator recipe that we just created will automatically add new WordPress users and Woo members to our Discord server. But what about your existing Woo members and WordPress users?
You can jumpstart your Discord channels with Automator’s Loops feature.
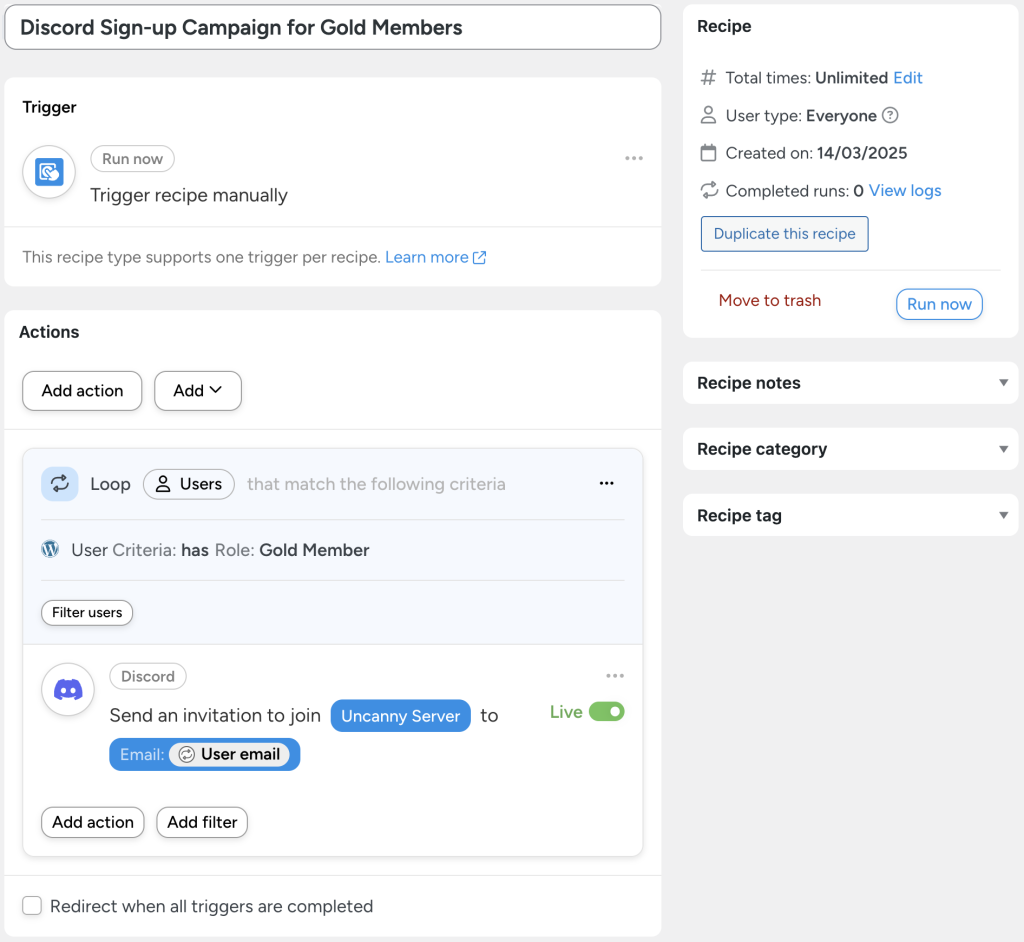
In the recipe pictured above, we’re able to send out an email campaign to hundreds or even thousands of members and users, encouraging them to join our Discord server.
Here’s how to set up an automated campaign like this one:
Step 1: Create and Name a New Recipe
From your WordPress Admin Dashboard navigate to Automator > Add new recipe. The popup modal that appears, select Everyone.
Give your recipe a name that makes it easy to recognize at a glance. For example, we have named this recipe “Discord Sign-up Campaign for Gold Members”.
Step 2: Configure Your Trigger(s)
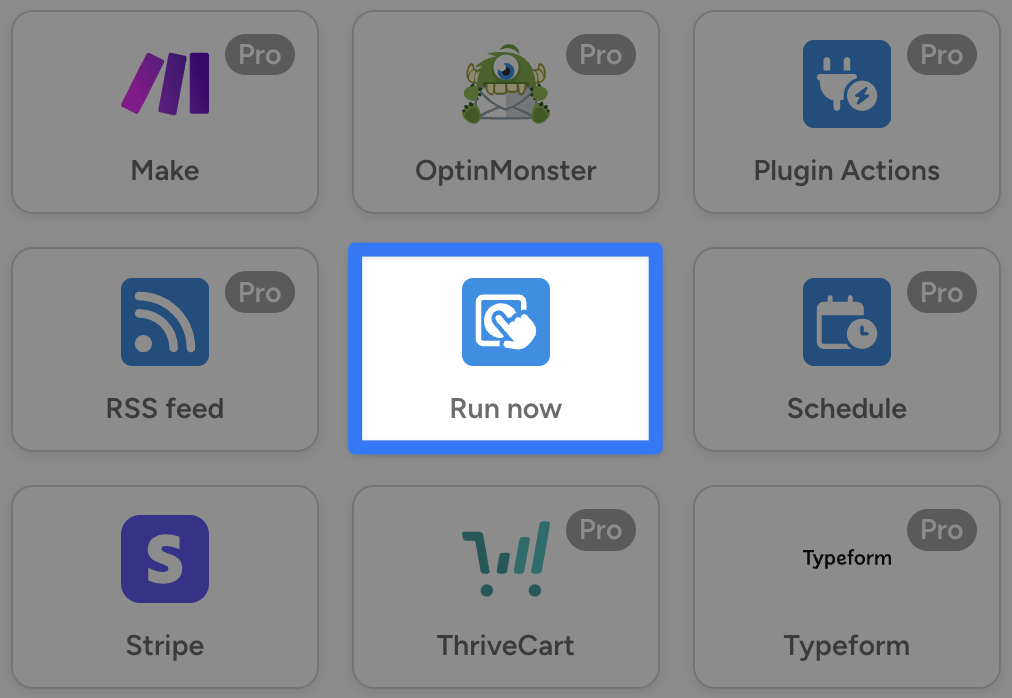
In the Triggers panel, from the menu of available integrations, select Run now.
From the dropdown list that appears, select Trigger recipe manually.
Step 3: Configure Your Action(s)
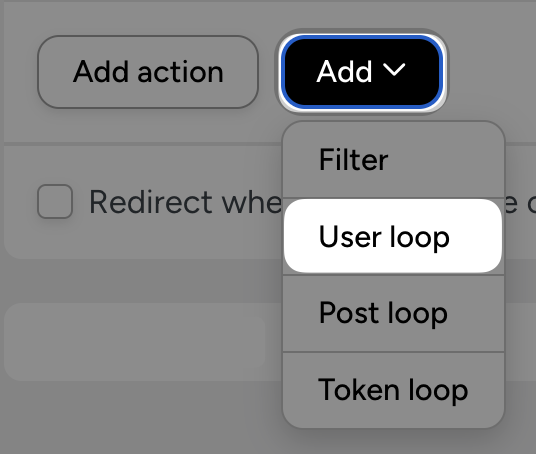
In the Actions panel, click Add and select User loop.
Within the Loop pane, click Add action and select Discord. From the dropdown list that appears, select Send an invitation to join a server to an email.
Once again, Automator will present you with a form to fill out the details for the invitation. Fill out these fields just as before, only this time, in the Email field, select Loop > User email.
Once you’re finished, click Save.
Step 4: Configure Your Action(s) Filters
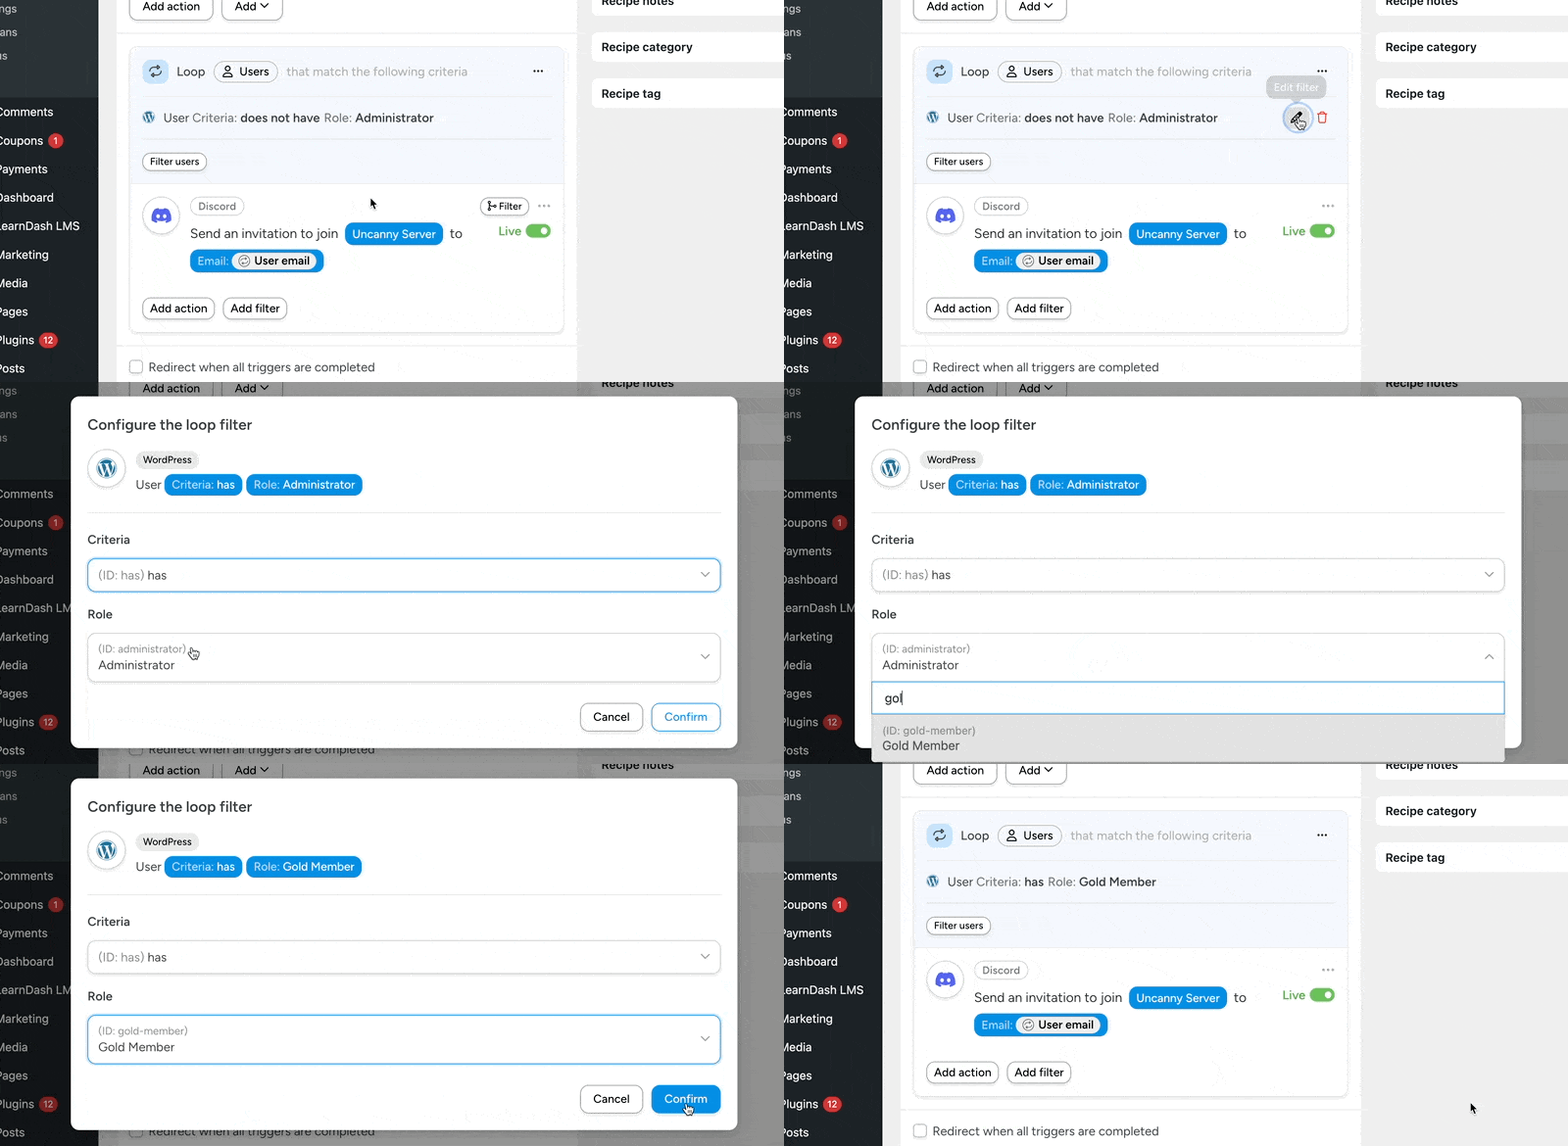
As the recipe is now, Automator will send the Discord invitation to all of your WordPress users who are not Administrators. However, if you’d like to be more selective and targeted, you can use Loop and action filters.
To change the Loop filter, simply click the Edit filter icon. In the modal that appears, select the type of users that you want to send the Discord invitation to.
Step 5: Run now
You’re just about ready to jumpstart your Discord server. Simply click Run now and kickback as Automator handles the rest.
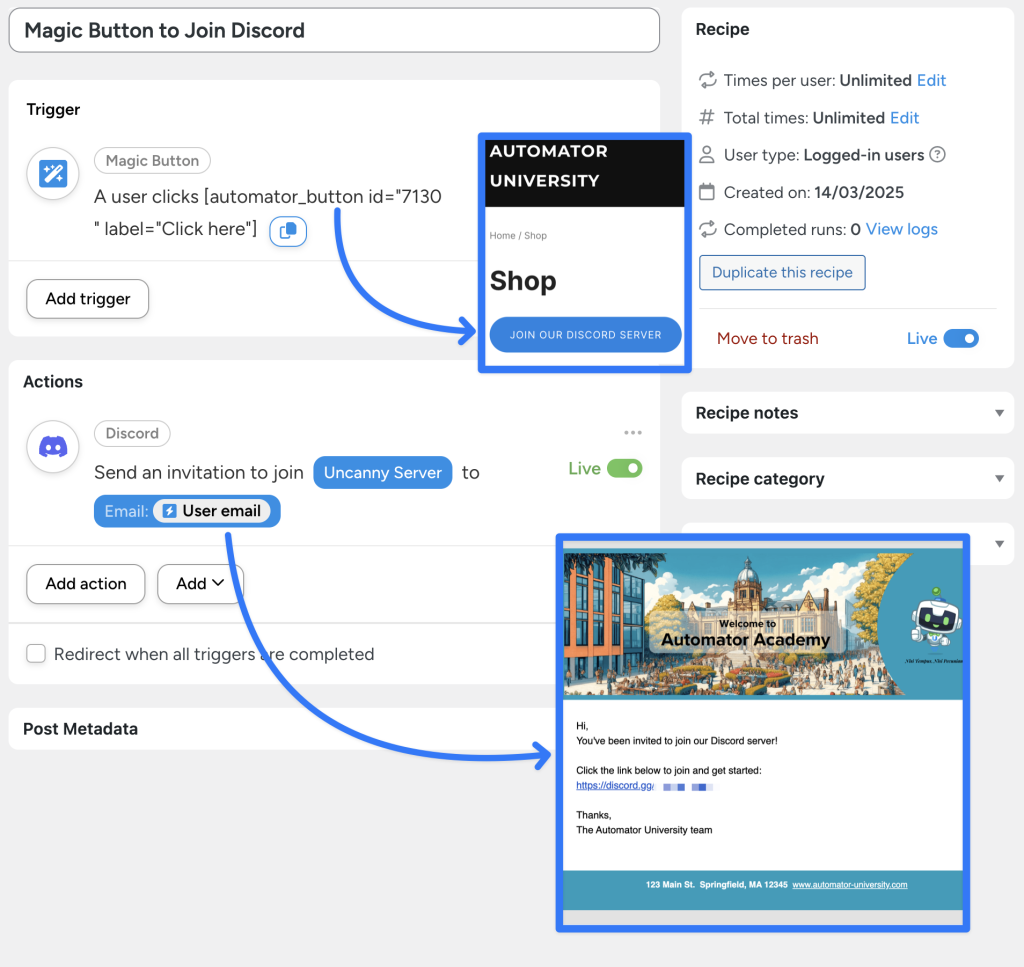
You can even use Automator’s magic button—which you can place anywhere on your website with a simple shortcode—to reinforce your campaign with compelling CTAs.
Upgrade to Automator Pro for more Magic… Buttons >>>
3. Send WordPress Content Updates to a Discord Channel
Now that you’re adding new WordPress users and Woo members to your Discord servers and channels at record speed, you need to keep them engaged.
Automator has countless triggers across 214 integrations, giving you endless ways to keep your community together online.
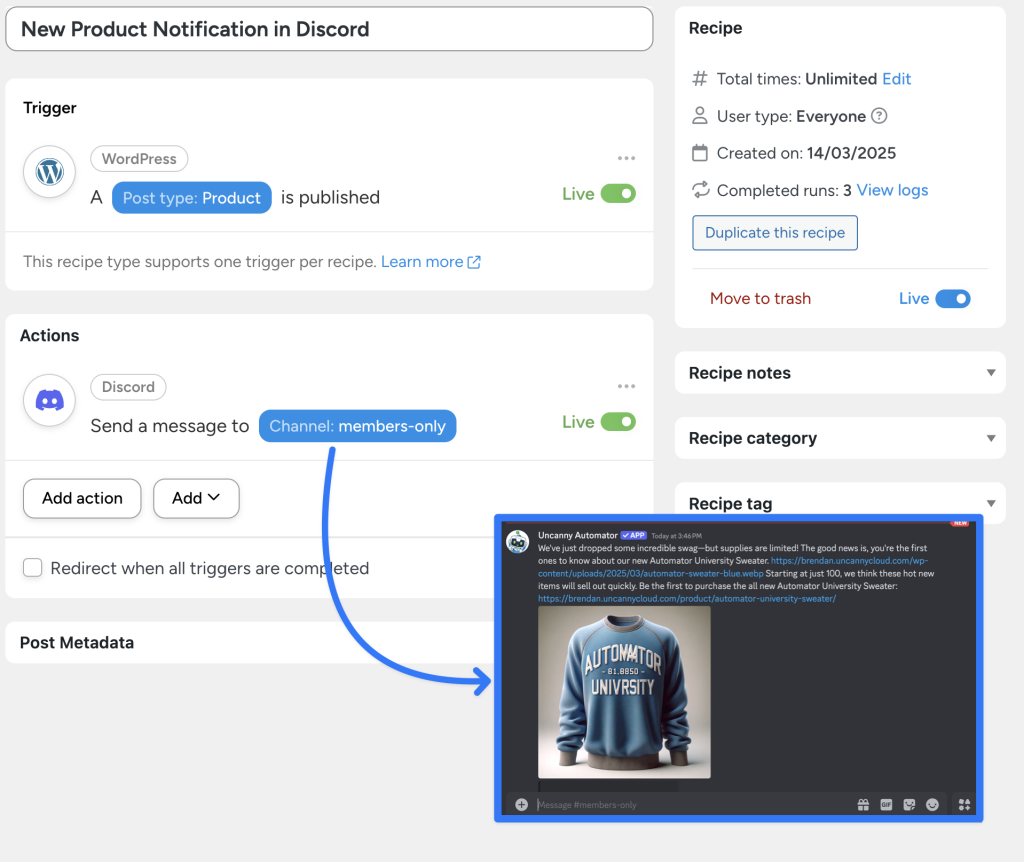
Want to send new product release notifications to a Discord channel?
How about sending automated personalized messages whenever a LearnDash assignment is graded? Or maybe you’d like the flexibility of automating Discord messages from a webhook? Better yet, connect your Discord channels to an RSS feed with Automator.
Once you upgrade to Automator Pro, you can unlock these and countless other new features to continue boosting your engagement.
Get an Automator Pro license now >>>
Best Practices for Connecting Discord to WordPress
By now, we’re confident that you have all of the tools you need to engage with your audience in new and exciting ways. Even so, here are some tips and tricks for getting the most out of your Discord WordPress integration.
1. Use Role-Based Access for Exclusive Content
- Assign Discord roles to new members automatically that correspond to their roles in WordPress.
- Create private channels for VIP customers, premium members, or students who have purchased a specific product or met specific requirements.
- Automate role removals when a user’s membership or subscription expires to ensure access stays up to date.
2. Keep Notifications Relevant & Avoid Spam
- Segment announcements by creating dedicated Discord channels for different types of updates (e.g., blog updates, sales promotions, course updates, etc.).
- Only send notifications for important events—spamming your community with constant messages can lead to disengagement.
- Use personalized direct messages instead of mass announcements when reaching out to individual users. Automator’s tokens feature makes this simple.
3. Automate Community Moderation
- Assign moderator roles dynamically based on user actions, such as completing an onboarding quiz or earning a specific badge.
- Keep discussions organized by creating new Discord channels dynamically for different cohorts, teams, or discussion groups.
4. Integrate with Other WordPress Plugins
- Integrate Discord with any of Automator’s many integrations to create advanced workflows and that enhance your engagement.
By following these best practices, you’ll create a well-managed, high-value Discord community that keeps members engaged while reducing manual effort.
Frequently Asked Questions
Conclusion: Supercharge Your WordPress-Discord Community with Automator
Now that you’ve connected Discord to WordPress and gotten a few automations under your belt, it’s only a matter of time before your online community flourishes.
In this article, we showed you how to:
- connect your Discord account to your WordPress website,
- automatically add your WordPress users to your various Discord servers and channels,
- create new Discord channels from events on your WordPress website, and more.
We also highlighted some key WordPress automations that showcased a few of Automator’s more advanced features, such as Loops and filters. Additionally, we covered best practices to ensure a well-organized community that remains engaged.
By implementing these strategies, you can create a dynamic and interactive space for your audience while reducing administrative overhead. Whether you run a membership site, an elearning site, or a product-based community, Uncanny Automator provides the tools you need to optimize your Discord WordPress integration.
What are some of the Discord and WordPress integration features you’d like to see? Engage with us in the comments section below!
Until next time, happy automating!



This Post Has 0 Comments