Revive old WordPress posts with AI and Uncanny Automator. Learn how to reverse content decay…
How to Make a Free WordPress Membership Website
Create a free WordPress membership website in minutes with Uncanny Automator and simple, lightweight plugins. Then, when you’re ready, easily scale up to a premium subscription model.
Are you looking for a free way to turn your WordPress website into a members’ only oasis? Or maybe you just want a cost-effective way to offer some exclusive content to paying subscribers? Well, look no further! You’ve found the perfect solution.
In this blog post, we’ll show you how to set up a fully automated WordPress membership website using nothing but FREE plugins. You’ll be able to register new users, create membership tiers, restrict content and collect membership fees.
WordPress developers, this could be the one-size fits all solution for your clients.
Now, without further ado, let’s start signing up some members!
Introduction
Running a WordPress membership website is easier than you might think. And you don’t have to spend hundreds—or even thousands—of dollars building the right tech stack.
Right out of the box, WordPress has most of the elements that you would need to create an exclusive online community. The trick, however, is in getting all of those elements to work together.
While there are plenty of paid solutions out there for creating a WordPress-based membership website, this blog post focuses on free solutions.
We’ll make use of some tools that you likely already have (such as an e-commerce plugin) and introduce you to some FREE plugins that, altogether, will help you create a lightweight membership website.
In the next section, we’ll take a look at the plugins that we’ll be using and the functions that they’ll serve in helping us turn our WordPress website into a members only retreat.
What You’ll Need for a Free WordPress Membership Website
At its core, a membership website only needs a few features to run smoothly. The plugins that we’ll feature in this blog post will give you access to all of the features that you need and then some.
These plugins will allow you to:
- register new users,
- create new user roles/membership tiers,
- restrict content by membership tier, and
- collect membership fees/subscriptions.
The plugins that we’ll be using are:
Let’s take a closer look at the free plugins that we’ll use to create an automated WordPress membership website.
1. User Role Editor
WordPress user roles usually serve to manage permissions on the back-end of your website. But, if you’re looking for a lightweight membership solution, then you can take advantage of user roles to create membership tiers.
You’ve likely already set up permissions for default user roles such as “Administrator” and “Subscriber”. Except for the most experienced WordPress developers, we don’t recommend changing those permissions. Nor do we recommend changing your theme’s functions.php file.
So, how do you add, edit and remove user roles easily? Enter User Role Editor.
As the name suggests, this simple (and, of course, free) plugin allows you to edit the user roles on your WordPress website without writing any code. With just a few clicks in a very straightforward interface, you can create user roles that correspond to membership tiers.
Furthermore, the User Role Editor plugin adds support for users having multiple roles. This means that your users can have various membership types or levels, allowing them to have greater control over their own user experience.
We’ll walk you through creating these membership tiers in the next section. For now, all you need to do is install and activate the User Role Editor plugin on your WordPress website>>>.
2. Content Control
At the core of any membership website is the ability to restrict access to certain types of content or pages. There are plenty of free and paid options available for placing content restrictions on your WordPress website. But few, if any, give you as much flexibility as the Content Control plugin.
Content Control allows you to restrict parts of your website based on user roles—and, as we’ve discussed, creating user roles is a cinch with User Role Editor. You can add as many restrictions as you’d like, tailor redirects, and even choose how much “teaser” content you want to show non-paying site visitors.
We will, of course, walk you through creating some basic restrictions later on. For now, simply install and activate Content Control on your WordPress website>>>.
3. WooCommerce
With User Role Editor at your disposal, you can create as many membership tiers as you want. And the Content Control plugin will allow you to restrict access to certain types of content and/or pages. Now, you just need a way to sell membership access. For this, we’re turning to the free version of WooCommerce.
WooCommerce is the preferred e-commerce solution for millions of WordPress websites—and with good reason. Woo “core”—i.e., the free forever version—allows you to sell digital products and content (such as membership access) with minimal setup.
The best part of building your WordPress membership website with Woo is its scalability. With countless premium addons and extensions, you can easily grow your platform and membership benefits as your site grows.
In the next section, we’ll walk you through configuring your Woo settings for an automated and free membership site.
For now, download WooCommerce core for free>>>.
(Note: You will need either a Stripe account or a PayPal account in order to process payments with WooCommerce. It is free to set up a Stripe account, however, you will incur transaction fees.)
4. Uncanny Automator
Now that you have the fundamental building blocks of a WordPress membership website, you just need a way to stack them. This is where Uncanny Automator comes in.
Uncanny Automator is the #1 automation and integration plugin for WordPress websites. Simply put, this means that Automator connects all of your favorite apps and plugins.
We’ll be using the free forever version of Automator to connect User Role Editor to WooCommerce so you can sell membership access. However, the paid version of Automator gives you access to countless more triggers, actions, and filter conditions.
Furthermore, Automator Pro licenses come with unlimited app credits for integrating engagement-boosting platforms like Discord, Slack, and Mailchimp.
In the next section, we’ll show you how Automator pulls everything together. For now, make sure to install and activate Uncanny Automator for free>>>.
(Note: Don’t forget to register your account with Automator. As a new user, you’ll receive complimentary app credits so you can try integrating your new membership website with CRMs such as ActiveCampaign and Drip. You could even try promoting your new membership features on social media like X/Twitter, LinkedIn and Facebook/Instagram.)
Make a Free Membership Website in WordPress
Fantastic! We now have everything we need to get started creating the free membership of our dreams. Let’s get to it.
Step 1: Create Membership Roles
By default, unless you’ve changed your settings, WordPress will register new users as Subscribers. While you likely won’t want to remove that user role from your members, you will want to add new user roles to their profile that will double as your membership tiers.
Recall that we’re going to use the User Role Editor plugin to accomplish this.
From your WordPress Admin Dashboard, navigate to Users > User Role Editor.
On the right-hand side of the screen, you’ll see a panel with options to edit user roles. Simply click Add Role.
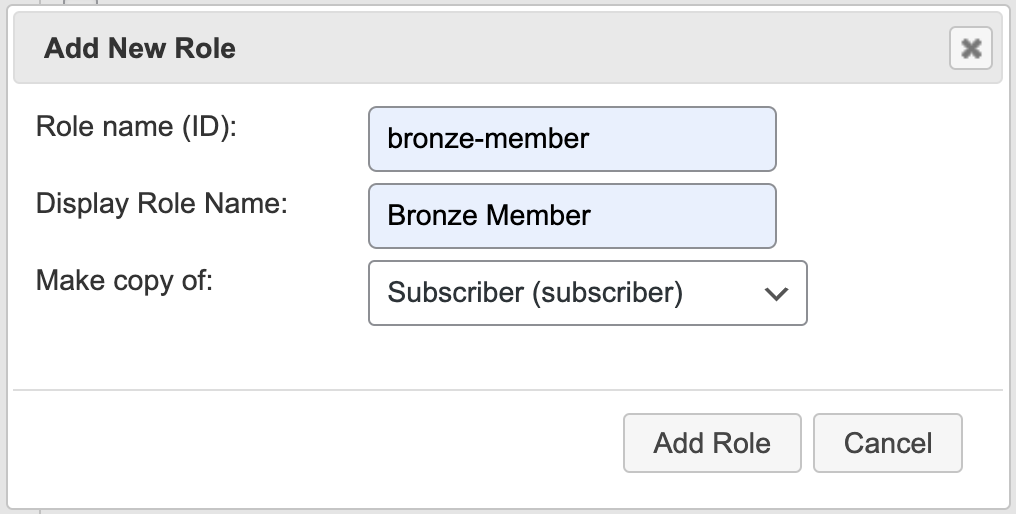
A pop-up window will appear with three fields; “Role name”, “Display Role Name” and “Make copy of”. It is in this new window where you can name your new user role/membership tier.
For example, we’ve created the membership tier “Bronze Member”, however, you can name your new user role anything you’d like. Whatever you enter into the Role name field is how the user role will appear on the back-end of your WordPress website. The value you enter into the Display Role Name field is how the name will appear on the front-end.
Finally, when you create a new role, the User Role Editor will duplicate the permissions of an existing user role. In most cases, you’ll simply want to duplicate the Subscriber user role as this is the default role for front-end users of your WordPress website.
Once you’re finished, click Add Role. You can continue to add as many new user roles/membership tiers as you’d like. For example, we’ve added two more, “Silver Member” and “Gold Member”.
Step 2: Restrict Content to Membership Role(s)
Now that you have created your membership tiers, you can add the content restrictions that will define each membership tier. This is where we put the Content Control plugin to use.
From your WordPress Admin Dashboard, navigate to Settings > Content Control. In the new screen, click Add Restriction.
The first thing that you’ll want to do is to name your restriction and select the user roles who will have access to the content.
For example, we’ve named this restriction “Bronze Member”. Next, we selected the “Bronze Member”, “Silver Member” and “Gold Member” user roles. (In other words, only members with a Bronze membership or higher will have access to the content that we define in this restriction.)
Next, click on the Protection tab. This is where you can configure how you would like to protect your restricted content. For a more seamless user experience, you can redirect users who do not have the proper user role(s) to your membership product page. (We’ll show you how to set this up in the next step.)
Finally, under the Content tab, you can choose the content that you would like to place behind your membership paywall.
The Content Control plugin offers you any number of ways to single out content. You can choose any content, from your entire site to blog posts with certain tags or even specific products based on their product ID.
We imagine that you already have some content that you would like to restrict to paying members only. You probably also have a structure and hierarchy for your content, so we’ll allow you to configure these rules for yourself.
As a simple example, we’ve chosen the rule “Content Is A Selected Page” and we will “house” our members-only content on this page.
You can add more content simply by clicking + Add Rule. You can even group rules together by clicking the + Add Group button.
Once you’re finished, use the toggle in the upper right-hand corner of the Restriction Editor window to enable the restriction. Next, click Add Restriction.
When you’re finished, your new restriction should look something like this:
Continue adding new restrictions until you have protected the content that will define your various membership tiers. If you only have one membership tier, then you can simply add more rules to the restriction you’ve just created.
Step 3: Create Membership Products(s)
With the steps that you have taken thus far, you have more or less created your membership website. Now, you just need to give your site visitors a way to purchase membership access.
Because we’re going to be using the free version of Uncanny Automator later on, we’ll need our would-be members to have a pre-existing user account on our WordPress website. Not to worry, this is something that WooCommerce can seamlessly integrate into our membership sign-up workflow for a smooth user experience.
First, from your WordPress Admin Dashboard, navigate to WooCommerce > Settings and click on the Accounts & Privacy tab.
Under “Guest checkout” and “Account creation”, unselect:
- Allow customers to place orders without an account
and select,
- Allow customers to log into an existing account during checkout
That’s it! Now, your soon-to-be members can create a free user account on your WordPress as part of their purchasing process.
(Note: Paid versions of Uncanny Automator allow you to run automations on site visitors who do not have a pre-existing account on your WordPress website.)
Now, it’s time to create your membership products.
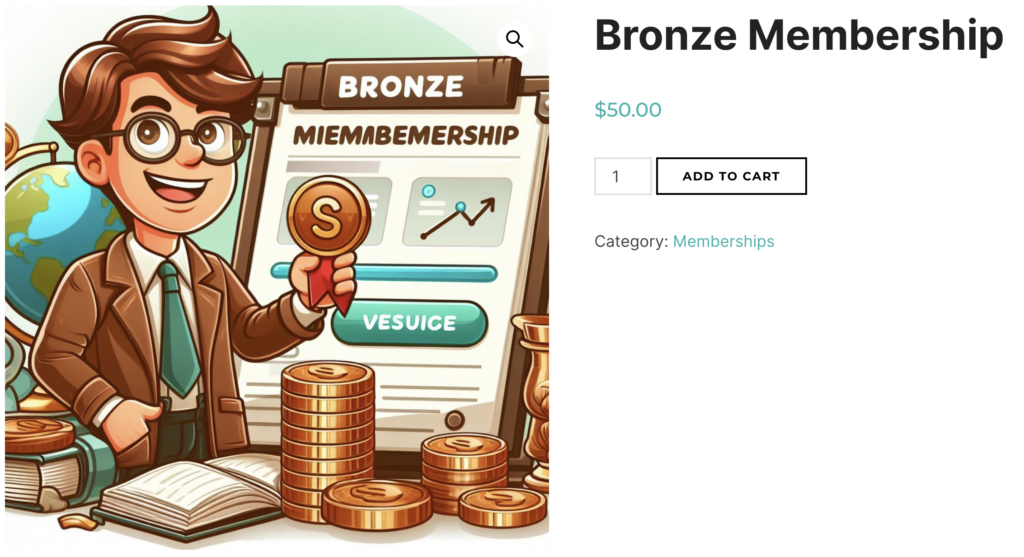
From your WordPress Admin Dashboard, head to Products > Add New. You can configure your membership product(s) however you would like as long as the product type is “Simple product” and “Virtual”.
After you have configured your membership product, click Save Draft or schedule a time to “release” the product by clicking Edit next to “Publish”.
You now have just about everything you need to create your WordPress membership website. All that’s left for you to do now is the fun part!
Step 4: Register Members with Automator
Uncanny Automator works using recipes (i.e., combinations of triggers and actions). You can think of everything you’ve done thus far as gathering the ingredients to cook up a free WordPress membership website. All you need now is a master chef (a.k.a. Uncanny Automator) to combine those ingredients into a winning recipe.
Let’s get to it.
From your WordPress Admin Dashboard, navigate to Automator > Add New. In the pop-up modal that appears, select Logged-in users.
First, give your recipe a name that makes it easy to recognize at a glance. For example, we’ve named this recipe “Bronze Membership Access”.
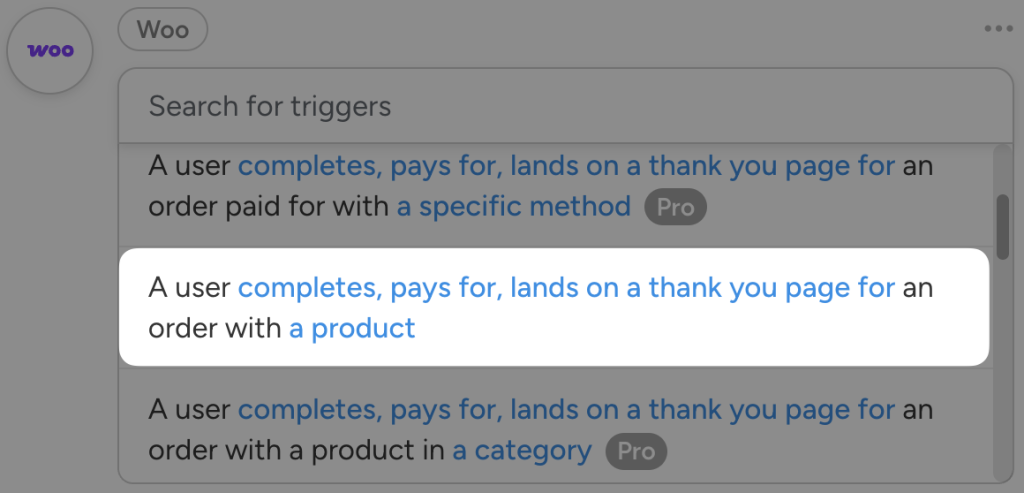
Next, in the Triggers panel, from the menu of available integrations, select Woo. From the drop-down list that appears, select “A user completes, pays for, lands on a thank you page for an order with a product”.
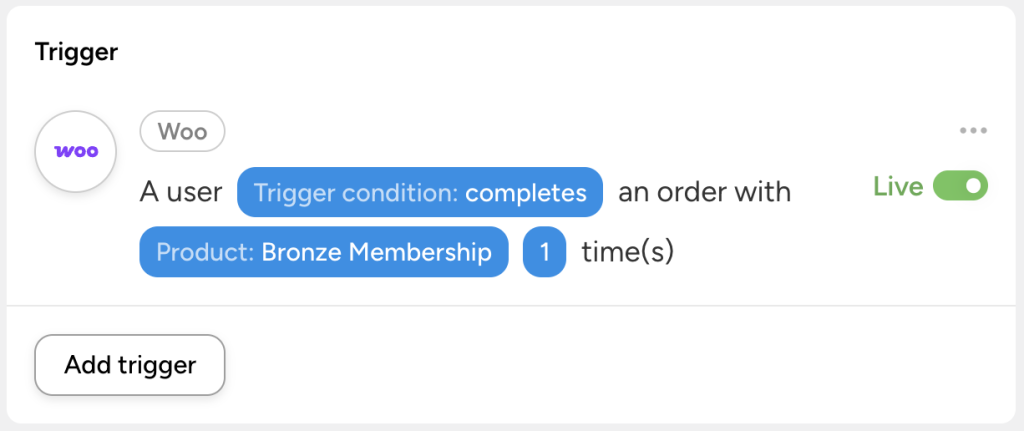
Select the trigger condition and your membership product. Once you’re finished, click Save. Your trigger should now look something like this:
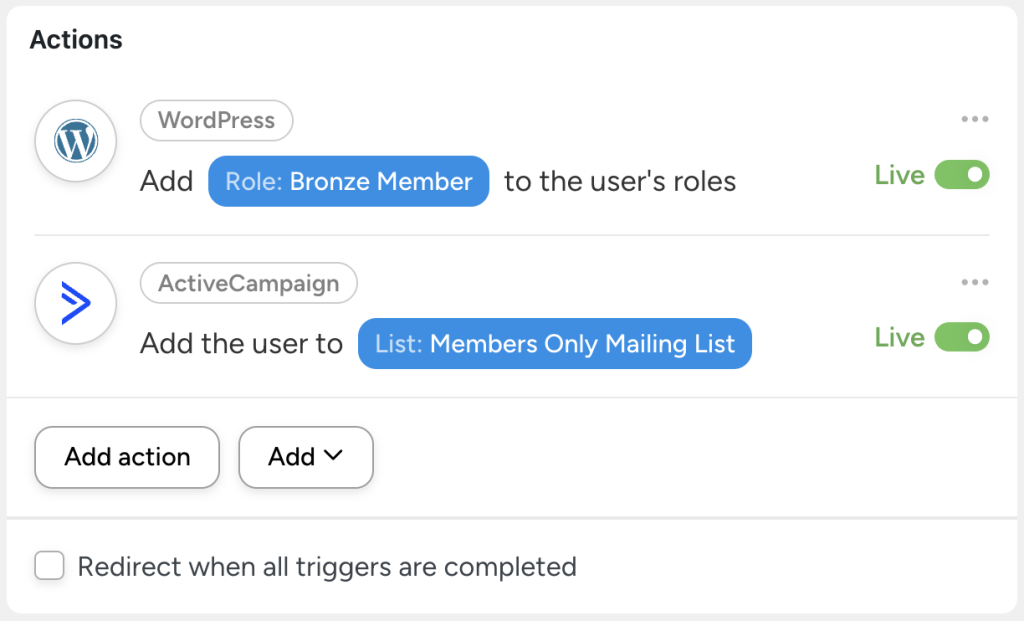
Next, in the Actions panel, click Add action and select WordPress from the available integrations. From the drop-down list that appears, select “Add a new role to the user’s roles”.
Select your membership role and click Save. Your completed action should look something like this:
Your WooCommerce customers will have received a transactional email after purchasing their membership access. However, because you have registered for a new Automator account (you have, haven’t you?), there should be some app credits knocking around for you to use.
To help onboard new members, add them to an ActiveCampaign or HubSpot drip campaign.
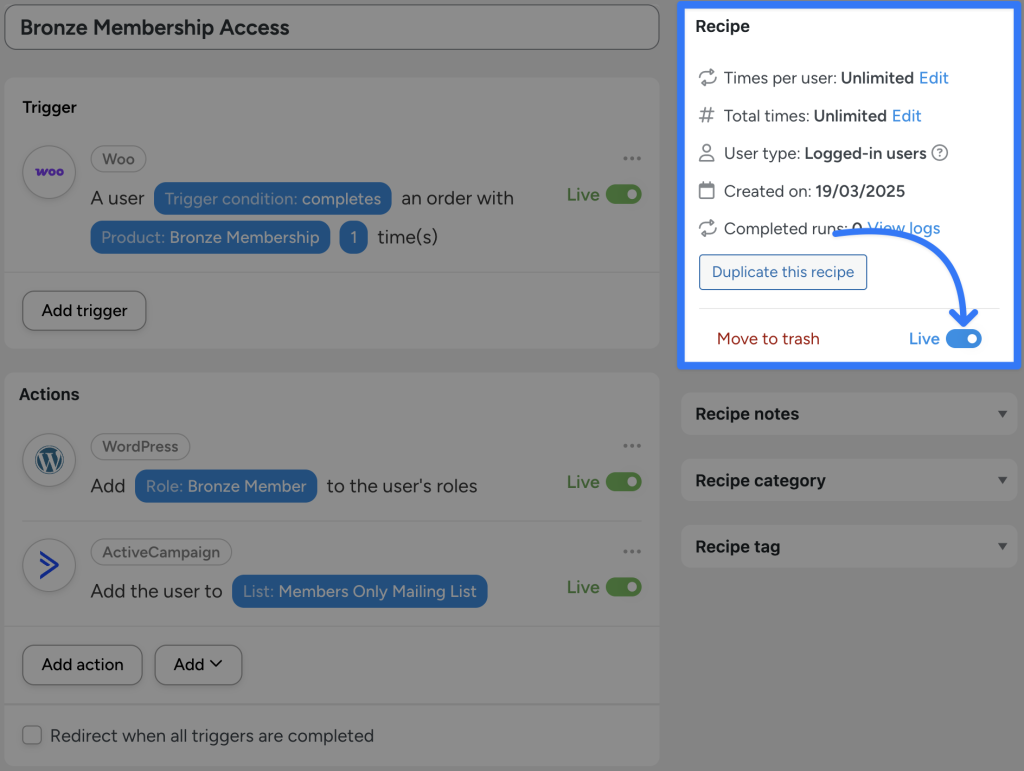
With or without a second action, you’re ready to roll out the red carpet for your members! All you have to do is toggle the recipe from Draft to Live and let Automator serve up your membership offerings on a silver platter.
Congratulations! You’ve just set up a fully automated (and totally free) WordPress membership website!
Upgrade Your Free WordPress Membership Website
We would like to think that this was a pretty straightforward solution to creating a free, automated membership website in WordPress. However, if you would prefer something even simpler, there’s nothing wrong with paying for expedience and convenience.
If you would rather have a simpler solution, or if you’re a WordPress developer looking for a cleaner solution for your clients, we recommend Automator Plus or Elite.
These premium plans of the Uncanny Automator plugin come with two addons at no additional cost that make setting up a WordPress membership website even easier.
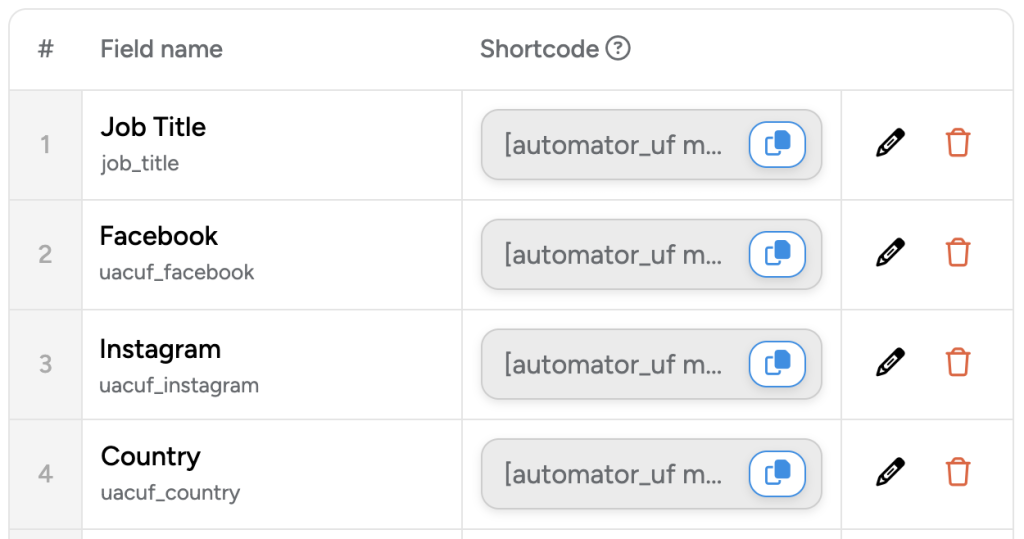
The Uncanny Automator Custom User Fields Addon allows you to collect and manage information about your members. You can even create membership tiers at the user meta level.
Want to celebrate their birthday? How about creating membership credits to encourage engagement? Or maybe you’d like to give your members the ability to display their socials on your website? It’s all possible with the Custom User Fields Addon.
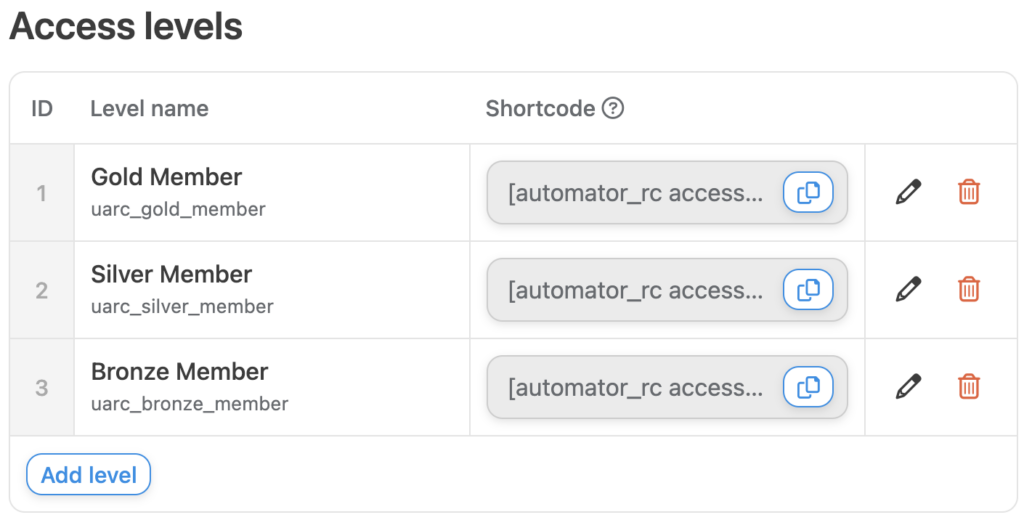
Then, once you’ve created custom membership tiers and profiles, use Uncanny Automator’s Restrict Content Addon to create your membership ecosystem. The Restrict Content Addon allows you to create access levels that you can map onto membership tiers.
Furthermore, you’ll get total control over your content’s protection with post and page level content restriction. And, in case that wasn’t granular enough, you can even restrict access to certain blocks within a post or page!
Finally, upgrading to Automator Plus and Elite unlocks even more powerful tools for integrating and automating your membership website.
Frequently Asked Questions
Conclusion
We hope that you’re enjoying your new free WordPress membership website. And, with top-notch exclusive offerings, we’re sure that your member list will grow. When you need some additional help managing your roster of rockstar members, we’re confident that you’ll know where to turn.
For WordPress developers, an Automator Elite license makes it easy and cost-effective to create membership websites for your clients. Additionally, they’ll get the exclusive automation and integration power that comes along with Automator Basic to help them manage their business as it grows.
Have any questions about setting up a free membership website in WordPress? Want to know how Automator can help you serve up delicious recipes for your members? Drop us a line in the comments section below and we’ll get right back to you!
Until next time, happy automating!












This Post Has 0 Comments