Revive old WordPress posts with AI and Uncanny Automator. Learn how to reverse content decay…
How to Seamlessly Connect WPForms to ConvertKit
Seamlessly connect WPForms to ConvertKit using Uncanny Automator to capture leads, improve email marketing, and enhance engagement.
Are you looking for a way to create a lead-boosting integration between WPForms and ConvertKit? Then you’ve landed on the right page.
In this guide, we’ll walk you through the steps to connect WPForms and ConvertKit with Uncanny Automator.
By the end of this article, you’ll be able to turn form submissions into leads and integrate your email marketing efforts directly with your WordPress website.
Let’s get into it.
Why Connect WPForms to ConvertKit with Uncanny Automator
WPForms is the leading form-building plugin for WordPress. Whether you’re choosing from one of a myriad of pre-built templates or starting from scratch with the drag-and-drop builder, WPForms allows you to create custom forms that meet your needs.
ConvertKit, similarly, is one of the leading email marketing platforms. Designed specifically for creators, ConvertKit’s user-friendly features give you more time for content creation while taking care of the distribution.
By integrating WPForms with ConvertKit, you can capture more leads, ensure the accuracy of your contacts’ information and enhance engagement with timely emails. The best part is that, with Uncanny Automator, you can do all of this while spending less time actually managing your subscriber lists and more time writing new content.

Uncanny Automator is the #1 automation and integration tool for WordPress websites. Whether you’re looking to connect WPForms to ConvertKit or two (or more) of your other favorite apps and plugins, Automator is the tool for the job.
Want to know what makes it so special?
- Ease-of-Use: Using simple combinations of triggers and actions called recipes, Automator connects all of your favorite apps and plugins. A user-friendly click-and-play interface means that you can automate your workflows in just minutes—or even seconds—without splurging on development.
- Versatility: With features such as filters and delays, Automator gives you the flexibility to connect your favorite apps and plugins however you choose.
- Affordability: Unlike other automation and integration solutions, Automator won’t charge you each time you run an automation. In other words, the more you automate and integrate, the more you save!
- Integrations: Automator has tons of integrations with more on the way all of the time.
- Support: Unparalleled support has made Automator one of the highest-rated plugins in the WordPress ecosystem. Whether you need help setting up a time-saving recipe or want to see some new integrations or features, the Automator support team is always at the ready.
Convinced yet? Get your Automator license now so you can follow along>>>.
Capture ConvertKit Leads with WPForms
Now that you have your Automator Pro license, let’s take a look at our first ConvertKit and WPForms integration.
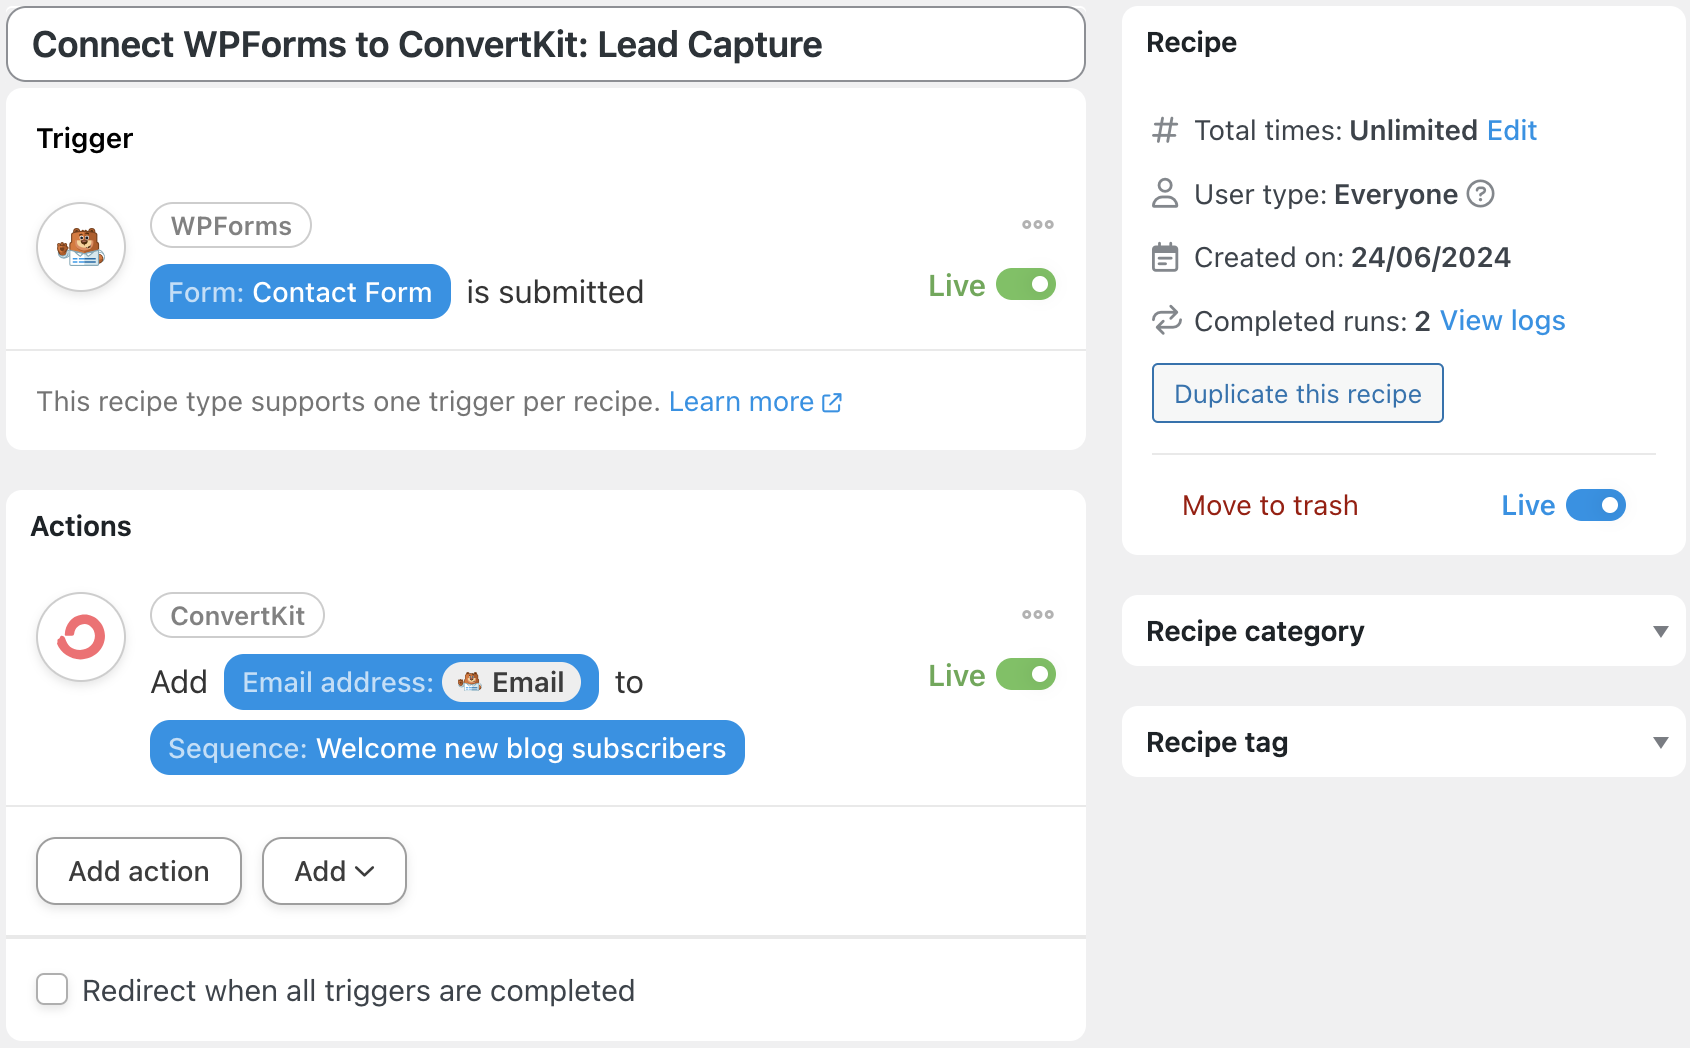
In the recipe pictured above, we’re able to create ConvertKit subscribers from WPForms submissions. Let’s take a look at how we did it.
Step 1: Create a New Recipe
From your WordPress Admin Dashboard, navigate to Automator > Add new recipe. In the pop-up window that appears, select Everyone.

(Note: We selected Everyone because we want to turn as many WPForms contacts into ConvertKit subscribers as possible, not simply our existing WordPress users.)
Step 2: Name Your Recipe
Give your recipe a name that makes it easy to recognize at a glance. For example, we’ve named this recipe “Connect WPForms to ConvertKit: Lead Capture”.
Step 3: Configure Your Trigger(s)
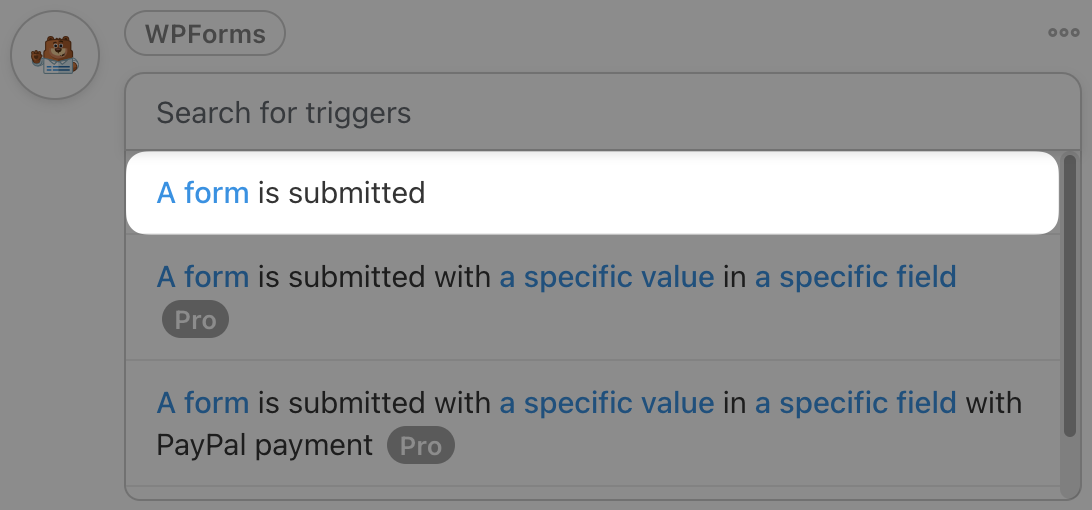
In the Trigger panel, from the menu of available integrations, select WPForms.

From the dropdown list that appears, select A form is submitted.
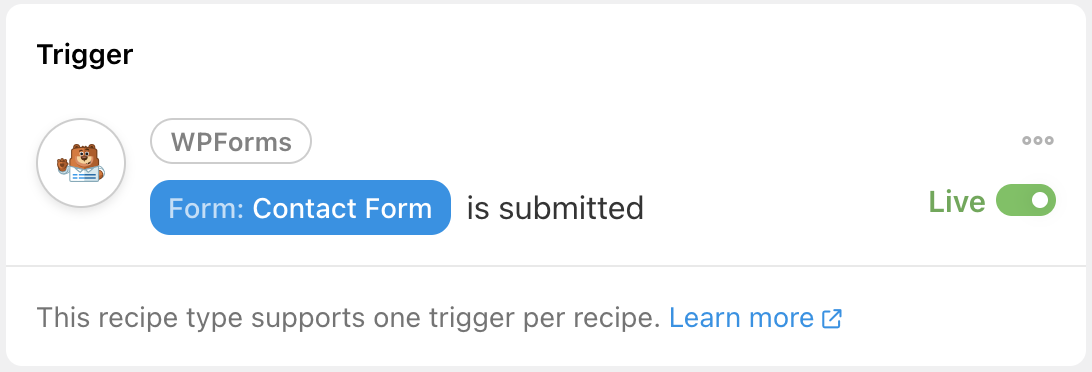
Automator will prompt you to select a form. For example, we have selected our contact form. Once you’ve selected your desired form, click Save.
Your completed trigger should look something like this:
Step 4: Configure Your Action(s)
In the Actions panel, click on Add action and select ConvertKit.
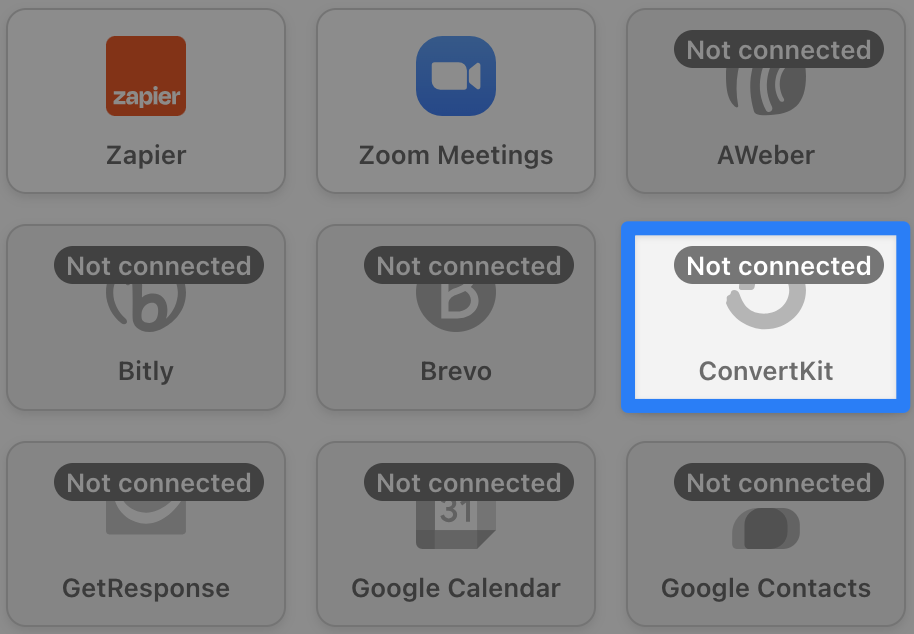
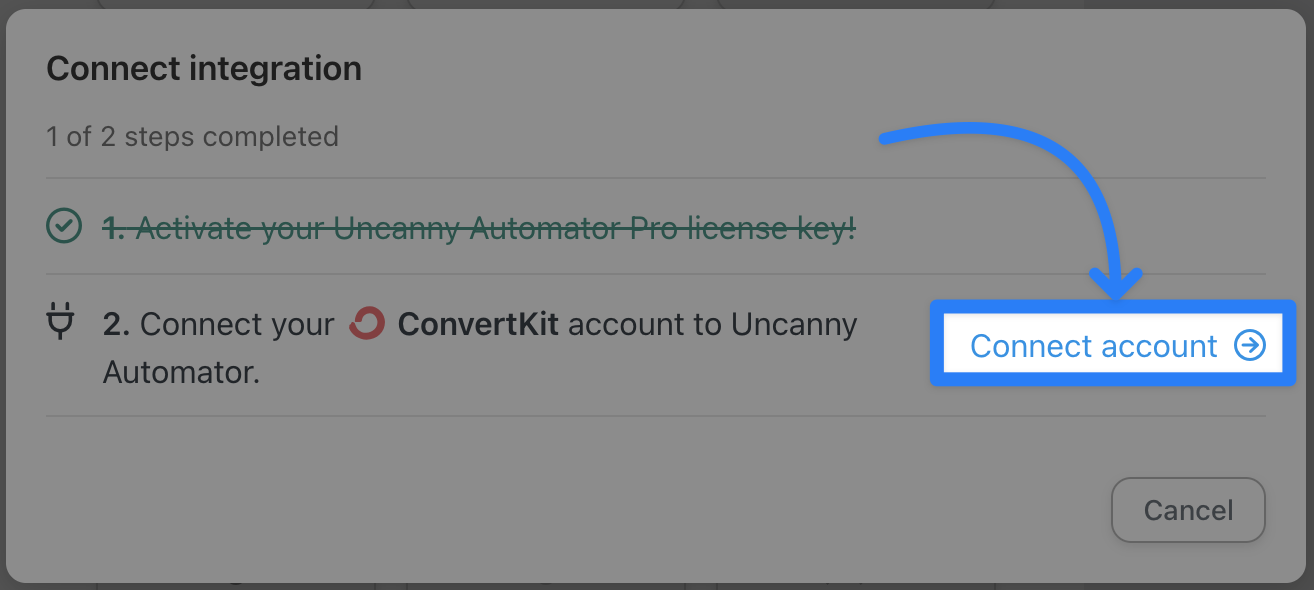
If you haven’t already connected your ConvertKit account, click on Connect account in the modal that appears.
Automator will then prompt you to enter some ConvertKit credentials; the API key and API secret. You can find these credentials by navigating to Settings > Advanced from your ConvertKit Dashboard.
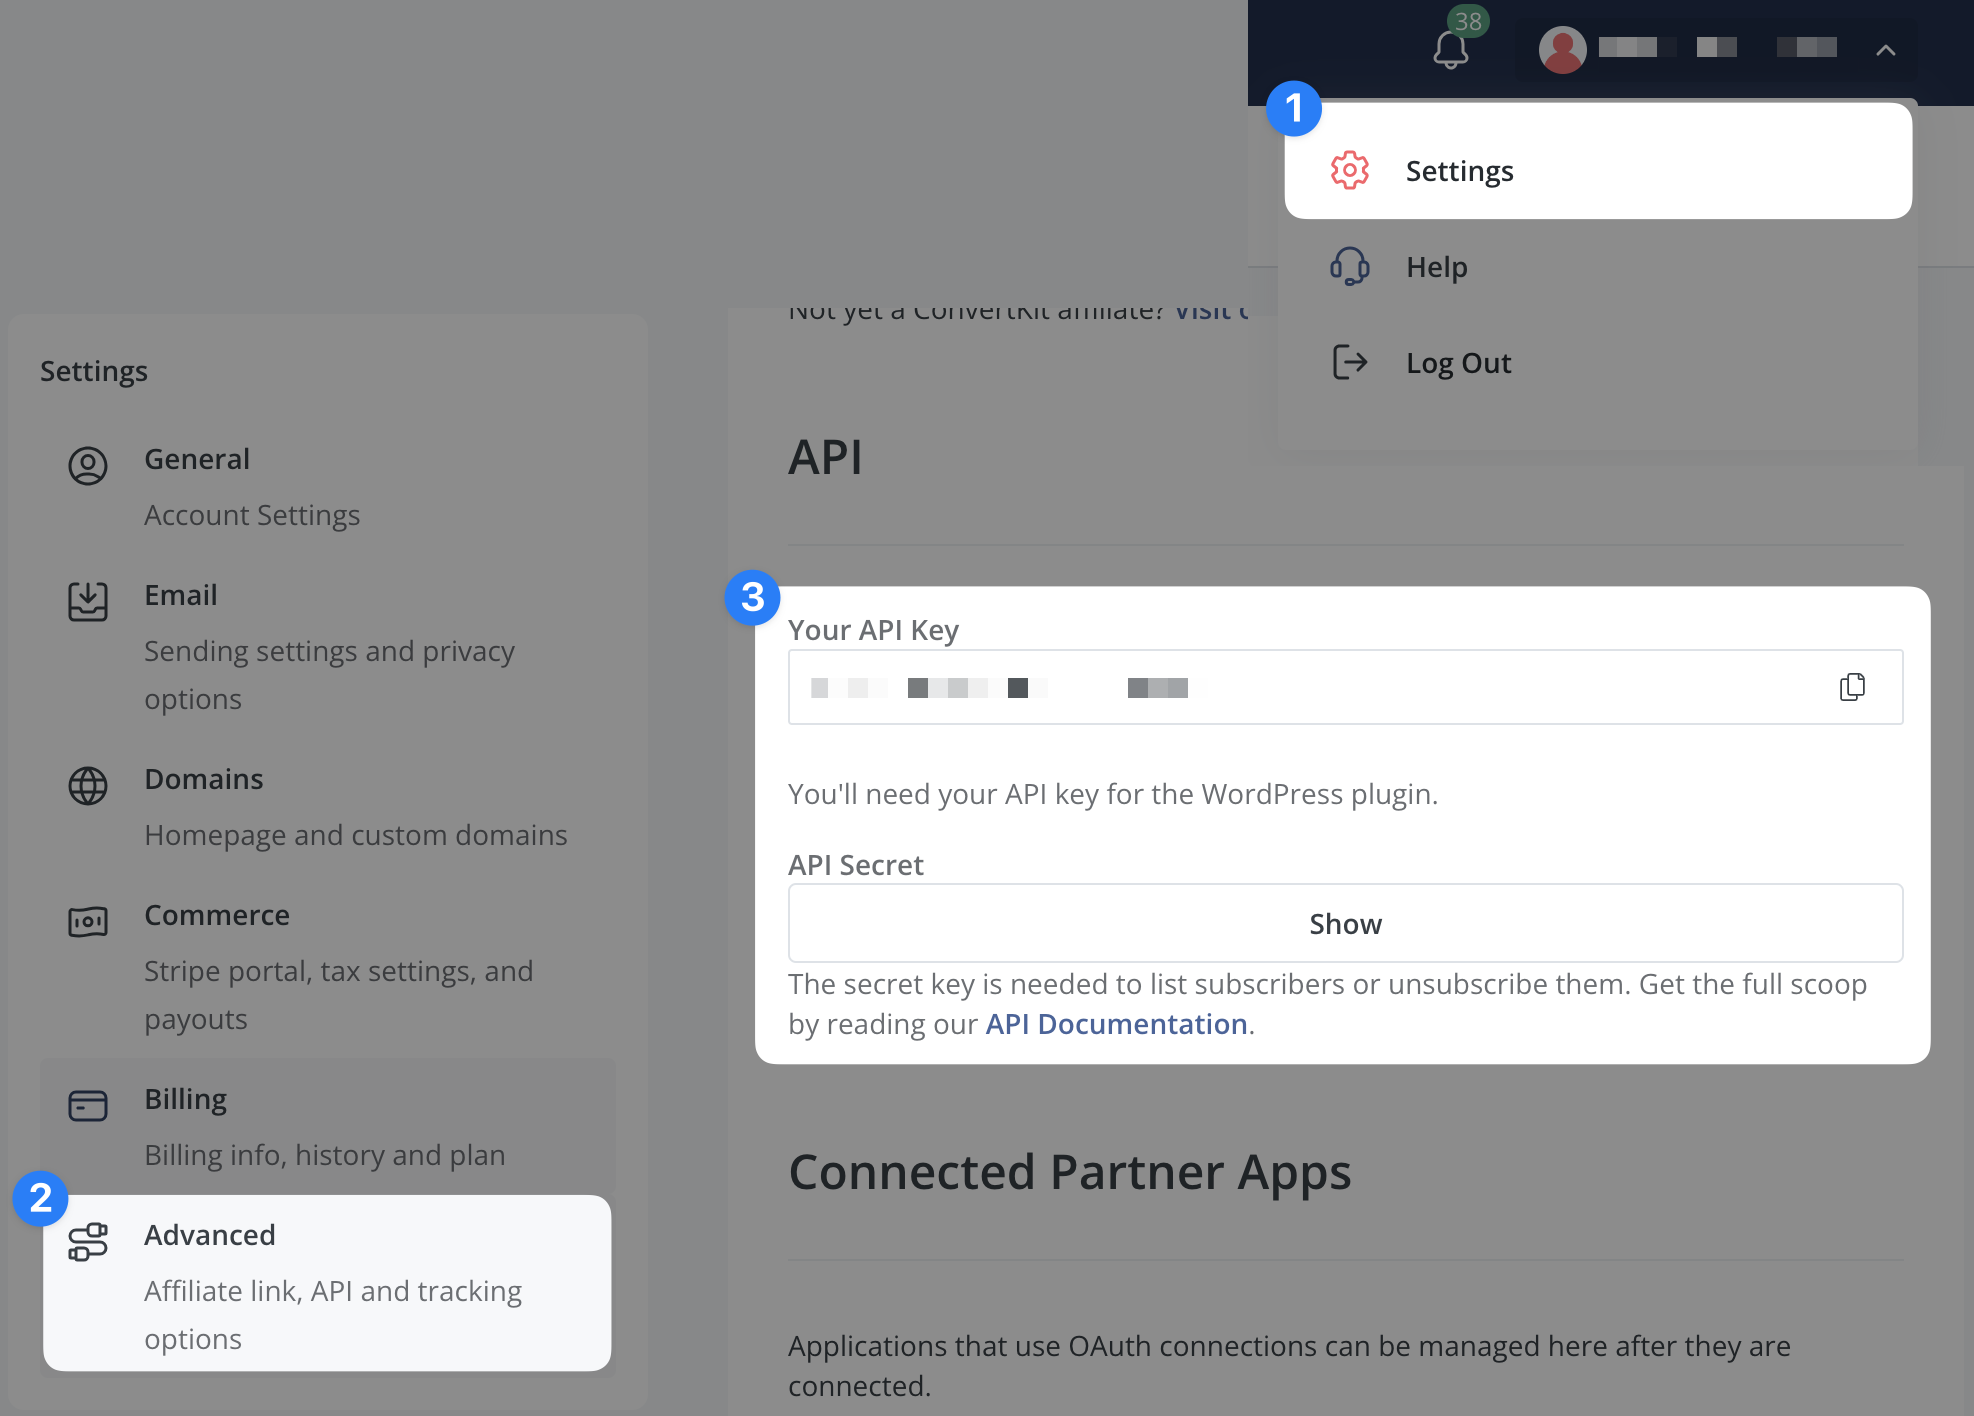
Copy and paste the API key and API secret into the fields as prompted. When you’re finished, click Connect ConvertKit account and return to the recipe editor.
From the dropdown list that appears, select Add a subscriber to a sequence.
(Note: Sequences are only available for ConvertKit Creator plans and higher. If you are using a free ConvertKit account, select Add a subscriber to a form. Automator will create the subscriber using either action.)
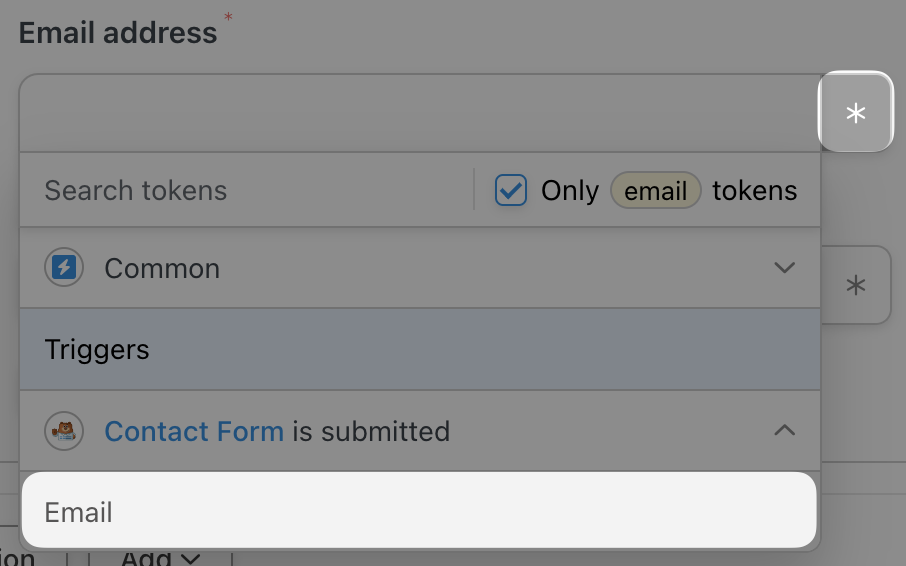
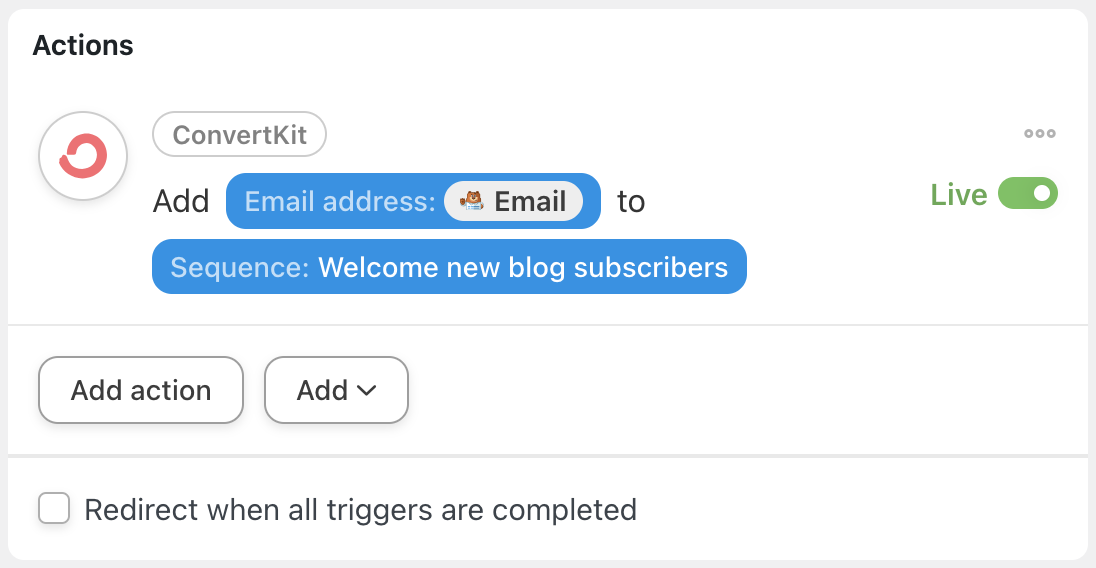
Automator will then prompt you to select Sequence, Email address and First name. We are going to use a token (i.e., dynamic data pulled from your WordPress website and from within recipes) to select the subscriber’s email address.
To use a token, click on the Asterisk and select the token that represents that data you want to add dynamically.
Once you’ve filled out the fields, click Save. Your completed trigger should look something like this:
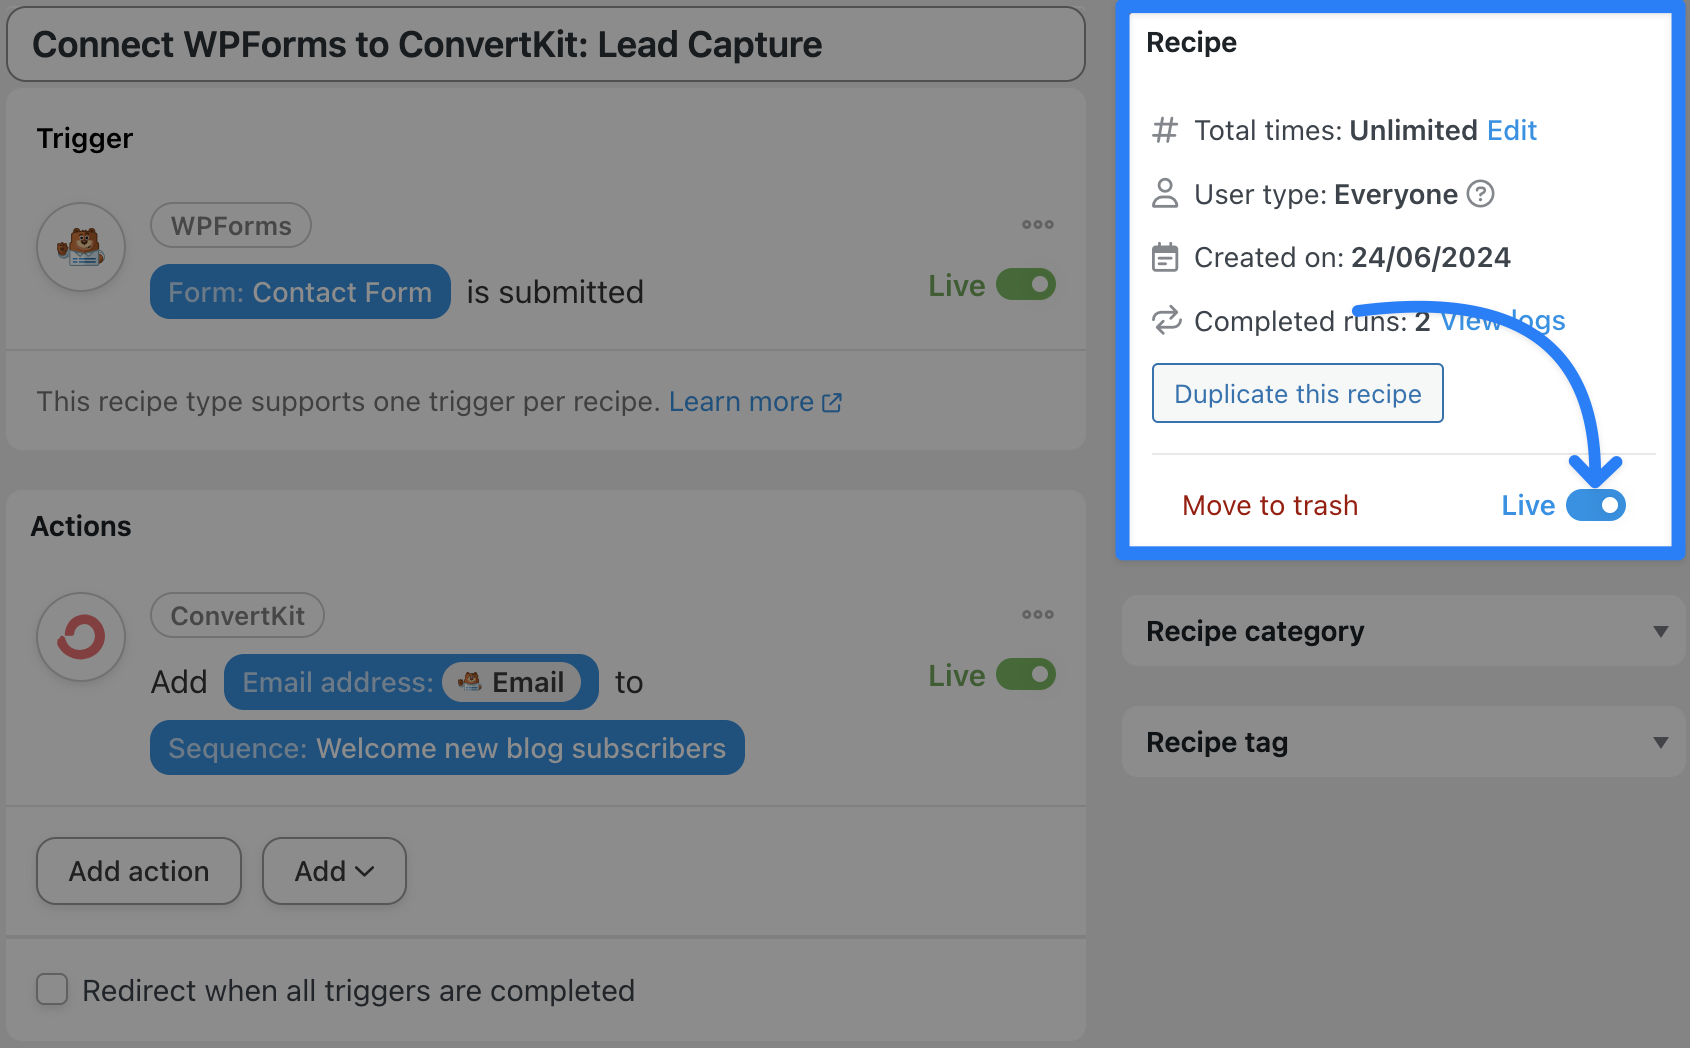
Step 5: Capture More Leads!
You’re just about ready to turn your WPForms submissions into ConvertKit subscribers. All that’s left for you to do now is toggle the recipe from Draft to Live.
That’s it! You’ve just successfully (and seamlessly) connected WPForms to ConvertKit. Now, let’s take a look at even more ways that Automator can boost this integration.
More Ways to Connect WPForms to ConvertKit
Automator has tons of features to help you create truly seamless integrations between all of your favorite apps and plugins. For example, action filters can help you sort your ConvertKit subscribers into the correct sequences.
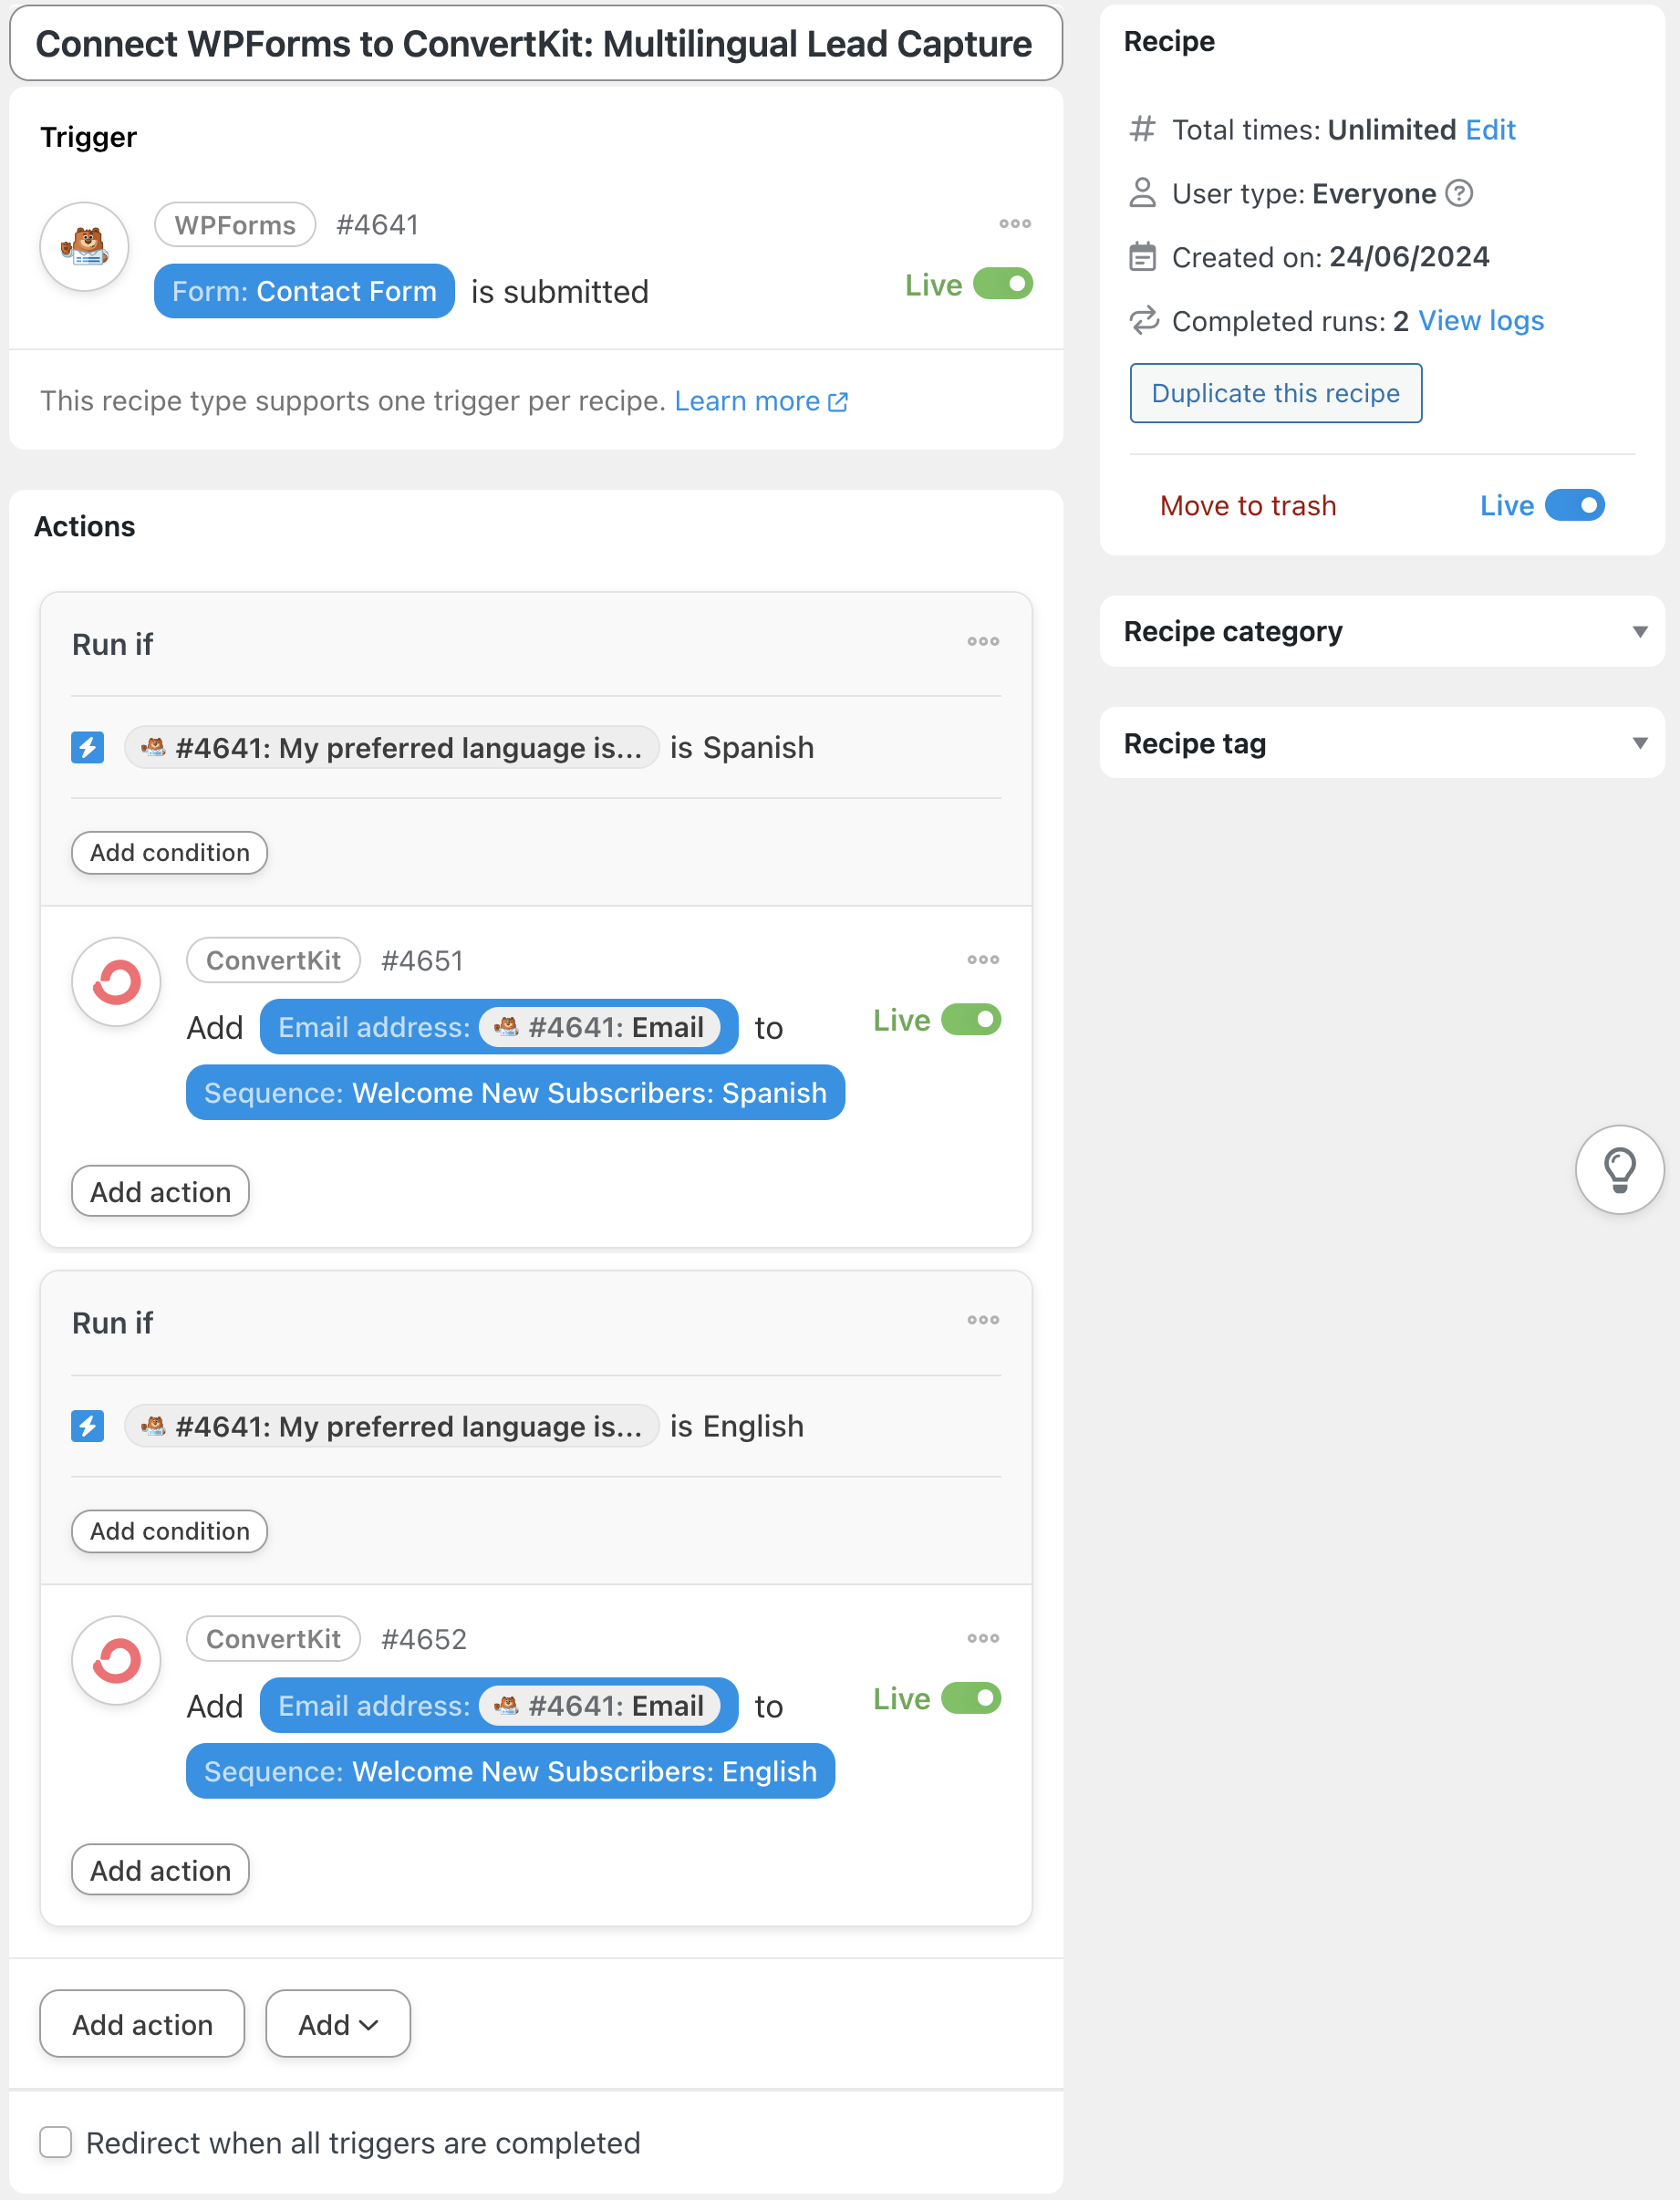
In the recipe pictured above, we used filters to sort our new subscribers into email sequences in their preferred language based on the information they put into our contact form. Here’s how we did it.
Step 1: Create and Name a New Recipe
From your WordPress Admin Dashboard, navigate to Automator > Add new recipe. In the pop-up window that appears, select Everyone.
We’ve named this recipe “Connect WPForms to ConvertKit: Multilingual Lead Capture”.
Step 2: Configure Your Trigger(s)
In the Trigger panel, from the menu of available integrations, select WPForms. From the dropdown list that appears, select A form is submitted.
Once you’ve selected your desired form, click Save.
Step 3: Configure Your Action(s)
In the Actions panel, click Add action and select ConvertKit. From the dropdown list that appears, select Add a subscriber to a sequence.
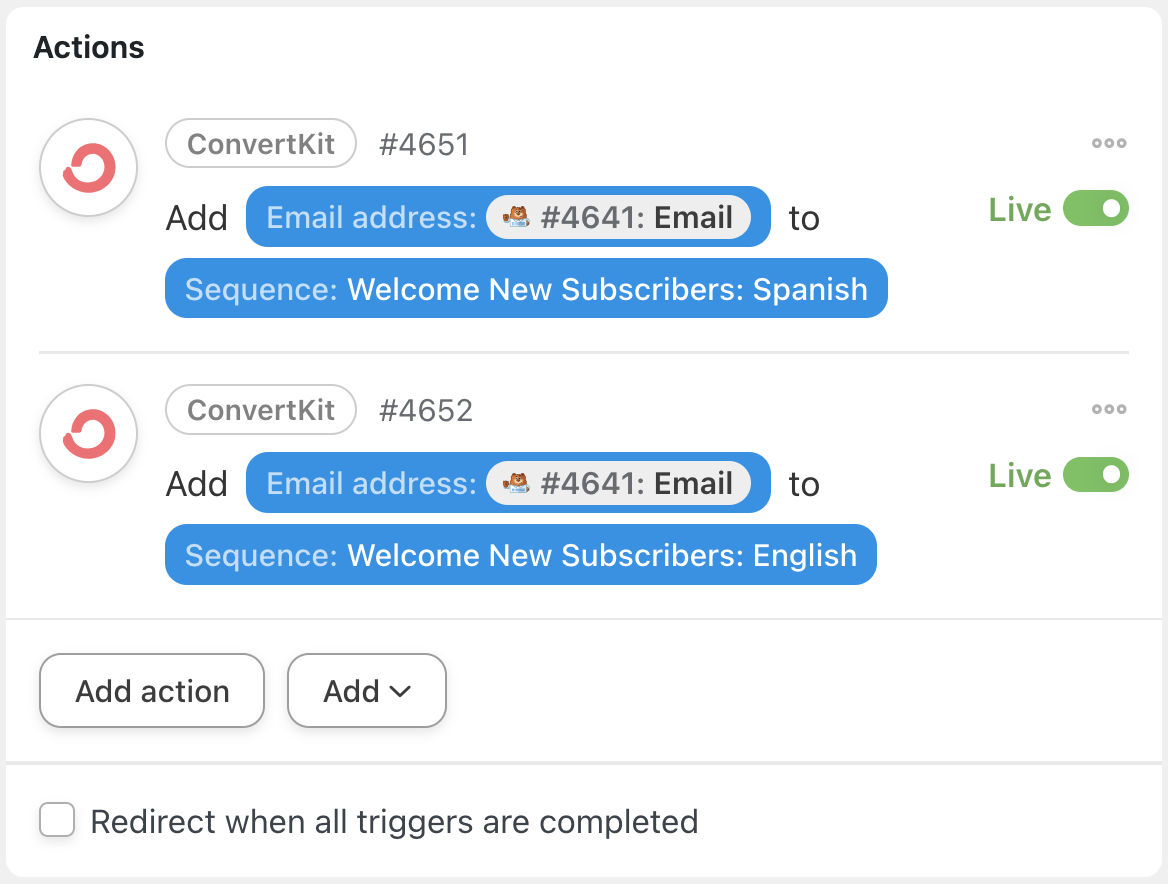
Just as before, select the Sequence, Email address and, if desired, First name. When you’re finished, click Save.Click the three dots and select Duplicate.
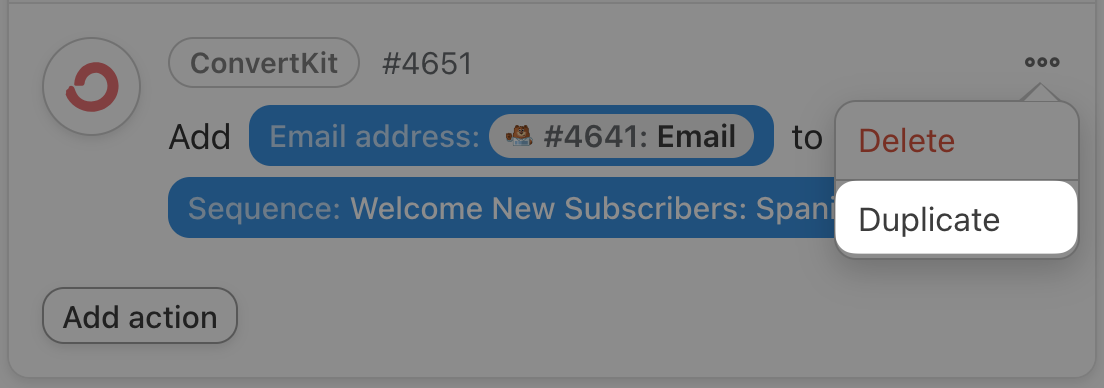
Click on the new action and select a different sequence. Once you’re finished, click Save. With two actions, your Actions panel should now look something like this:
Step 4: Add Your Action Filter(s)
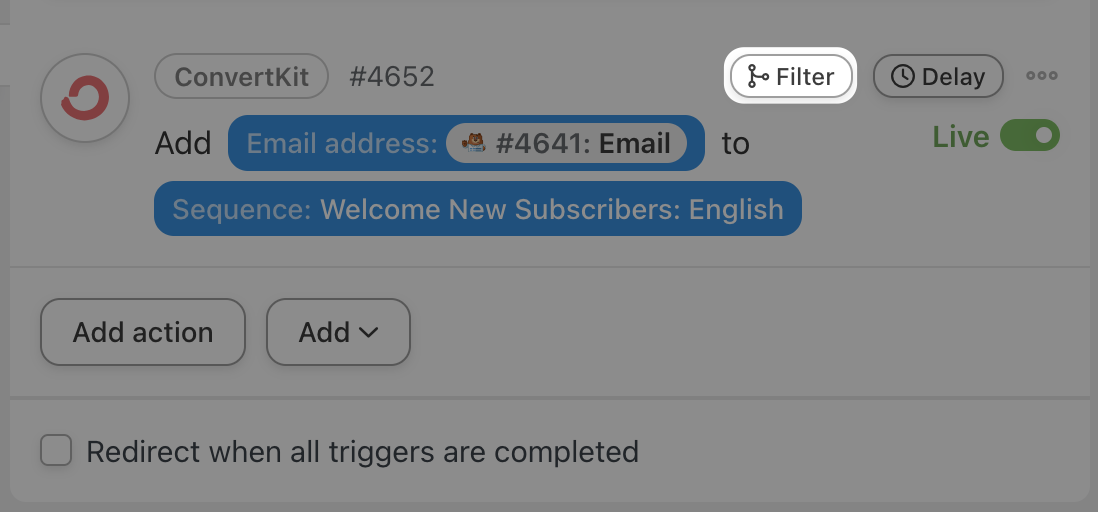
To add an action filter, hover over an action and click Filter.
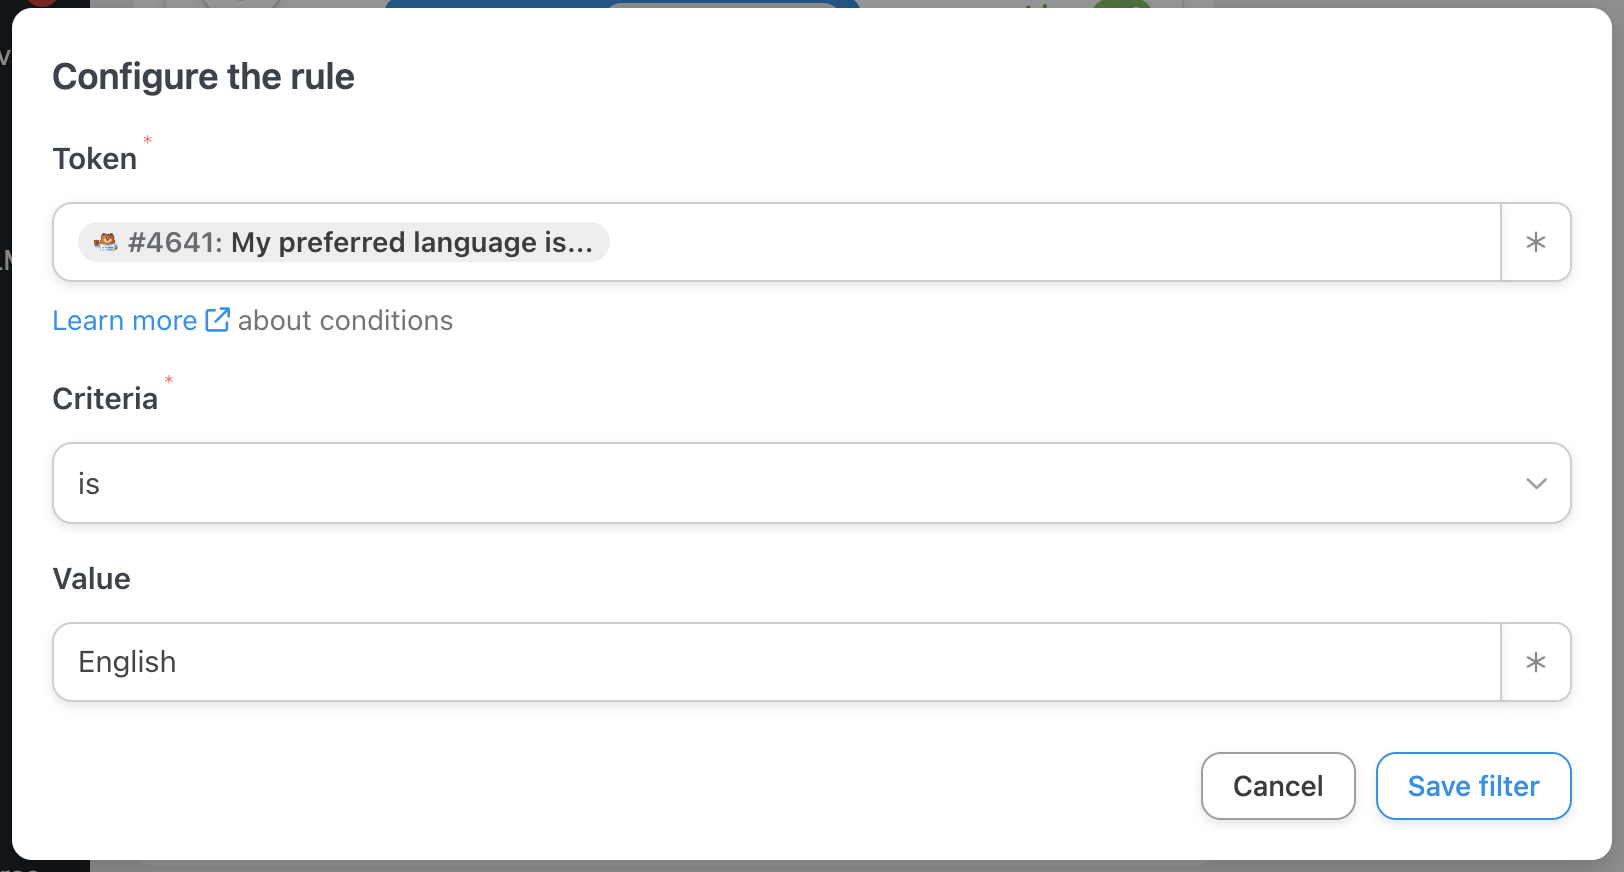
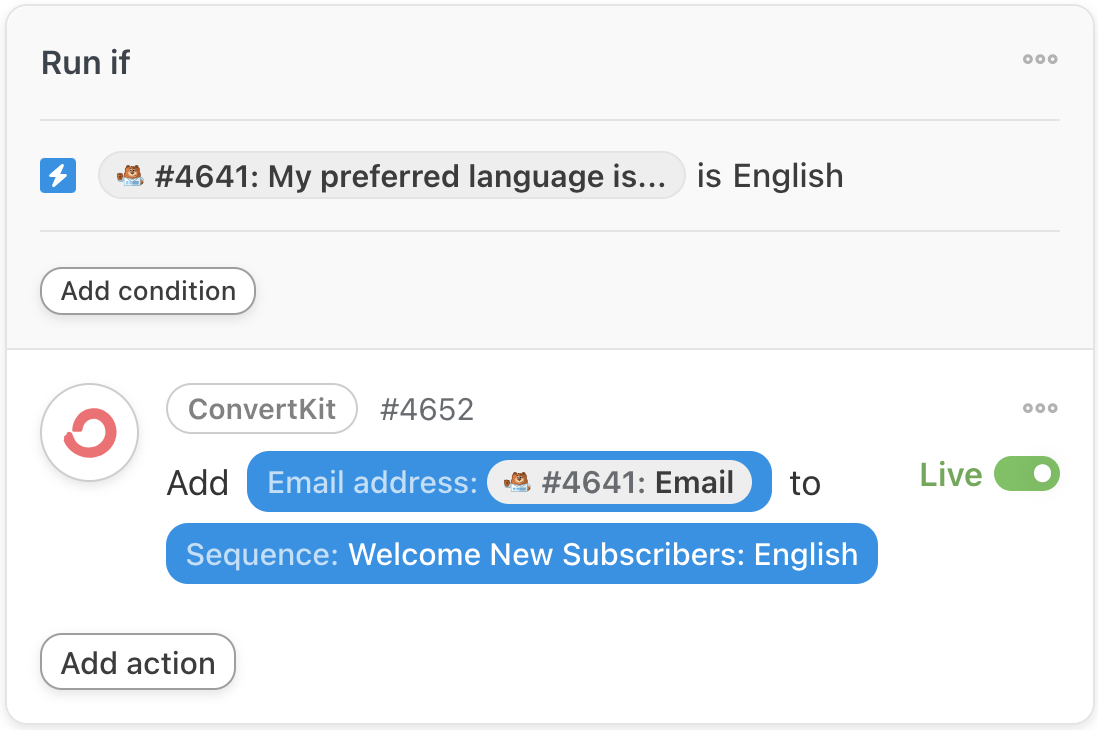
In the modal that appears, select A token meets a condition. Automator will then prompt you to configure the rule that defines the condition for the token.
In the Token field, select the WPForms field that you want to target. For example, we have a field labeled “My preferred language is…”.
(Note: The token with the word “label” in brackets refers to that field’s label/name and not the value a user enters into that field.)
Next, define the Criteria and Value the token must satisfy.

Once you’re finished, click Save filter. Your completed action with a filter should look something like this:
Repeat the process to add a filter to your second action.
Step 5: Go Live!
Once again, you’re just about ready to connect WPForms to ConvertKit. Toggle your recipe from Draft to Live and let Automator manage your subscribers for you!
Connect WPForms and ConvertKit to More Apps and Plugins
Now that you’ve gotten the hang of connecting WPForms to ConvertKit, you can explore even more of Automator’s many integrations.
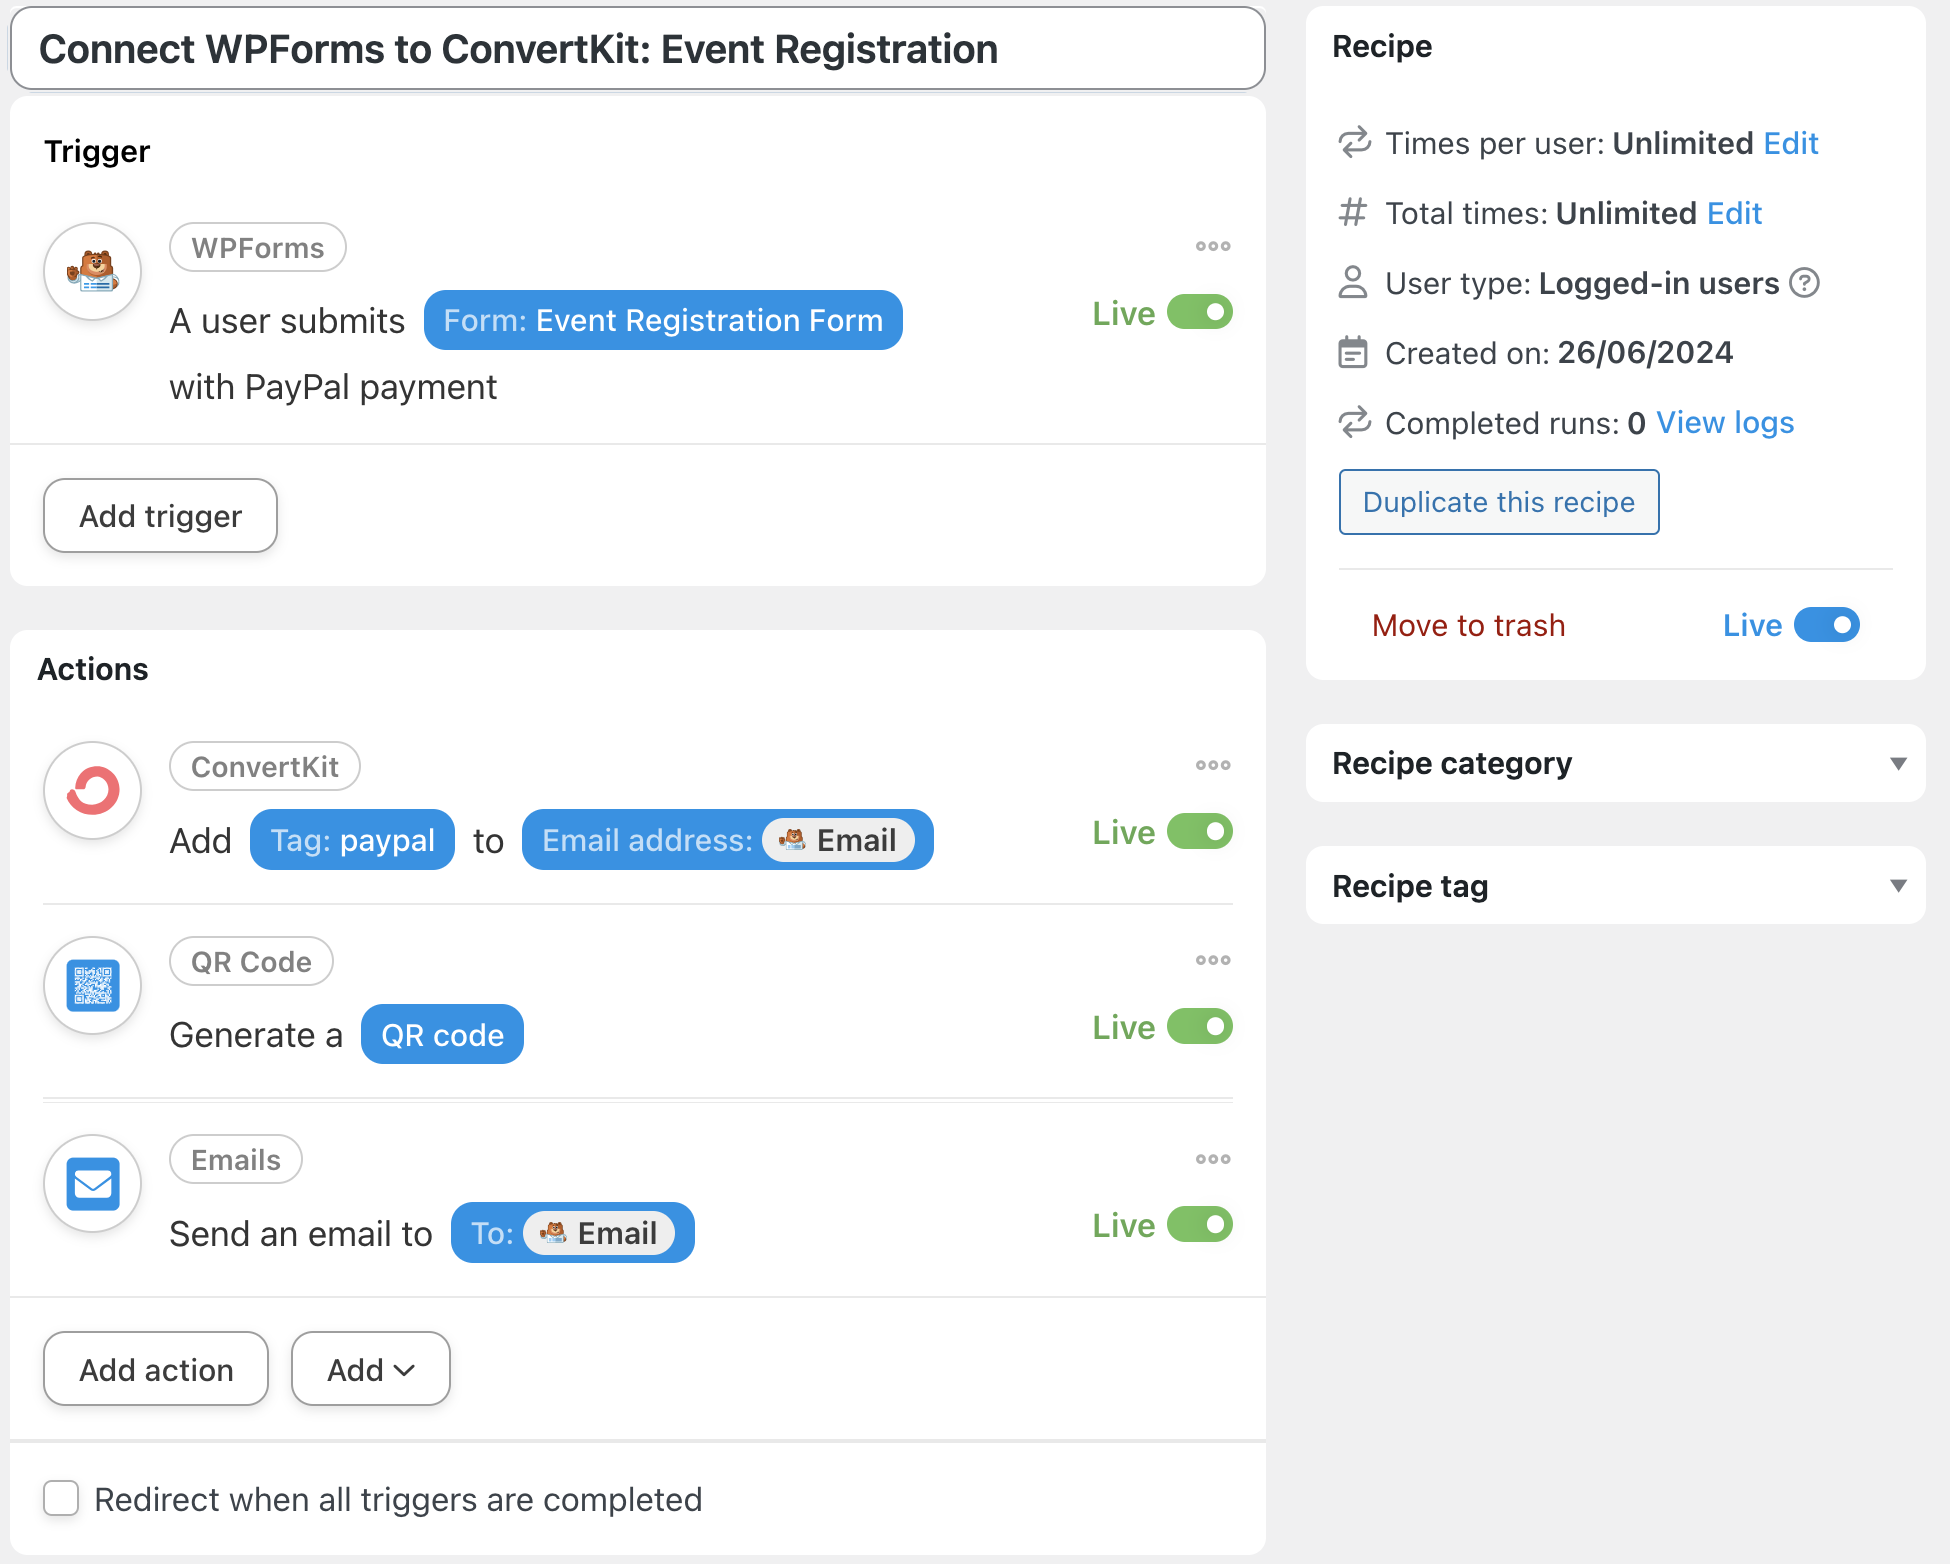
In the recipe pictured above, for example, we’re able to automate our event registration process. We can tag our ConvertKit subscriber, indicating that they paid for registration through WPForms using their PayPal account. Next, we generated a QR code to serve as our customer’s ticket and emailed it to them.
These kinds of fully-automated workflows are just tip of the iceberg of what you can do with WPForms, ConvertKit and Automator all working together.
Try connecting ConvertKit to your Woo-powered and EDD-driven ecommerce store. Or boost your online education system with LearnDash and ConvertKit. With Automator to connect all of your favorite apps and plugins, you can do all of this and much more.
Frequently Asked Questions
Conclusion
Connecting WPForms to ConvertKit using Uncanny Automator is a powerful way to streamline your email marketing efforts and ensure no lead is lost.
By following the steps outlined in this guide, you can automate the process of turning form submissions into engaged subscribers, allowing you to focus more on content creation and less on manual data entry.
Ready to take your email marketing to the next level? Get started with Uncanny Automator today and unlock the full potential of WPForms and ConvertKit>>>.
If you have any questions or need further assistance, feel free to reach out to our support team.
Until next time, happy automating!

Related Posts


This Post Has 0 Comments