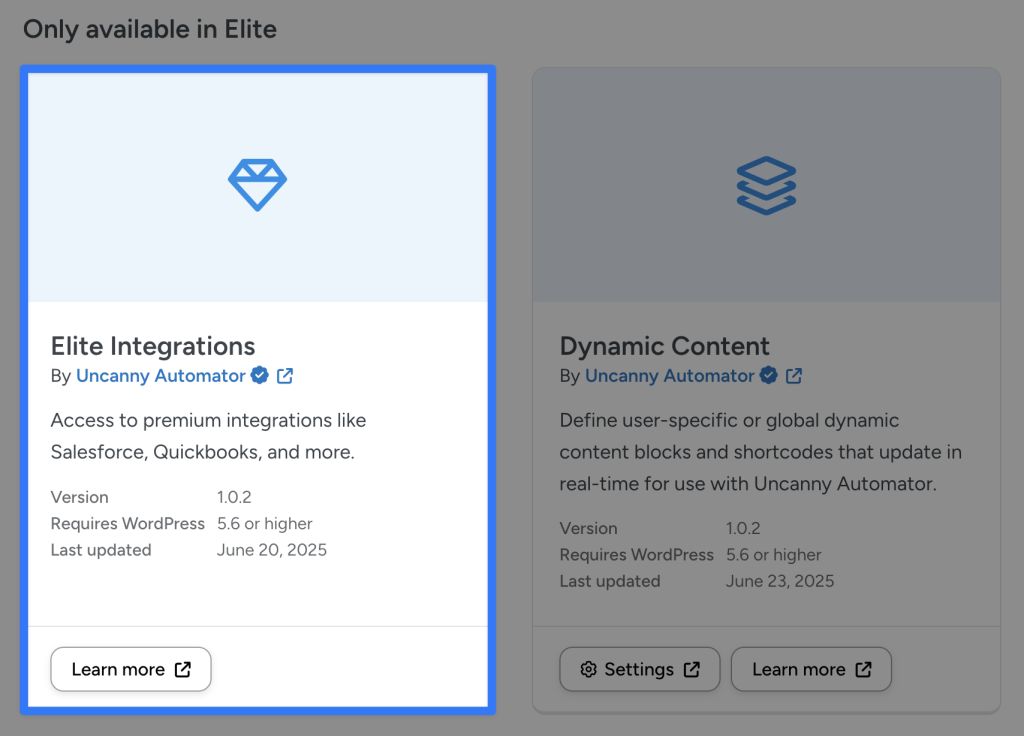
QuickBooks Online is an Uncanny Automator Elite Integration. This means that you will need an Uncanny Automator Pro – Elite license with the Elite Integrations Addon activated to use the QuickBooks Online integration.
If you already have an Automator Pro – Elite license, you can find detailed instructions on activating the Elite Integrations Addons by clicking here.
In this article, we will cover connecting QuickBooks Online to WordPress using Uncanny Automator and how to create product associations between QuickBooks Online and WooCommerce.
Connecting QuickBooks Online to WordPress
Prerequisites:
- WordPress website with admin access.
- QuickBooks Online account.
- Uncanny Automator Pro – Elite license (with Elite Integrations Addon activated)
Step 1: Purchase Automator Pro – Elite
Purchase an Automator Pro – Elite license from https://automatorplugin.com/pricing. You will receive a purchase confirmation email and a Welcome email. You can follow the installation and activation instructions in your Welcome email or follow the instructions below.
Step 2: Install and Activate Automator Lite
Automator Lite is the free version of Uncanny Automator—you will need to install and activate it on your WordPress site to use Automator Pro.From your WordPress Admin Dashboard, navigate to Plugins > Add plugin. In the search bar, enter “uncanny automator”.
Uncanny Automator will be the first search result. Click Install and Activate.
Step 3: Activate Automator Pro – Elite License
Download Uncanny Automator Pro from your purchase confirmation email or from your Uncanny Automator account.
Next, upload the Automator Pro plugin by navigating to Plugins > Add New from your WordPress Admin Dashboard. Click the Upload Plugin button at the top and complete the upload process.
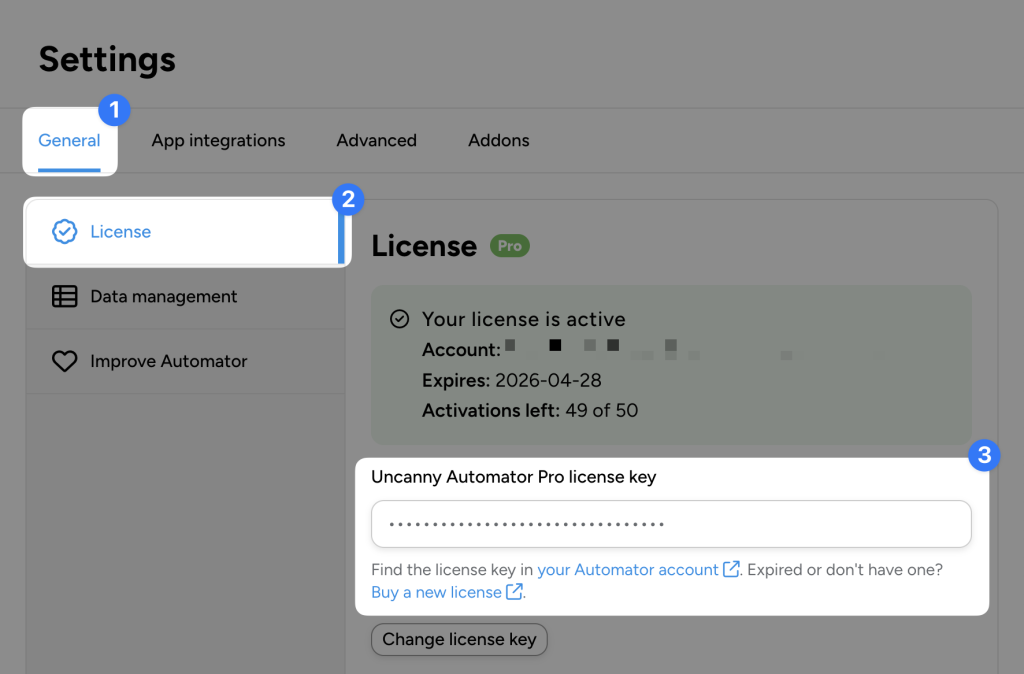
Activate the Pro plugin after uploading it and activate your license key by visiting Automator > Settings > General > License and entering the key from your email or account page.
Step 4: Activate Elite Integrations Addon
Your Automator Pro – Elite license gives you access to the Elite Integrations Addon which has the QuickBooks Online integration. Before you can connect QuicksBooks Online to WordPress, you will need to activate the Elite Integrations Addon.
To activate the addon, simply navigate to Automator > Addons and ensure that “Elite Integrations” is activated.
With Uncanny Automator Pro – Elite and the Elite Integrations Addon now installed and activated on your WordPress website, you can connect your QuickBooks Online account to your WordPress site.
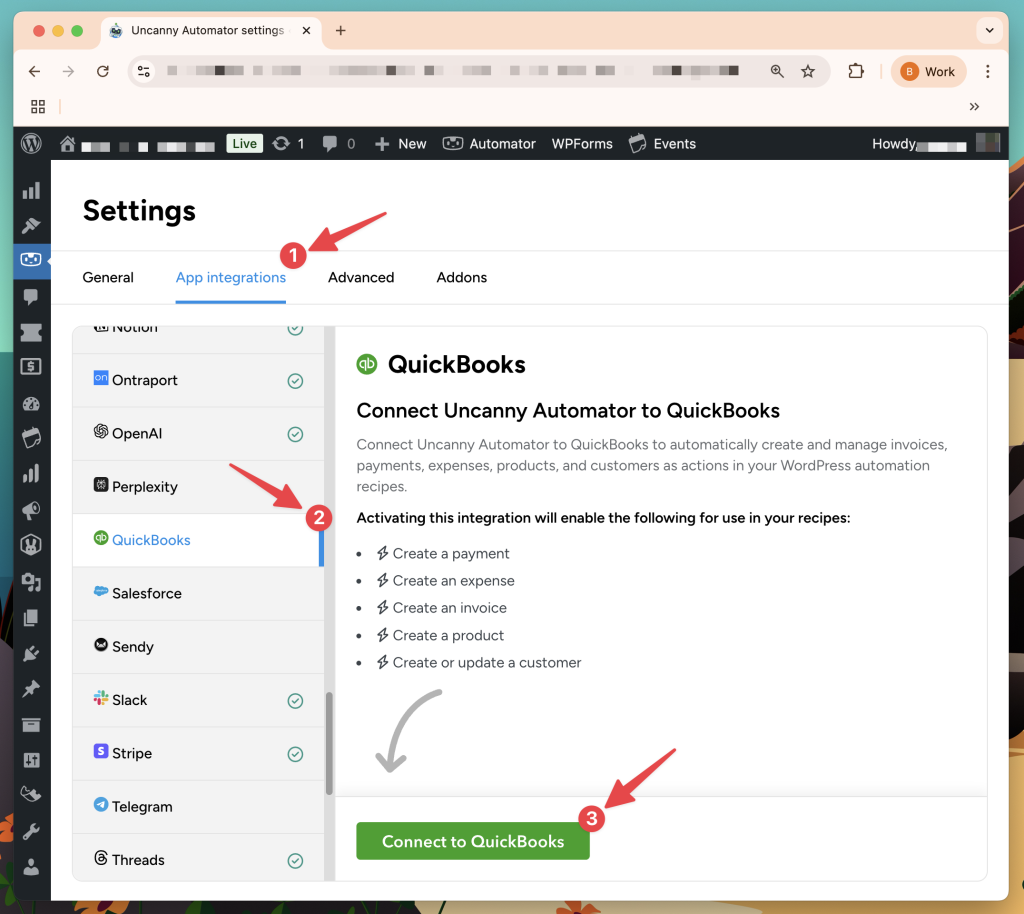
From your WordPress Admin Dashboard, navigate to Automator > App integrations > QuickBooks.
(Note: If you do not see QuickBooks in the left sidebar of app integrations, navigate to Automator > Addons and ensure that “Elite Integrations” is activated. “Refer to Step 4”.)
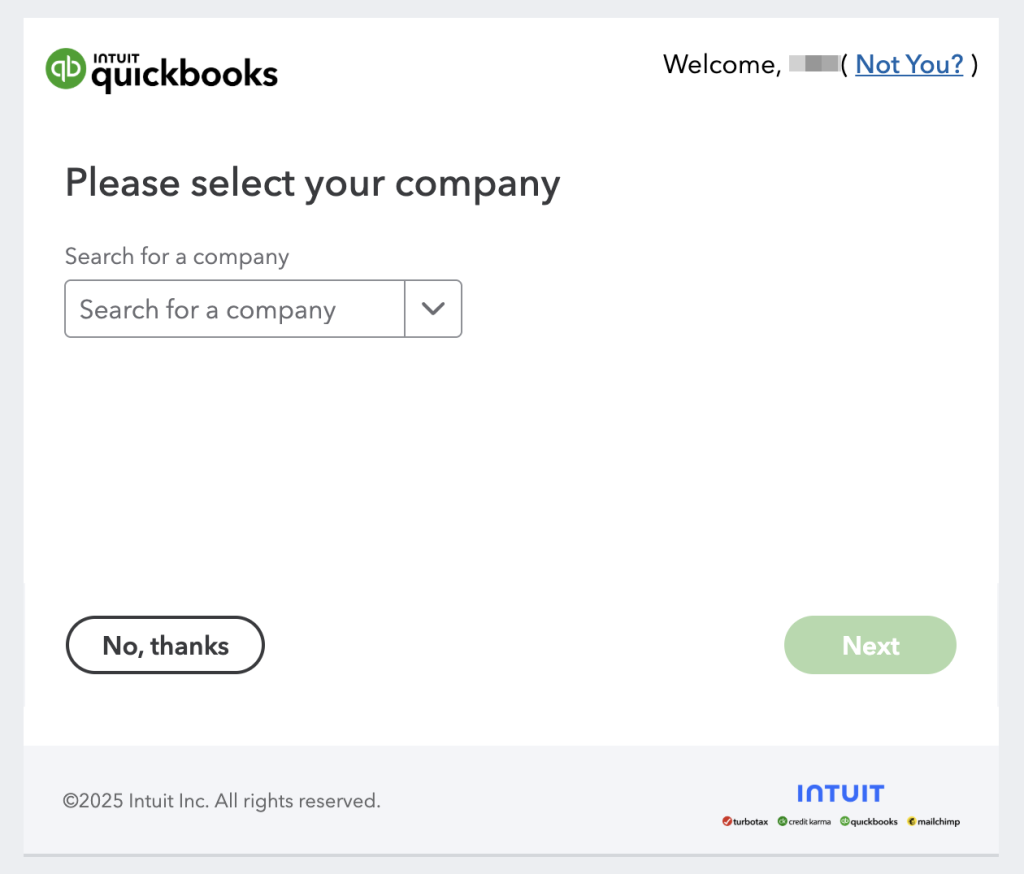
Automator will prompt you to log into your QuickBooks account if you haven’t already. After logging in, select your QuickBooks company and click Next.
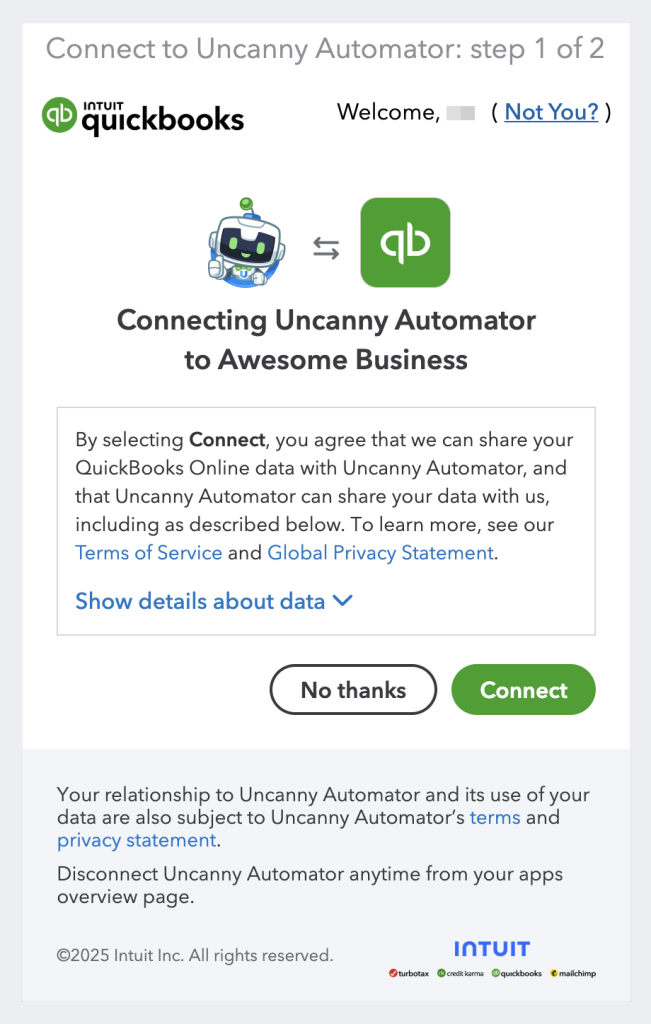
Automator will present you with a modal to complete the QuickBooks integration. Click Connect.
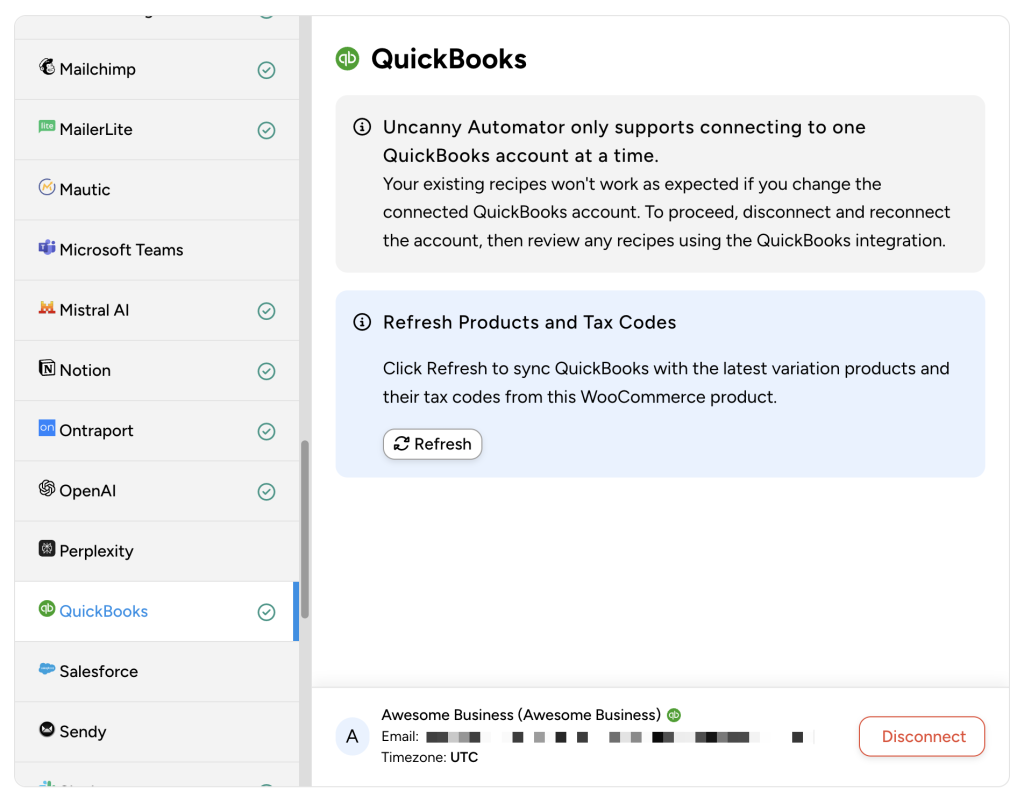
Once you have successfully connected your QuickBooks Online account, Automator will return you to the App integrations screen.
To help keep your QuickBooks account and WordPress website synchronized, Automator provides you with a “Refresh” button.
Connecting QuickBooks Online and WooCommerce Products
The Uncanny Automator QuickBooks Online integration allows users to create QuickBooks Online and WooCommerce product associations directly in the WordPress product editor.
From your WordPress Admin Dashboard, navigate to Product > Add new or select an existing product.
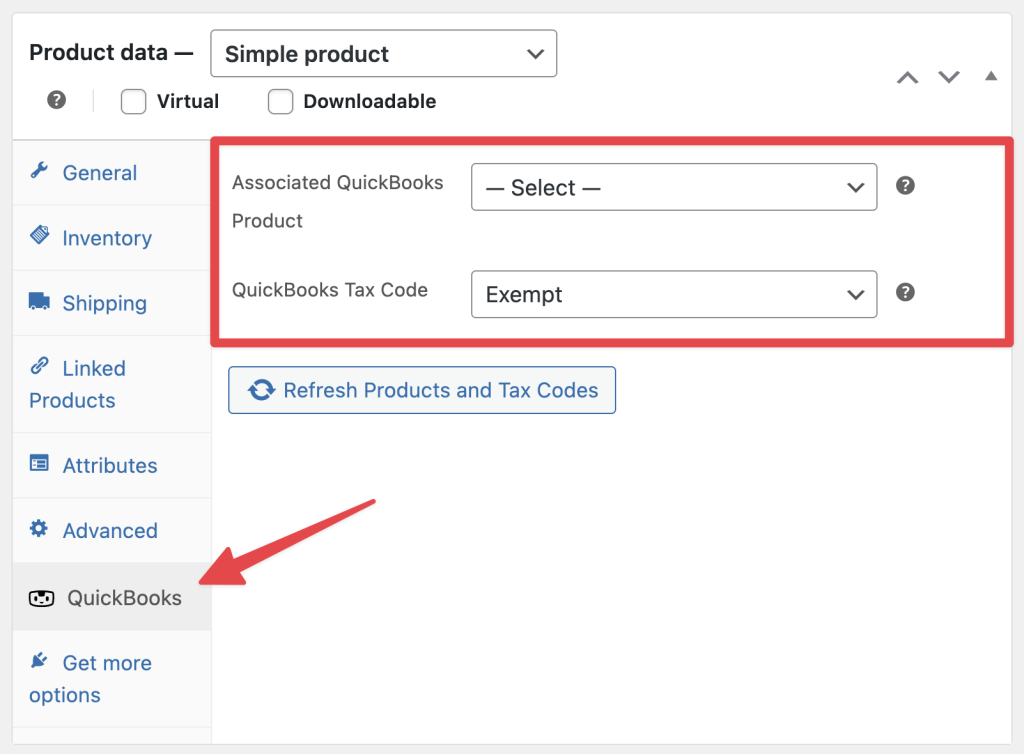
Once in the product editor, scroll down to the “Product data” pane and click the QuickBooks tab.
Automator will present you with two dropdown lists:
- Associated QuickBooks Product
- QuickBooks Tax Code
Both of these dropdown lists are automatically populated with products and tax codes from your QuickBooks Online account. If you create new products and/or tax codes in QuickBooks, you can click the Refresh Products and Tax Codes button to retrieve the new data.

